
Birthday Block of the Month #1: Ricky Tims
 Welcome to the first month of the Quilt Alliance Birthday Block of the Month! We are so happy that you are following along and joining our party!
We’re kicking things off with one of the most beloved quilters we know — Ricky Tims. One of the many things Ricky is known for is his easy-to-follow, beginner-friendly quilt pattern instructions. For all the beginner quilters following along, we couldn’t have asked for a better block to kick things off! And for experienced quilters, you’ll love the ease of sewing this block. It’s so quick that you’ll want to make more.
Meet Ricky Tims

A best-selling author, enthusiastic and encouraging teacher, an award-winning quilter, fabric designer, talented speaker, and novelist, Ricky’s entertaining presentations feature live music and humor combined with scholarly insights and motivational anecdotes. Ricky began designing and making quilts in 1991 and was named one of The Thirty Most Distinguished Quilters in the World. In 2009 he was selected (in a three-way tie) by the readers of Quilter’s Newsletter Magazine as The Most Influential Person in the Quilting Industry. He is the co-founder and co-host of The Quilt Show. You can follow Ricky on his website, on Facebook, and on Instagram. We recommend all three!
One of the Quilt Alliance’s signature projects is the Go Tell It video documentation project which anyone can do. Watch the video below to see Ricky talk about his block, and keep reading this blog post to learn about how you can create your own Go Tell It video about one of your quilts!
Ricky’s Top BOM Tips
Each month, our Birthday Block of the Month Designers will share their top tips for making the block they designed. Here are three great tips for making this block straight from Ricky himself.
Ricky’s Tip 1: Avoid Distortion
When sewing the strips, sew the seams in opposite directions to avoid distortion — sew the first seam from the top of the strip to the bottom, then the second seam bottom to top, the third seam top to bottom, etc.
Ricky’s Tip 2: Double-Check Cuts
Cutting accuracy is critical so make sure the ruler doesn’t slip and double-check every cut before cutting.
Ricky’s Tip 3: Handle Bias Edges with Care
There will be bias edges on two sides of each triangle (fabric cut on an angle, which is stretchy). Be extra cautious not to tug those bias edges when handling or sewing the four triangles together.
Quilt Alliance BOM Tips
If you want even more tips for making this block, we’ve got you covered! Here are even more tips to help you kick off our Birthday Block of the Month with the best block you can make.
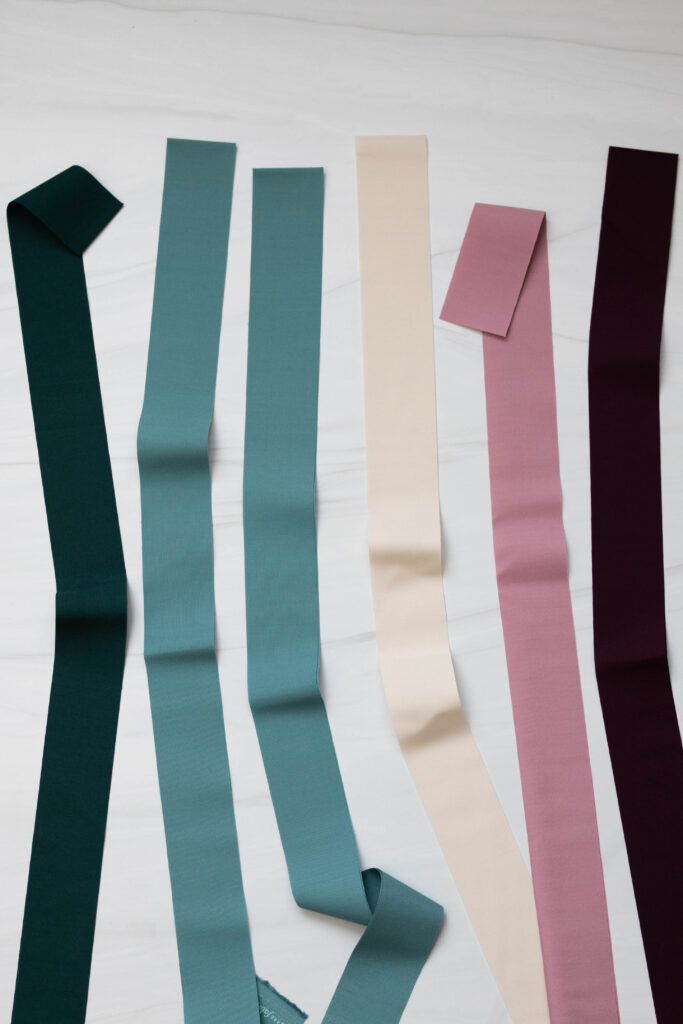
Sew with a Scant Quarter Inch Seam
We love this block for its trademark Ricky Tims ease. If this is your first time picking up a rotary cutter, you can make this block! The biggest thing you’ll have to focus on besides Ricky’s tips above is the accuracy of your seam allowance.
If you are not yet confident in the accuracy of your quarter inch seam, consider sewing with a scant quarter inch, which is a seam that is very slightly smaller than a quarter inch. This will give you a little bit of wiggle room and may make the difference in your sewn strips ending up the correct width.
 Finger Press Before Using an Iron
Some quilters find pressing tedious, and others love it. Regardless of how you feel about pressing, good pressing technique can increase your quilting accuracy. Before pressing your block with your iron, give it a good finger press to make sure you aren’t losing valuable fabric in your seams.
Begin with the sewn strips facing right side up (seam side down). Gently press your fingers along the sewn seam to make sure the seam is completely open. For this pattern, we are pressing each strip seam to the side, so be sure that as you finger press, the seam and going in the correct direction.
Finger press for about 12″ at a time and then give it a quick heat set with your iron. When you flip your strips over, your seams will be ready for an accurate iron pressing!
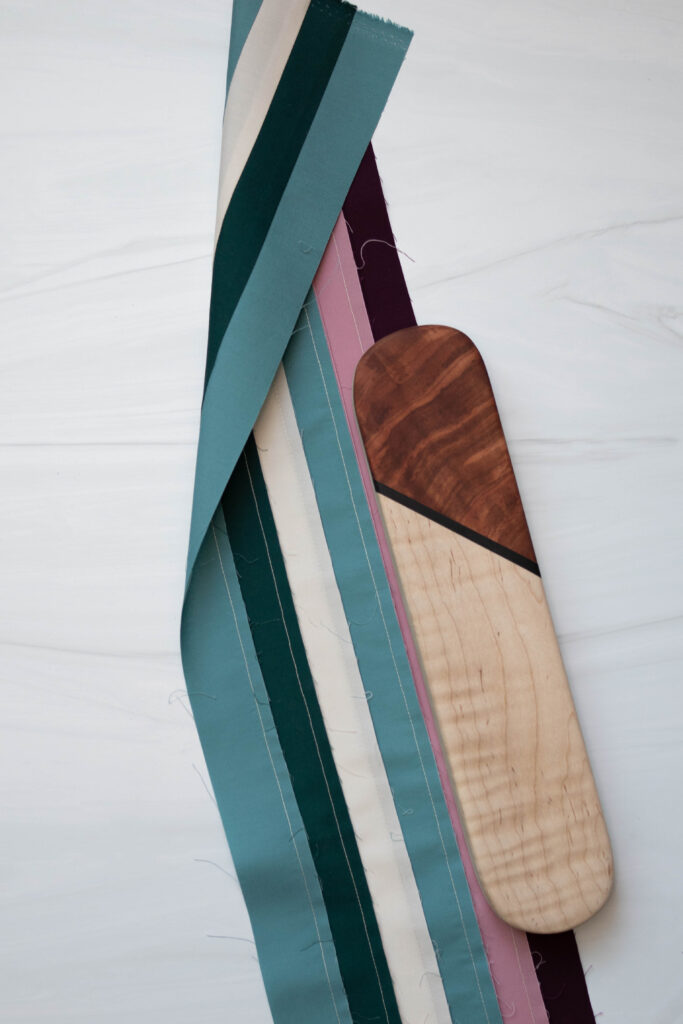 Keep Seams Flat With a Tailor’s Clapper
If you haven’t used a tailor’s clapper before, you’re in for a treat. This little piece of wood works big wonders and locks seams into place, keeping them flat as you piece.
Using a spray bottle or continuous mist bottle (these bottles help distribute water more evenly than the spray setting on most irons), spray a small amount of water onto a seam. Press the damp seam with your iron. Immediately lay a tailor’s clapper on the seam.
As the seam dries and cools, the tailor’s clapper keeps the fibers in your seam in place. Once cool, the seam is locked into place! Having flat seams will help with the next tip.
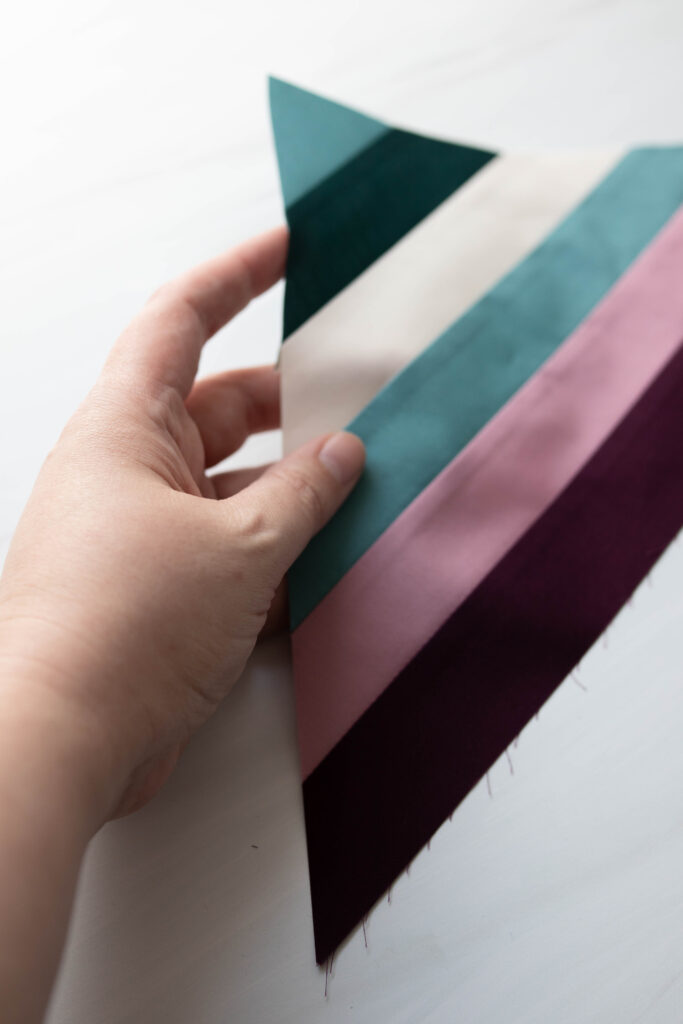
Cutting at a 45-Degree Angle
If you haven’t cut fabric at an angle before, here are some pictures that can help you make the strip triangles that form this block.
Start with your sewn strips laying with Color 5 at the top as shown above. Lay your ruler on the sewn strips with the 45-degree mark across the top of Color 5. The right side of the ruler should be in the lower left corner of the sewn strips. Make your first cut and discard the half triangle.
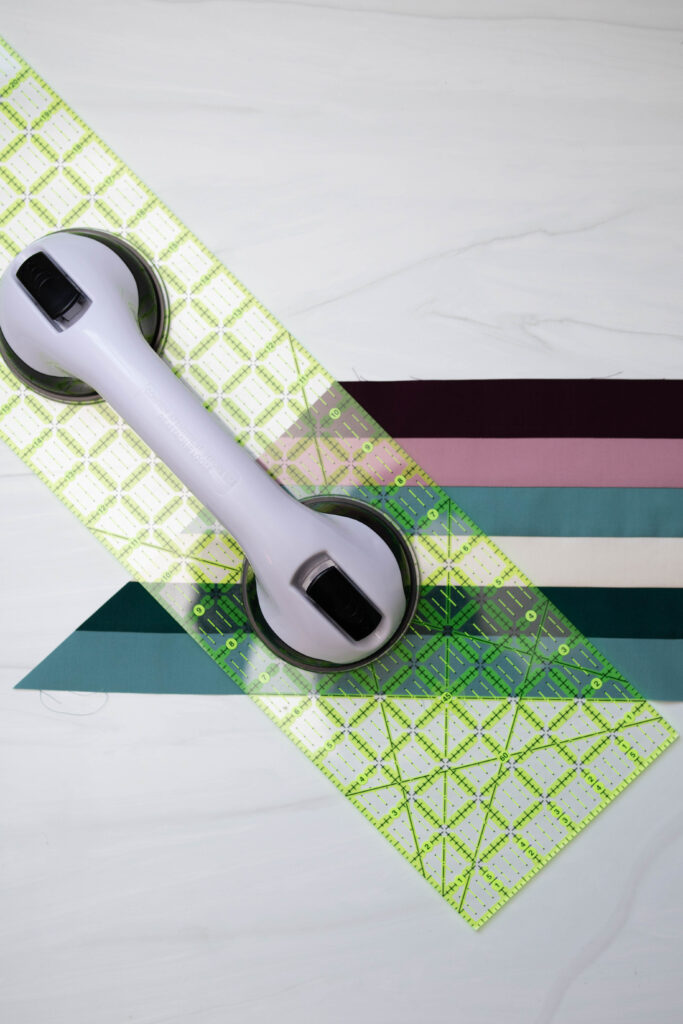
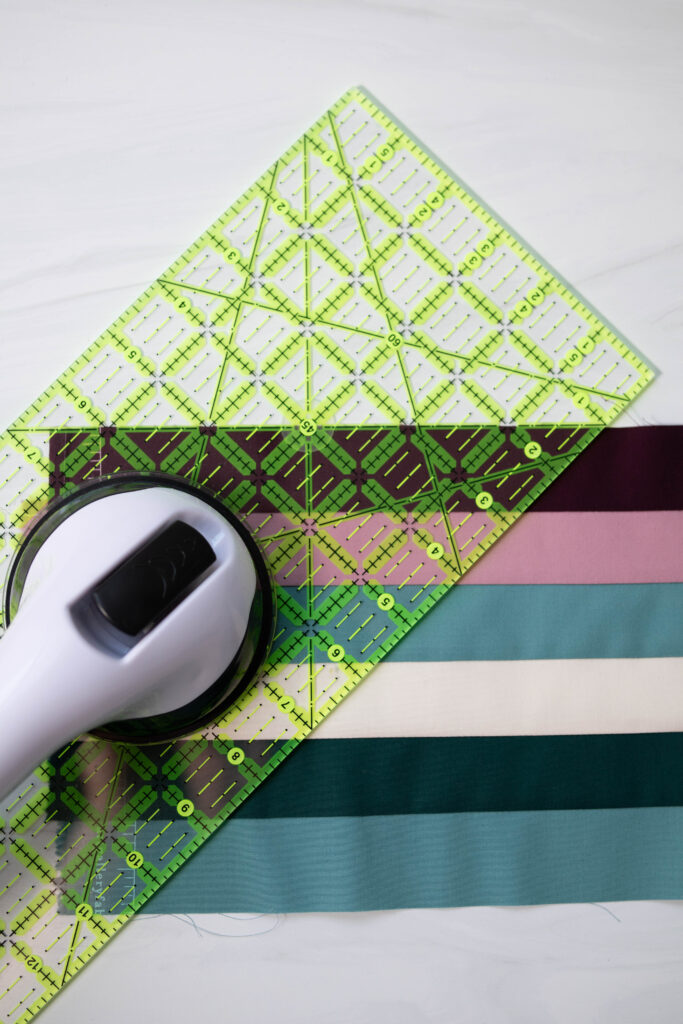
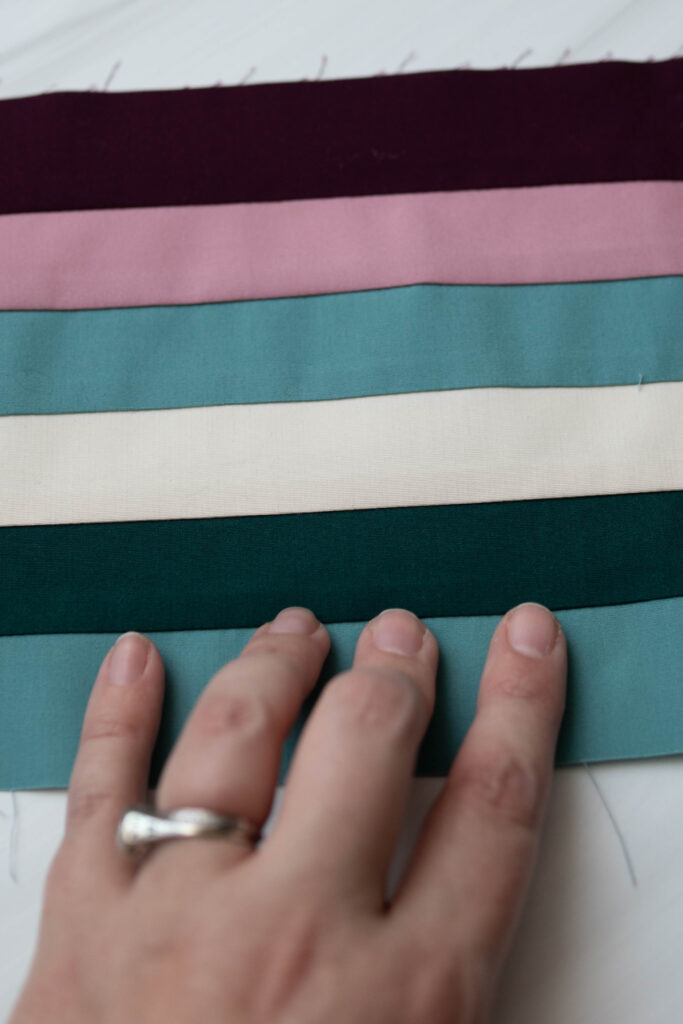
Keeping the sewn strips facing the same way (Color 5 up), flip your ruler for each subsequent cut, aligning the 45-degree angle mark with the bottom or top edge of the sewn strips.

In the second picture above, you can see that the 45-degree mark is now aligned with the bottom, or Color 2. The top of the ruler is lined up with the point of the triangle. Make your cut along the right side of the ruler, and you’ll have your first triangle!
Nest the Seams
When sewing the strip triangles together, nest your seams to get perfect points. Once you feel the bumps of your seams nesting together as shown in the picture above, pin the seams in place so they do not stretch as you move your triangle strip blocks or sew them together.
As Ricky notes, the bias edges of the triangle strip blocks are very delicate. If they are stretched, your finished block may be wavy or less accurate than you’d like.
Quilt Documentation Tip
Each month, we’ll bring you a quilt documentation tip in these blog posts. These tips will help you not only learn more about the Quilt Alliance but also learn how to preserve your own quilt stories. Your quilts matter and we want to help you preserve and share their stories!
Ricky’s block is focused on beginner quilters, and since this month is the first in our Block of the Month, we want to encourage you to document your very first quilt. The journeys we all take towards becoming quilters are all unique. Share yours in a DIY Go Tell It Video, just like the video Ricky made about this block.
To learn how to make your own Go Tell It video, head to the Go Tell It! page here. You’ll see that documenting your own quilts is much easier than you might think!