Most quilters have heard the message about quilt labeling. Adding a label to your quilt that includes, at minimum, your name, and when and where the quilt was made, is one way to ensure that its history will remain known and preserved. However, according to the 2016 Handi Quilter Quilters’ Survey only 57% of the 24,185 respondents say they label their quilts consistently, even though 94% of this group said they believe it is important to document and preserve the history of quilts and quiltmakers. What gives?

During our Quilt Story Road Show lectures we always ask the audience: “How many of you label the quilts that you make?” A typical response mirrors the figure from the survey–a little over half the room raises their hand. When we ask a follow up question: “How many of you label the quilts that you own, but did not make?” the room gets quiet and there is mostly blinking and nodding. So, we continue our crusade to change the documentation habits of quilt makers and owners until our vision of No More Anonymous Quiltmakers is realized. (There’s even a t-shirt for this campaign now–buy yours in the QA web shop).
Let’s go over a simple method for making a quilt label.
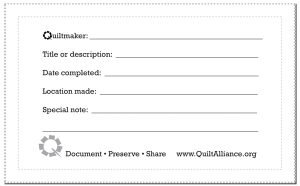
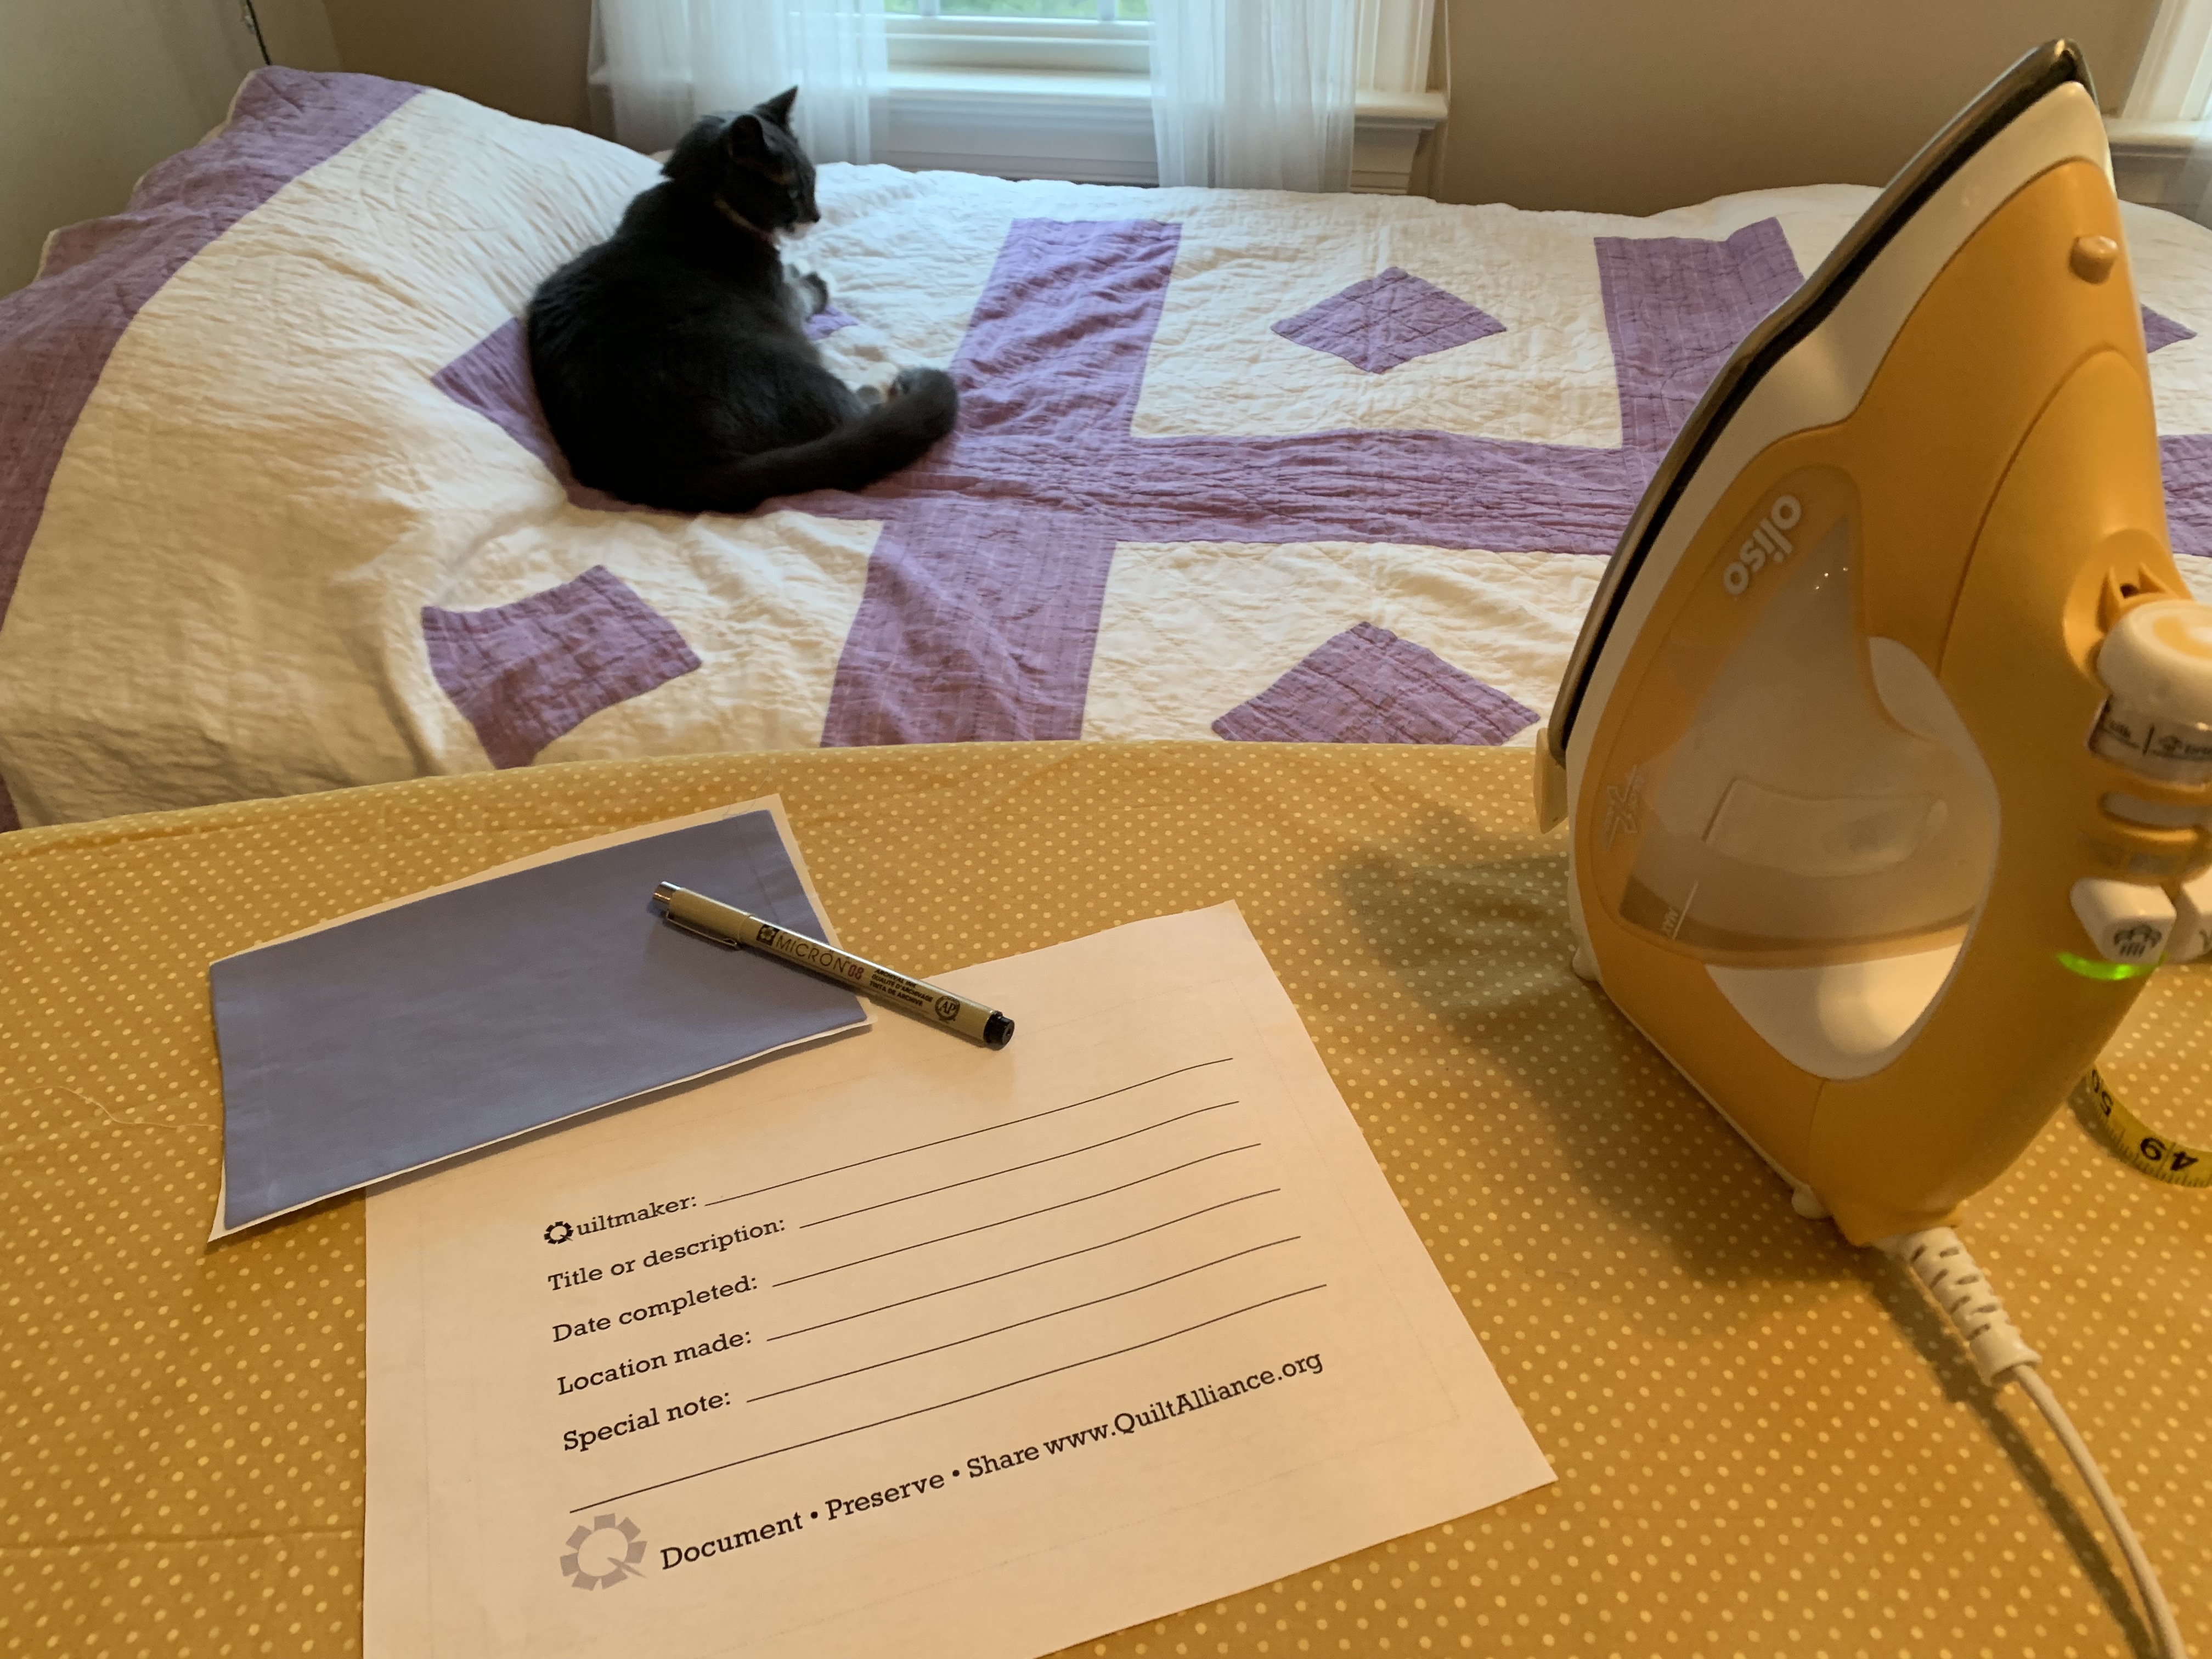
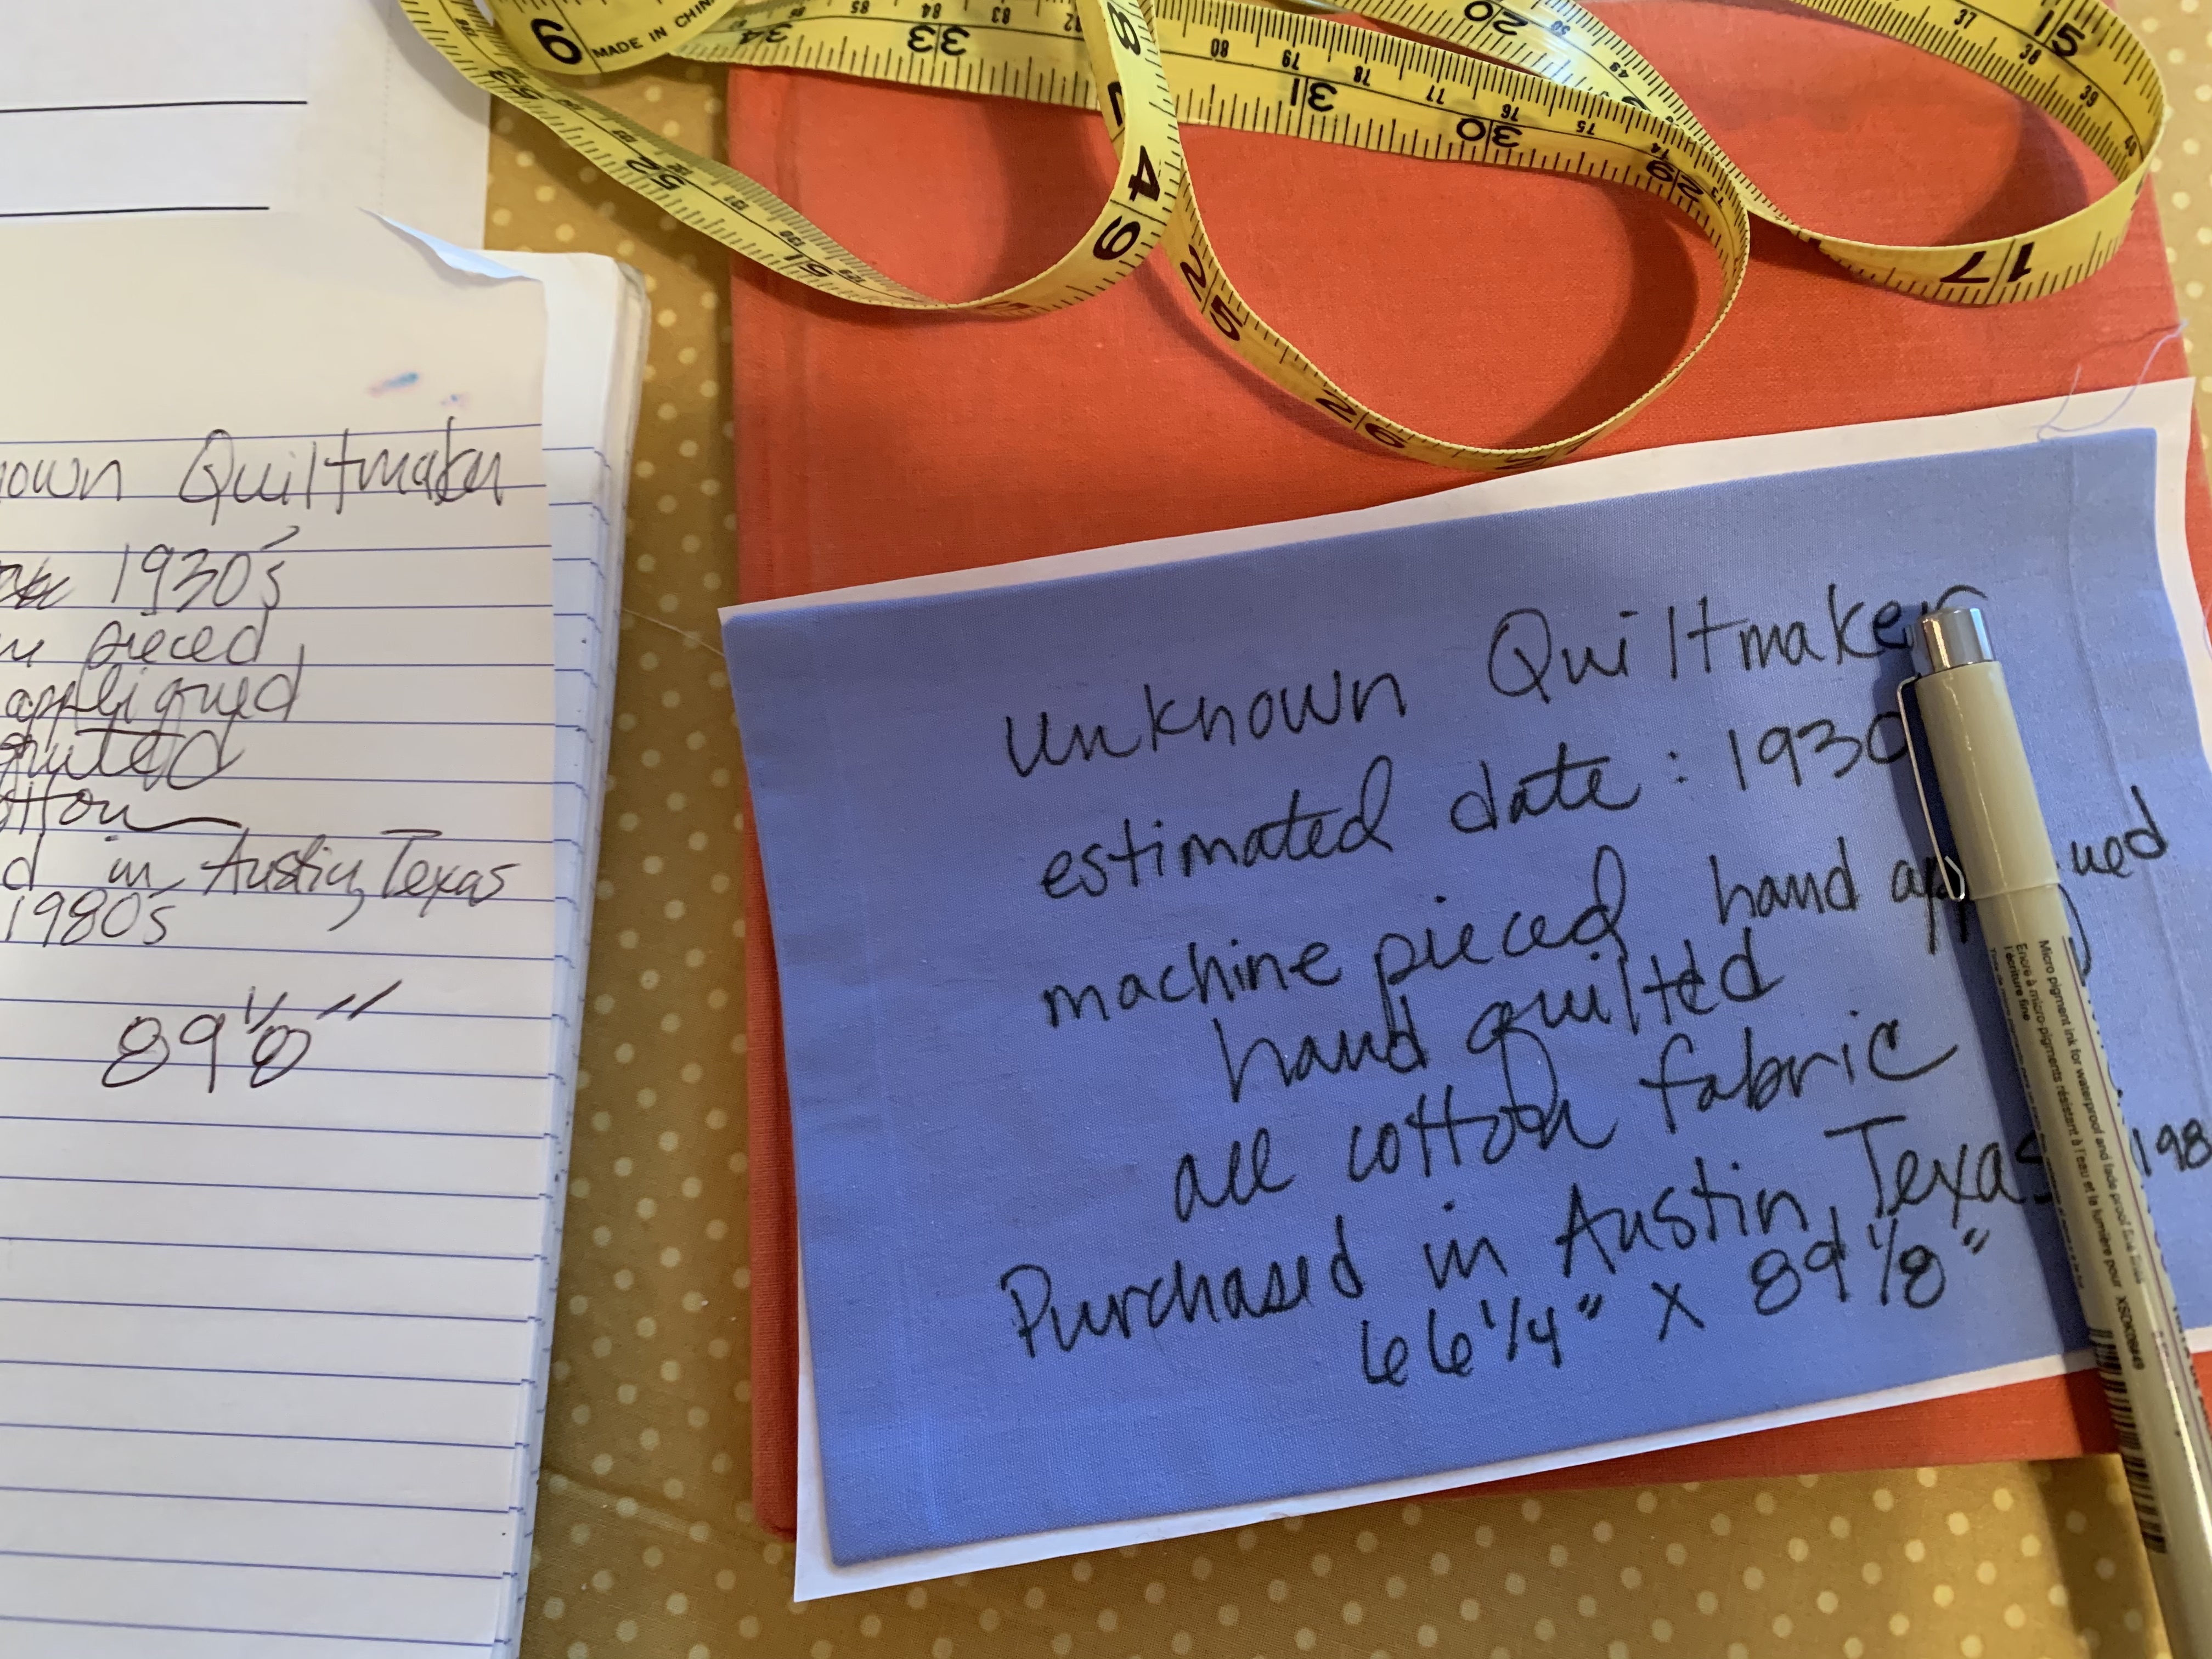
In the past, the Quilt Alliance has offered samples of pre-printed quilt labels (example below) as giveaways at lectures and quilt shows. The labels are small, all-cotton fabric printed with fields for the most basic information.
You can buy all manner of pre-printed labels. Some are pre-cut, some are printed on yardage, and if you don’t like the choices you can buy fabric that goes in your printer to create your own custom labels. The goal of this post is to leave you with no excuse not to make a simple label and sew it on.
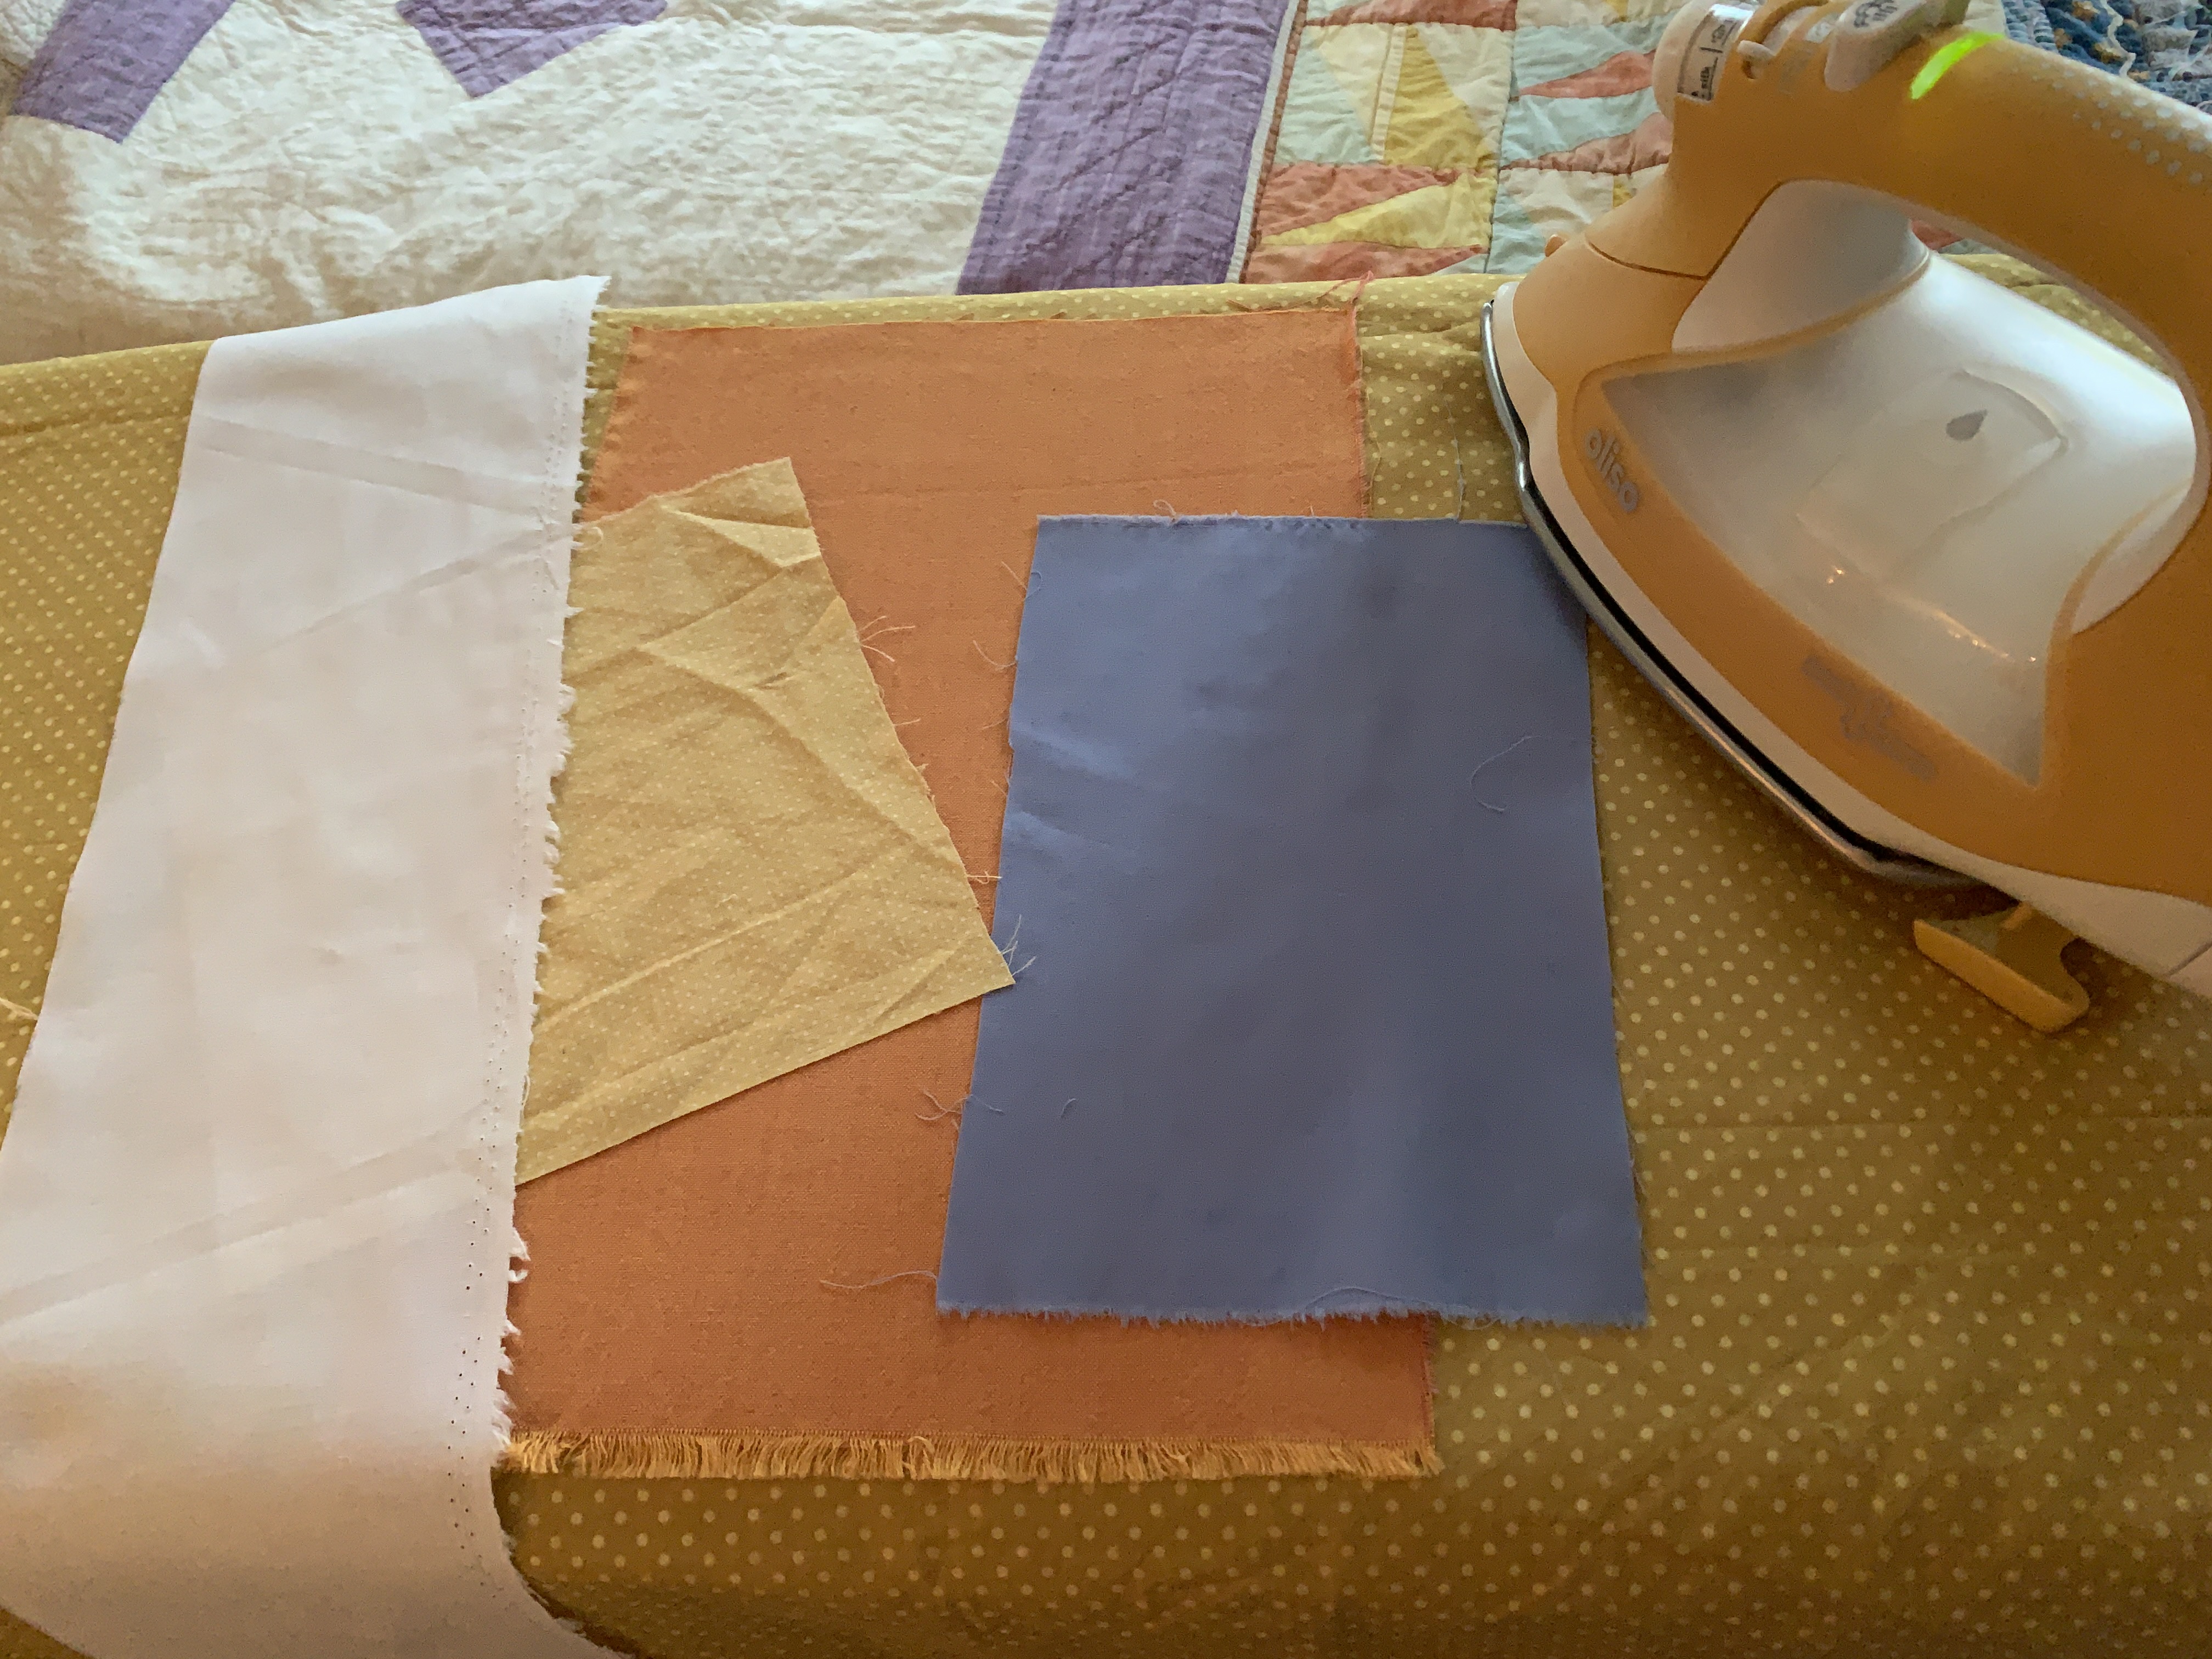
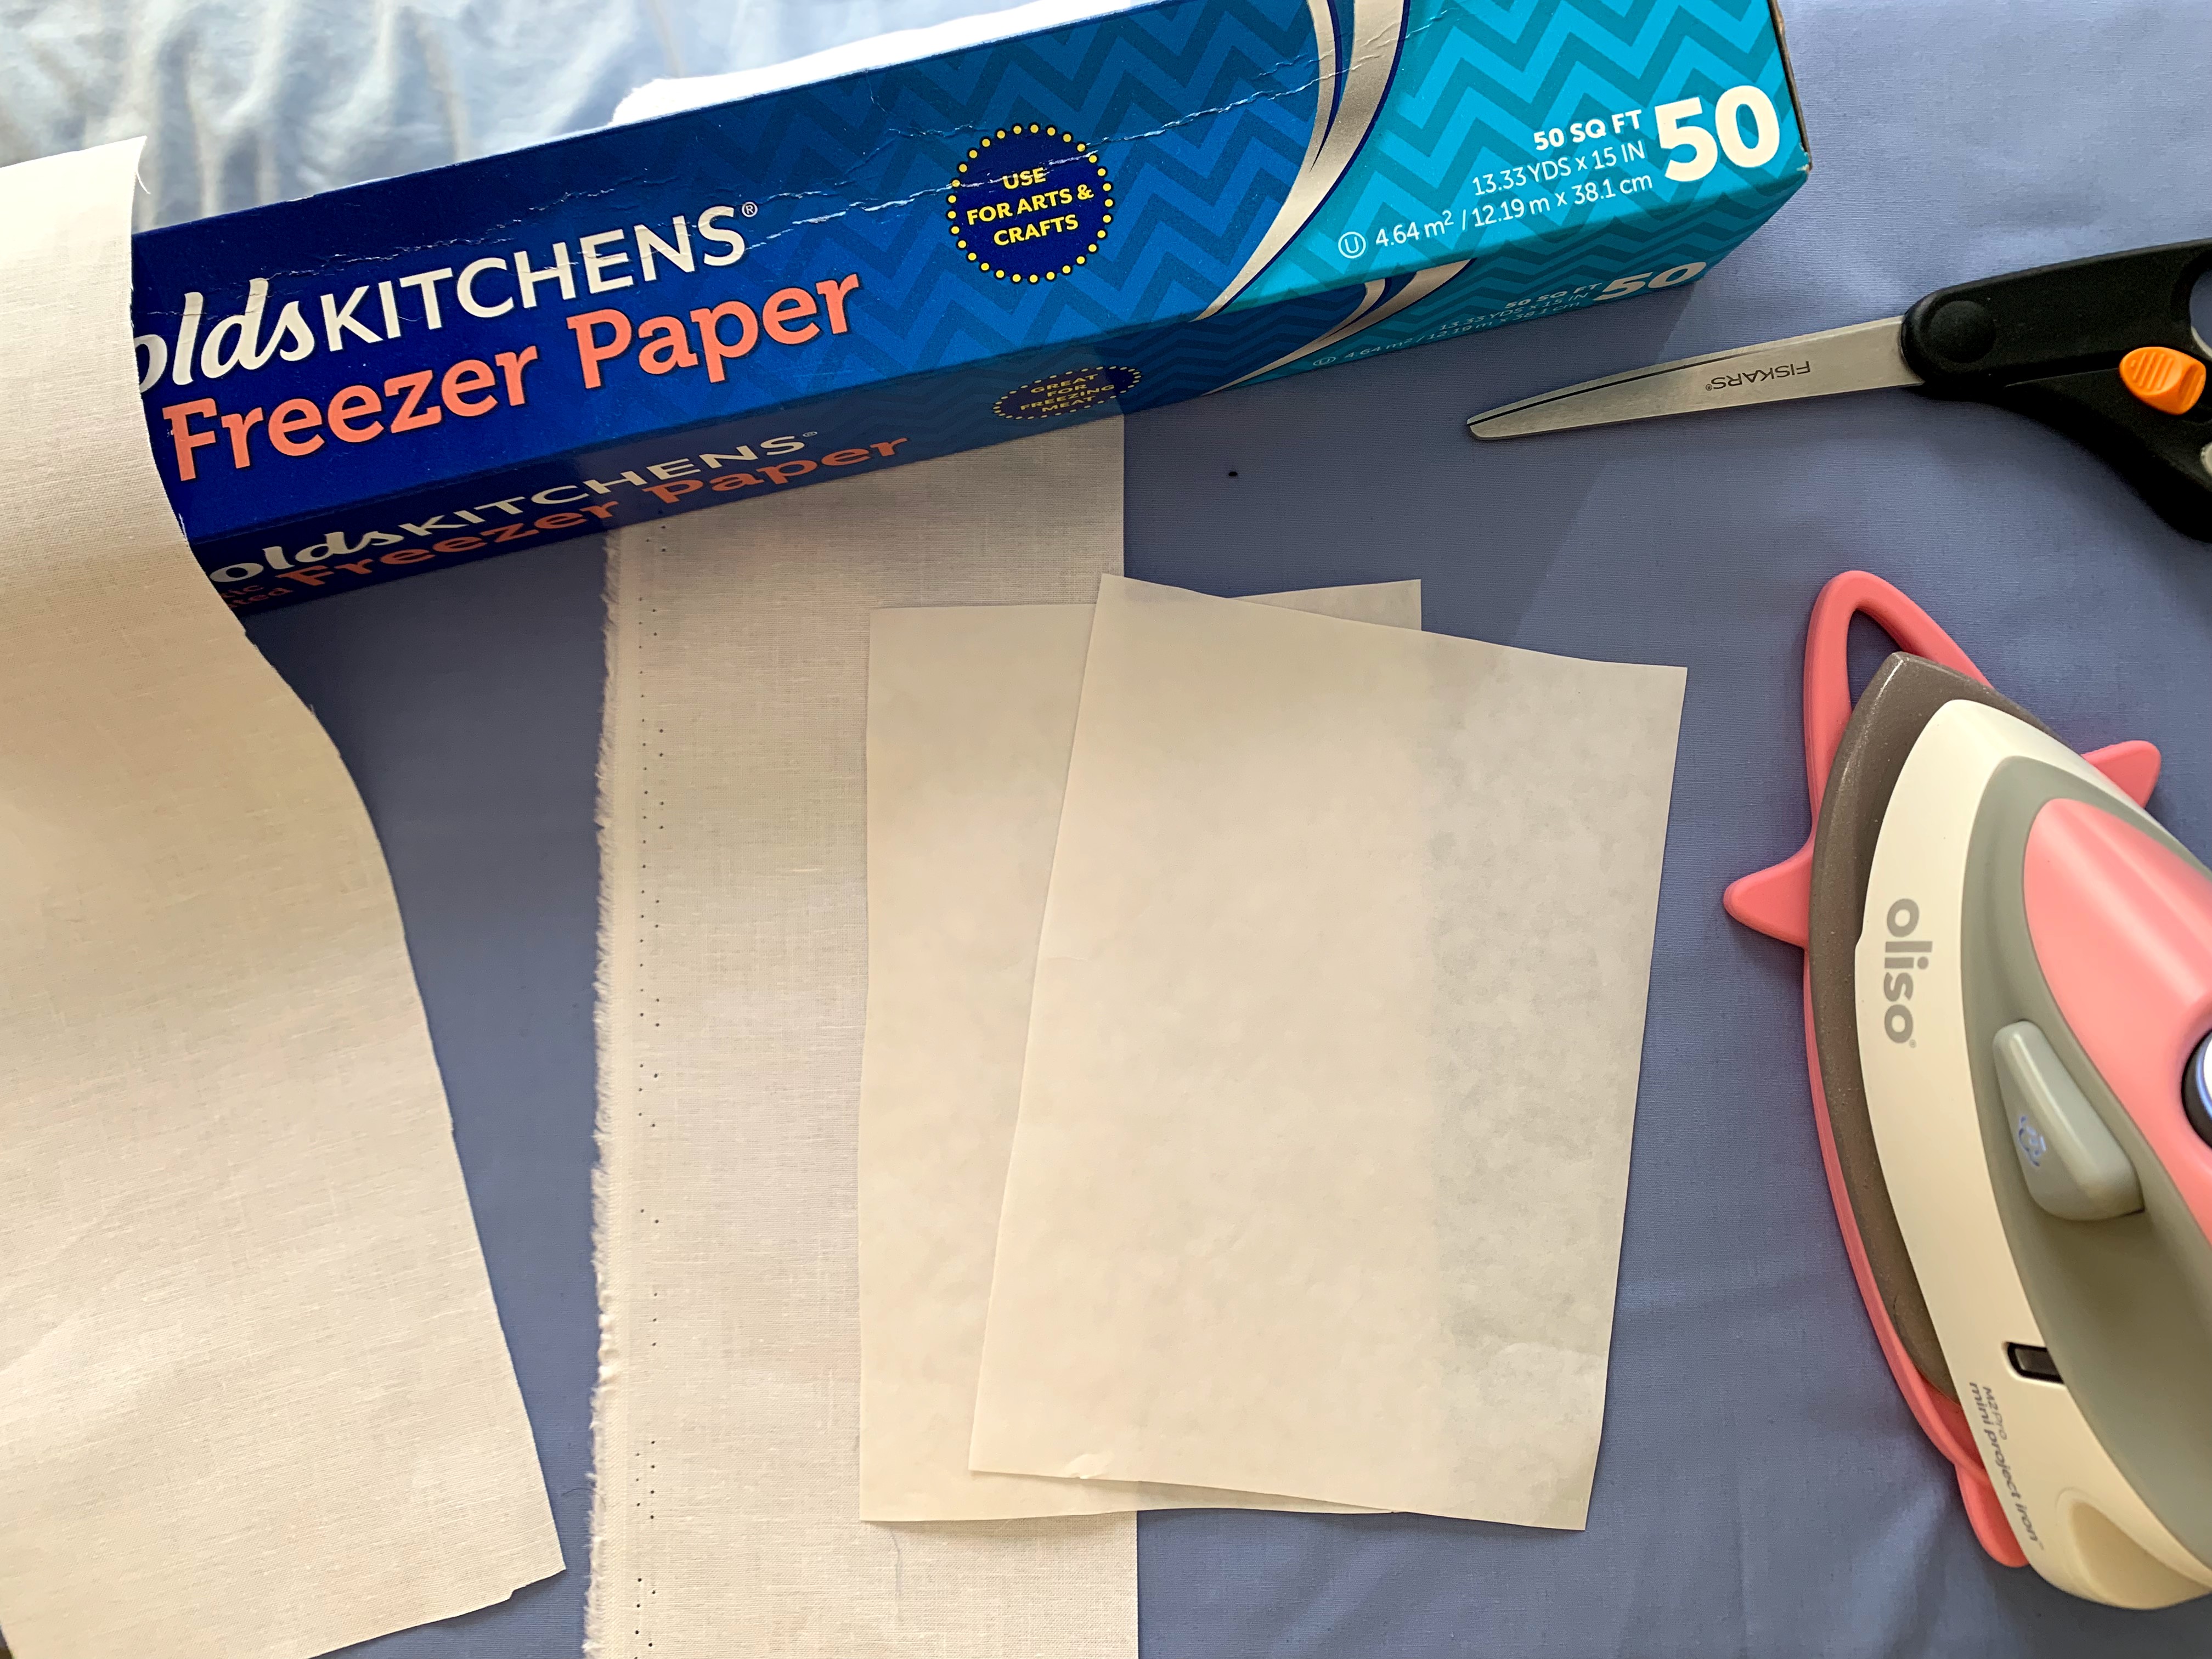
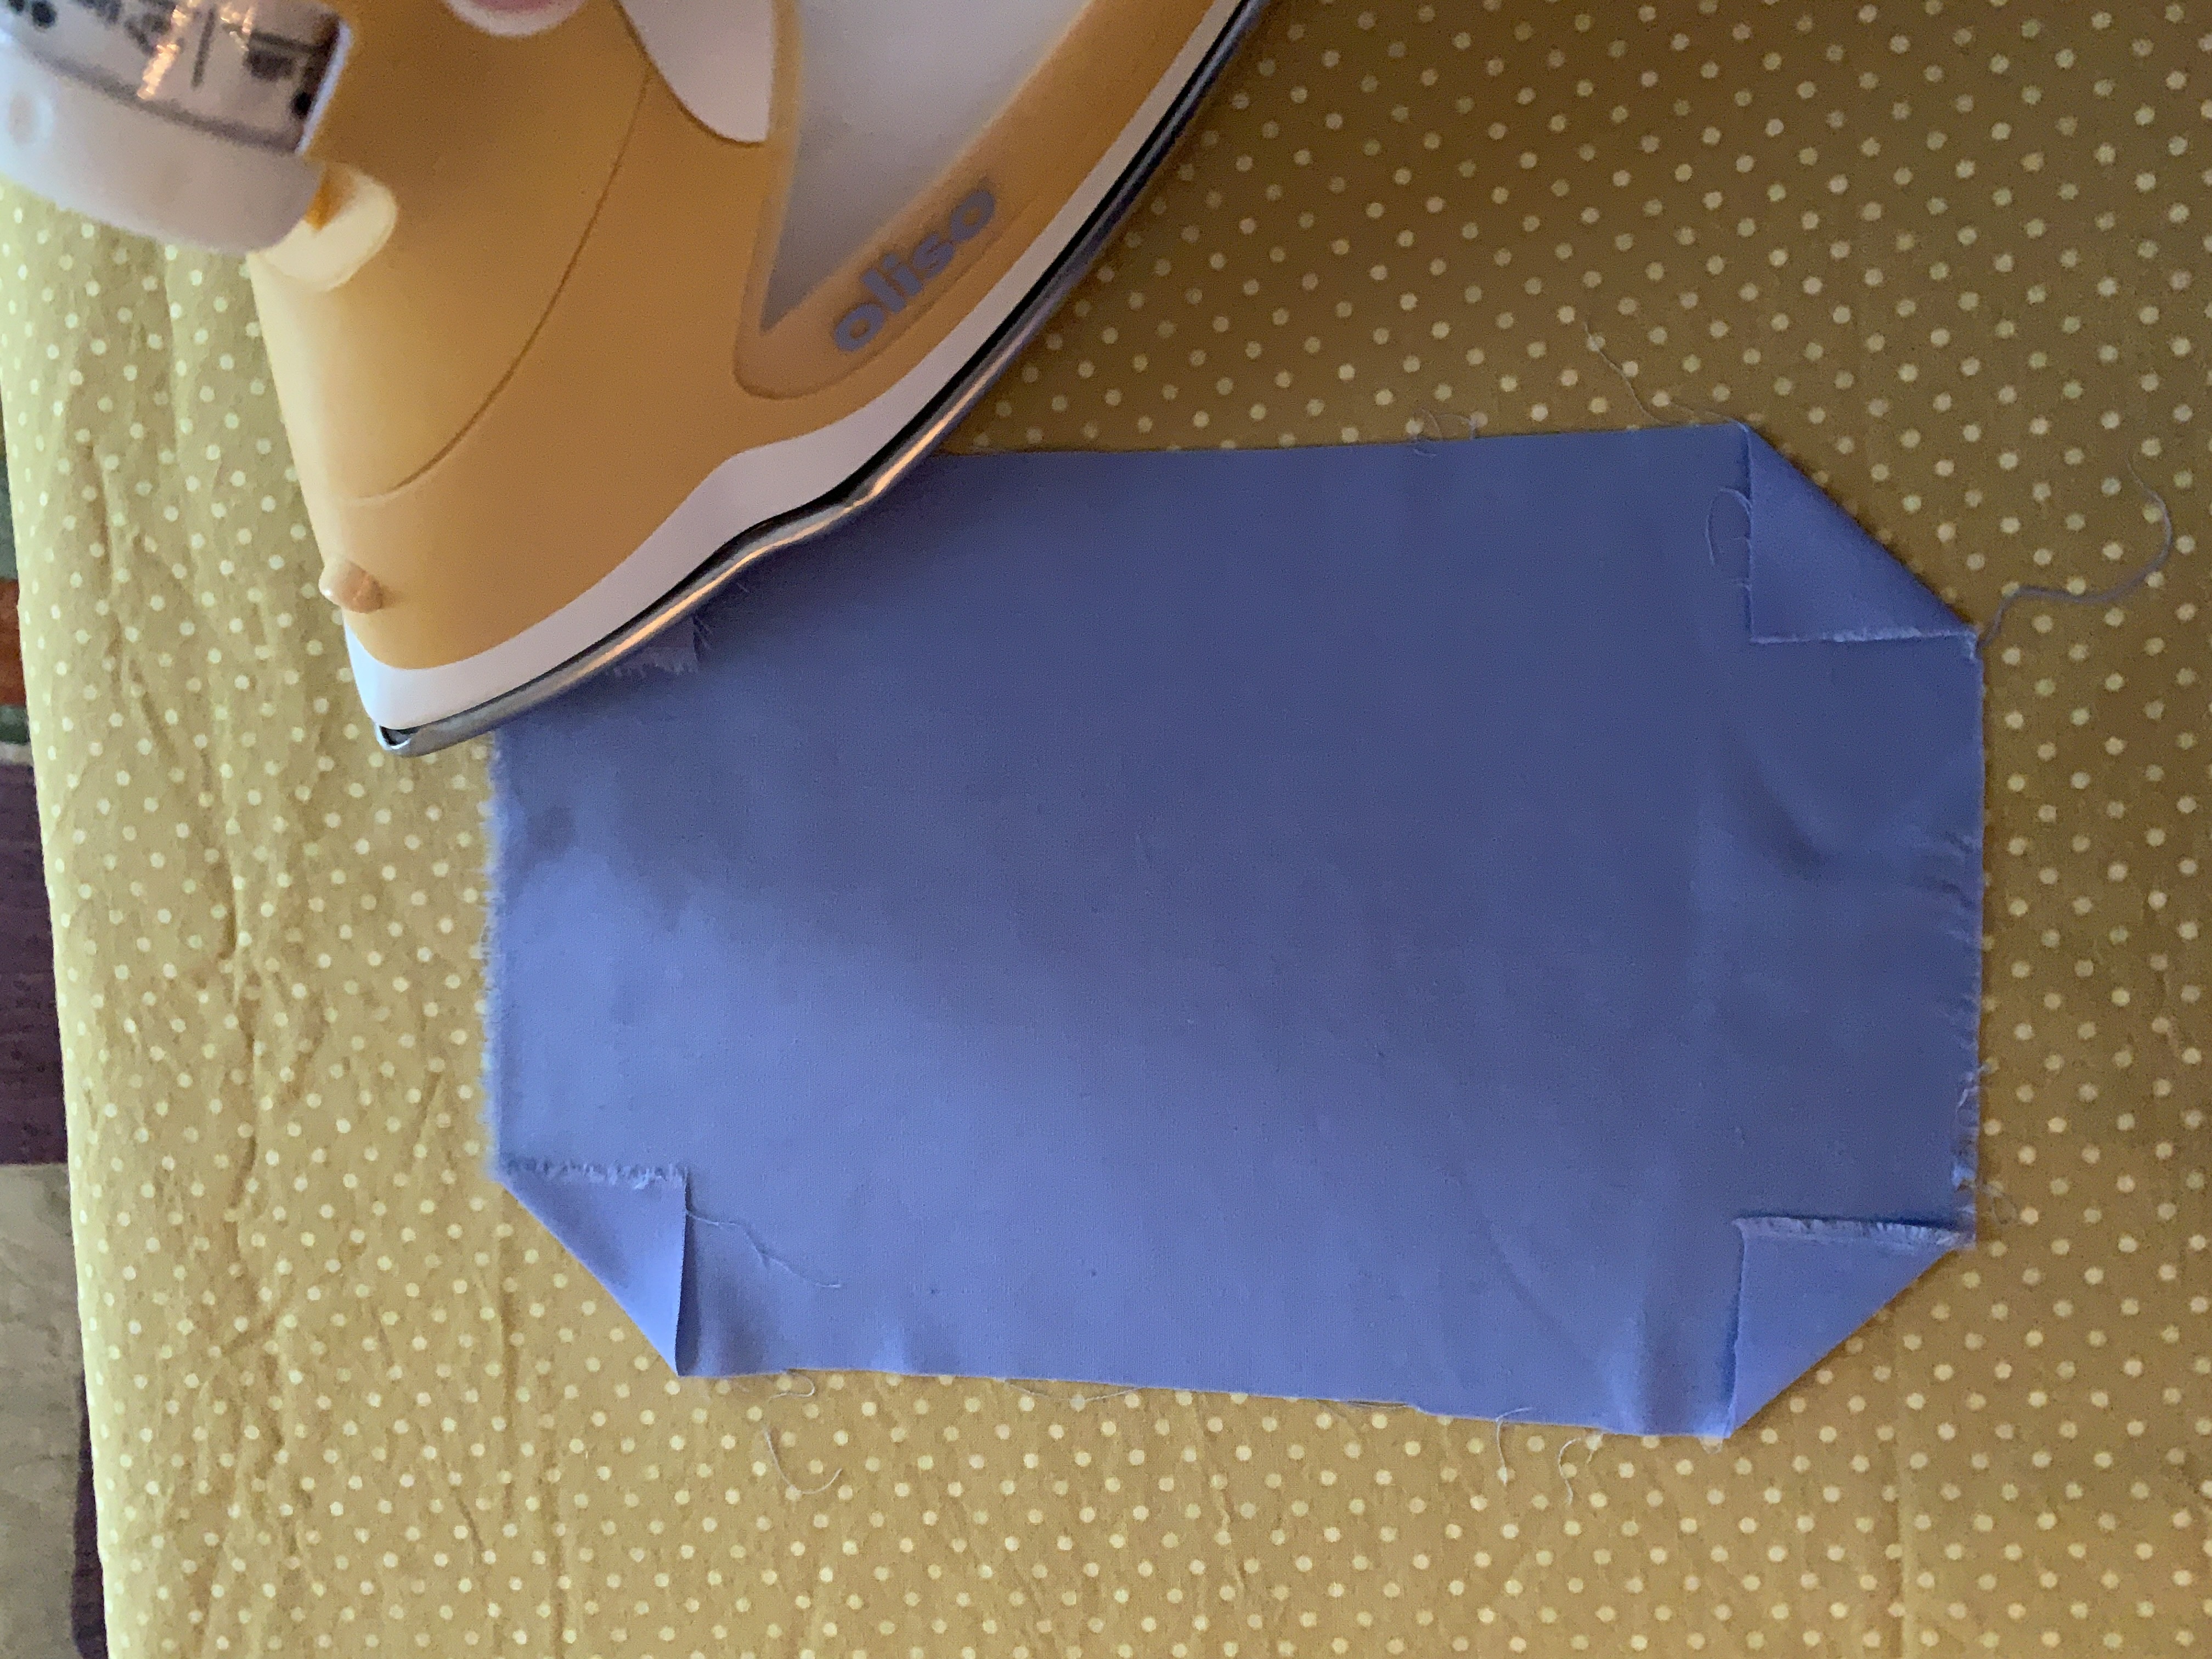
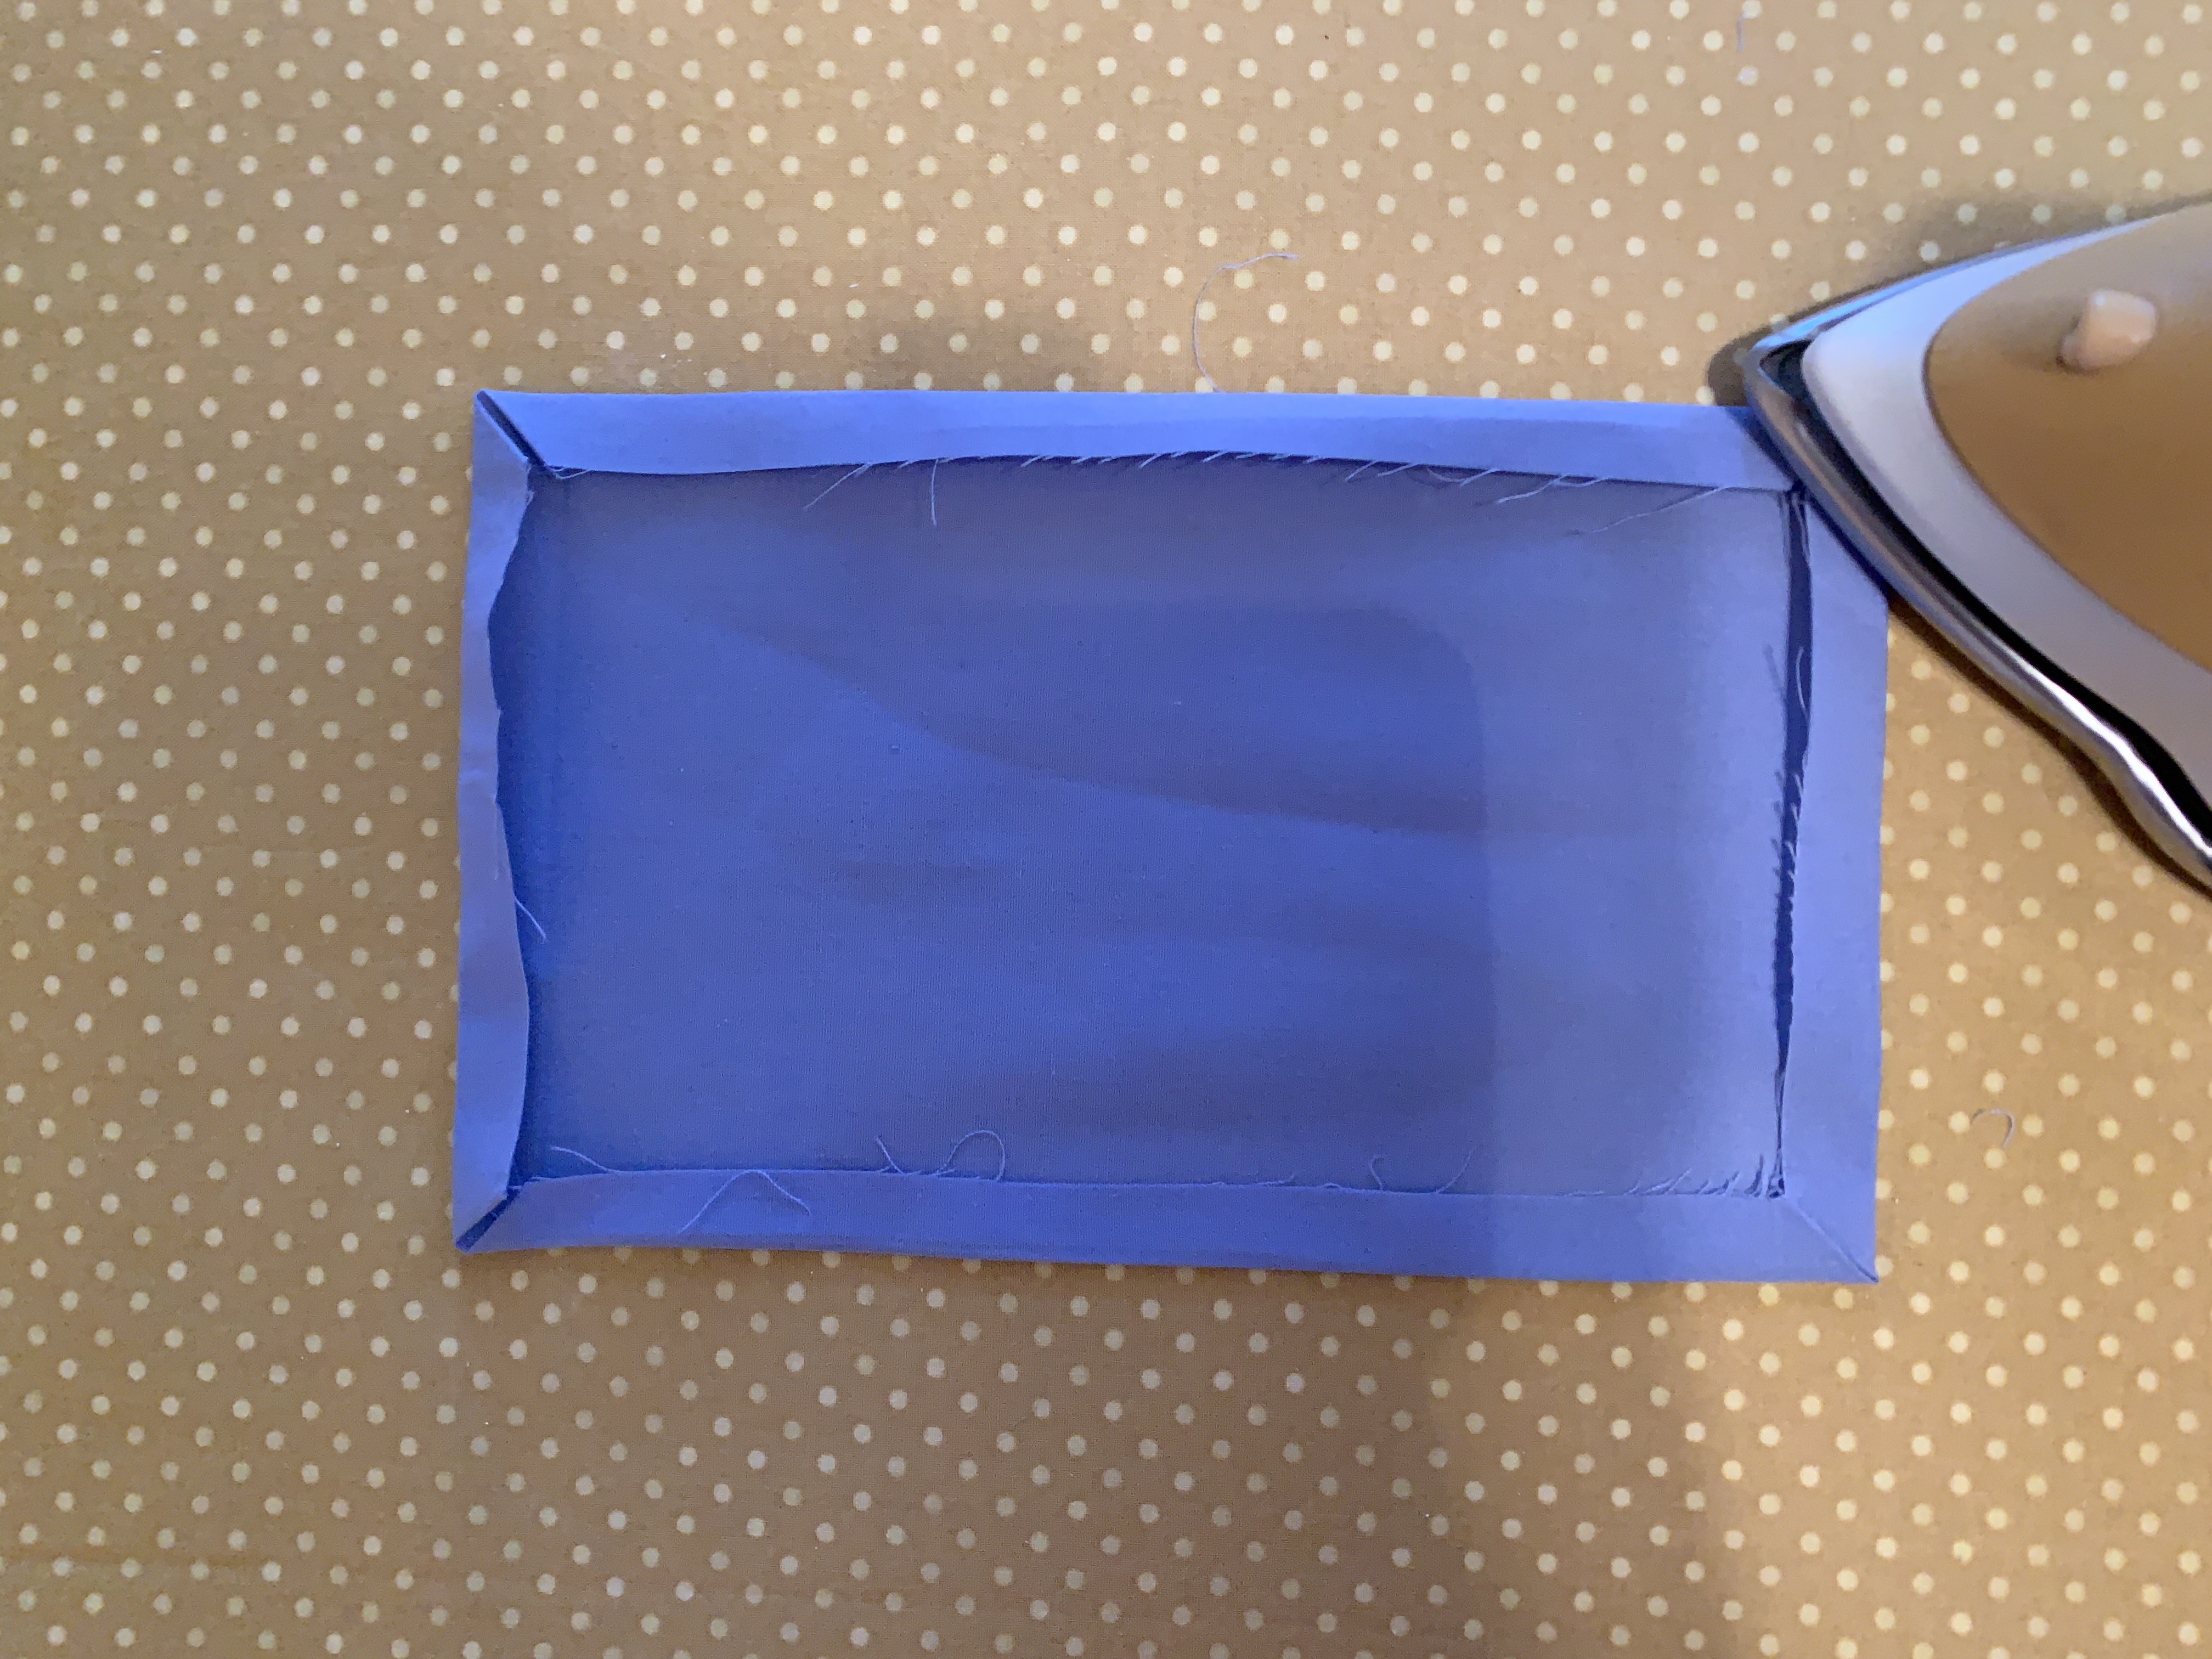
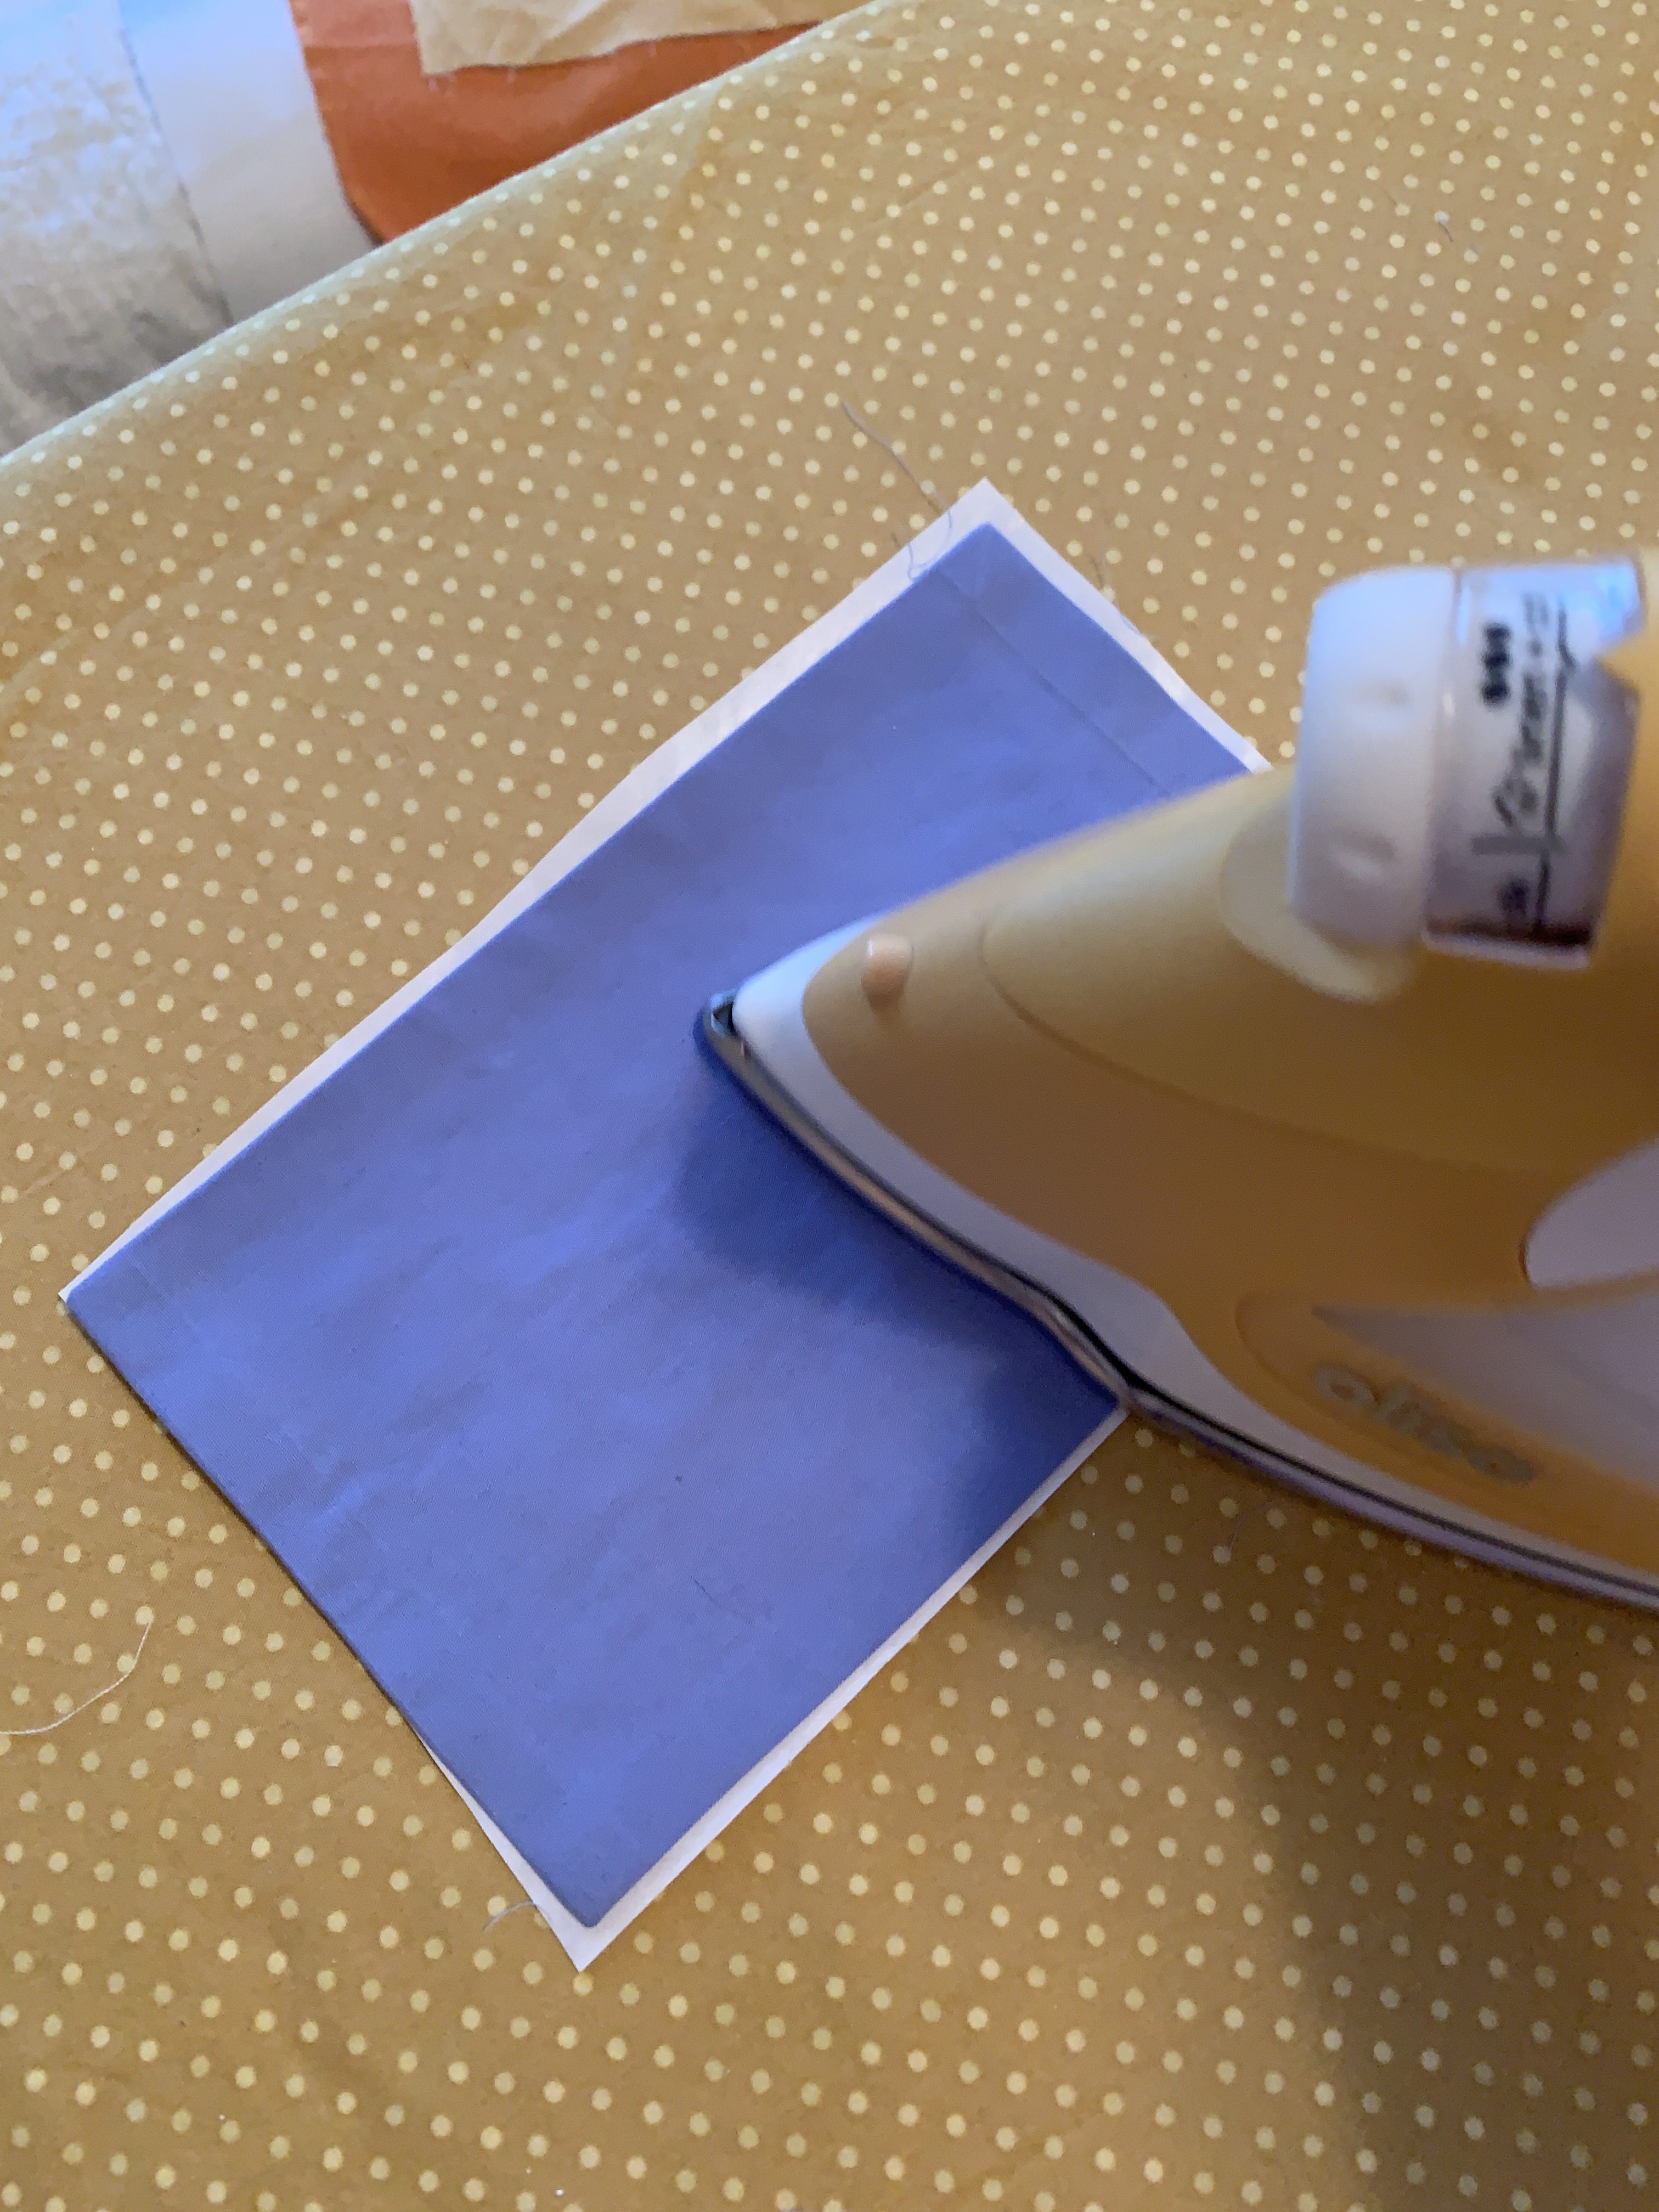
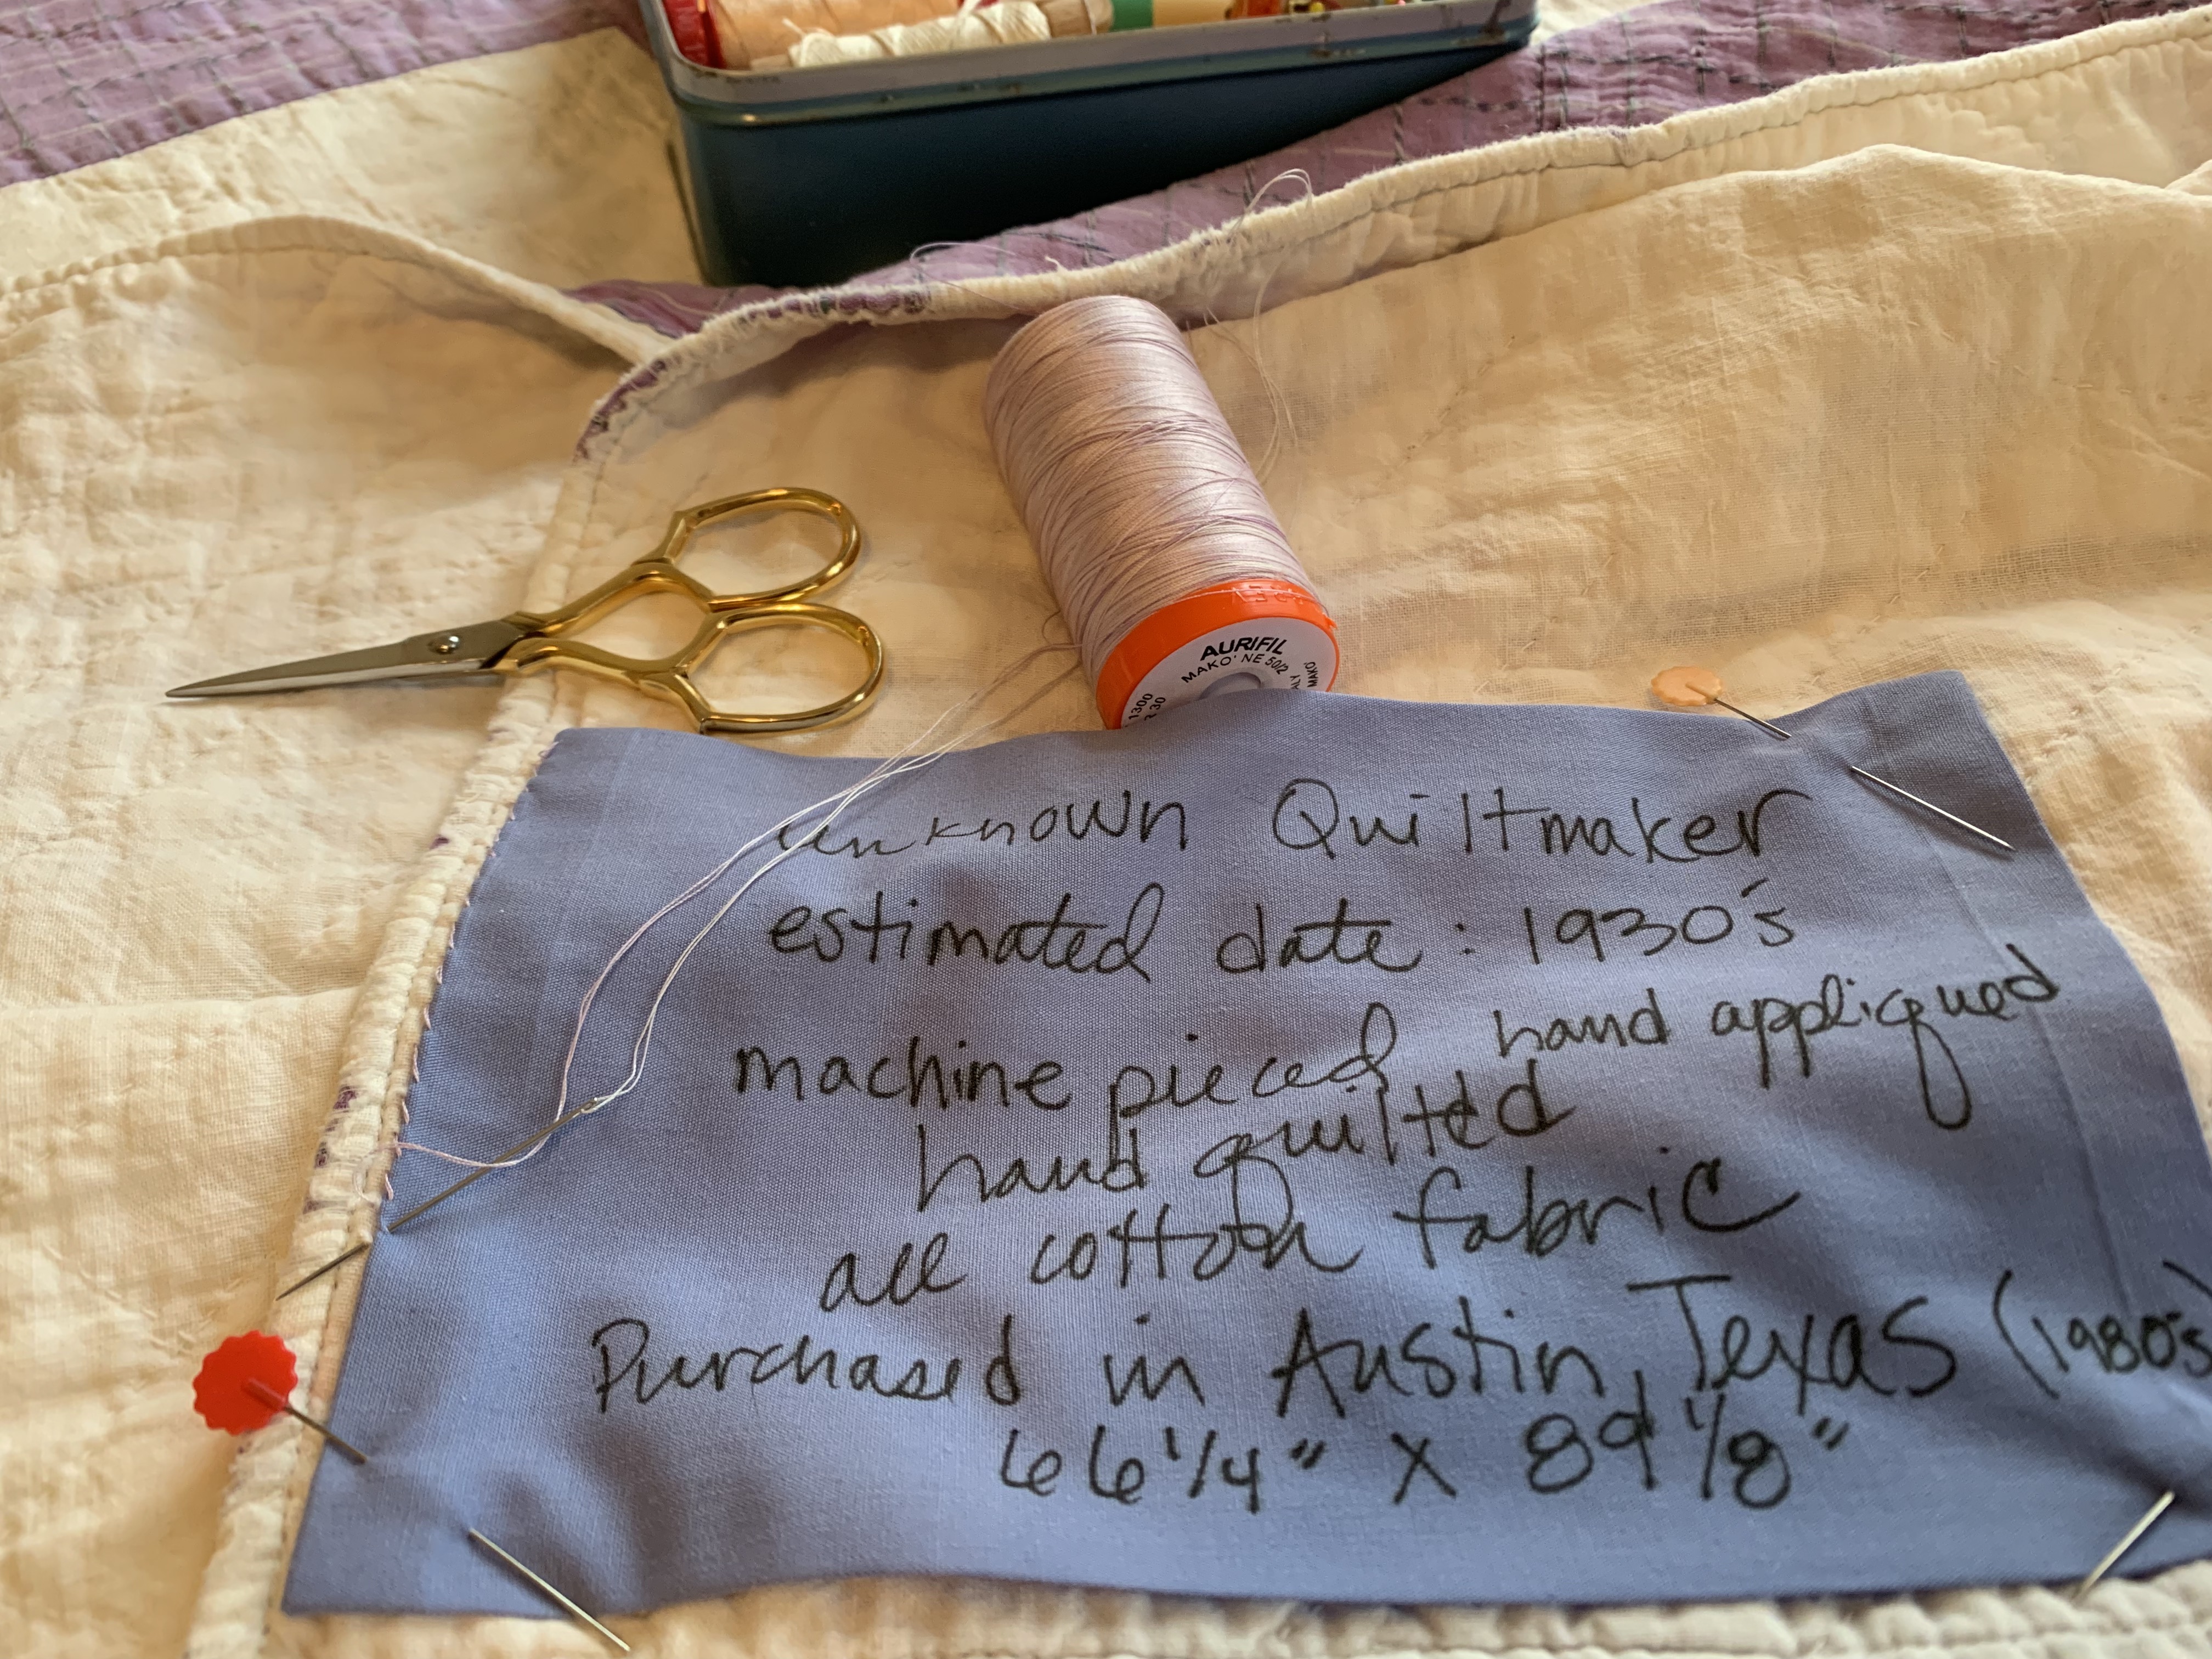
Here are the materials and the steps, now label it already! The two irons featured in this demo are made by Oliso, 
Here are the options and steps:
Click arrow in top right to view slides.


Thank you so much for this!!!????
I try to label all my quilts both old and new
This is so good to hear, Cheryl!
I did a quilt history of my quilts with my local guild recently and showed many of my quilts. As I was going through my quilts, I found at least 2 dozen without labels. (I thought I was pretty good about labeling them.) So now I have those stacked up and I’m making labels for all those unlabeled quilts before putting them away!
Good for you, Pamela! Thank you for posting because I think you are not alone. Many of us who take care to record the history of our quilts, find some in our collection that are still Anonymous.
I mostly make donation quilts and never put a label. They are simple designs and I feel that making a label takes away from the thought that the quilt is FOR the receiver.
Hi Kathy, thanks for commenting and donating quilts! It’s true that the label often focuses on the maker, but there are a lot of other important pieces of information that could be shared on this tag for the recipient. These include the year made, materials used and/or care instructions, and a simple message about why it was donated (e.g., “This quilt was made especially for you, and I hope it makes you feel warm and cared for. From me: a quiltmaker in your community.”).
Thank you for this great info!!!! It is very helpful!
Thank you for commenting, Barbara!
Hi, I found your labels at a Quilt store, I am not a Quilter but have tried it.
I am A Rug Hooker, and thought how perfect these labels are for the backs of our Rugs . We will include these as Giveaways at our next big Hook In next month.
Our Nova Scotia Guild does a label and archive for older Rugs , but we all know how quickly information can be lost.
Thank you for your preservation of Handcrafted articles ❤️
Barb, thank you so much for commenting. We are so glad that you found our labels useful. Have you discovered the Textile Talks series yet? It’s a wonderful free lecture series on Zoom each week at 2pm EDT. We are one of four fiber arts organizations who present–so not always about quilts, but other fiber media too. The audience connects from around the world. Join us! Here’s a link to the registration page on our website: https://quiltalliance.org/events/textile-talks/