Creating Quilt Labels
You are FINALLY finished with that wonderful quilt! It
has been pain-stakingly pieced, quilted, and bound. If
destined for a show, it has a hanging sleeve proudly
attached to the top. All set to pack it up and send it to
the new owner or the show venue? Not. So. Fast.
What about the label?
Quilts, like paintings or other art forms, tell a story.
They are love-offerings, dimensional forms of artistic
expression that have told countless tales of friendship,
political activism, and even loss. Quilt historians can
offer information about the era in which a quilt has
been created based on the textiles used. Still, what
every historian, what every descendant who discovers
a wonderful quilt in an attic trunk, even the bidder on an
eBay auction, wishes for is a label on the quilt.
Quilt labels add value to every single quilt. Labels
can tell a story that adds so much to the artistry of the
piece. Labels can offer as little as the maker’s name,
date of completion, and the city where the quilt was
constructed. They can offer information about the
occasion for which the quilt was created: wedding,
birth, anniversary, and more. Every piece of information
the quilt artist includes adds meaning to, not only the
original recipient, but everyone who encounters the quilt
in the future.
I am a great “rescuer” of abandoned quilts: those
forlorn pieces that are found on eBay, finished and
unfinished. I always want to know more than the quilt
has to “tell” me. I have a mid-1800s signature quilt that
I want to know more about: was it given to a friend
who was moving away? Did the quilt commemorate
a milestone in the recipient’s life? If only I knew! I
wonder what I might find out if only the quilt had the
maker’s name, a city, a date, and even more on the label.
Making labels is as simple as writing directly on the quilt
back with a permanent textile marker or pen, to a more
elaborate printed label that has been stitched onto the
back.
Labeling certainly does not have to be labor-intensive.
I’ve come to the conclusion that creating a unique label
is the equivalent to an “artist signature” on a painting:
an opportunity to express my own creative mark on a
finished creation.
I’ll show you a couple of very simple methods of
labeling a quilt as well as a few images of some of my
more “interesting” labels.
Labels may be hand or printer-generated. I use both
equally. Often, I will create the label and fuse it to the
quilt back prior to the quilting. When finished, the label
is securely embedded onto the back surface. When
adding the label to a finished quilt I fuse, then hand-
stitch, the label. Fusing is a means to stabilize the label,
but I always add stitching to assure that it will remain in
place in spite of use and probable washing (in the case
of a bed quilt).
Online sources for additional information about
labeling:
http://quiltwithus.connectingthreads.com/page/quilt-
labels
http://www.quilterscache.com/Q/QuiltLabels.html
http://www.allpeoplequilt.com/techniques/finishing/
making-quilt-labels_1.html
http://www.victorianaquiltdesigns.com/
VictorianaQuilters/PrintableQuiltLabels/
freeprintablequiltlabels.htm
Pinterest is a great source of inspiration for creative
label ideas, and includes links to more tutorials on label-
making. Here are a few:
http://pinterest.com/cheri_barnett/quilt-labels/
http://pinterest.com/search/pins/?q=quilt+labels
http://pinterest.com/search/boards/?q=quilt+labels
Here is my general Etsy search for quilt labels, which
turned up 617 items! http://www.etsy.com/search?
q=quilt%20labels&view_type=gallery&ship_to=US&ref=a
uto1
http://www.etsy.com/people/lillalotta?
ref=owner_profile_leftnav
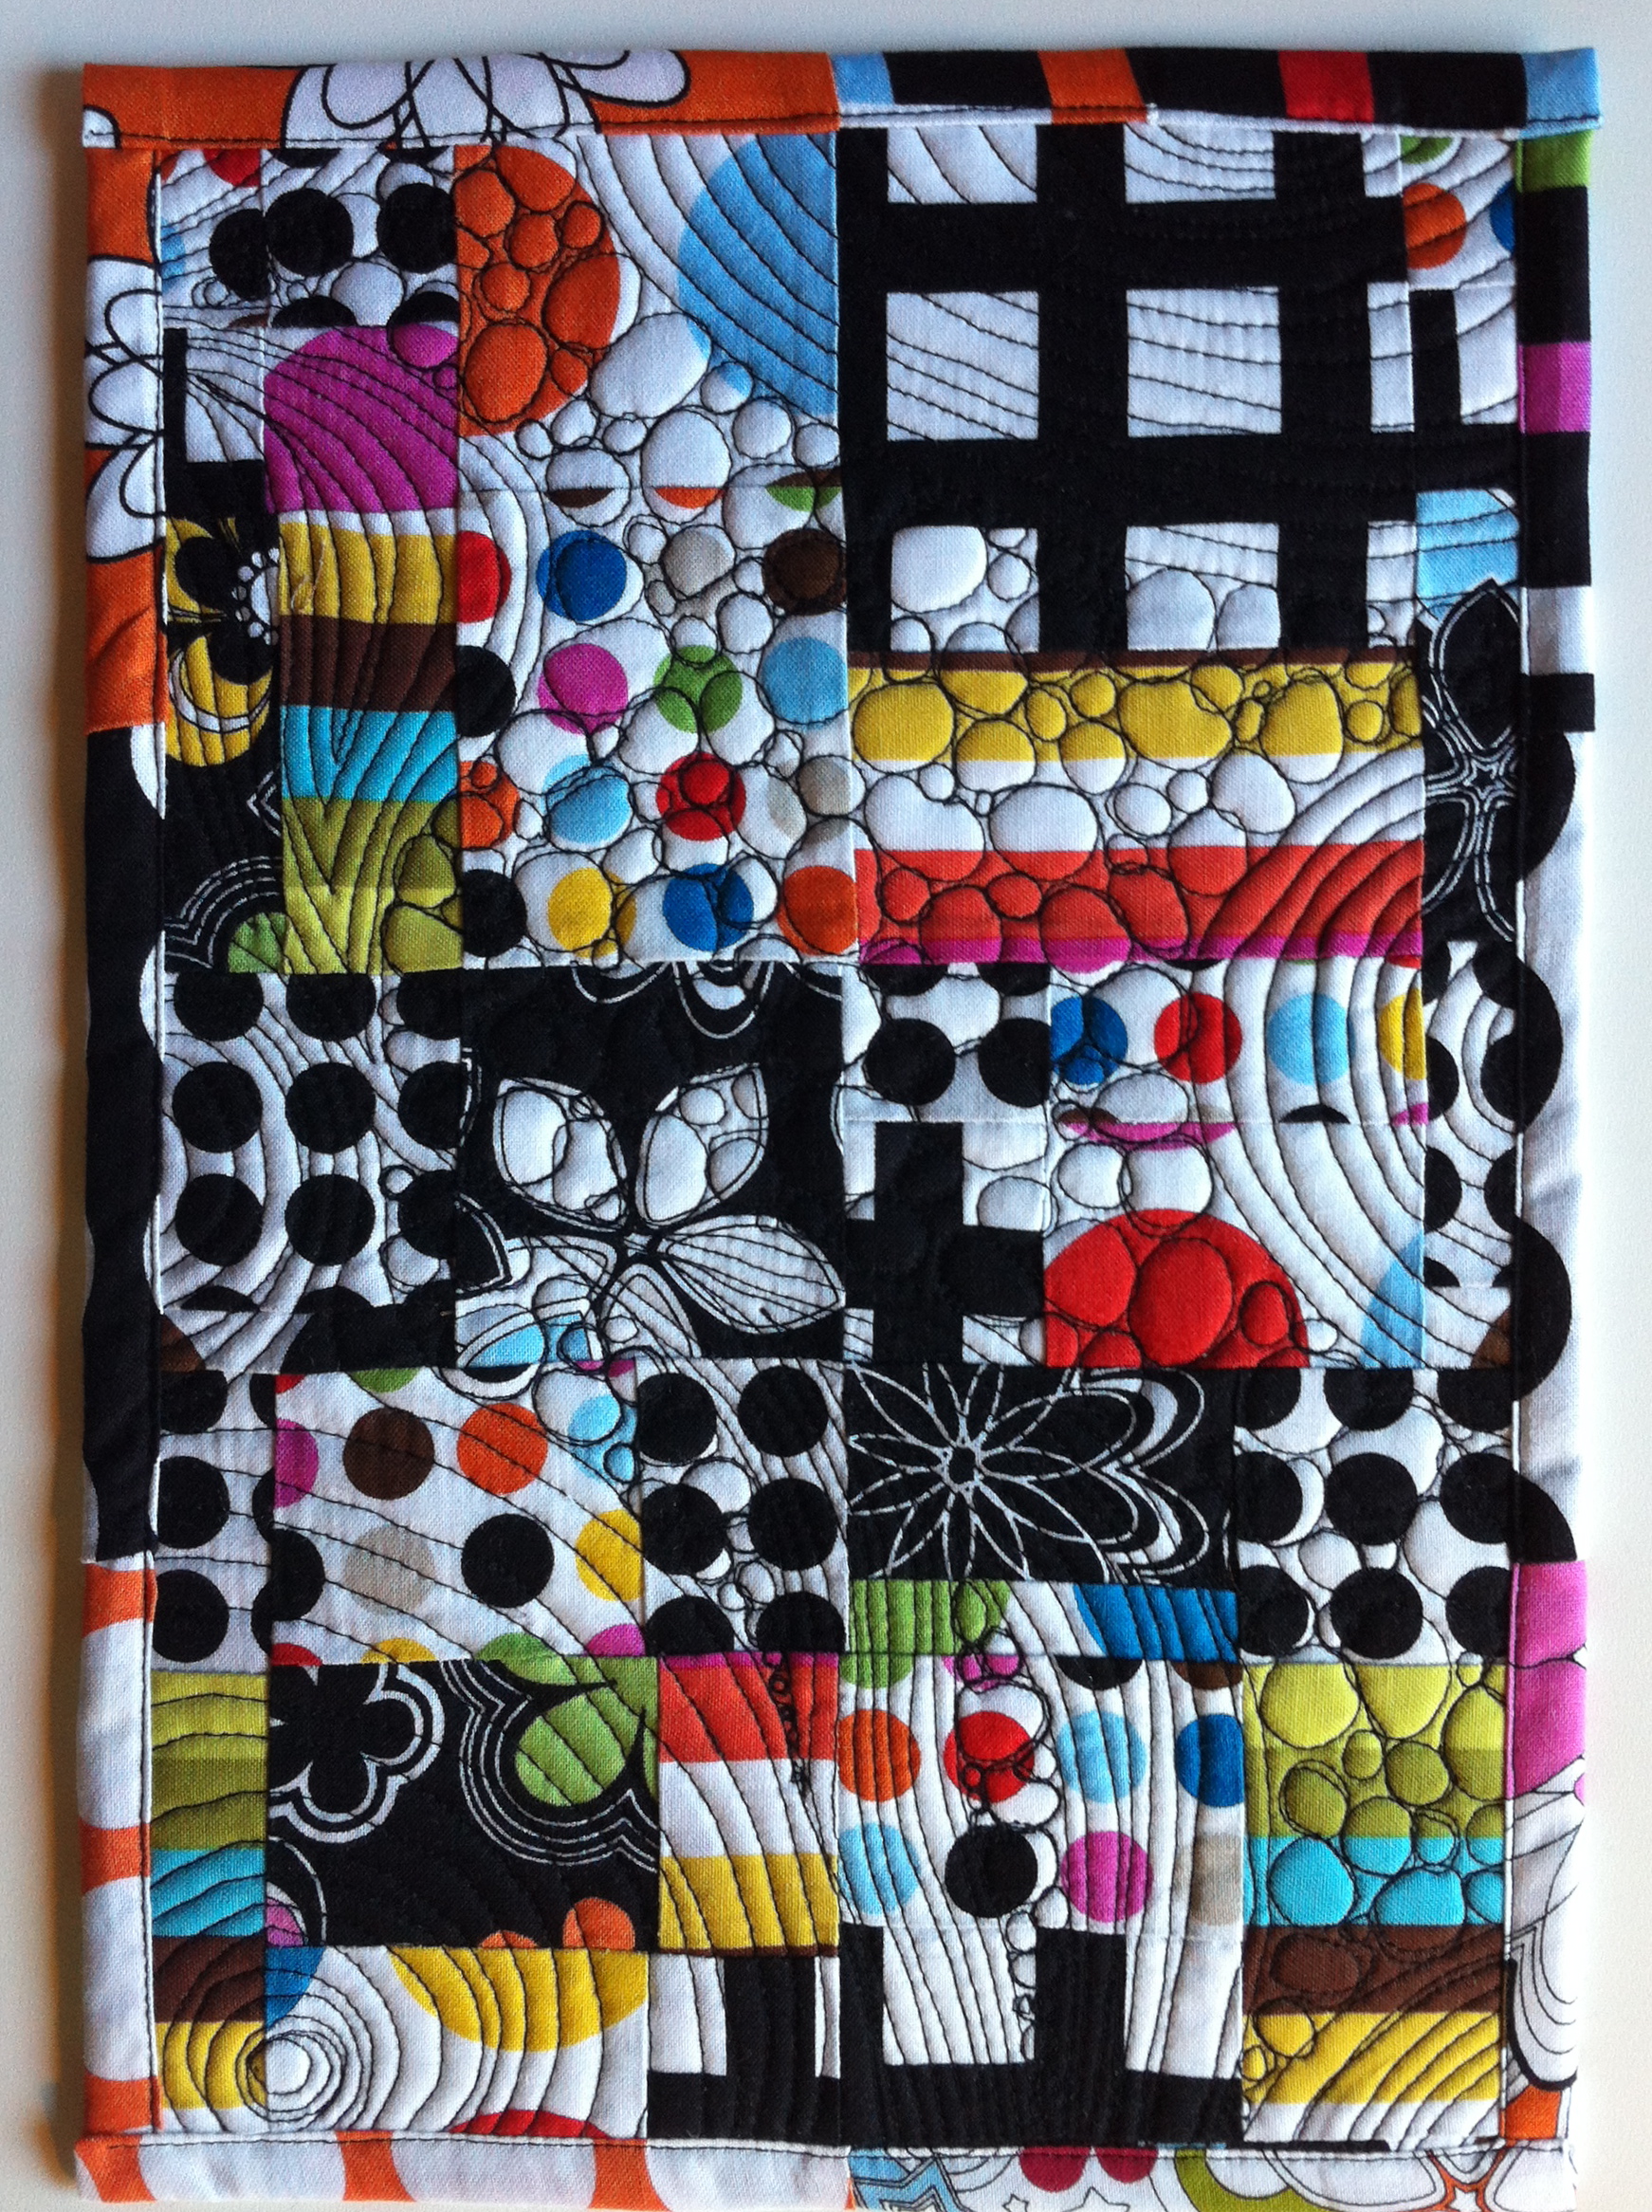
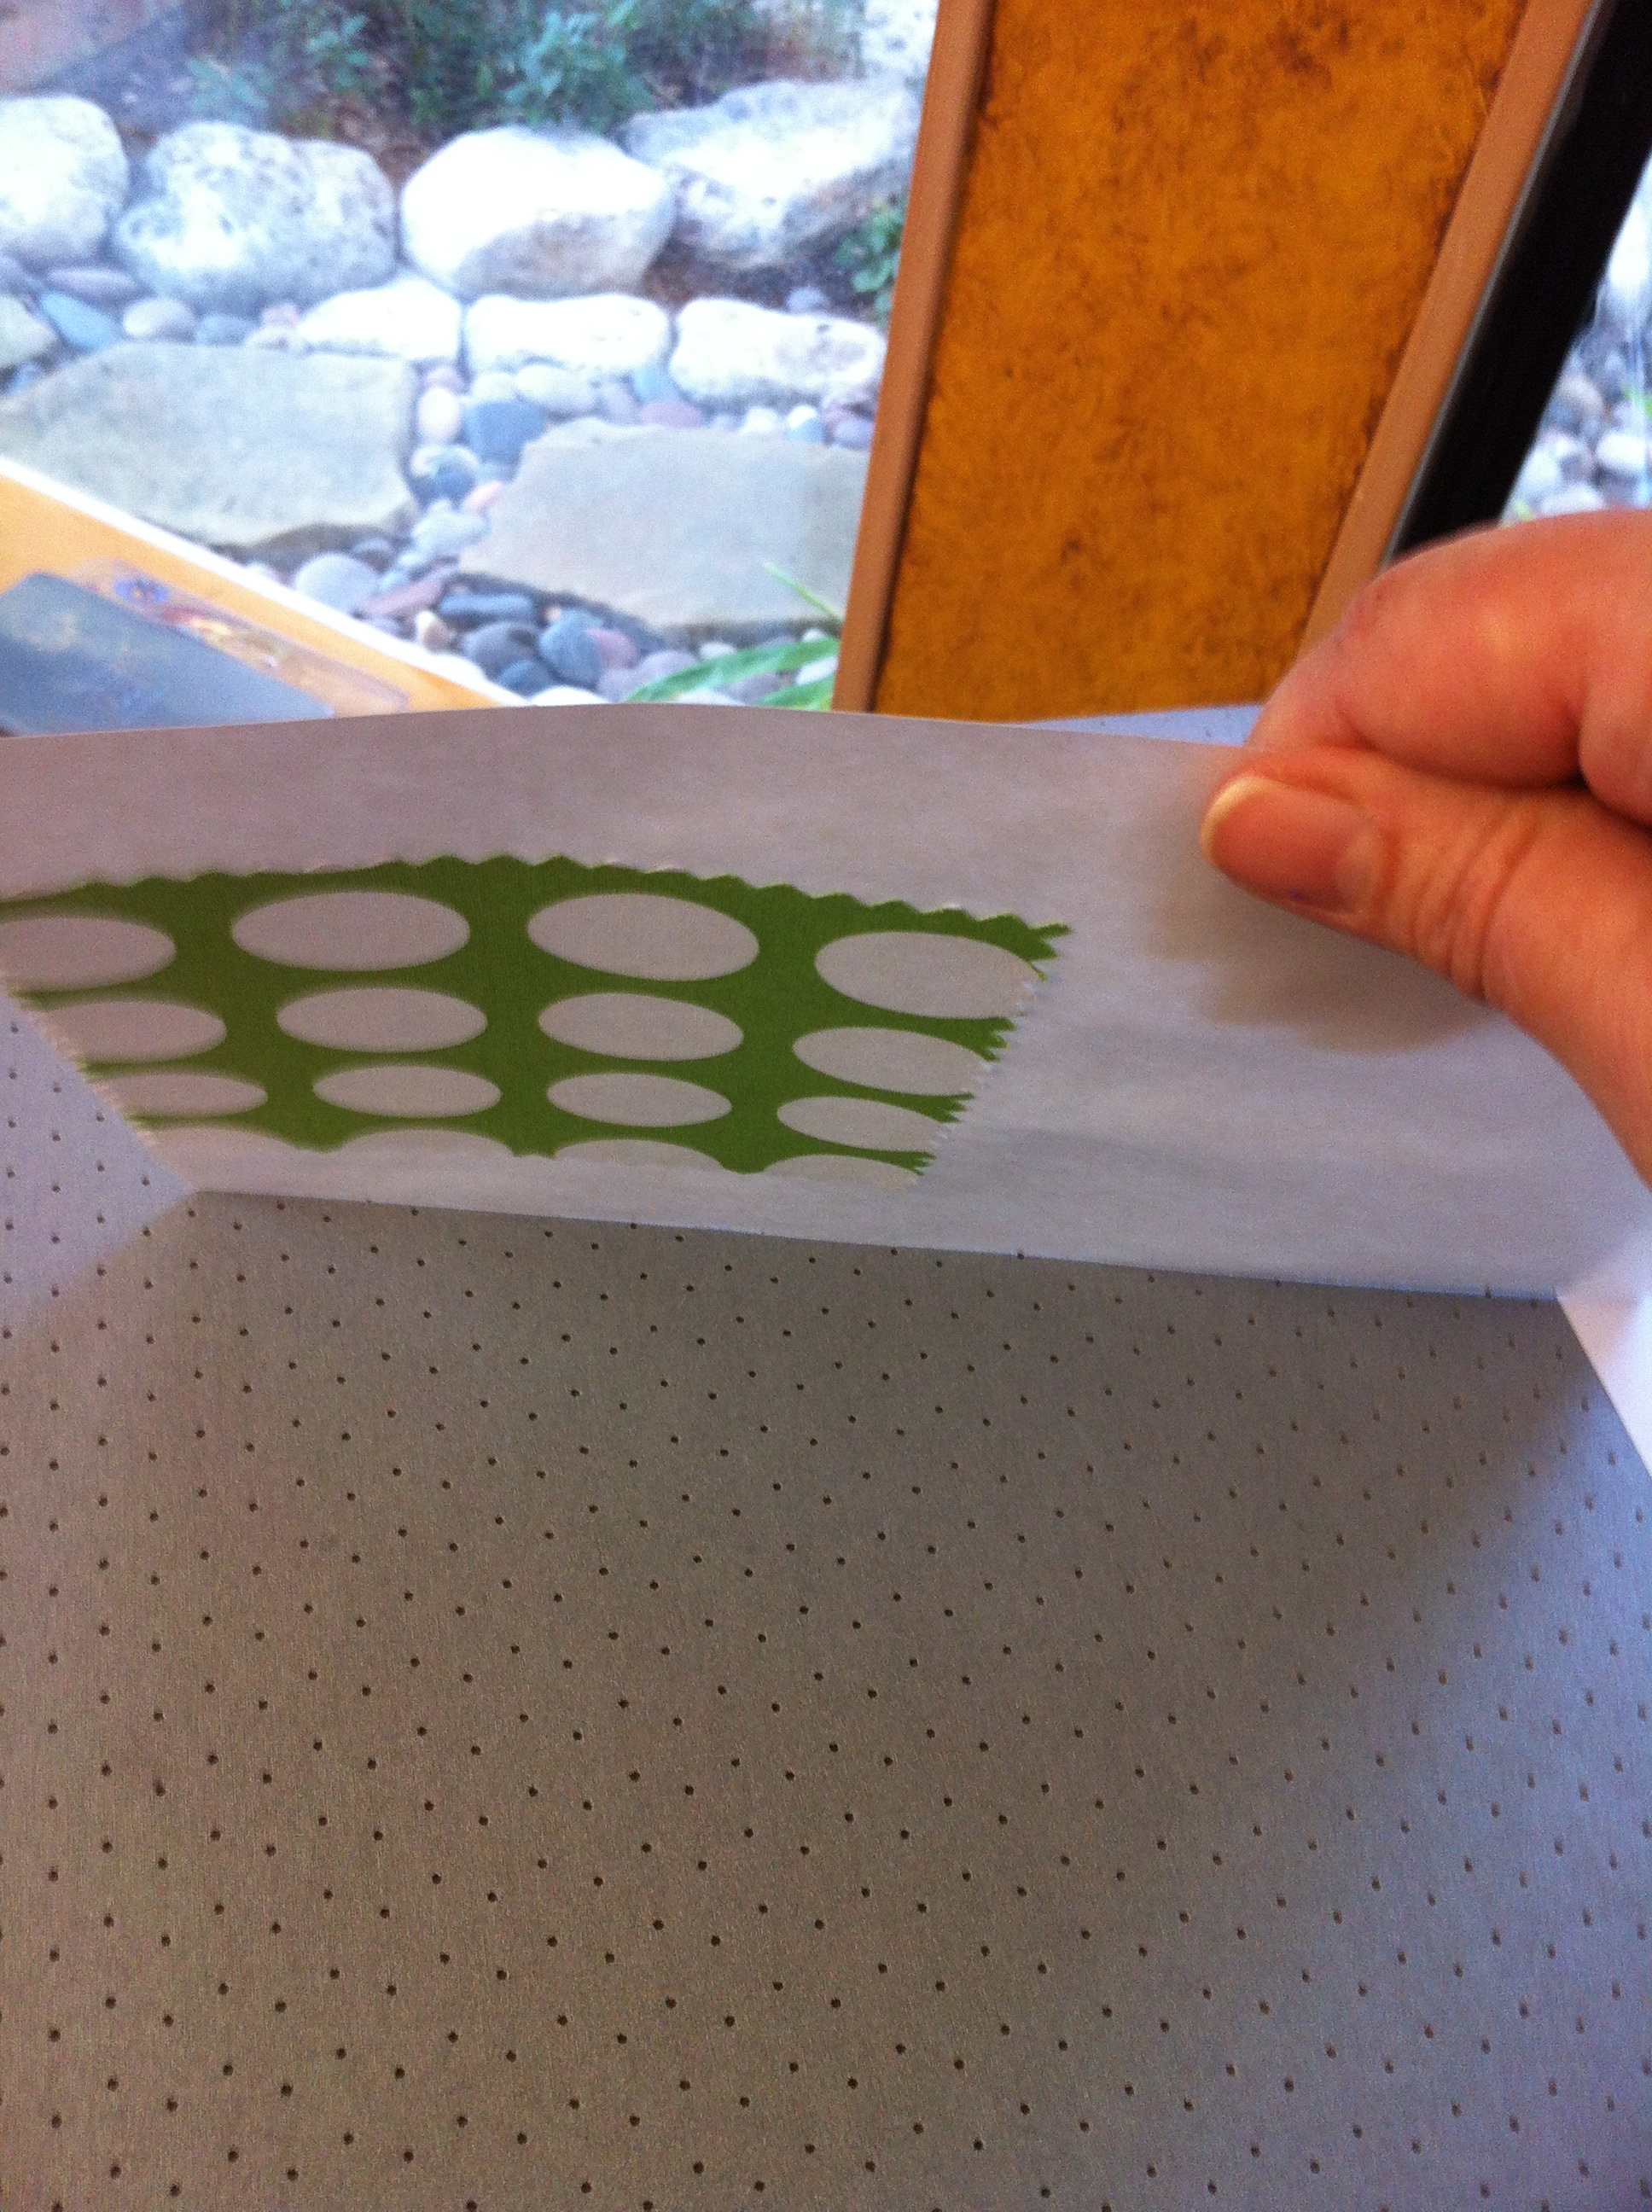
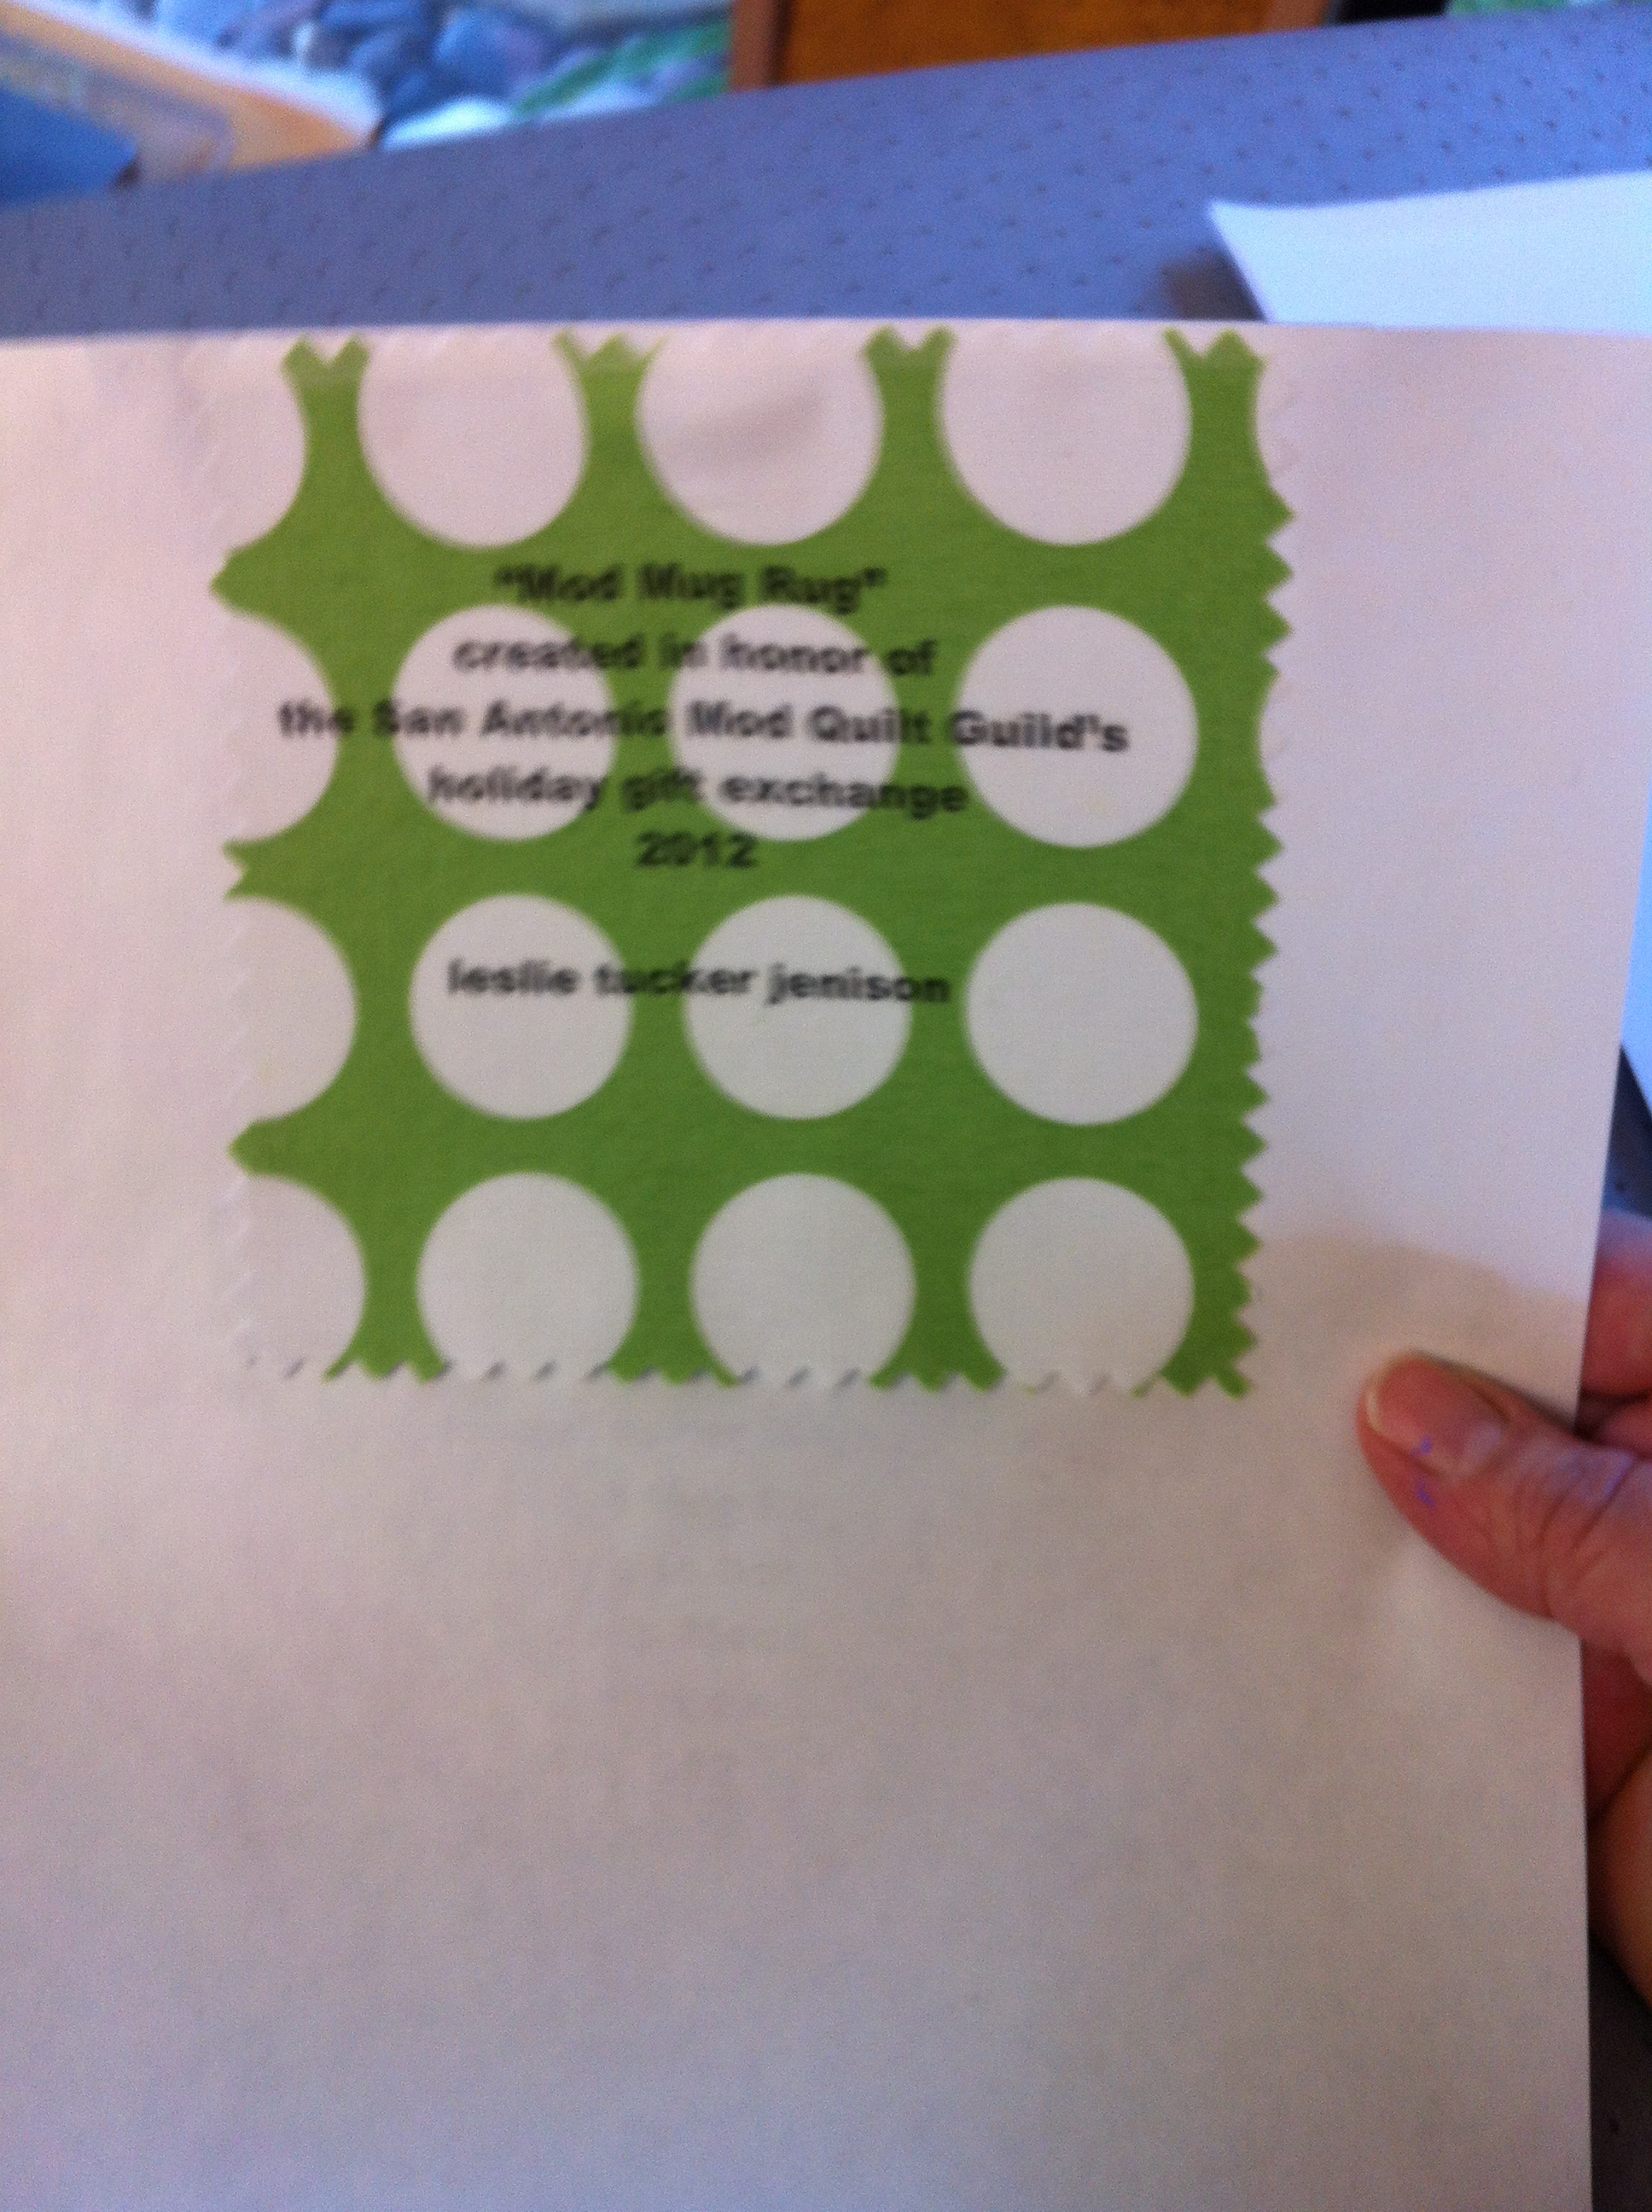
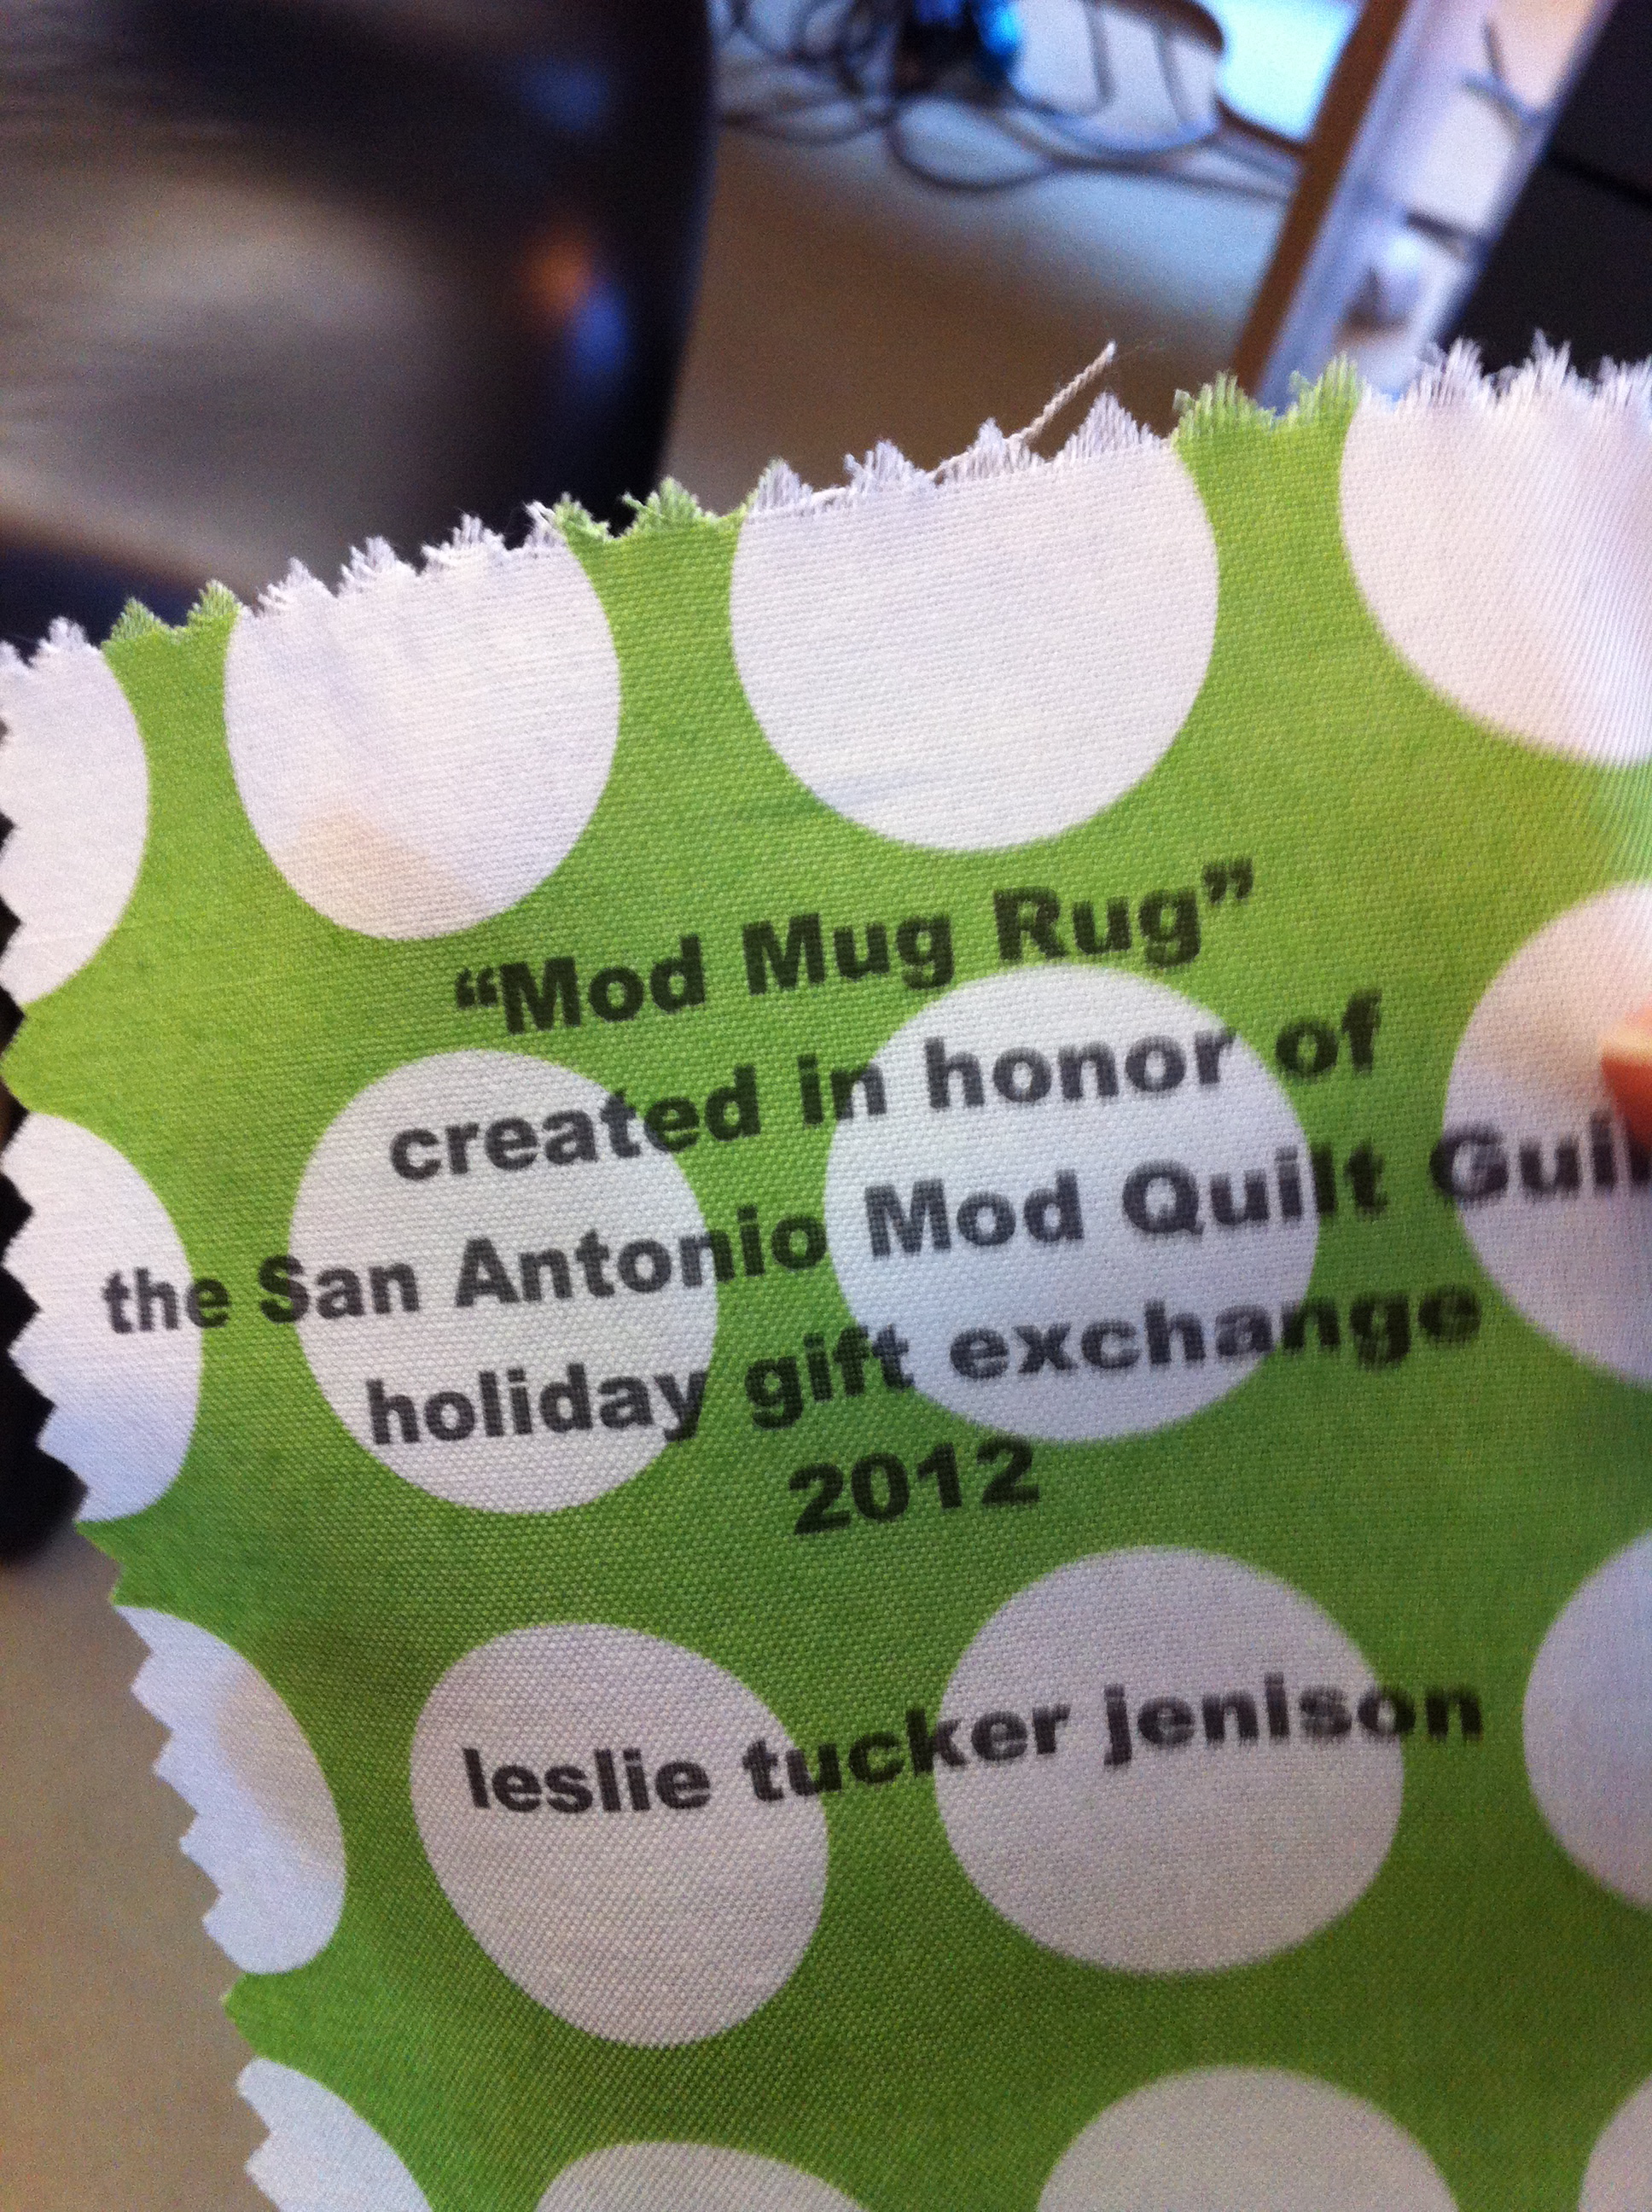
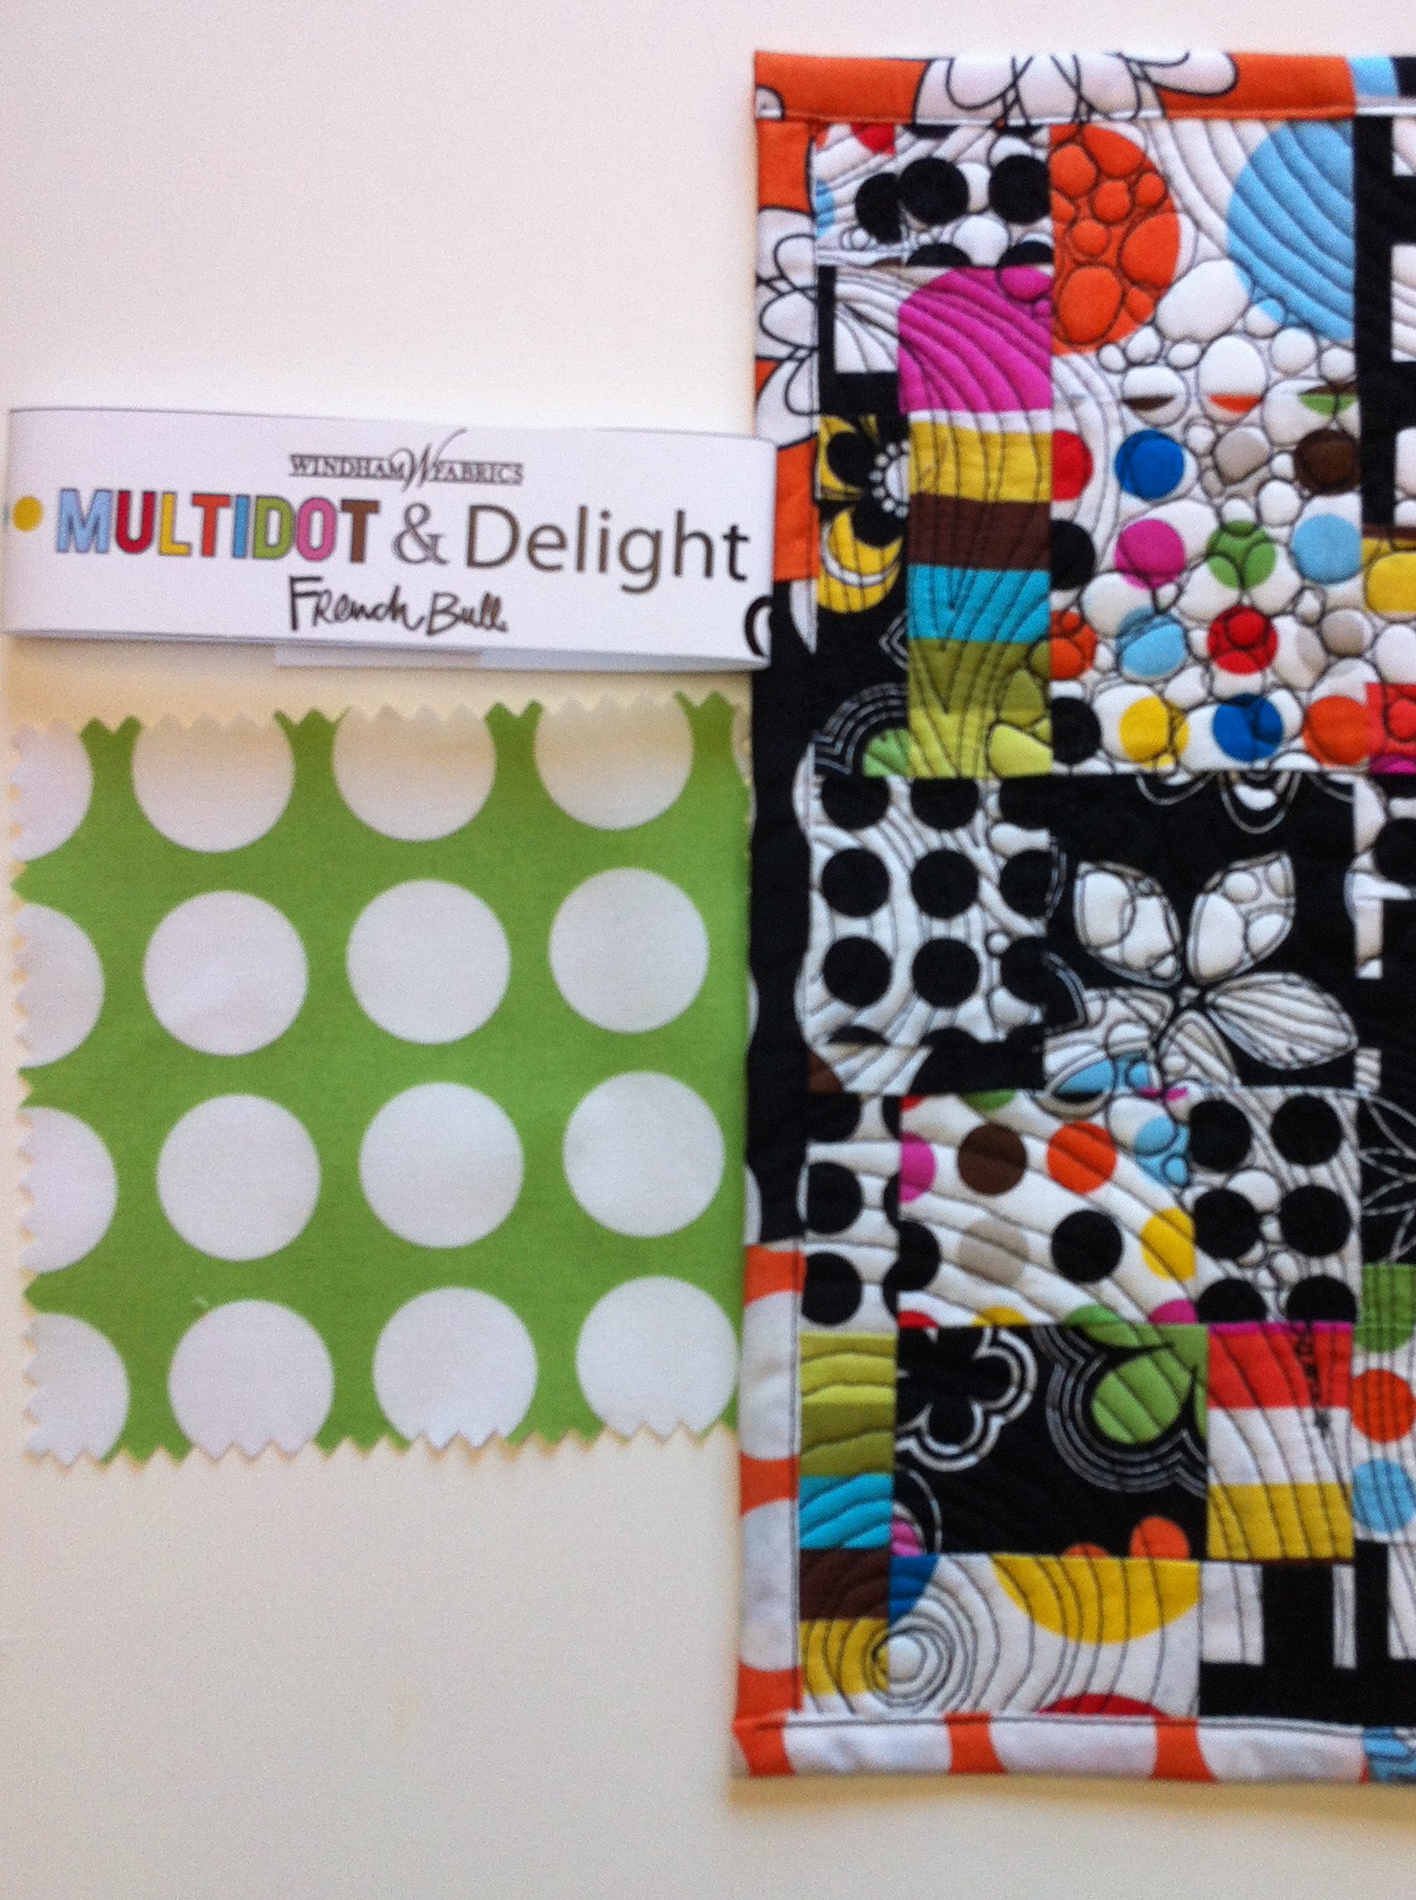 A label will be created using another square
from the “Multidot & Delight” charmpack, by French Bull
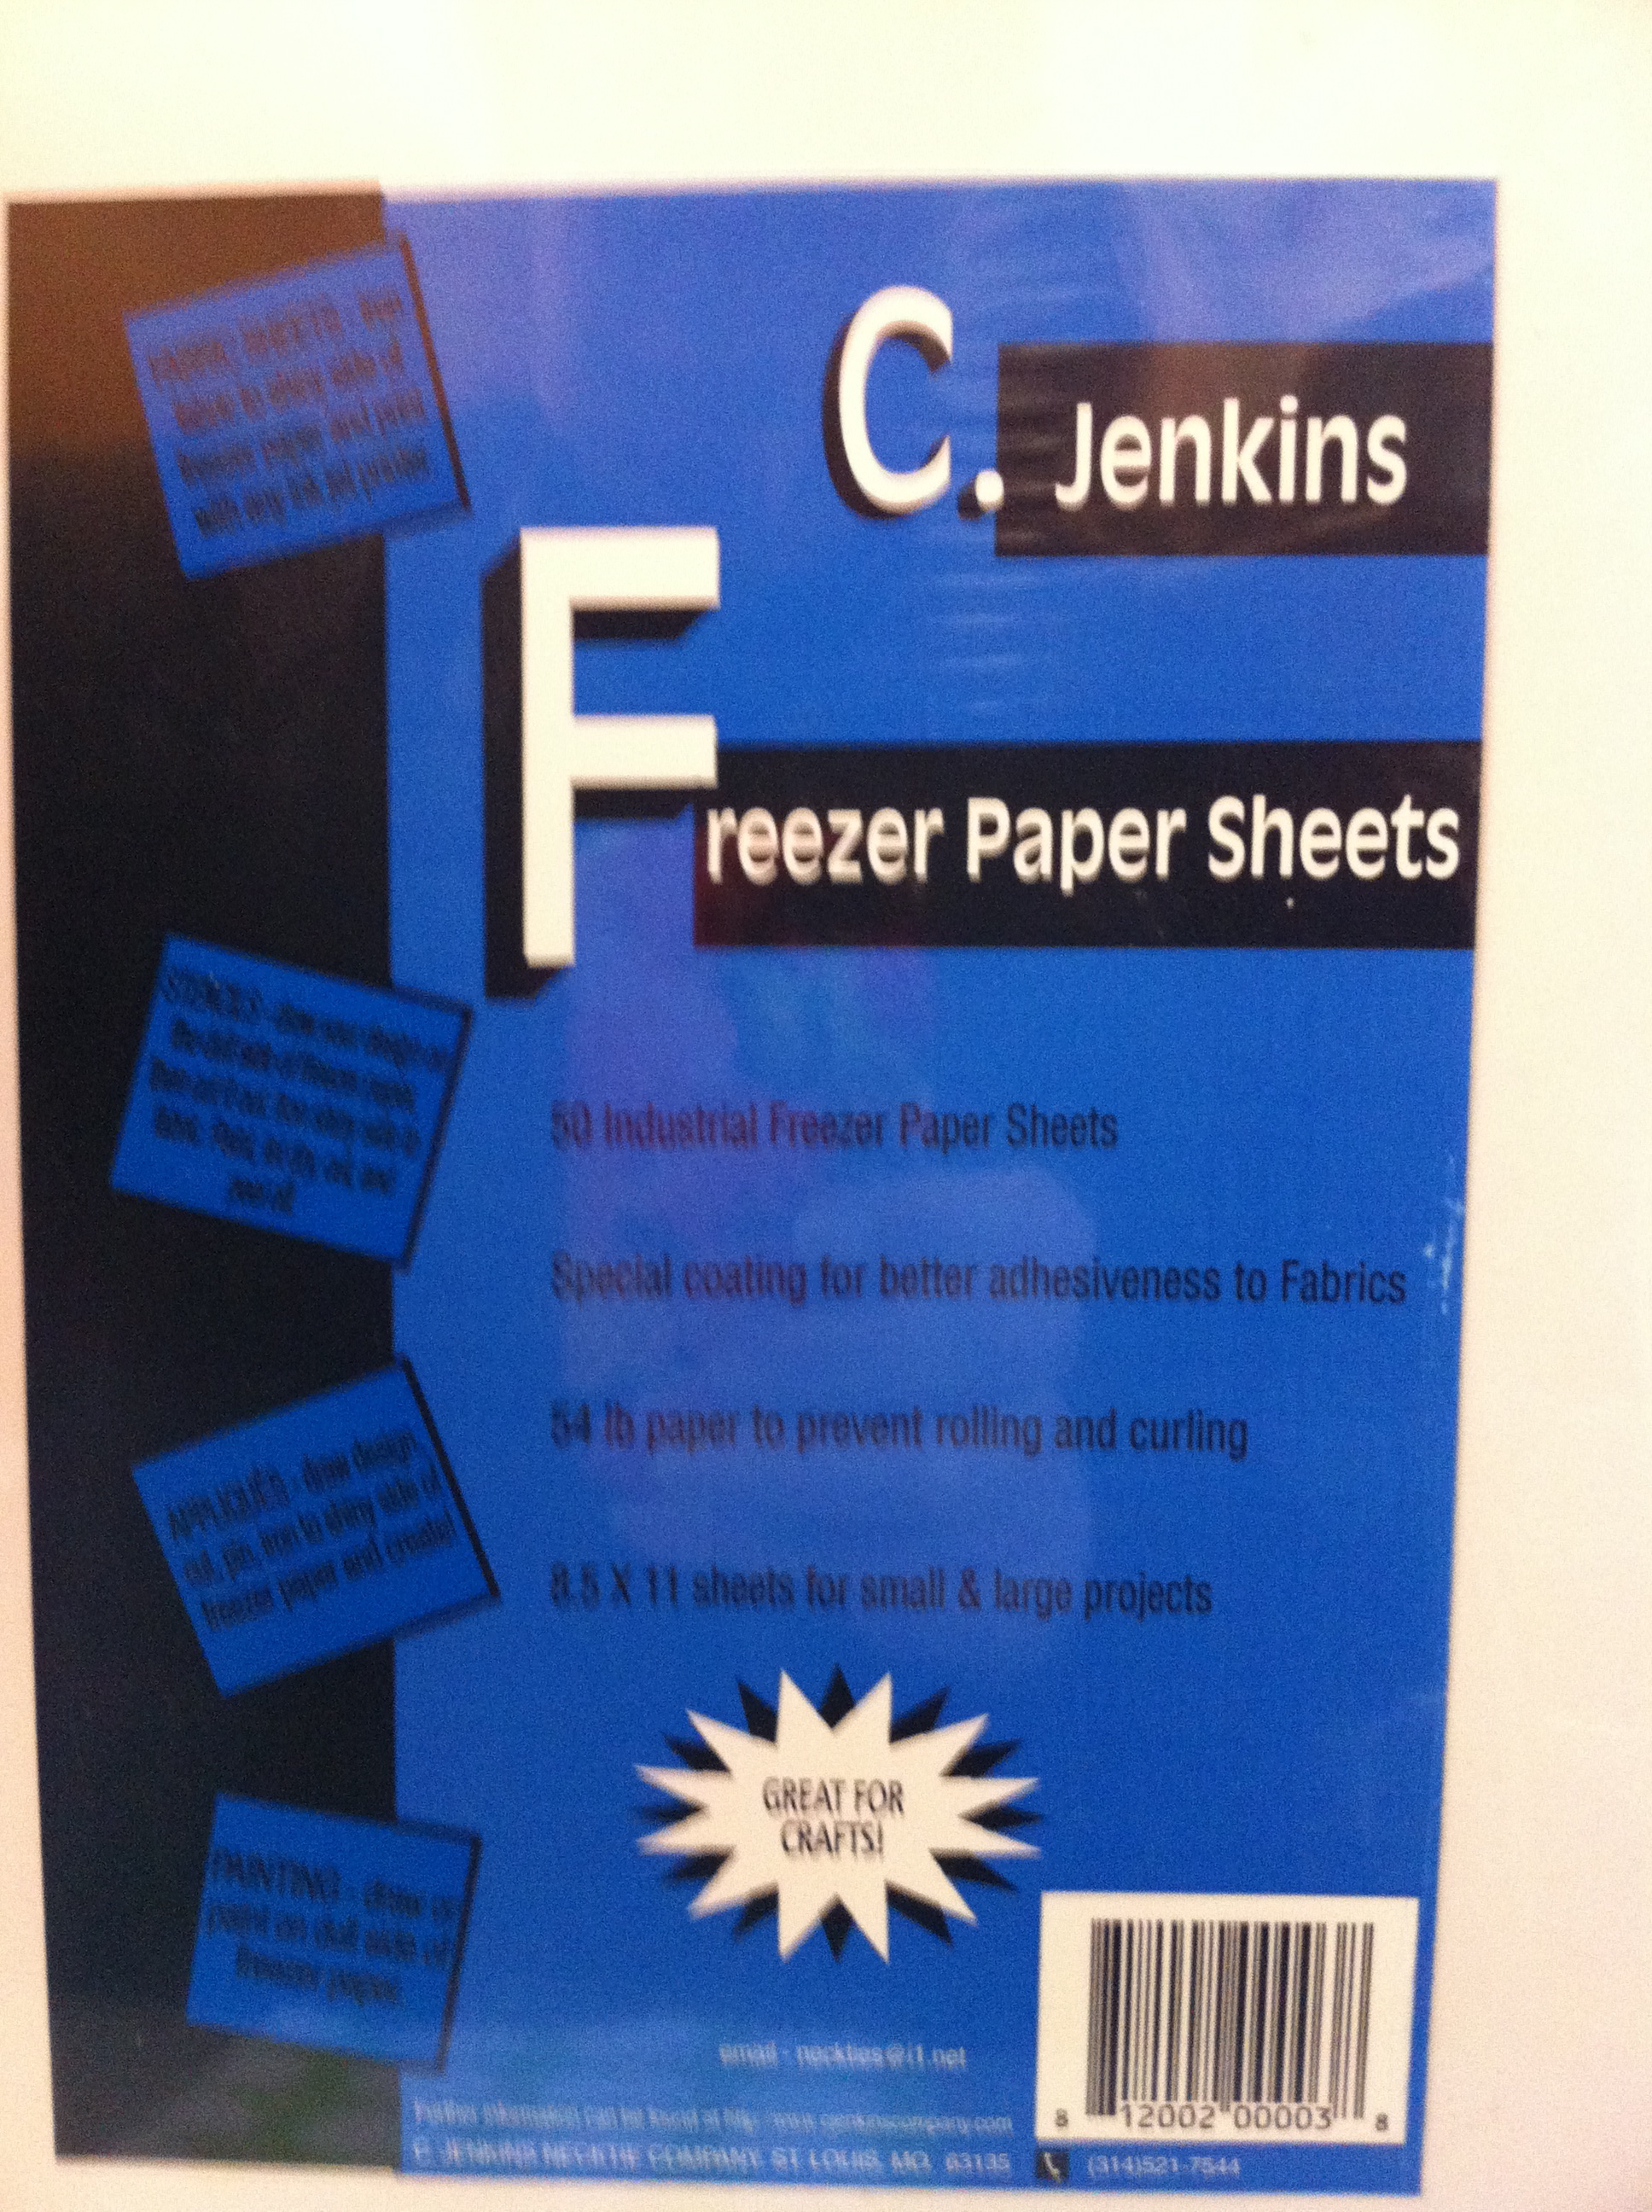 These die-cut, printer paper-sized sheets of
freezer paper provide simple method for printing label
information onto cloth. A traditional roll of freezer paper
can be cut to size for this purpose. I prefer these as
they lay flat!
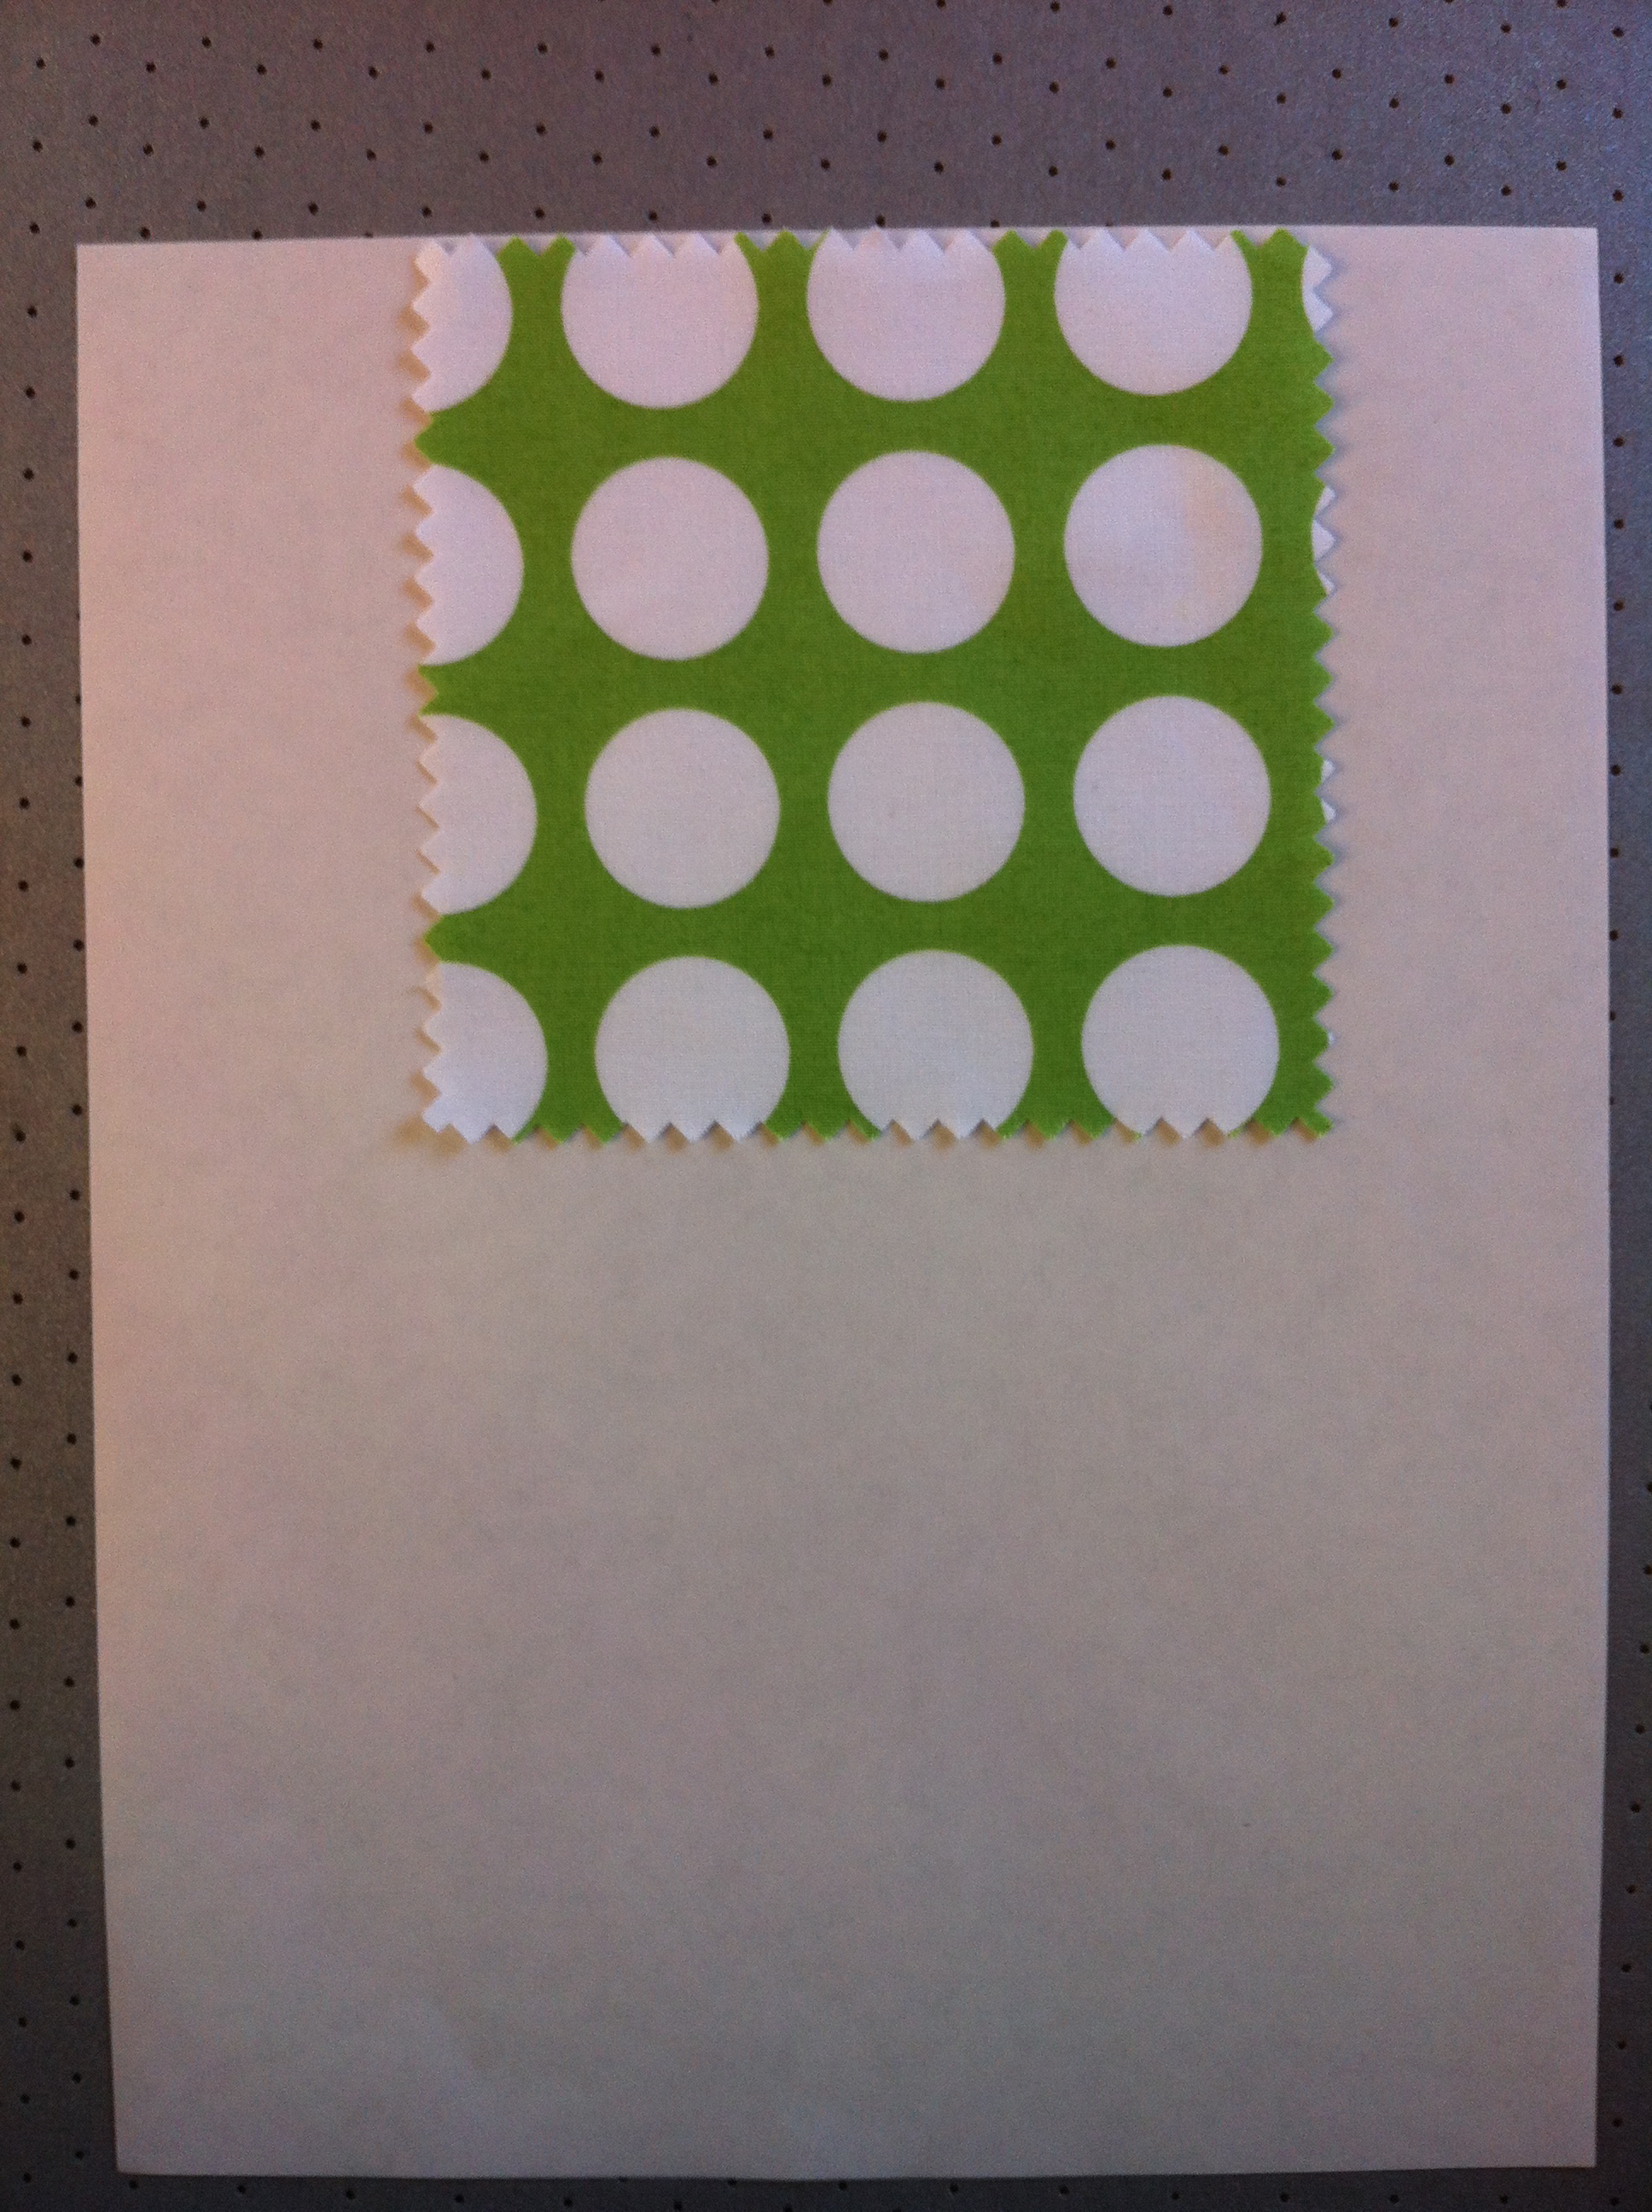 Fabric is positioned at the leading-edge of the
paper, and, in this case, centered.
One can heat-set a larger piece of cloth, then cut the
edges to the paper size.
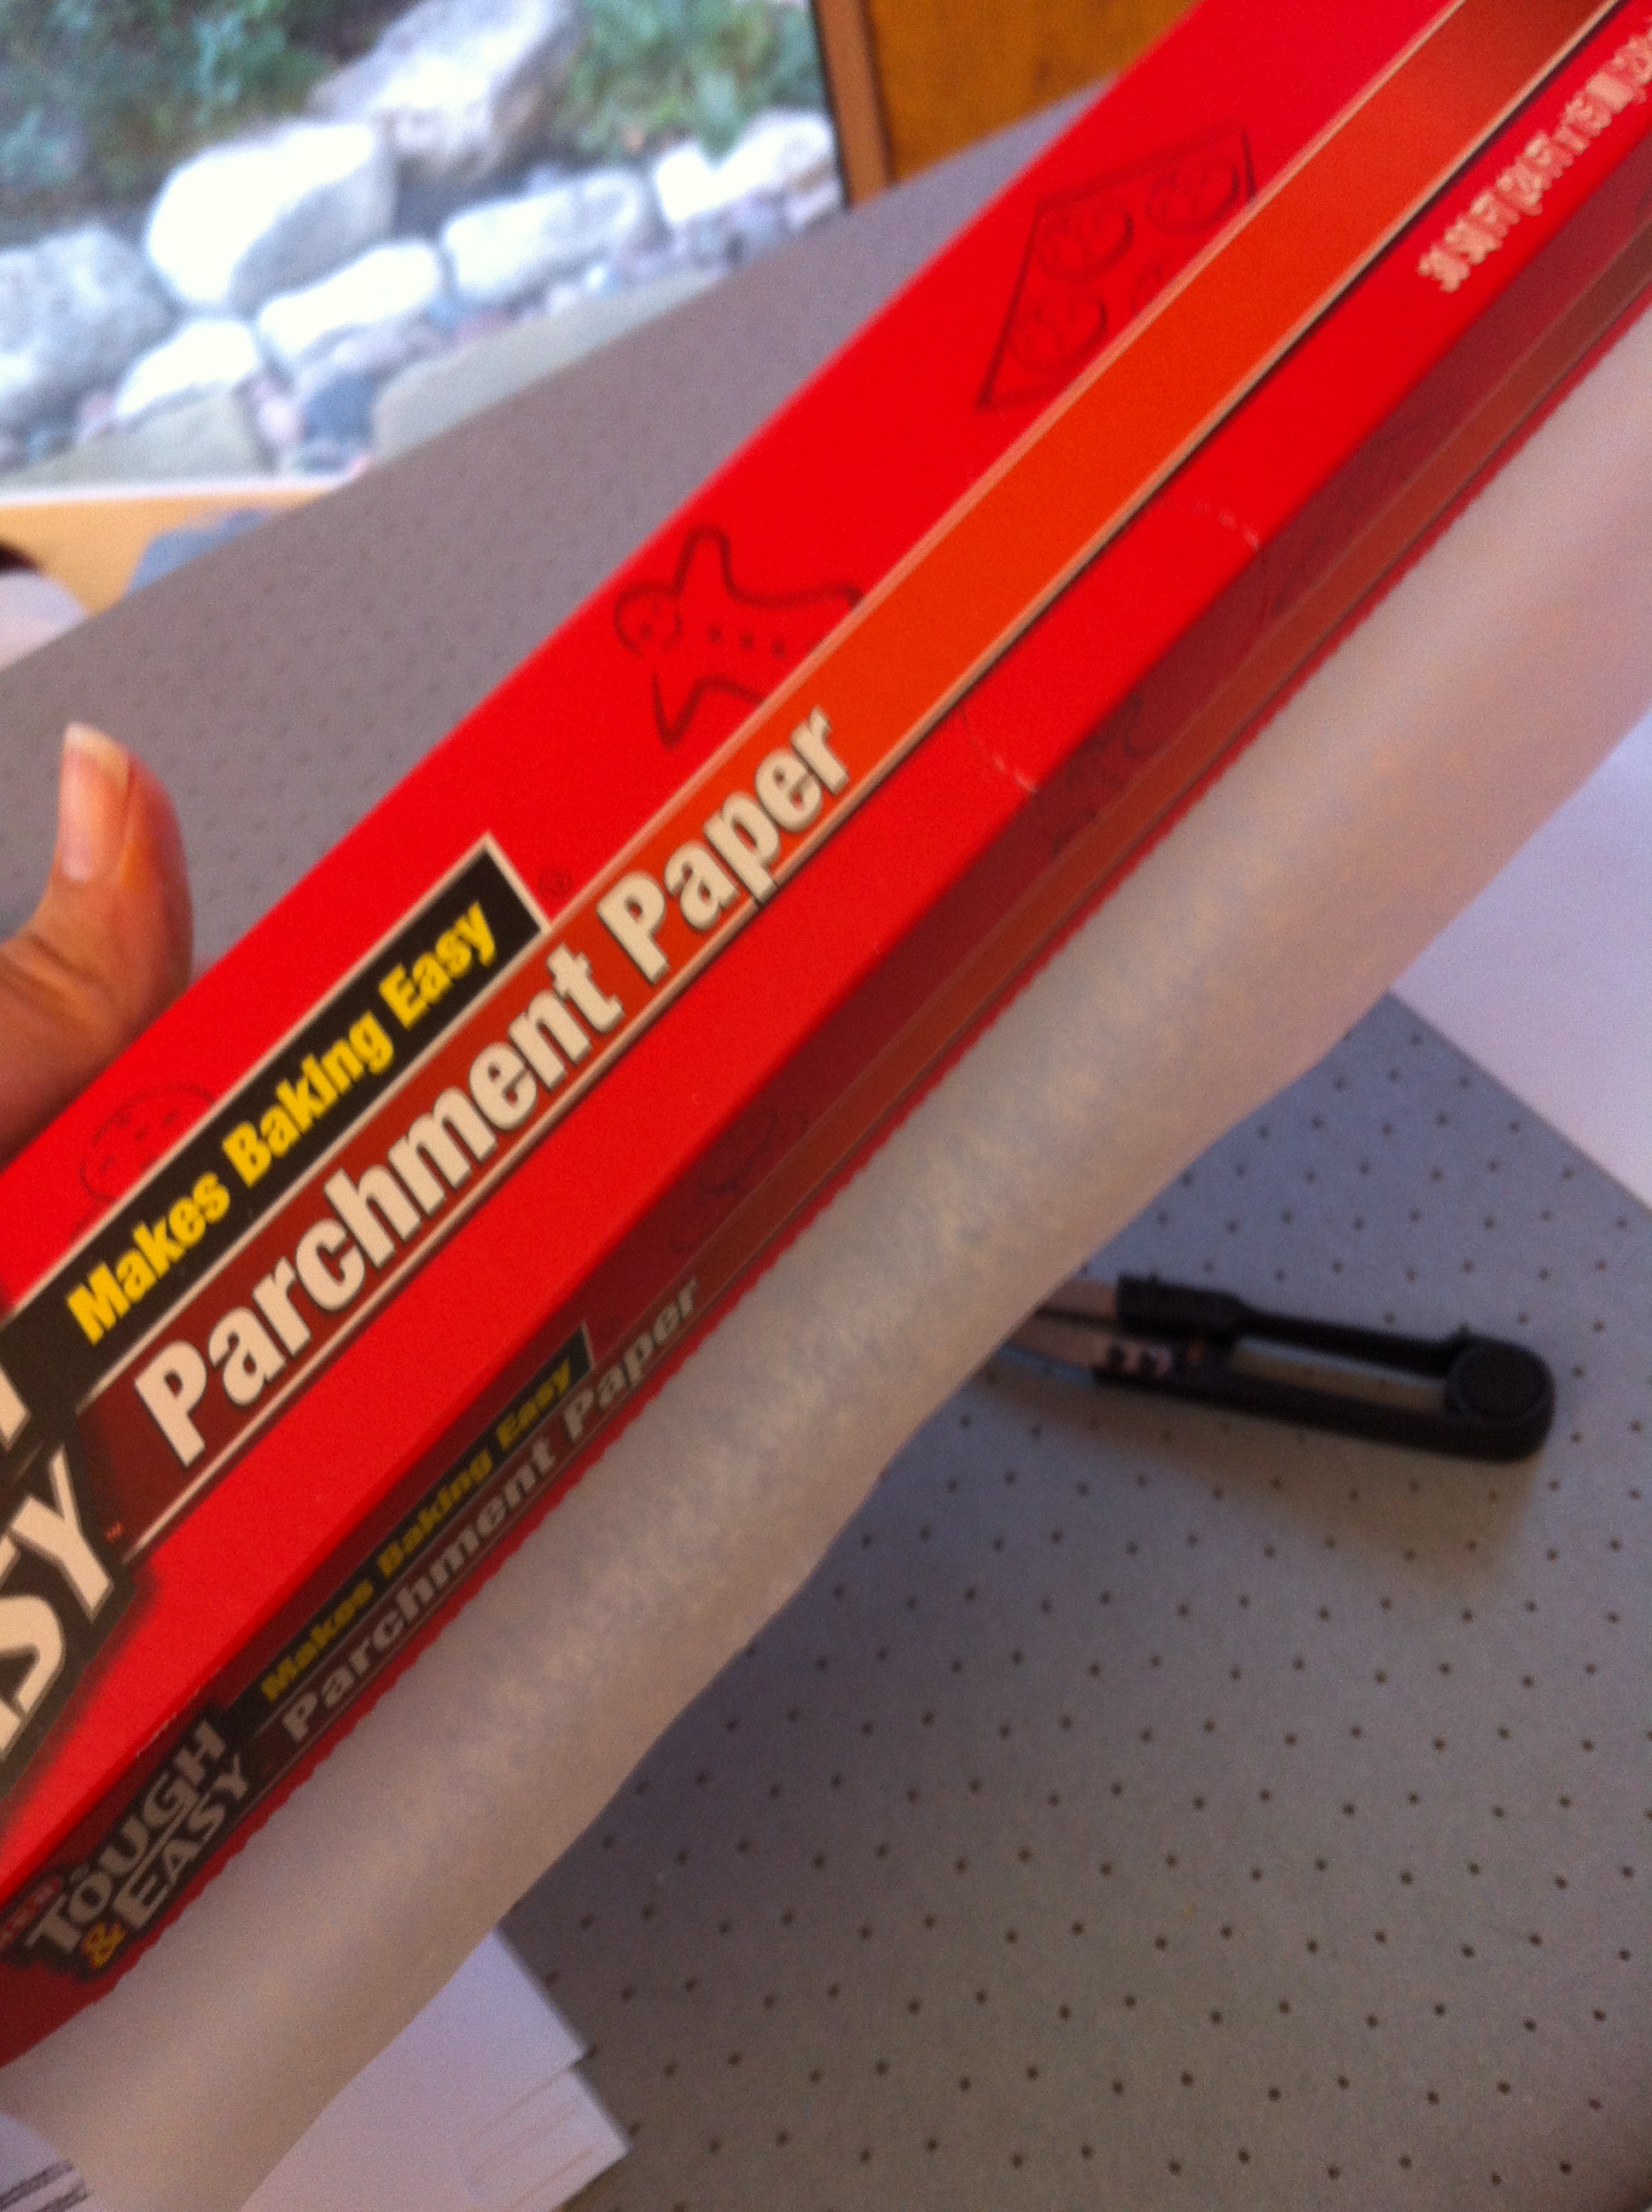 I use a section of kitchen parchment paper to
protect the surface of my iron when heat-setting the
fabric to the shiny surface of the freezer paper.
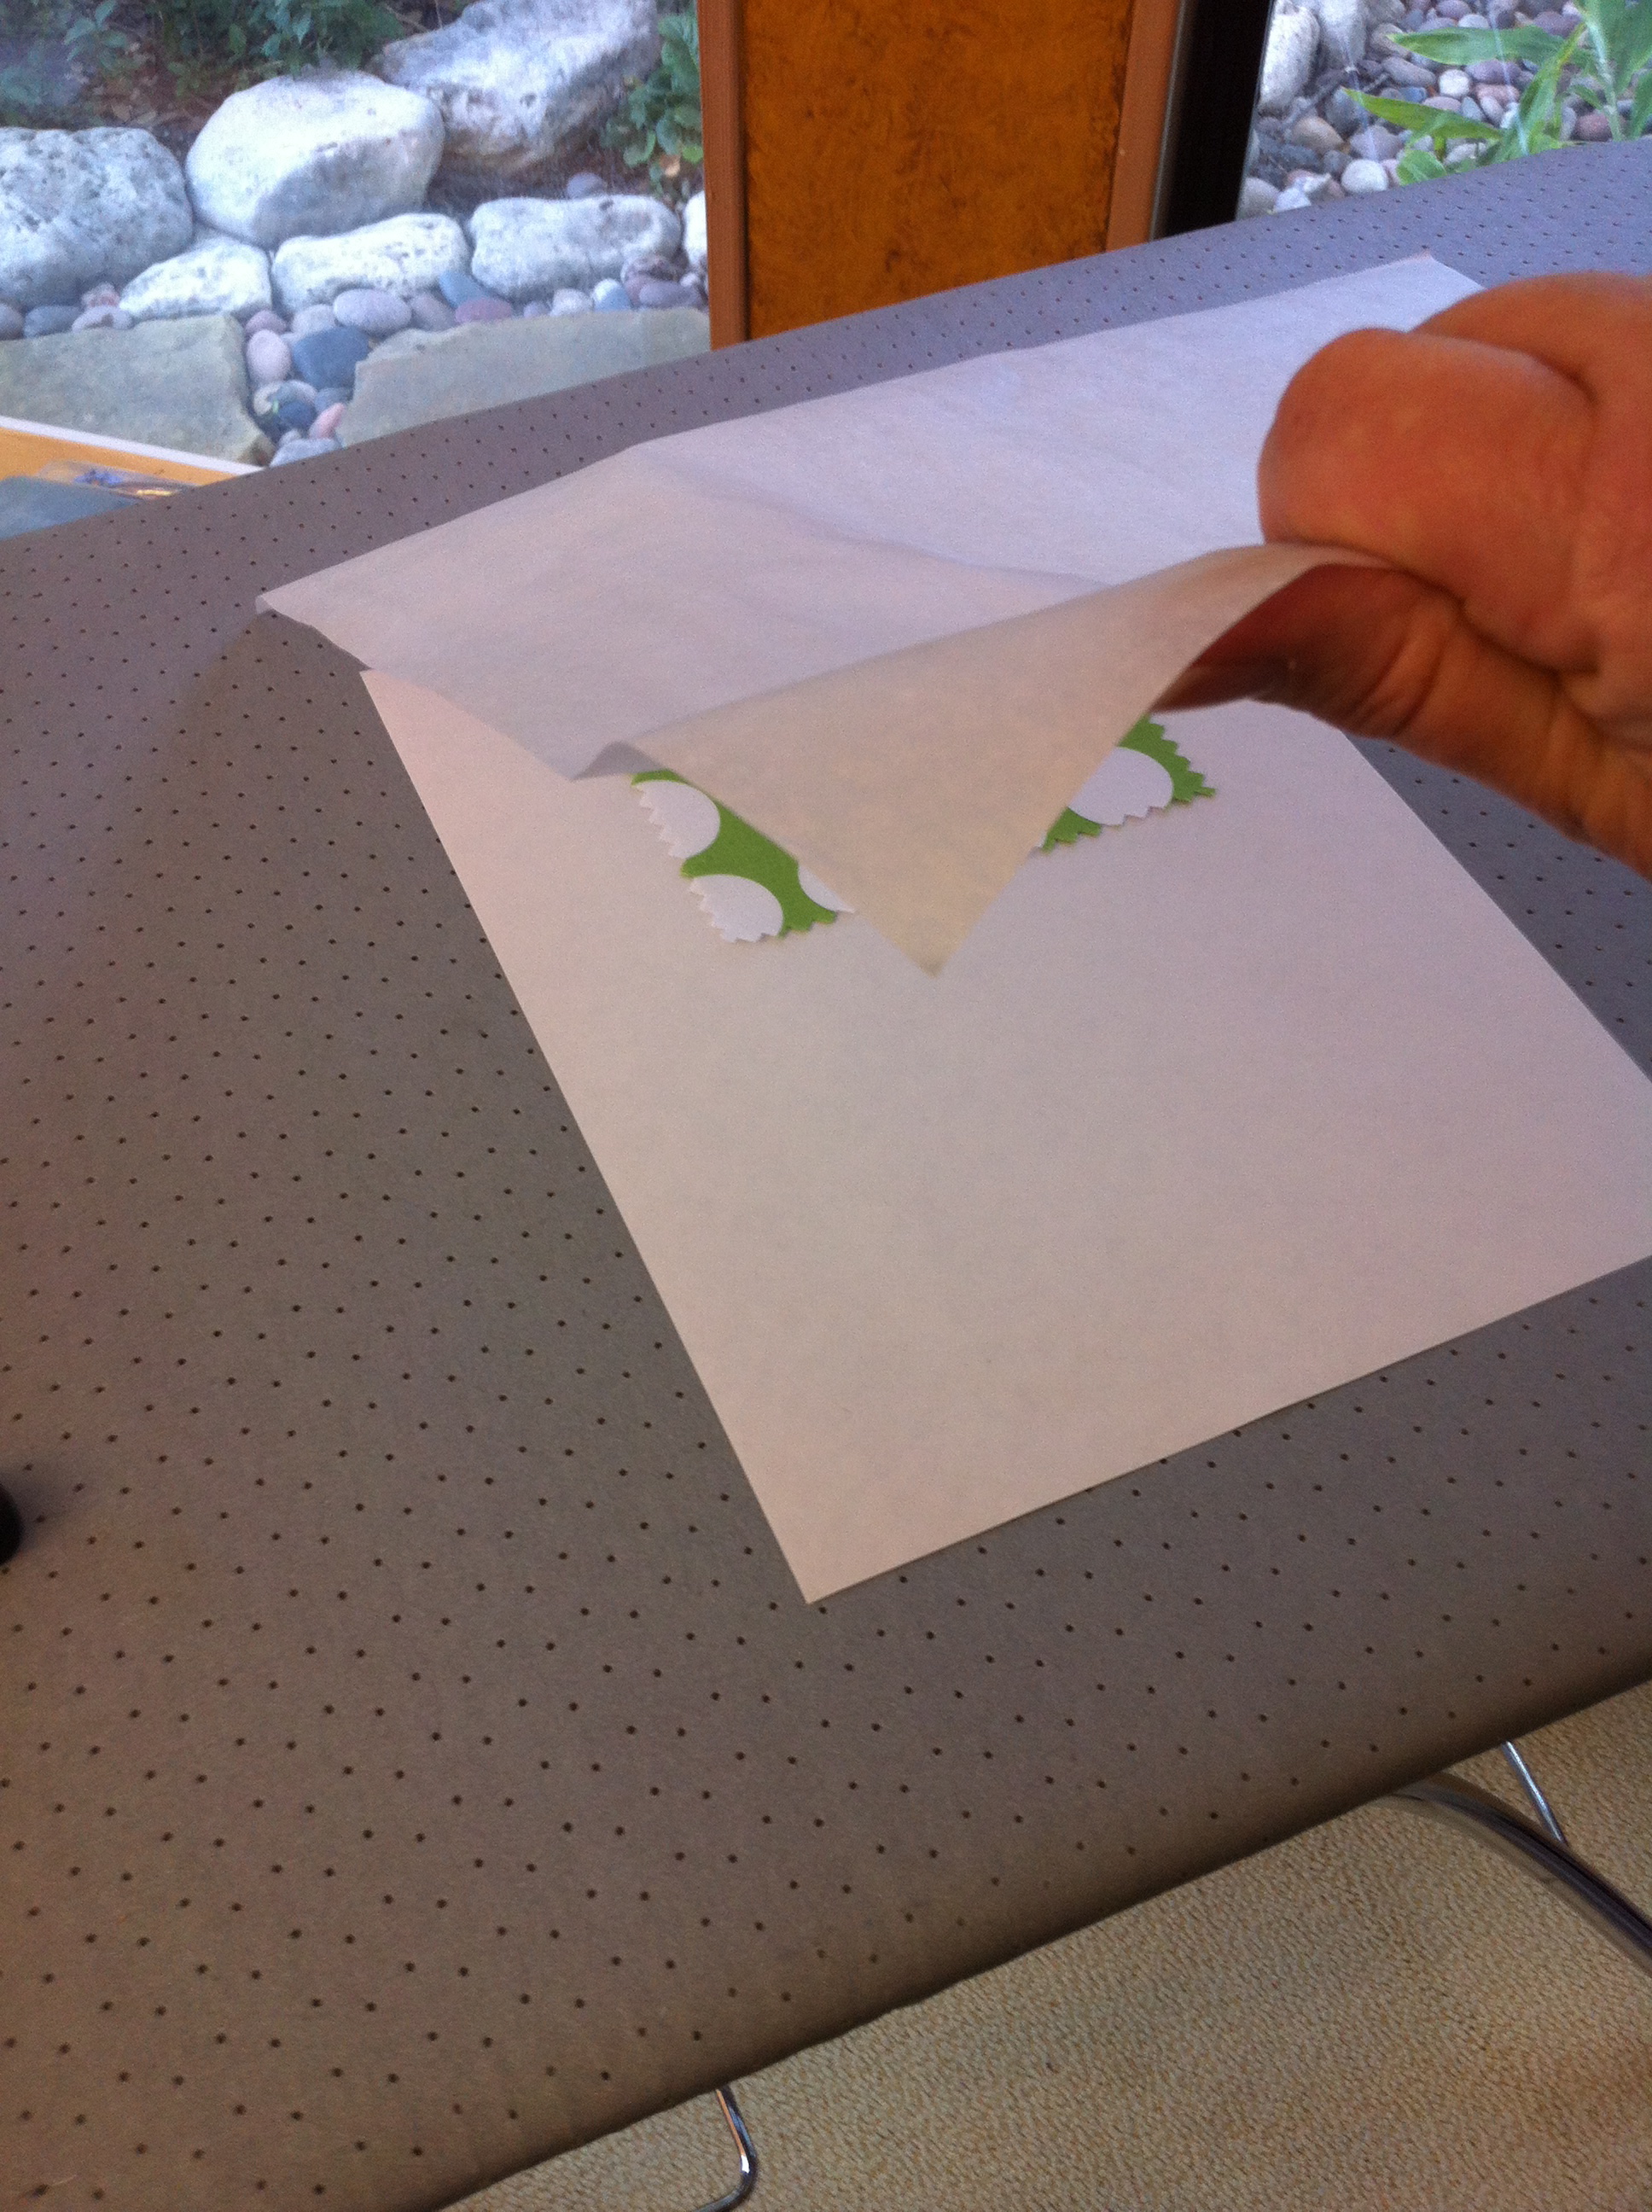 Parchment is placed over freezer paper
surface.
 Dry iron, at medium-setting, moves over the
surface to temporarily “set” the fabric onto the freezer
paper.
 Freezer paper clings to the shiny surface of the
paper.
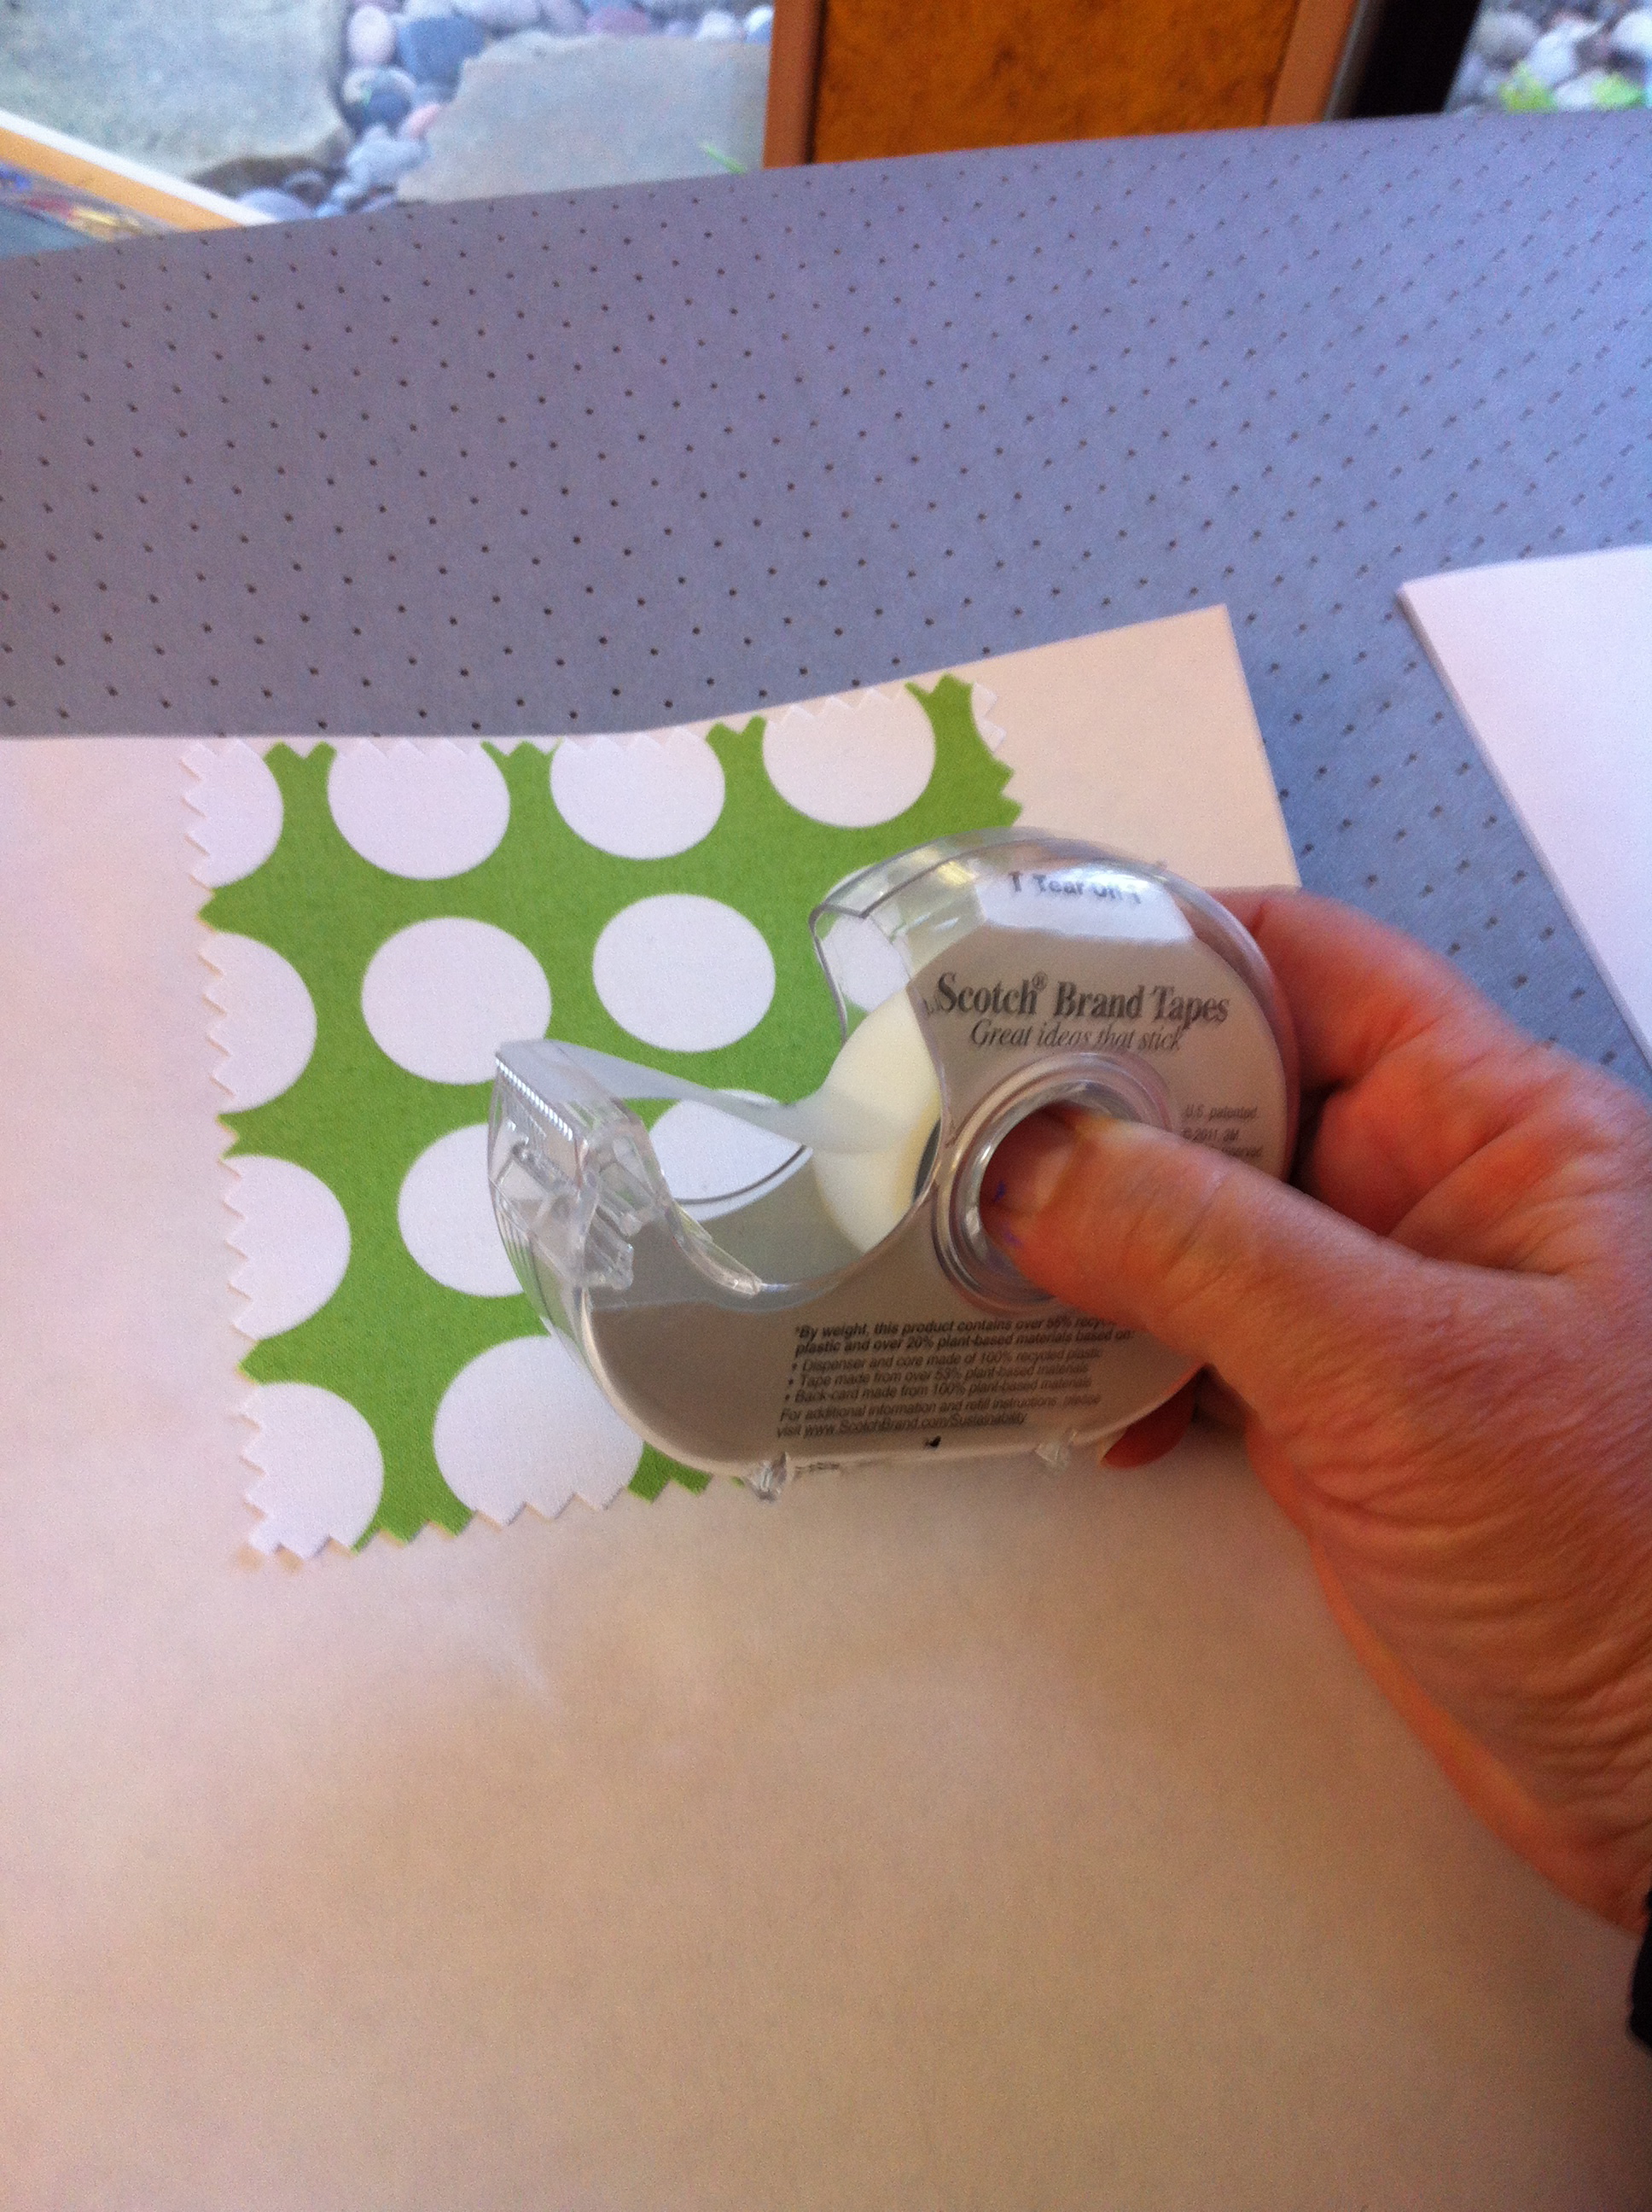 Run a line of tape across the leading edge of
the paper and fabric, which prevents the fabric from
getting lifted from the paper surface by the printer
rollers.
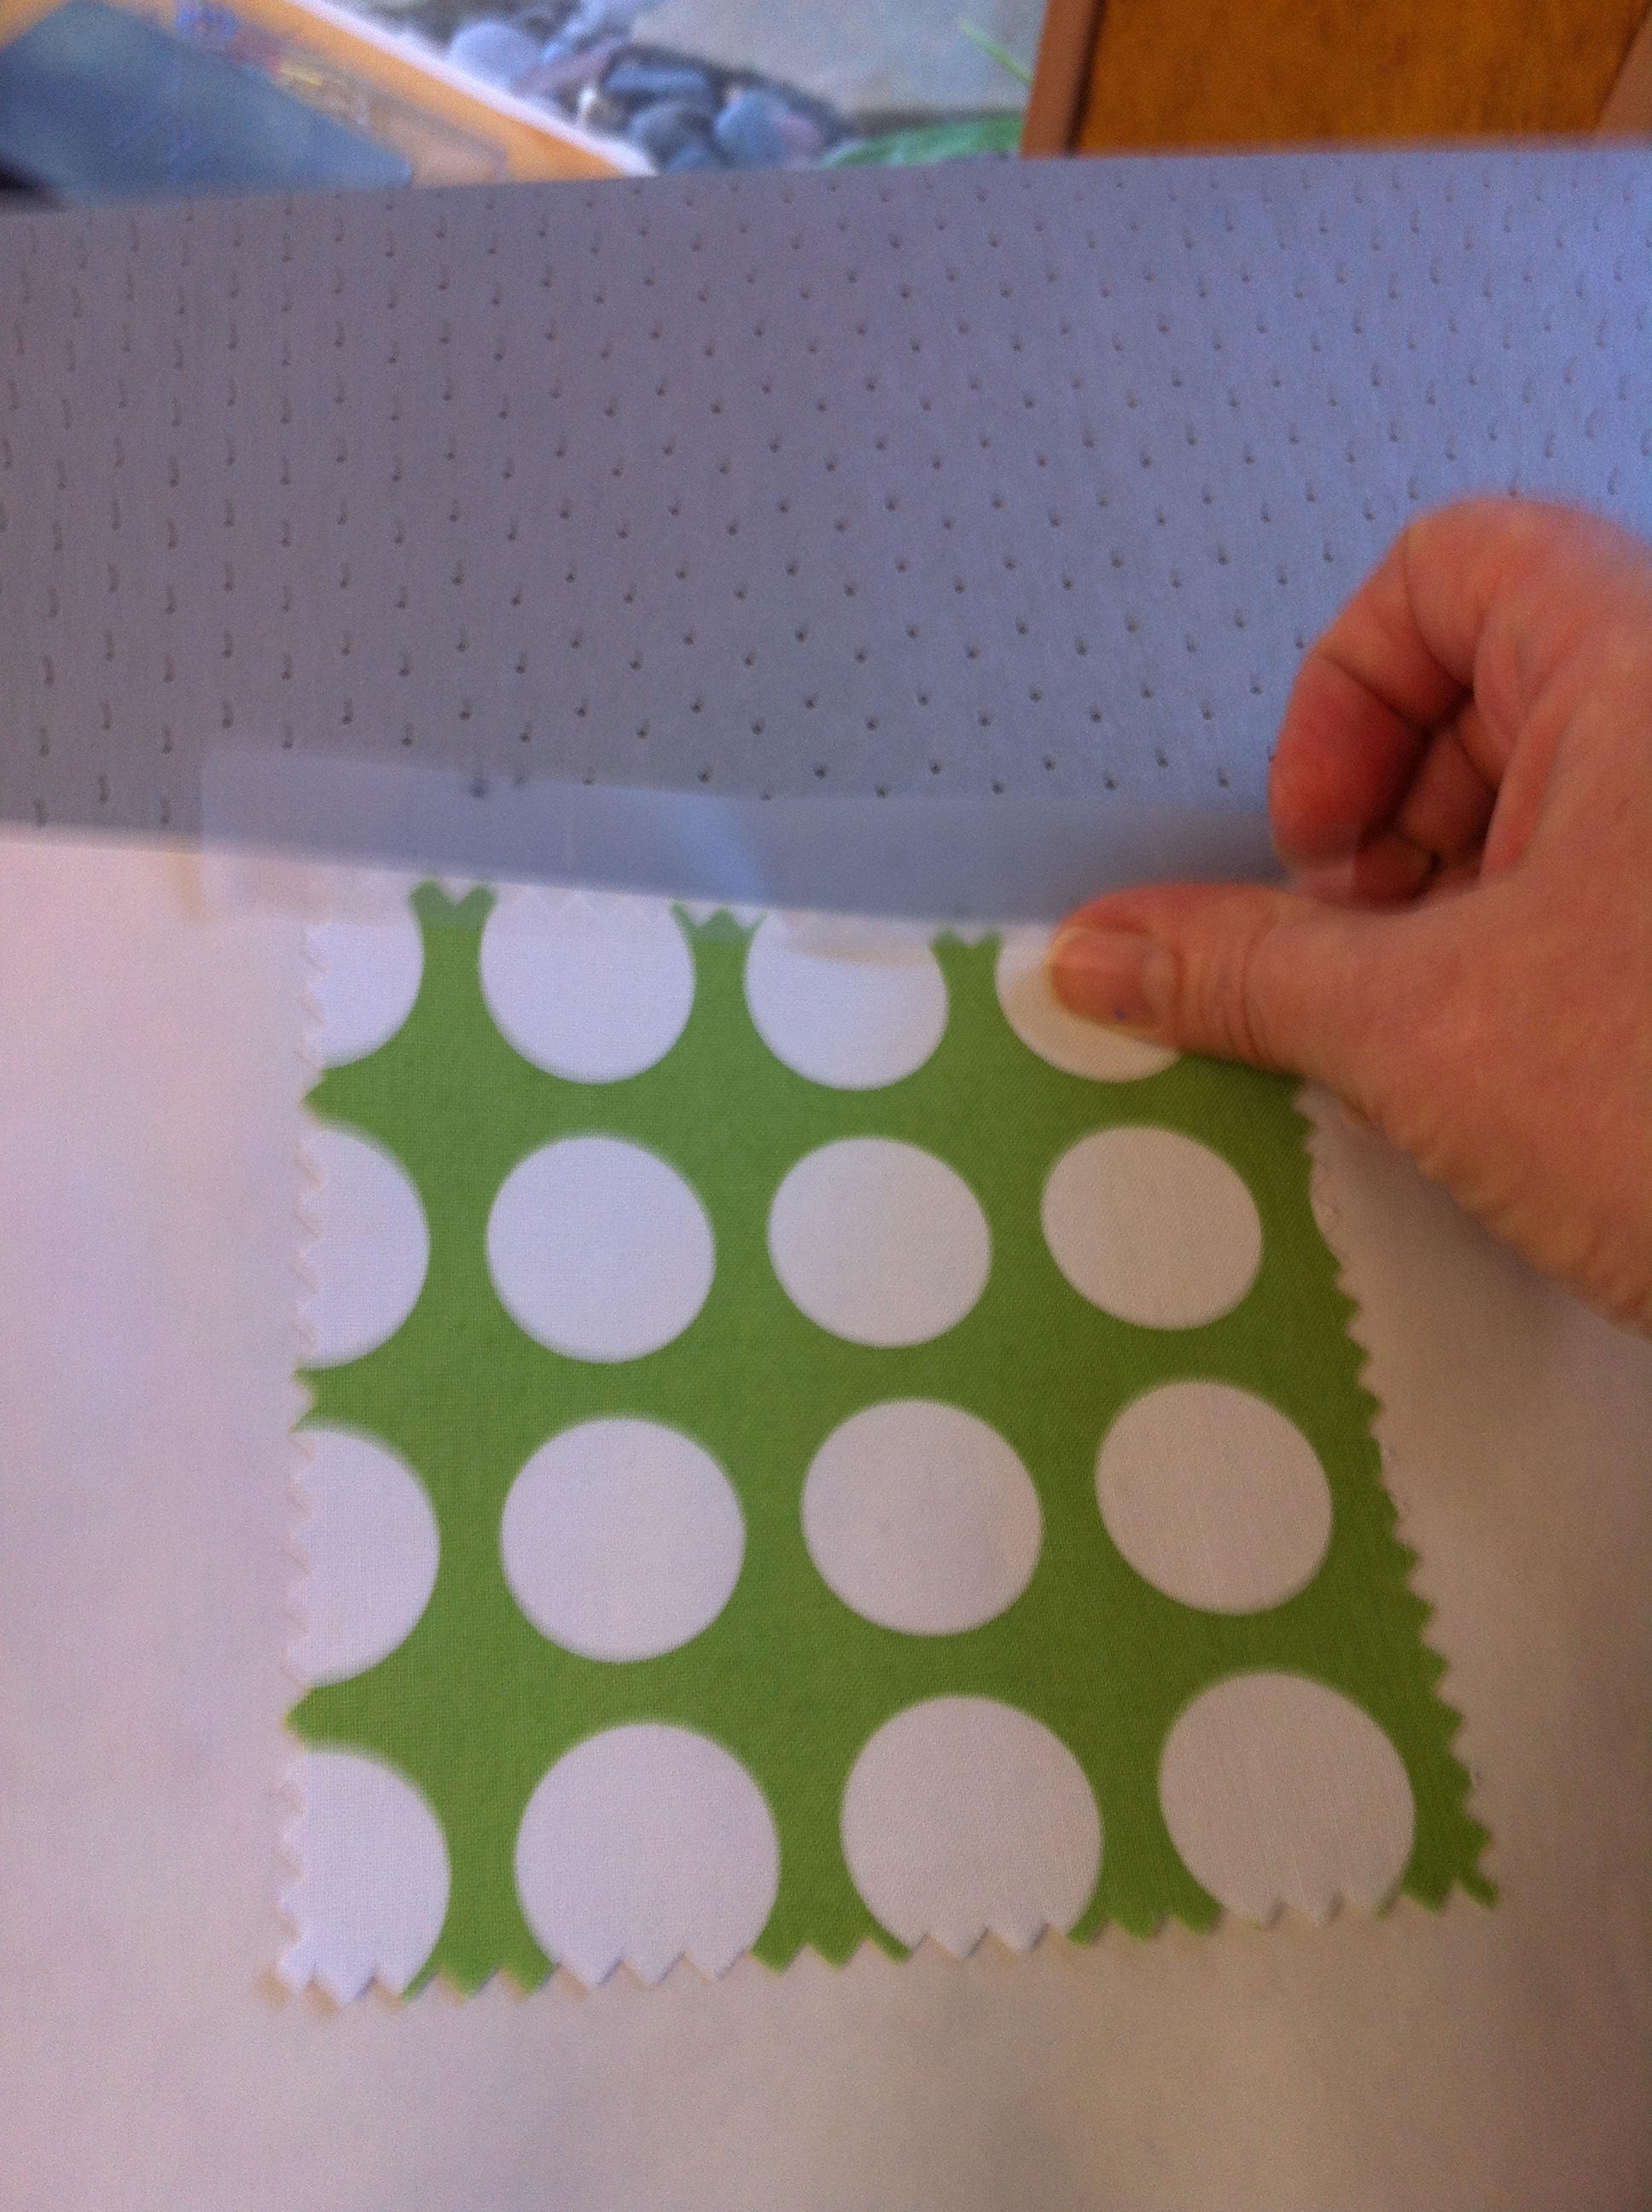 Position the tape with a very thin edge of the
tape on the cloth surface to prevent excessive fraying
during removal. Fold remainder over to the back of the
freezer paper.
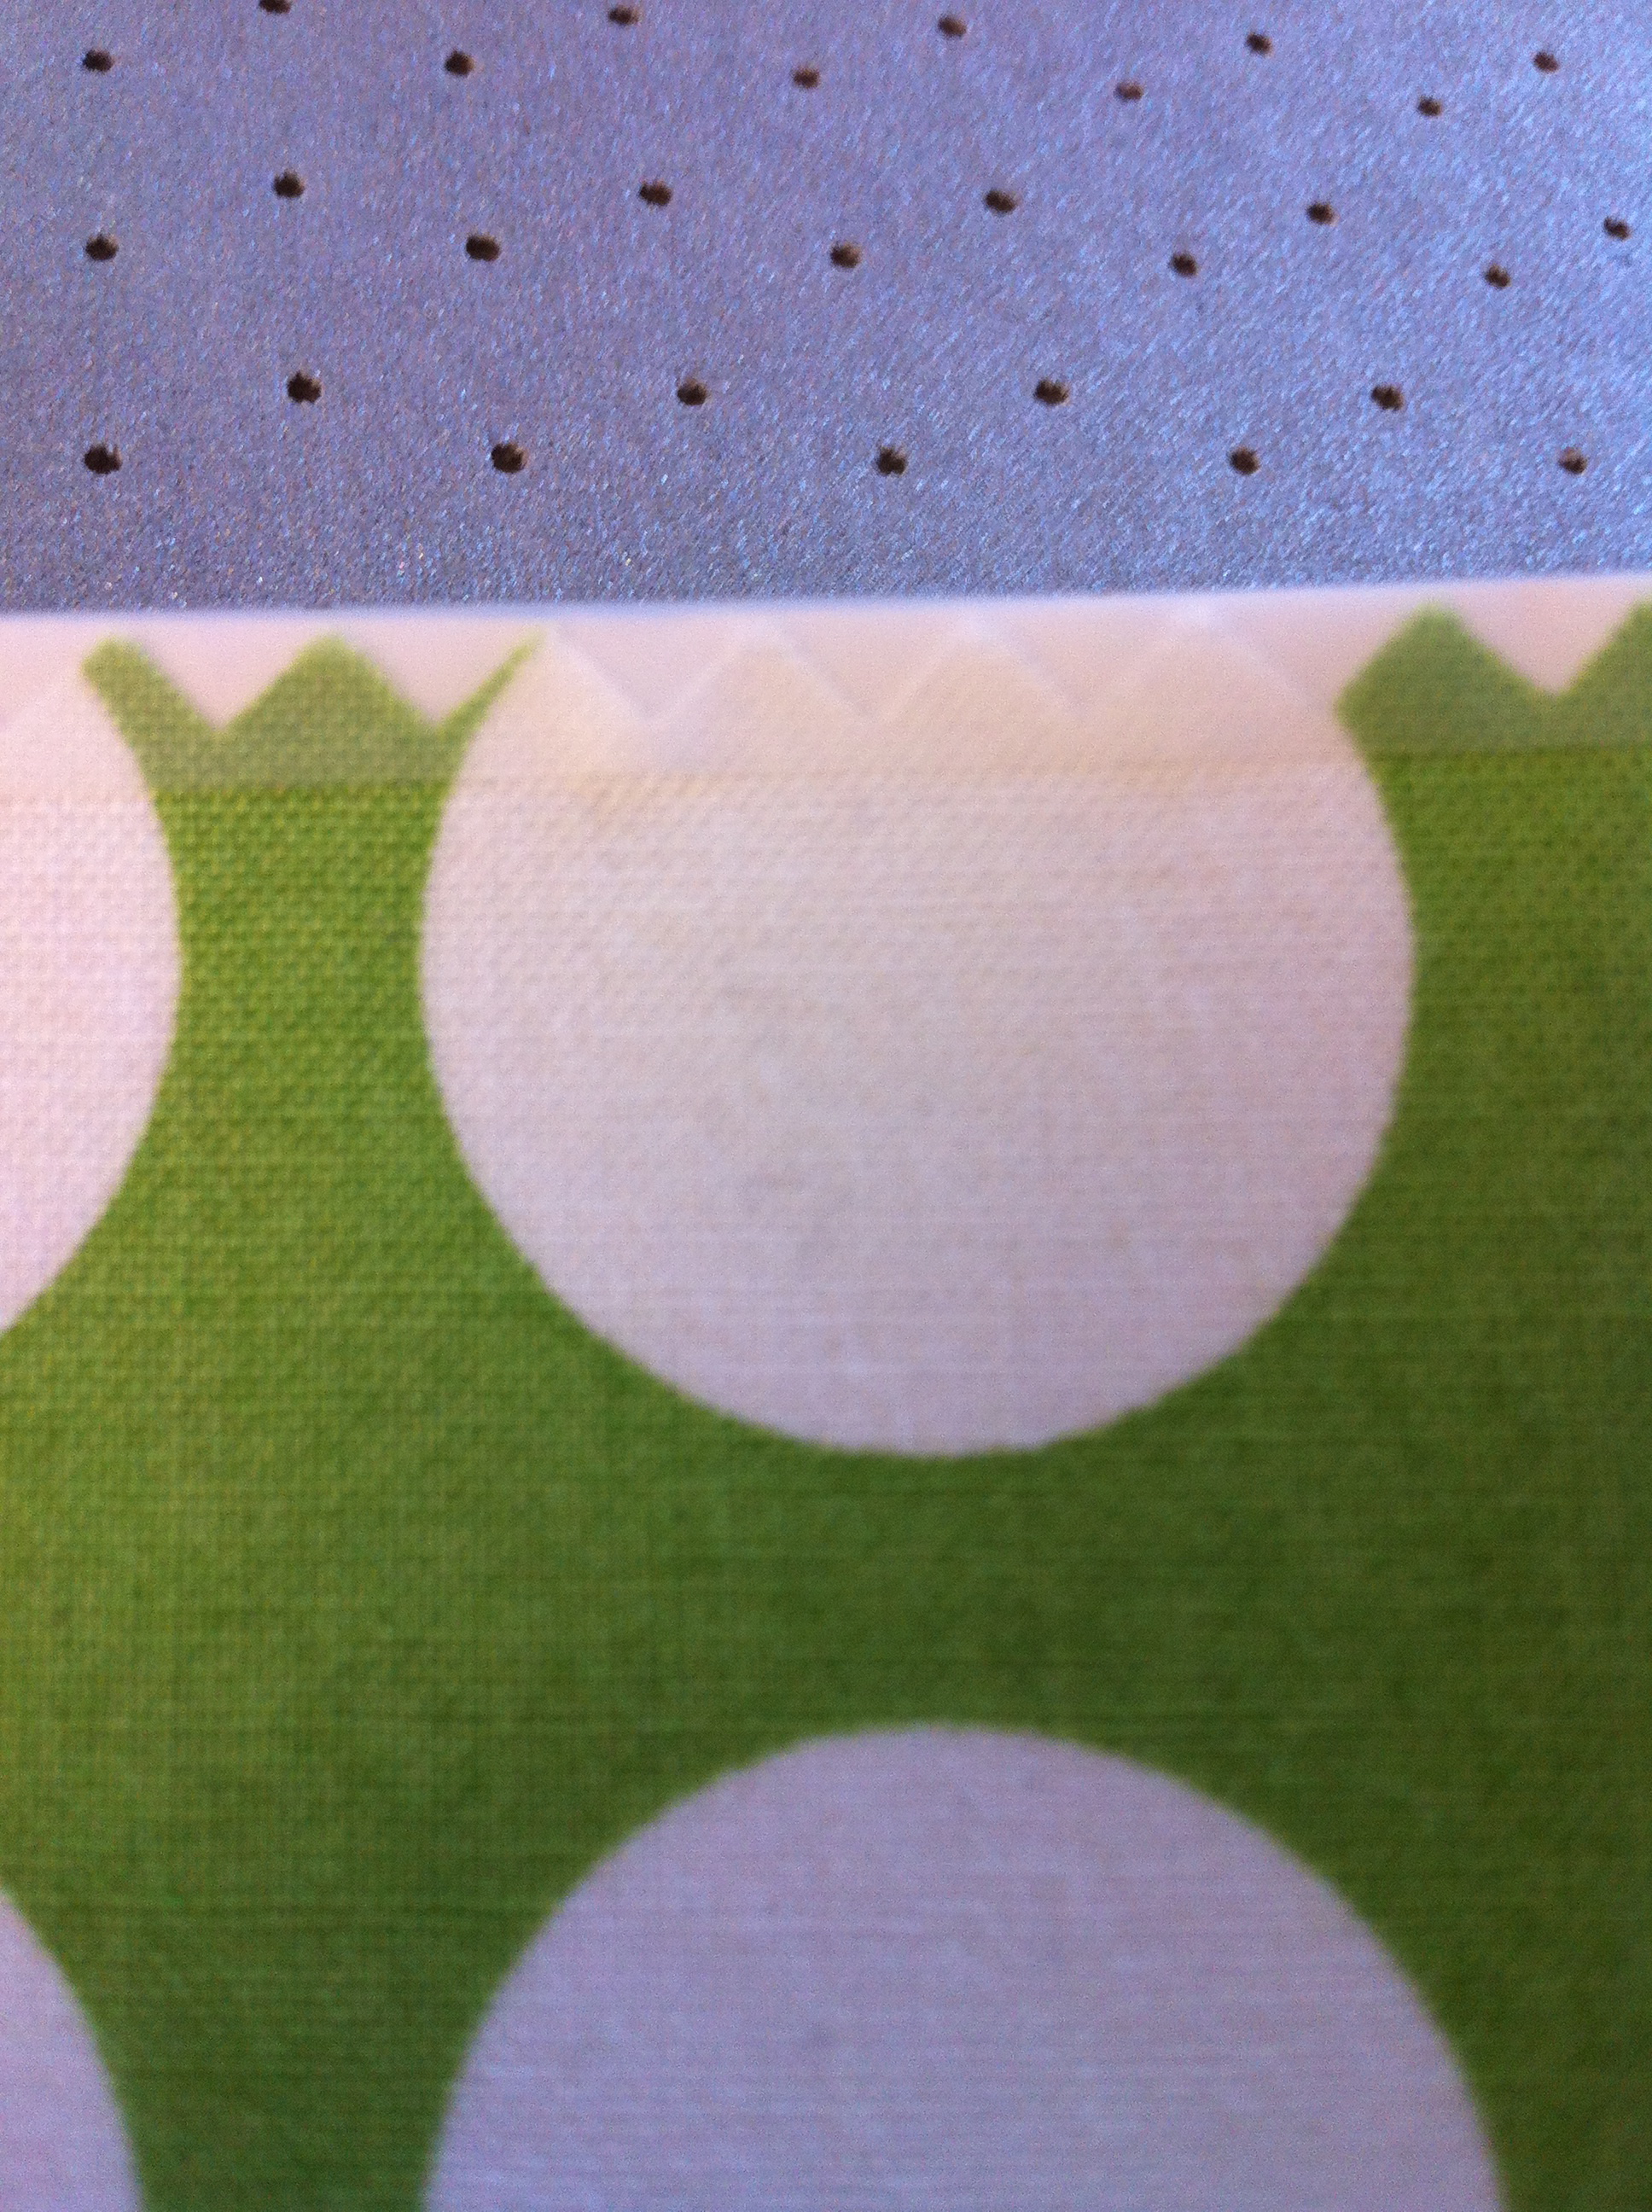 Tape edge.
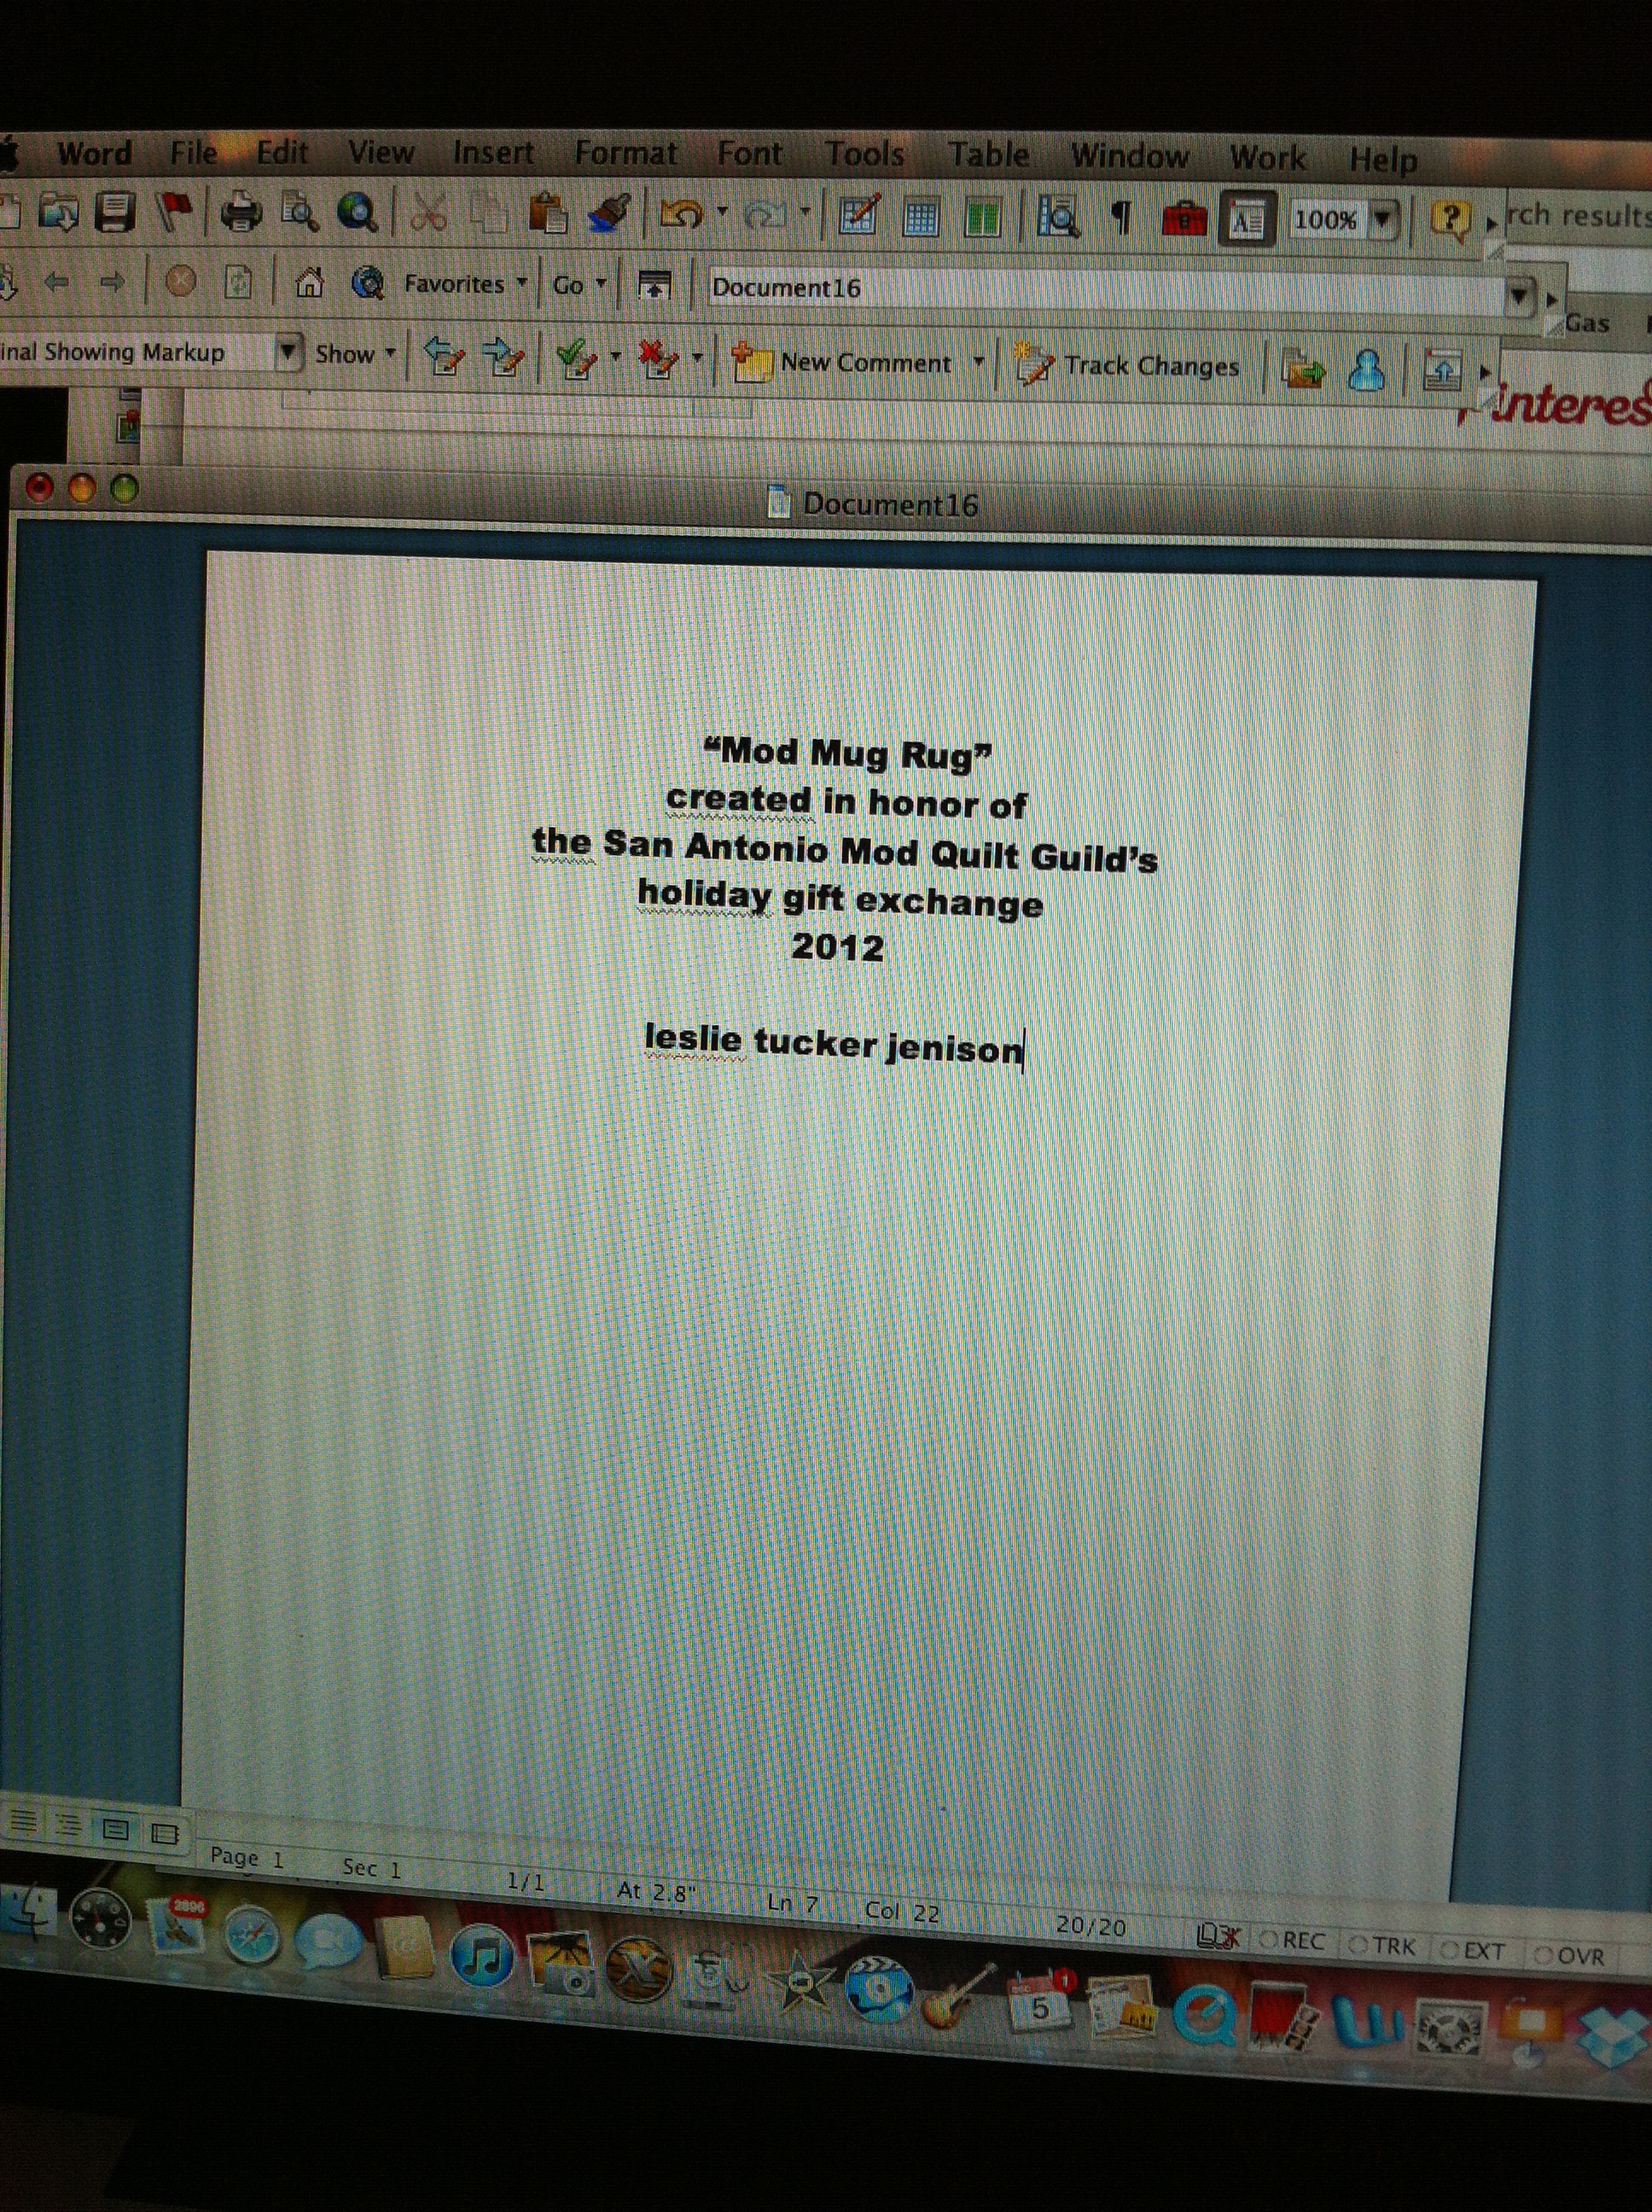 Computer screen shows the contents of the
quilt label, aligned in the center,
on a Word document.
 Selecting “Print” from my file.
 The fabric after passing through the printer.
Be sure to position the freezer paper so the fabric will be
on the proper side as it passes through the print rollers!
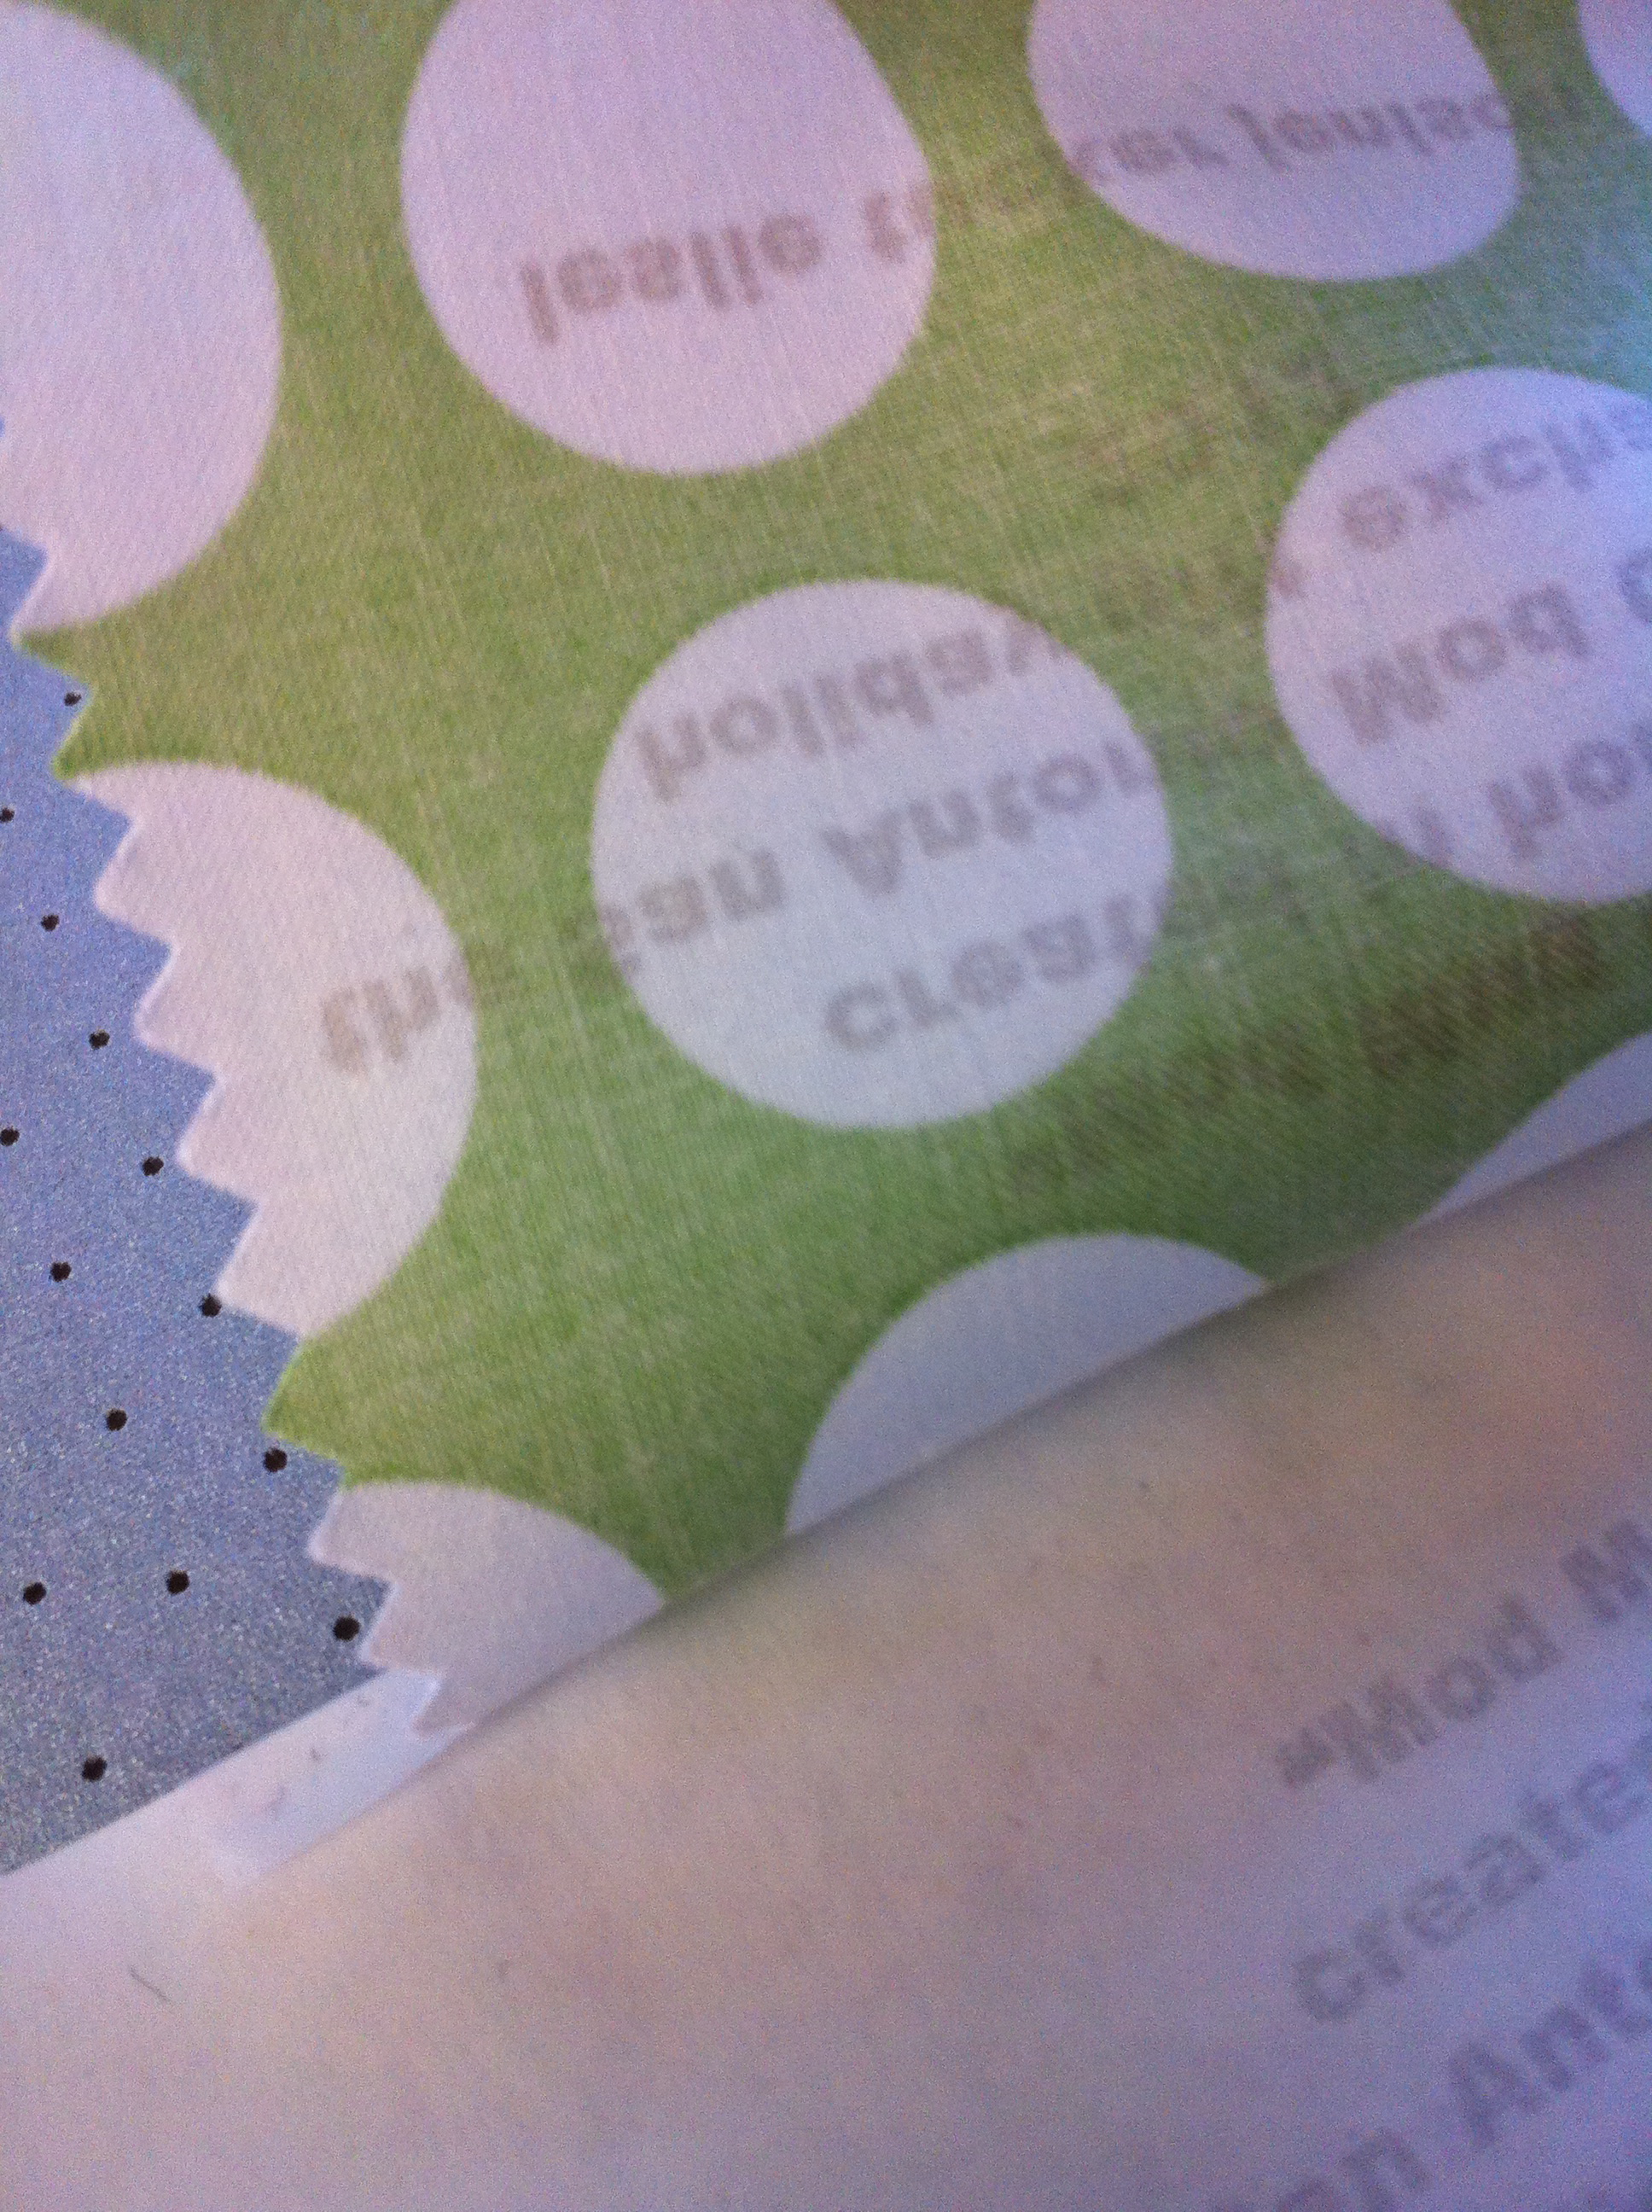
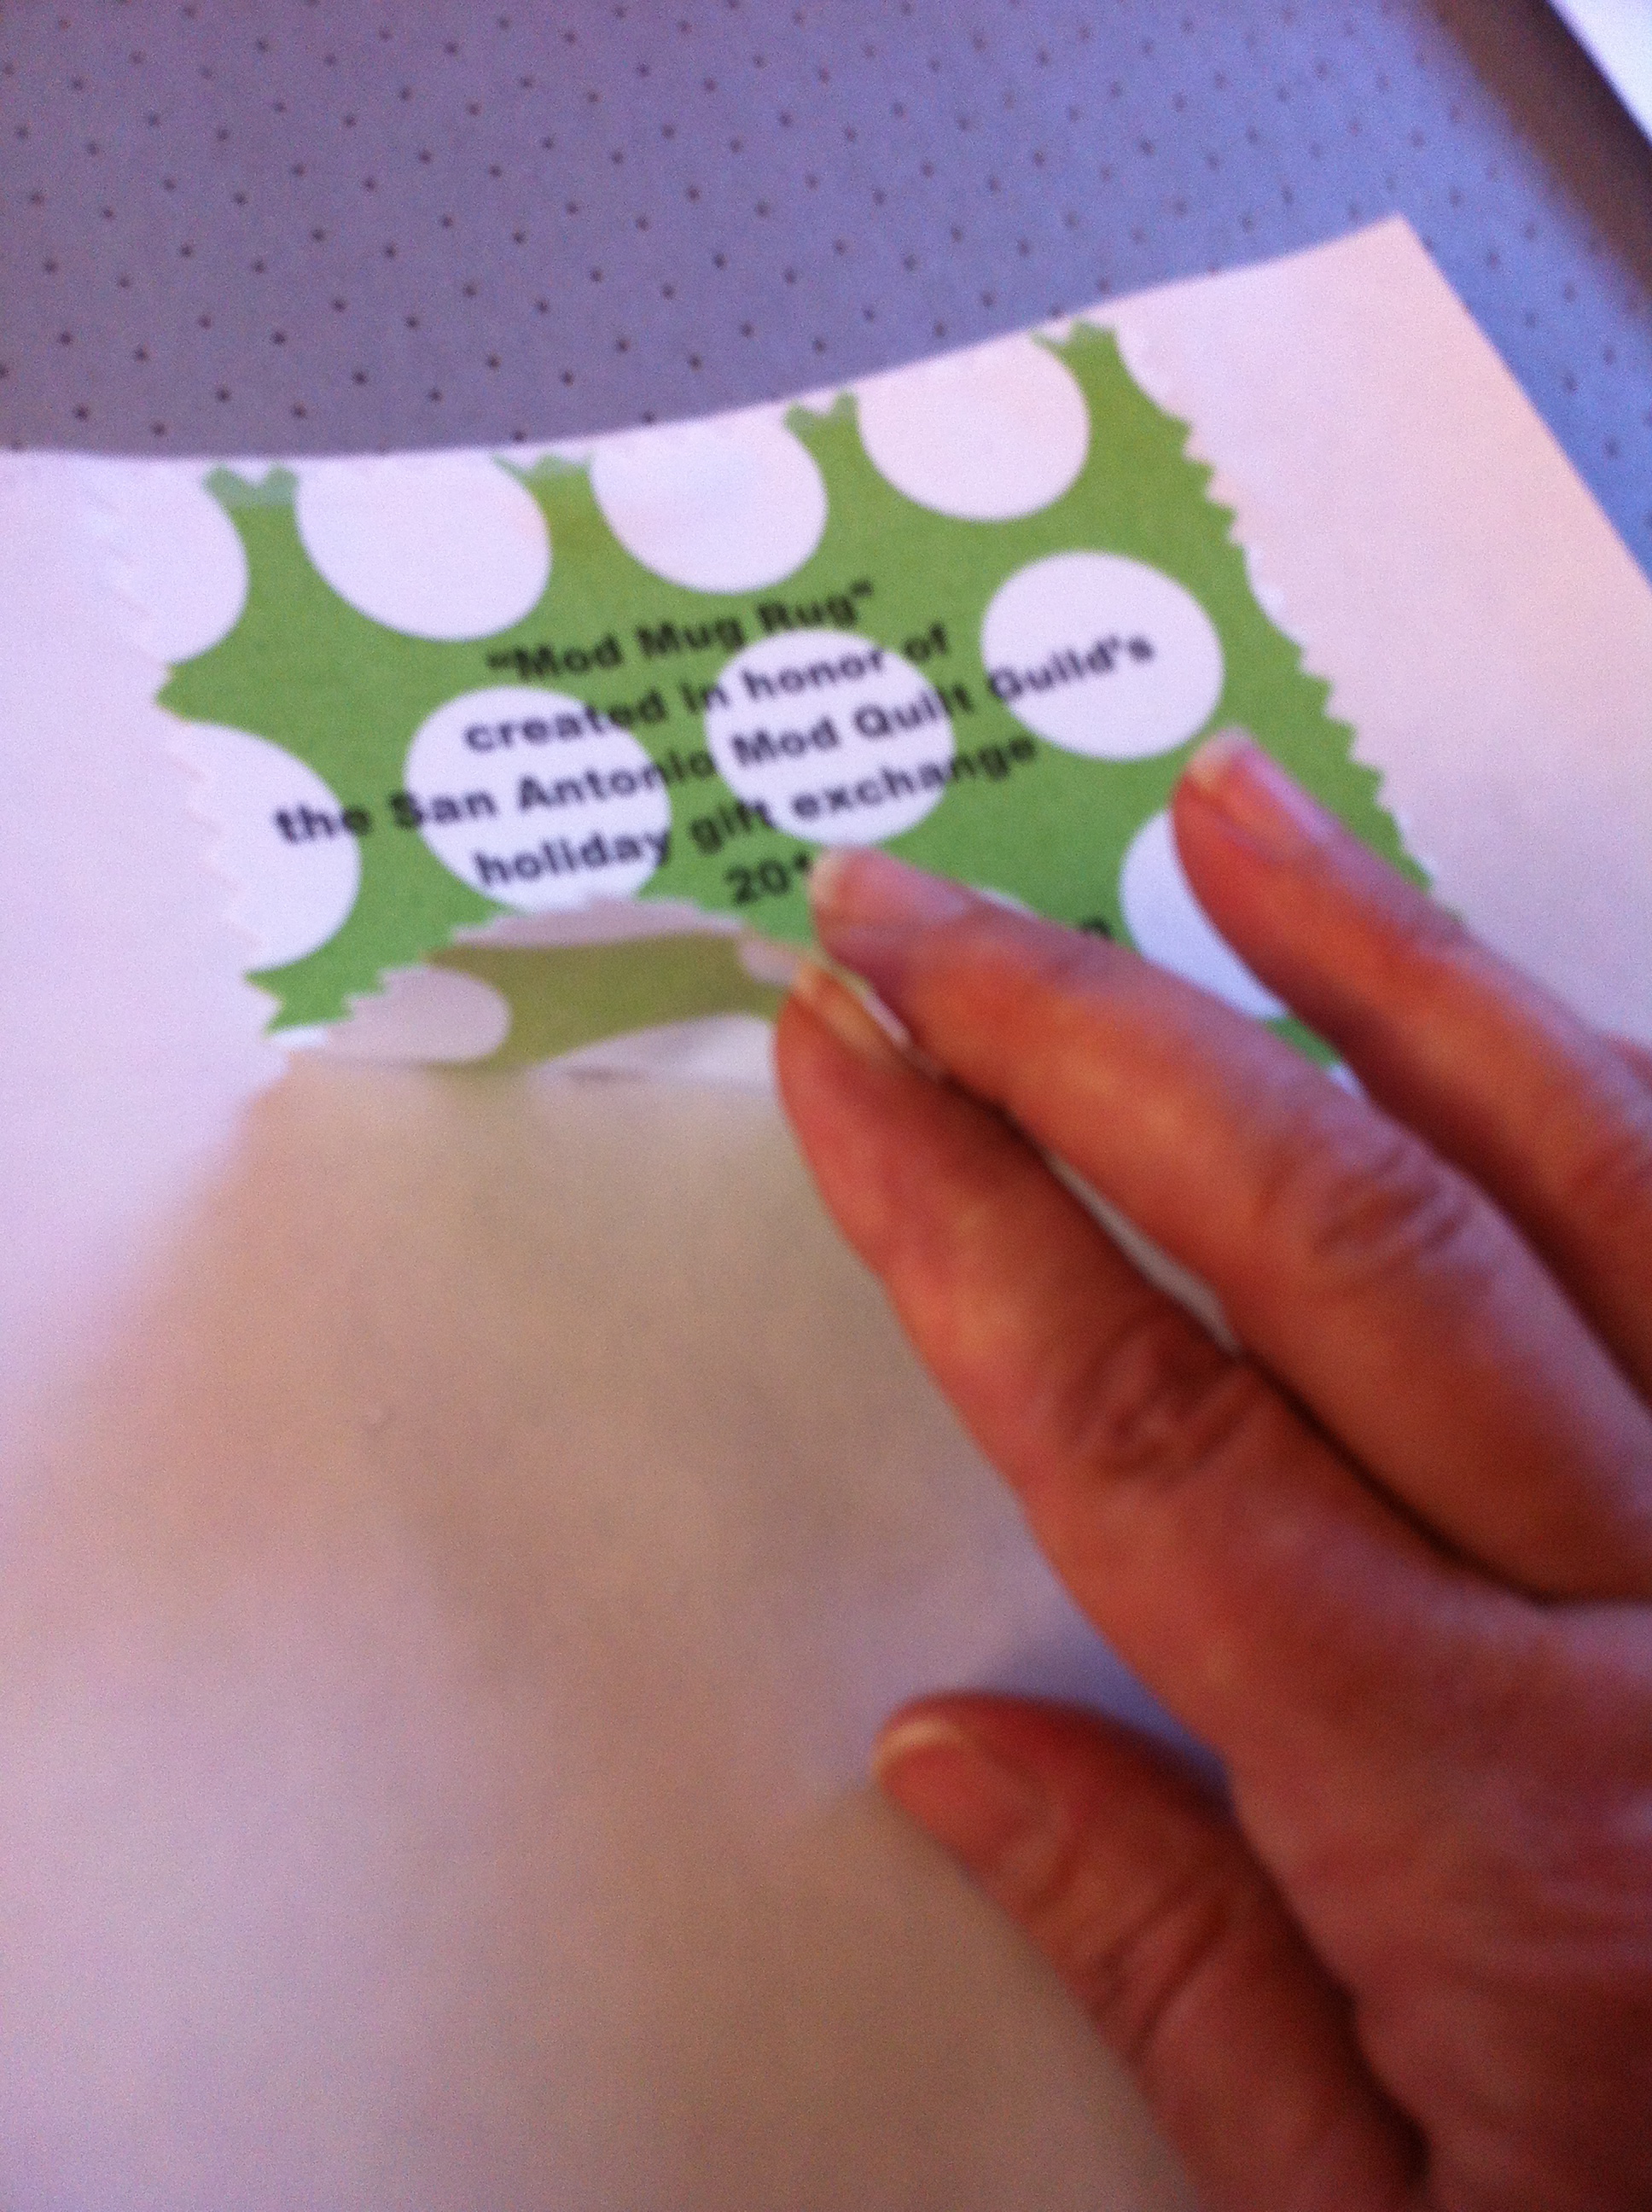 After printing, the fabric is easily peeled from
the freezer paper surface.
 Gently remove the leading edge of the fabric
from the tape.
 Now the label is ready to be sized using a
ruler and rotary cutter.
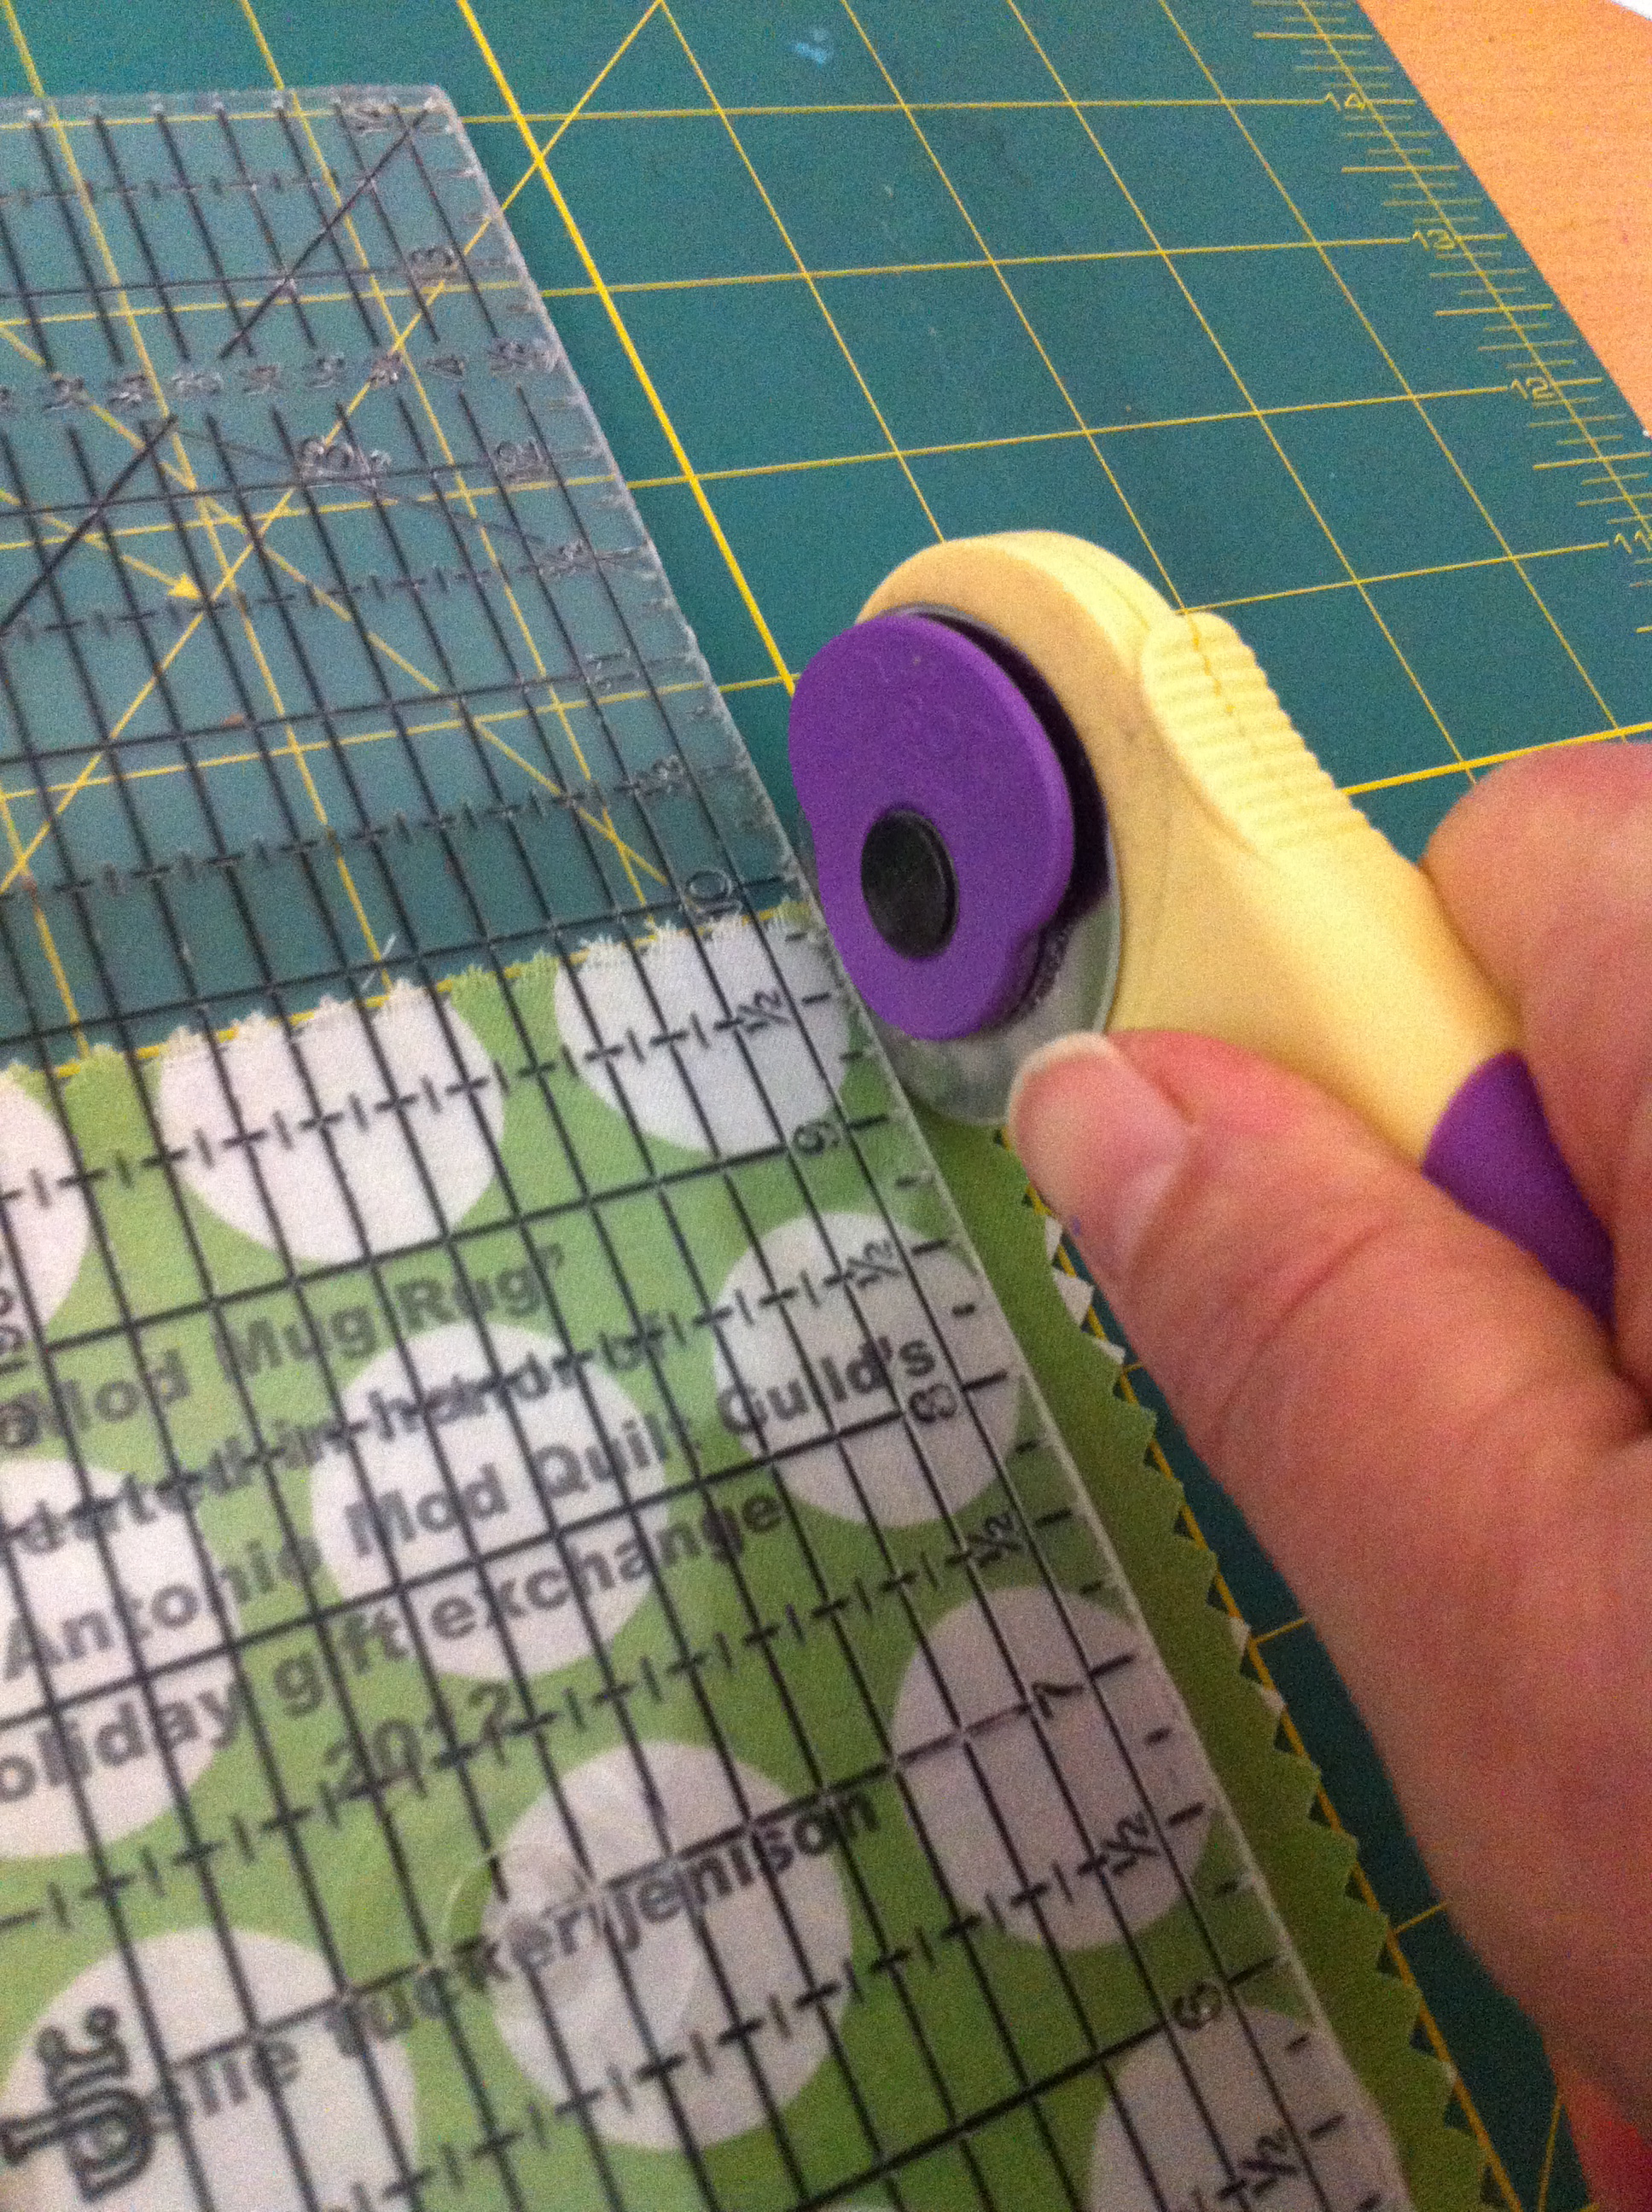 Creating a symmetrical size for the label.
 Using another piece of freezer paper that has
been cut approximately 1/8 inch smaller on each edge of
the label, the paper is pressed, shiny side down, to the
RIGHT SIDE of the label in preparation for appliquéing
the label to the quilt back (needle-turned appliqué).
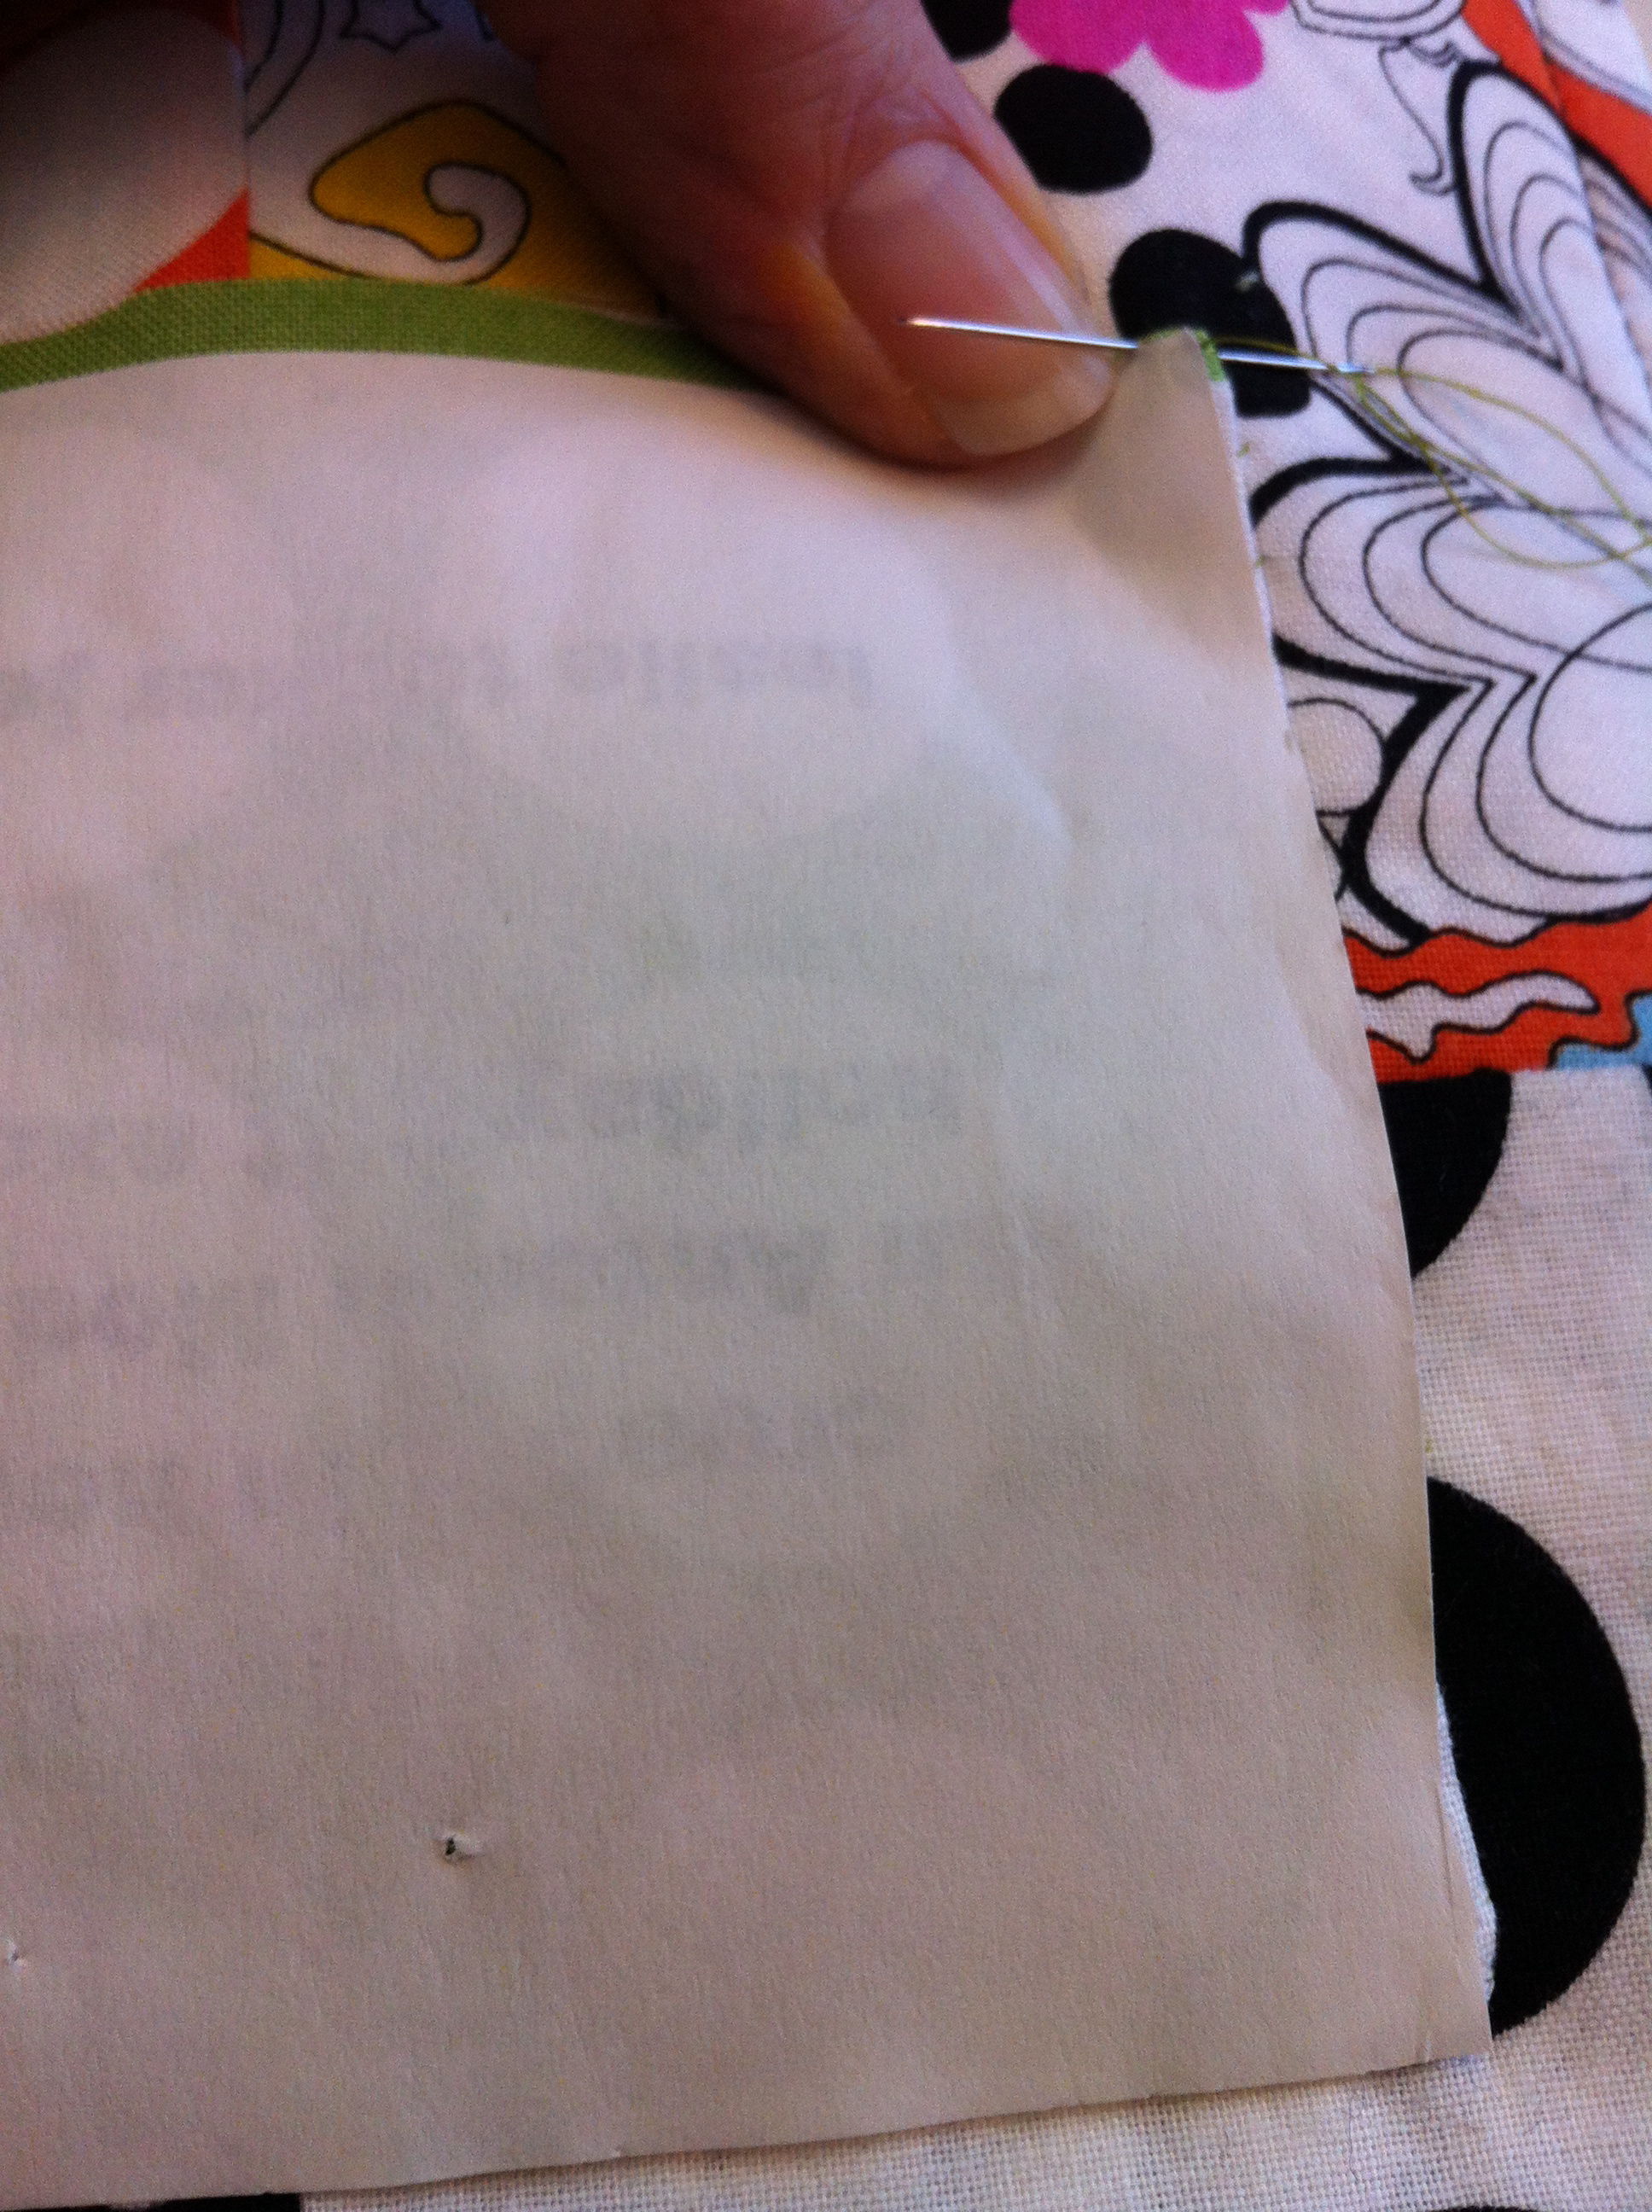 Using a coordinating thread color, the label
remains stabilized by the freezer paper, which provides
a nice edge to support the needle-turned appliqué.
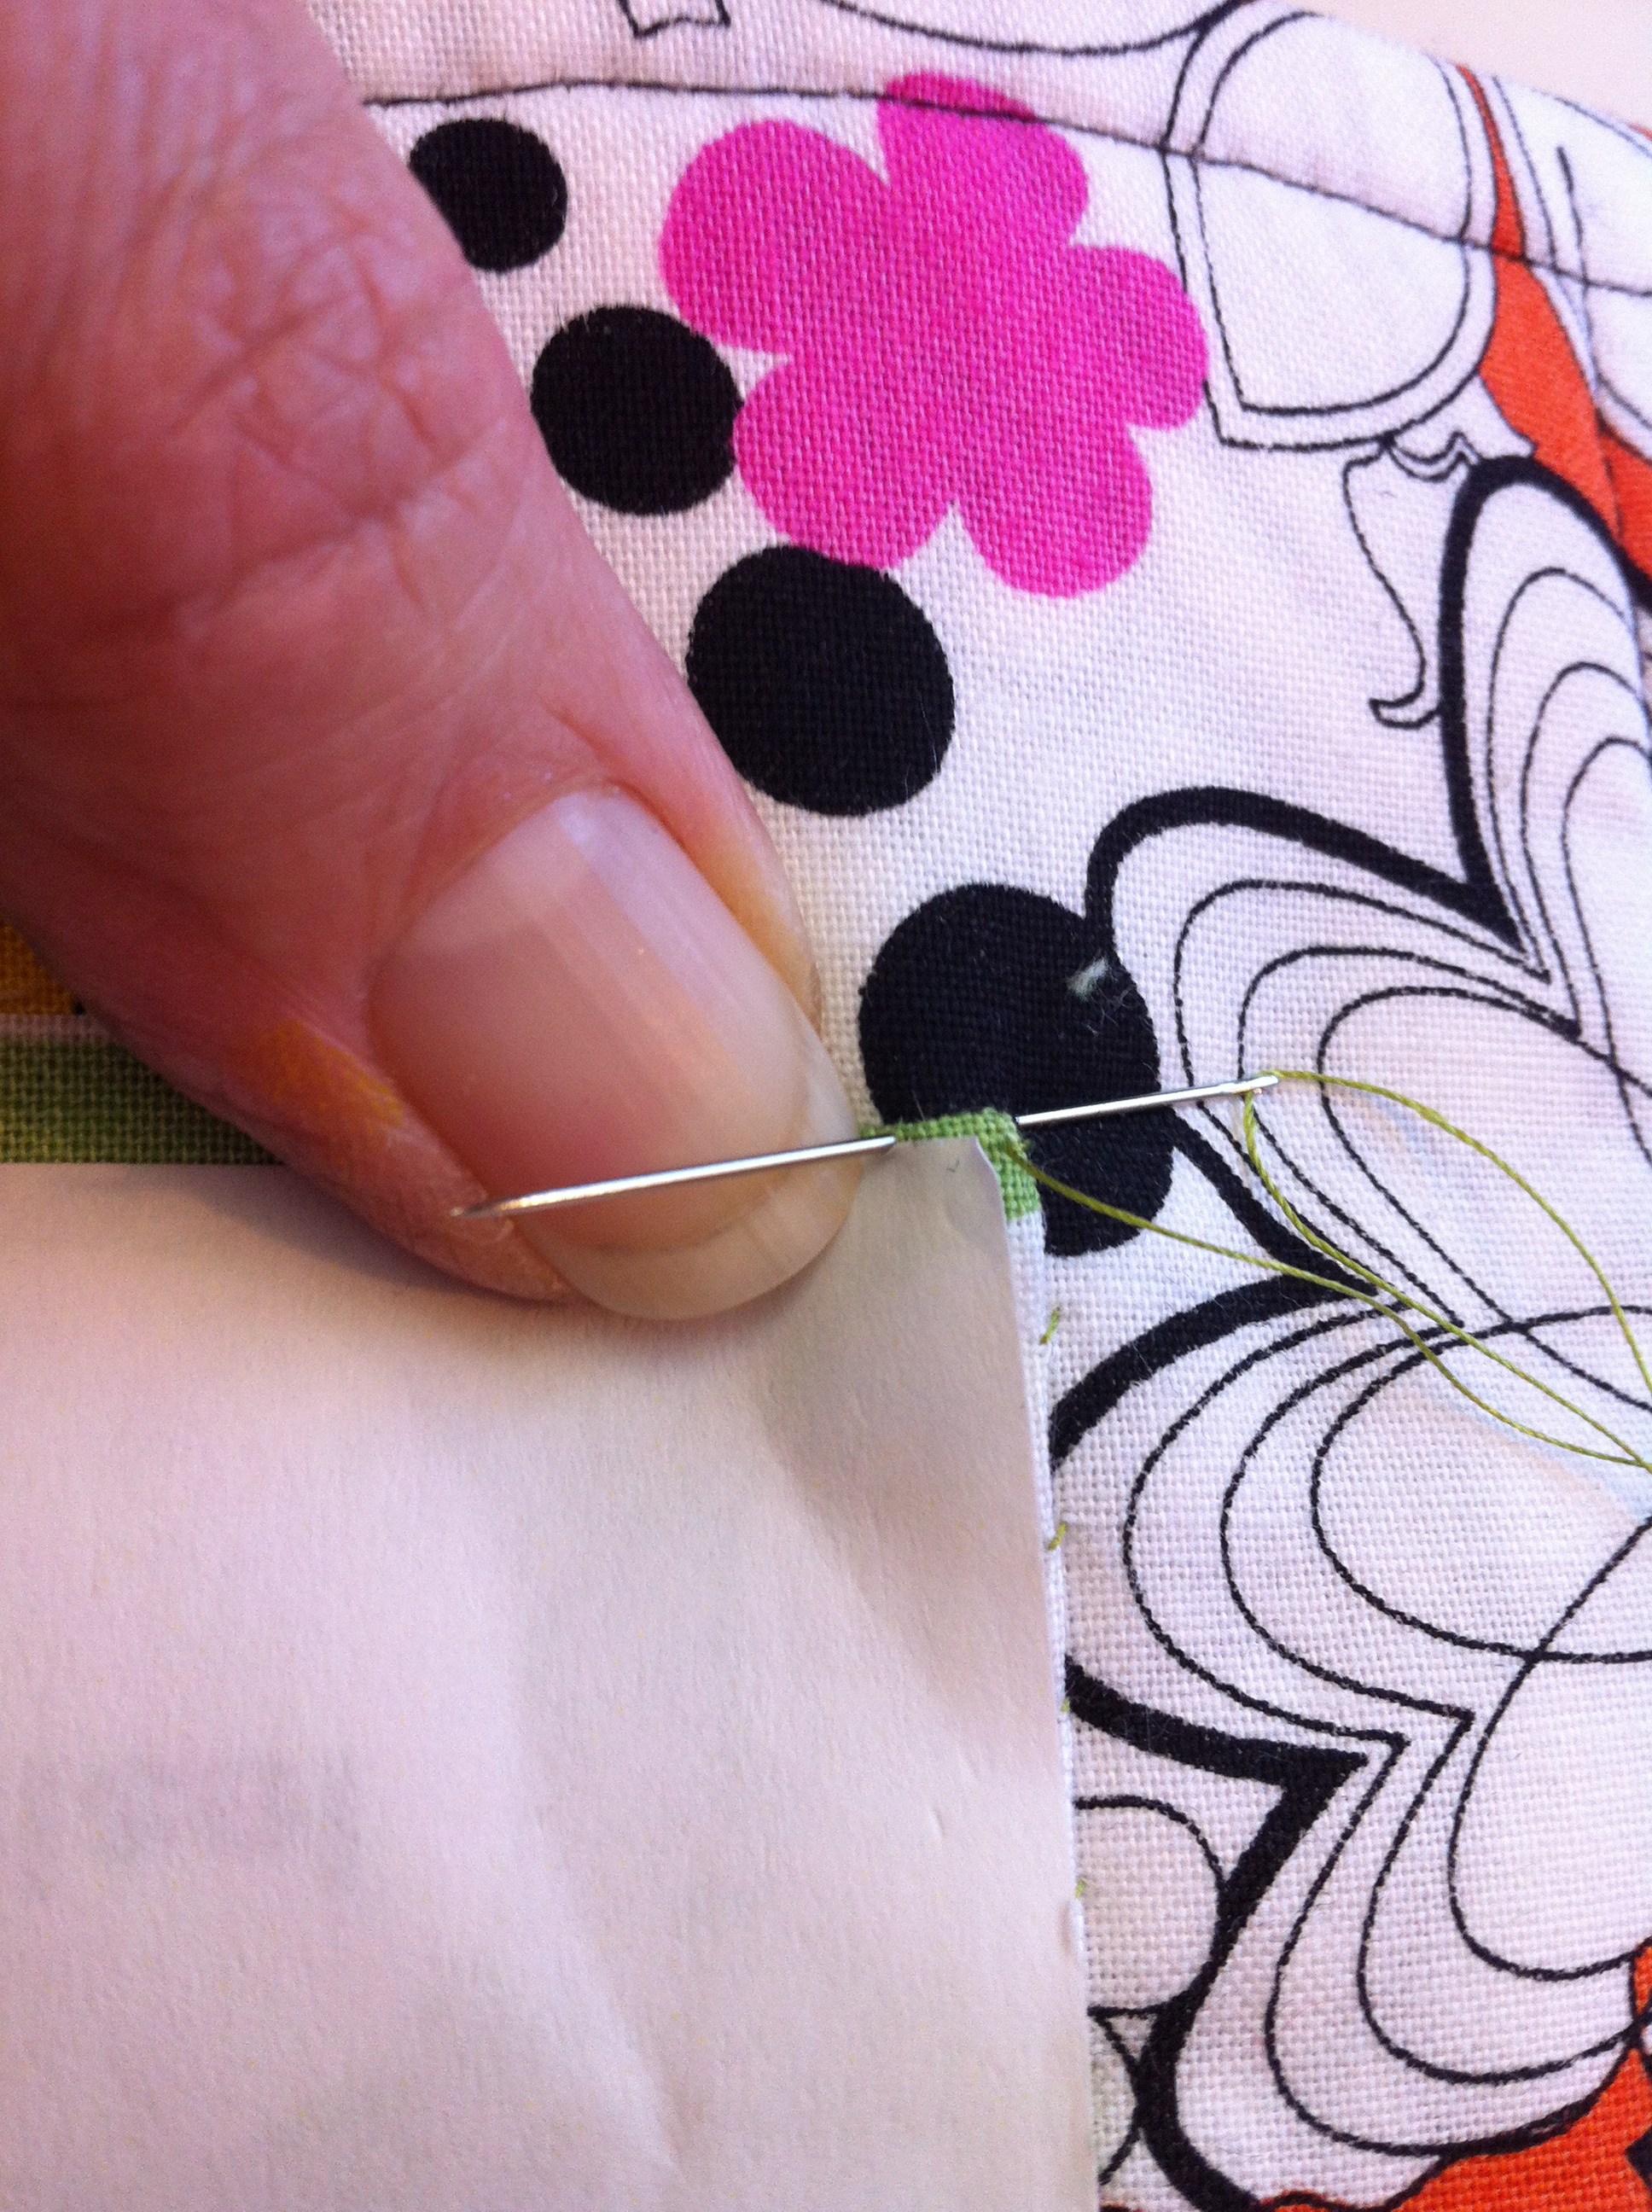 Working around the corner of the label.
 The needle “sweeps” the fabric edge under
the surface as the stitching secures the finished edge.
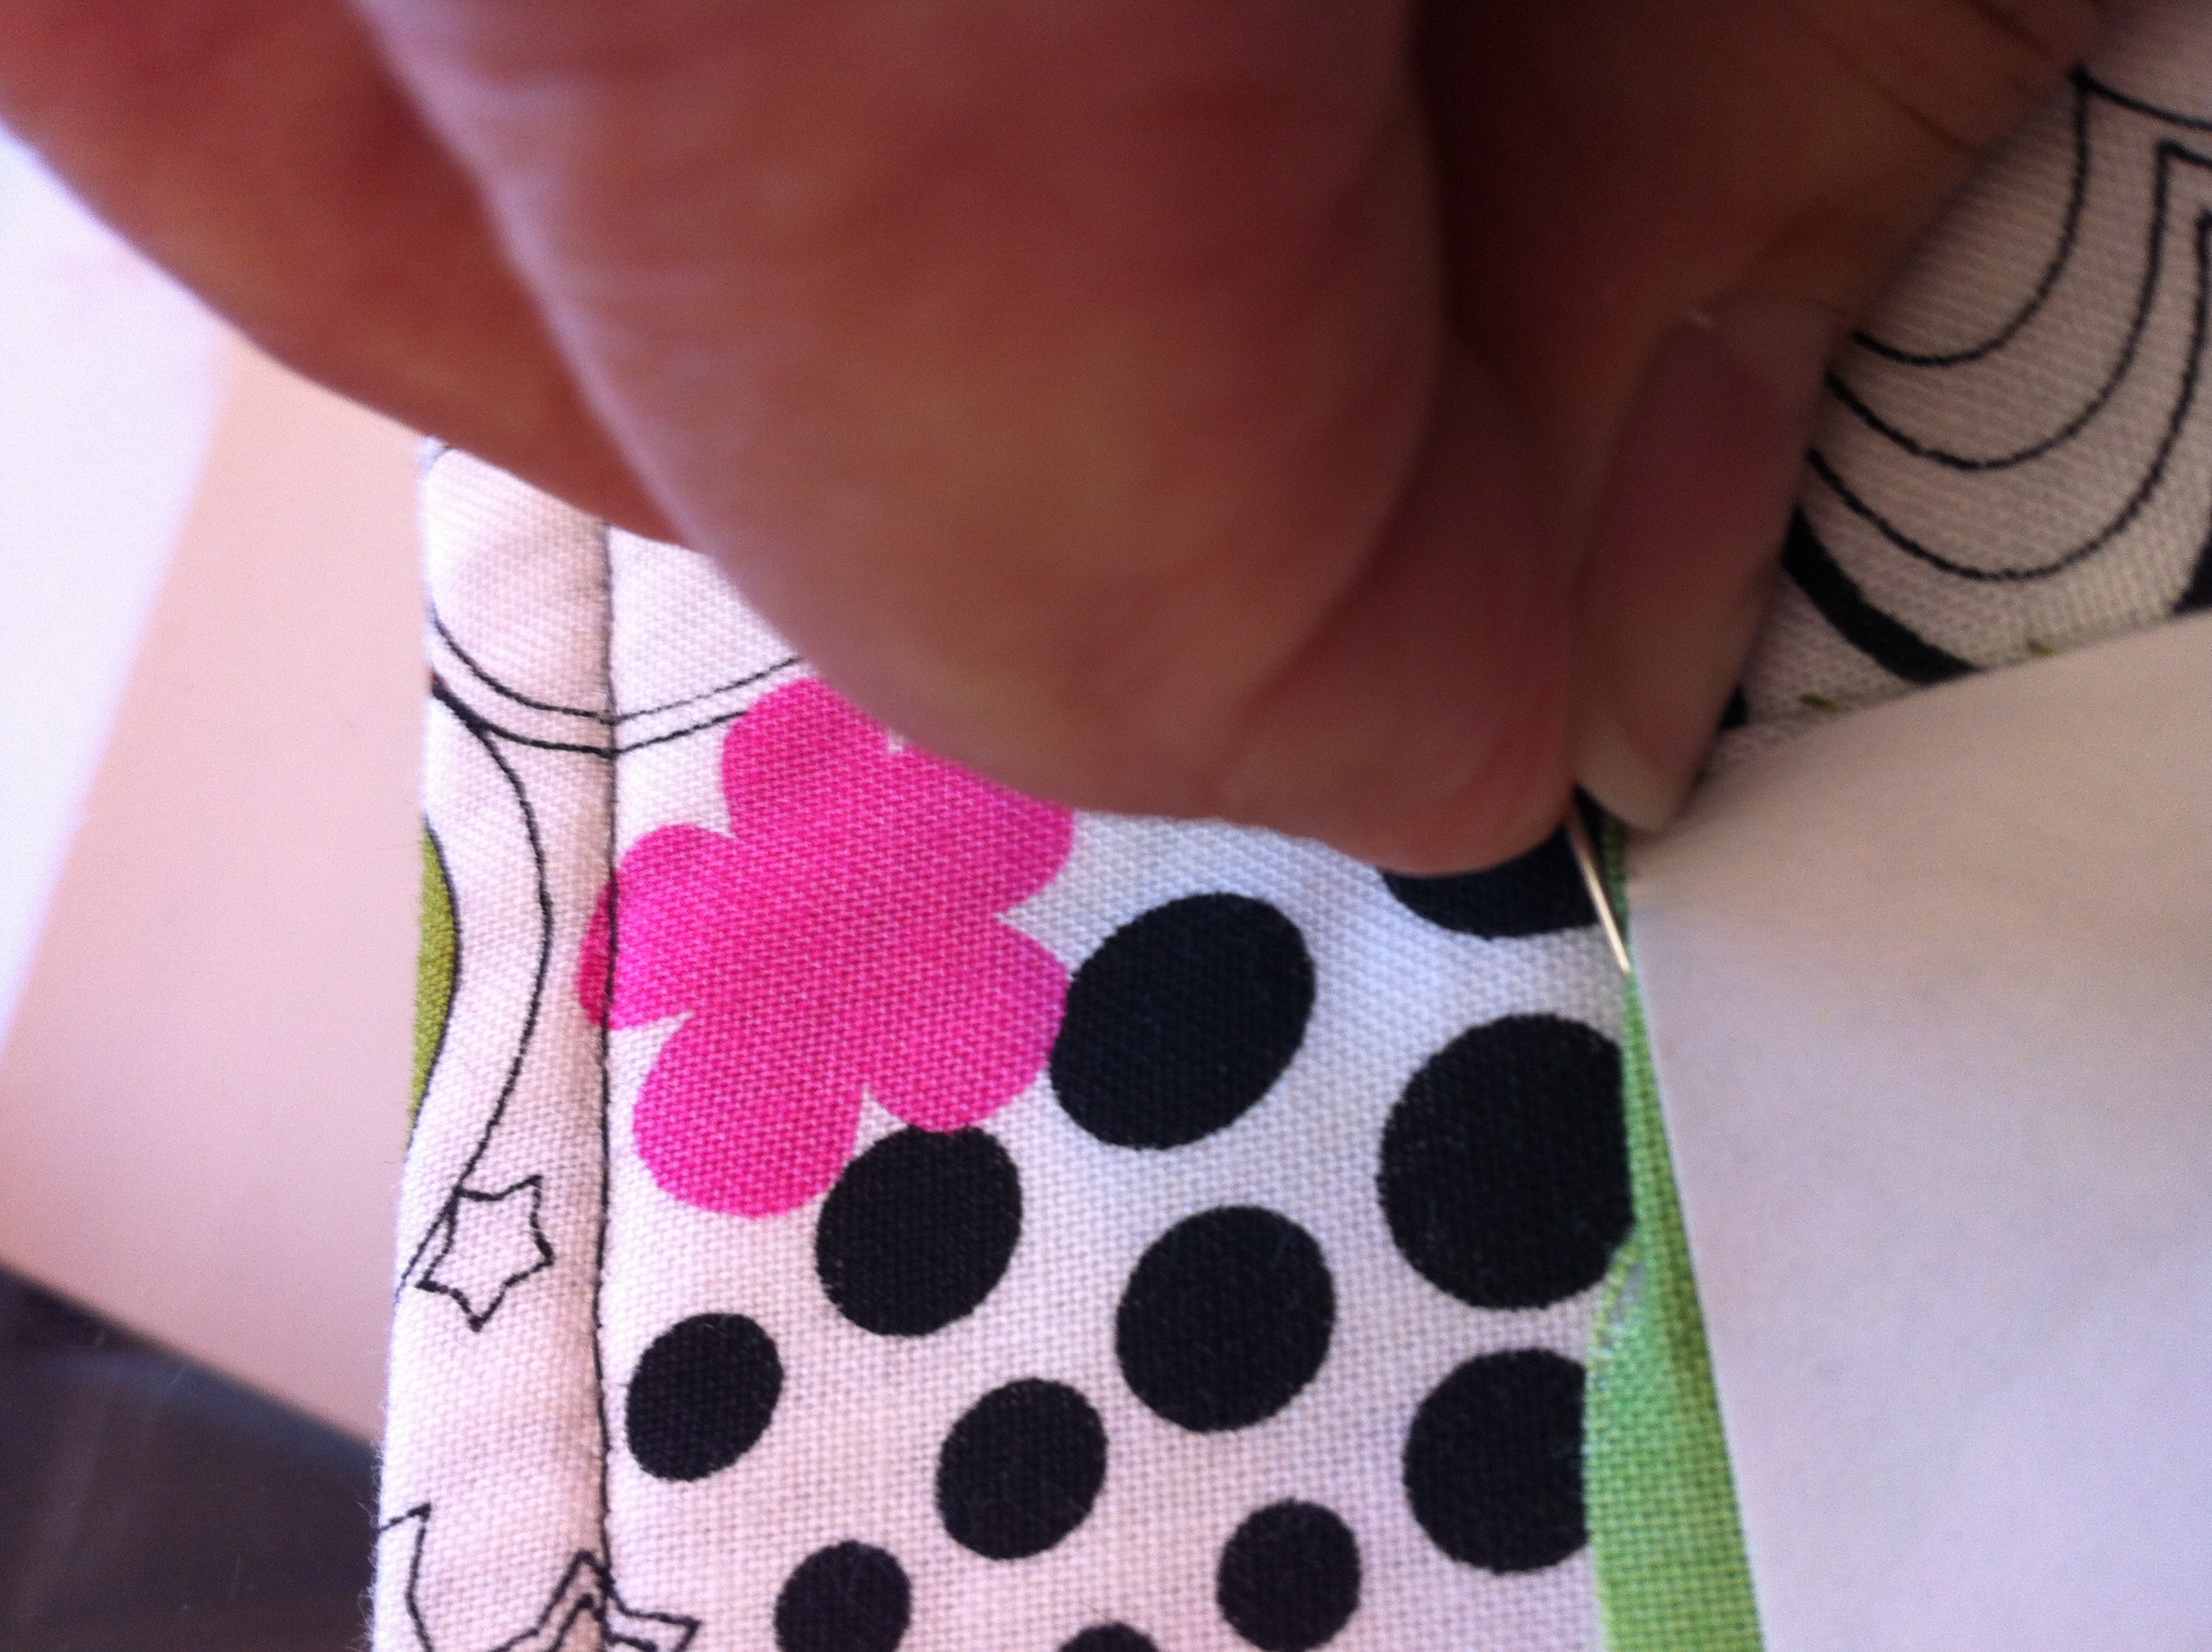
 Once the entire label is stitched into place the
freezer paper is easily peeled off the surface.
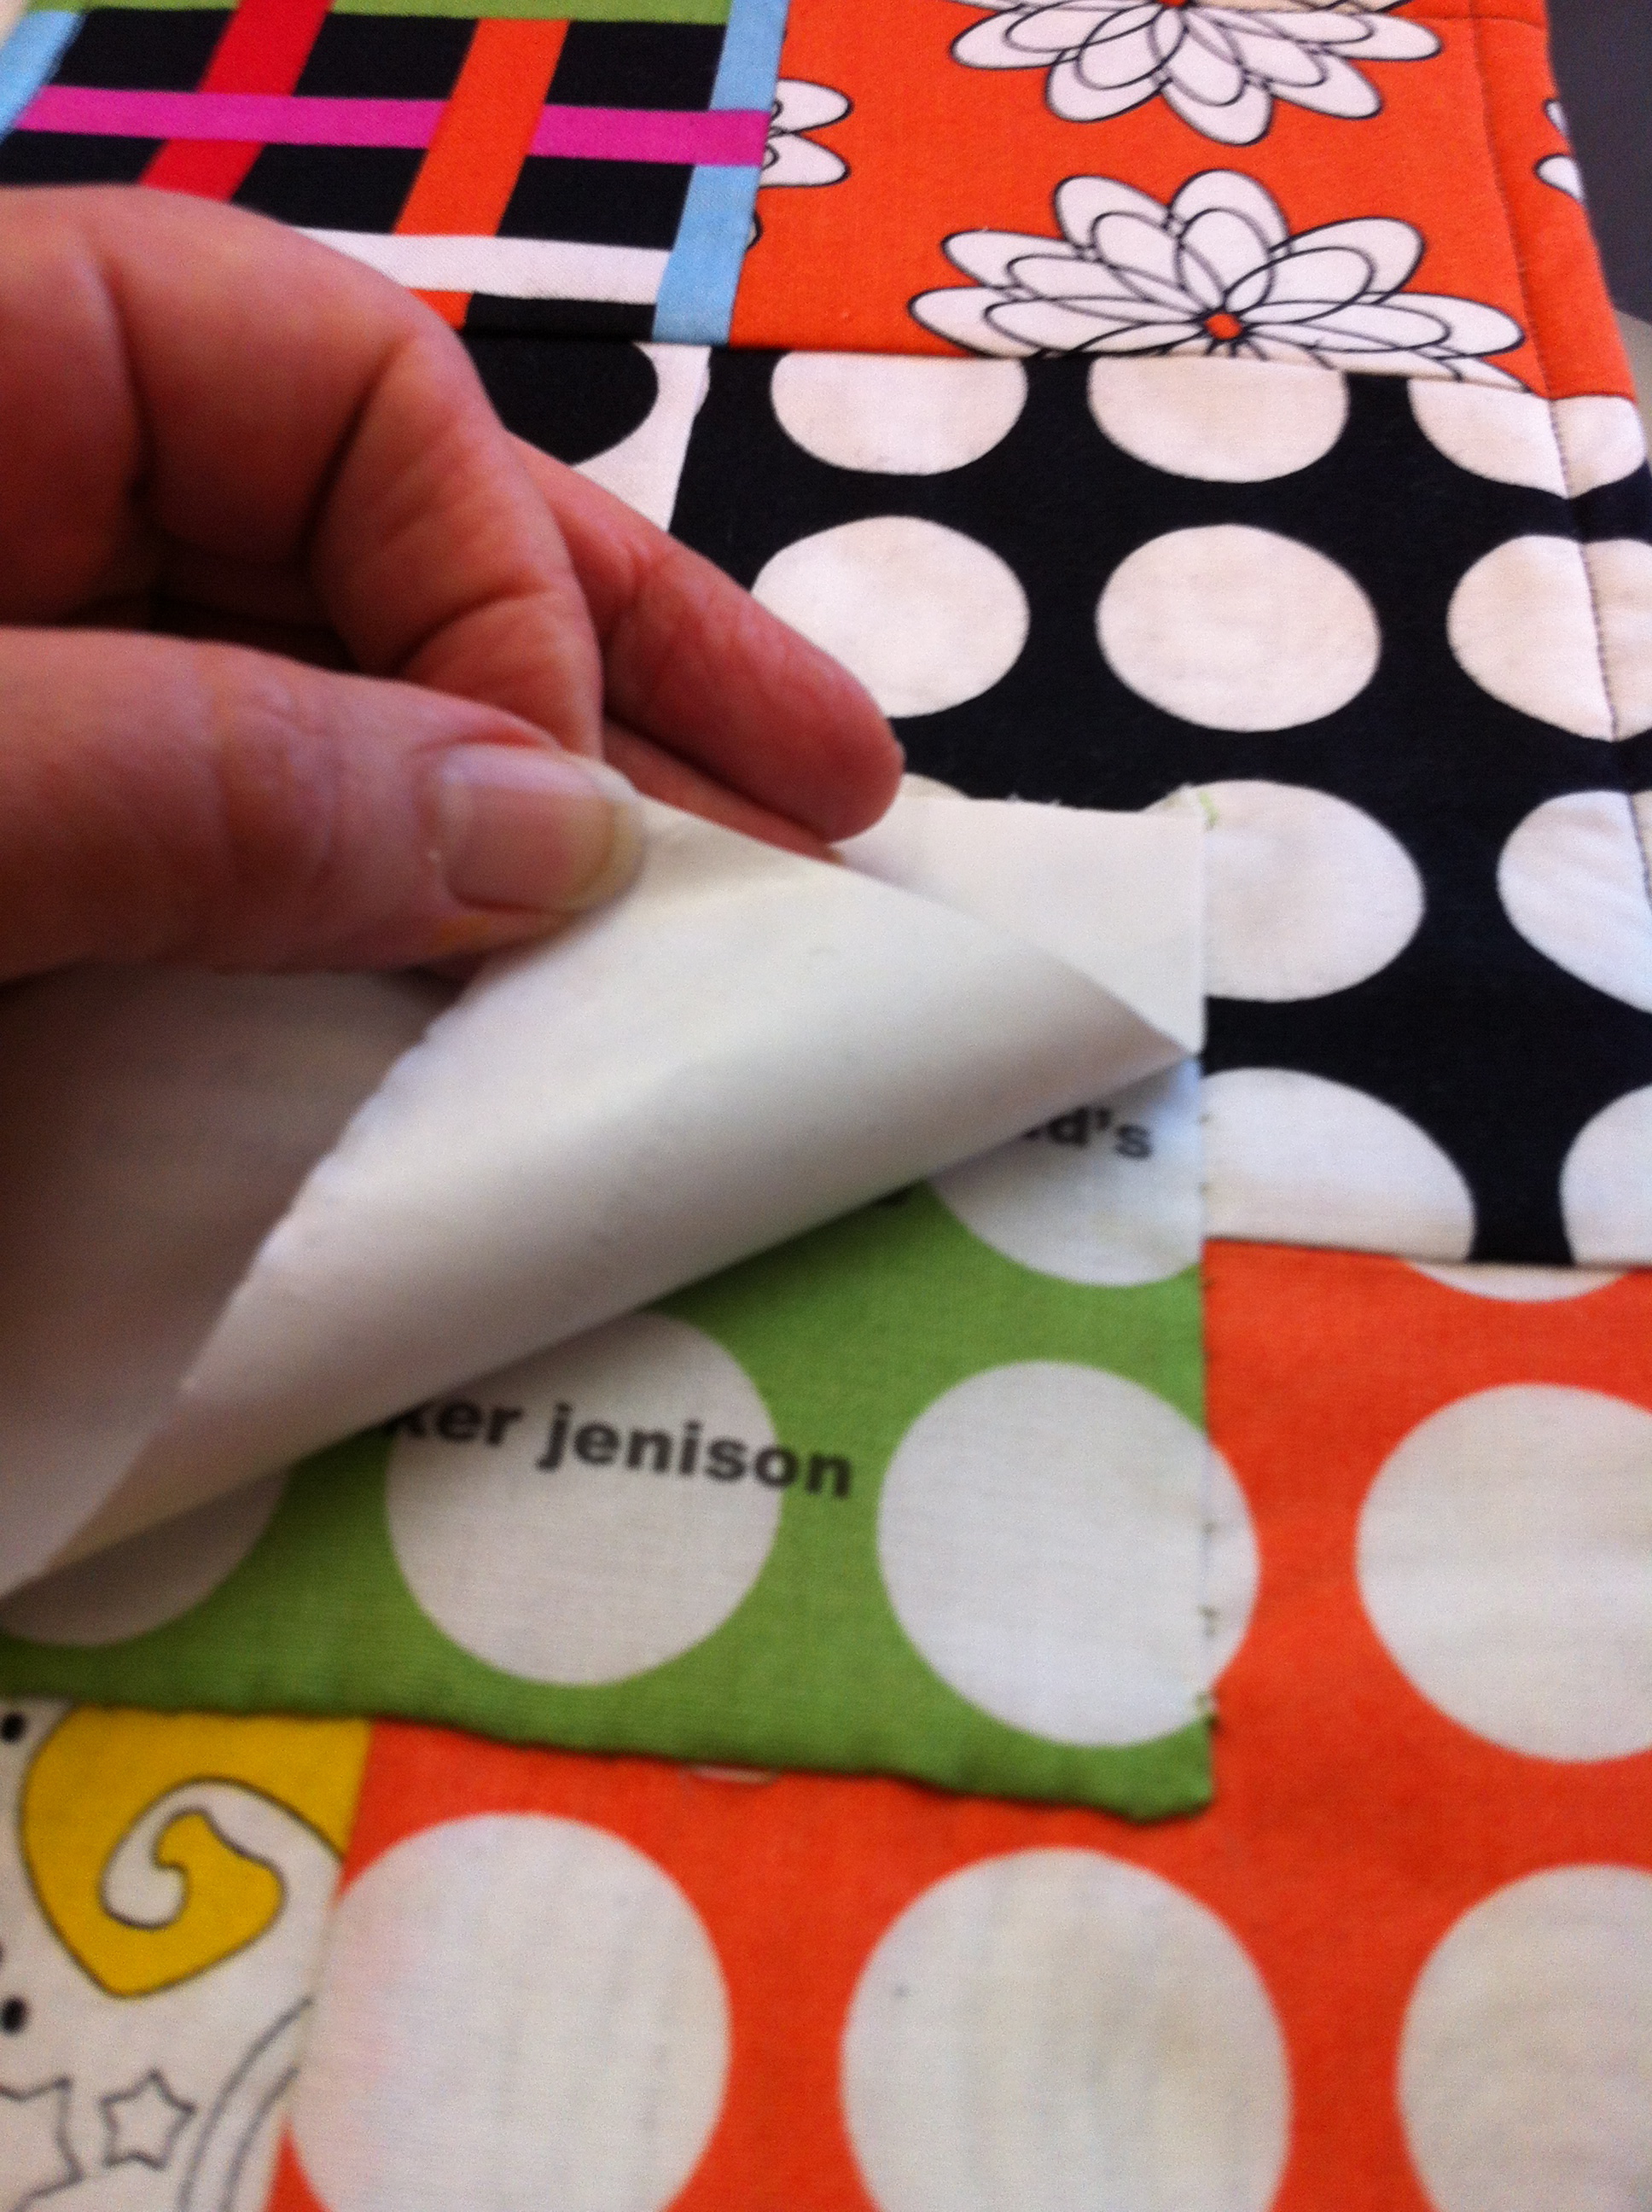
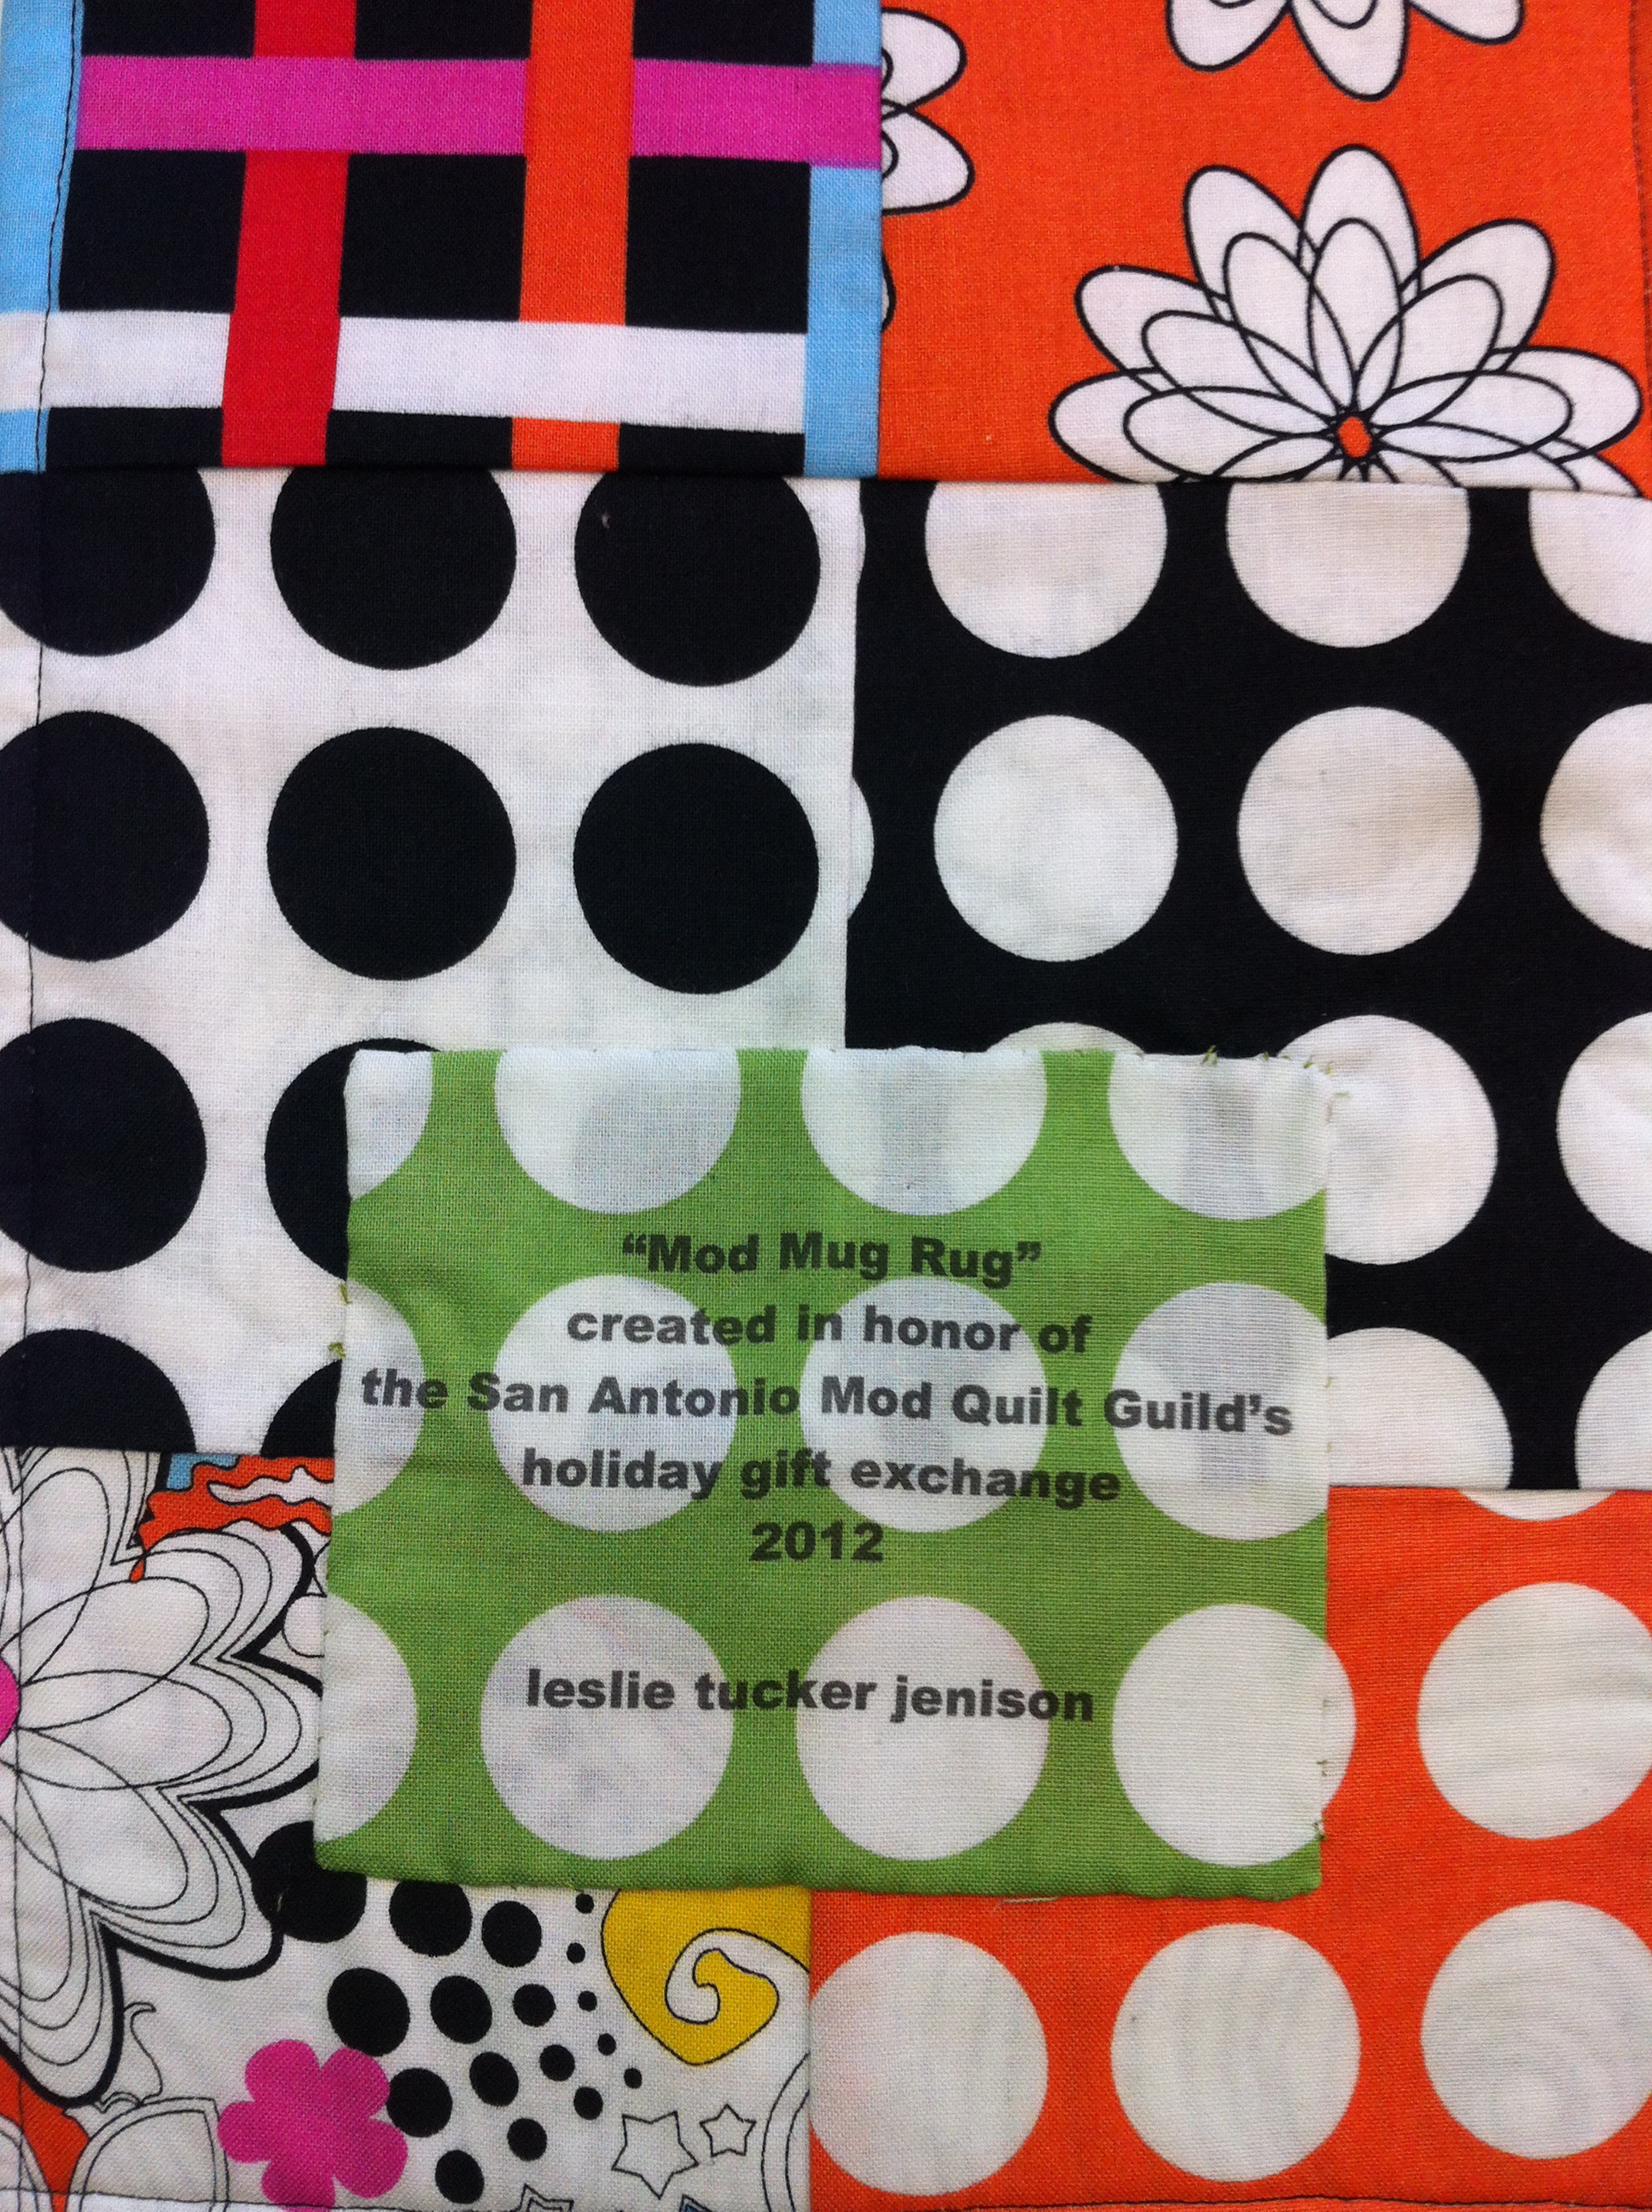 The result? A fun, colorful label that adds so
much to the quilt (no matter what the size or occasion!).
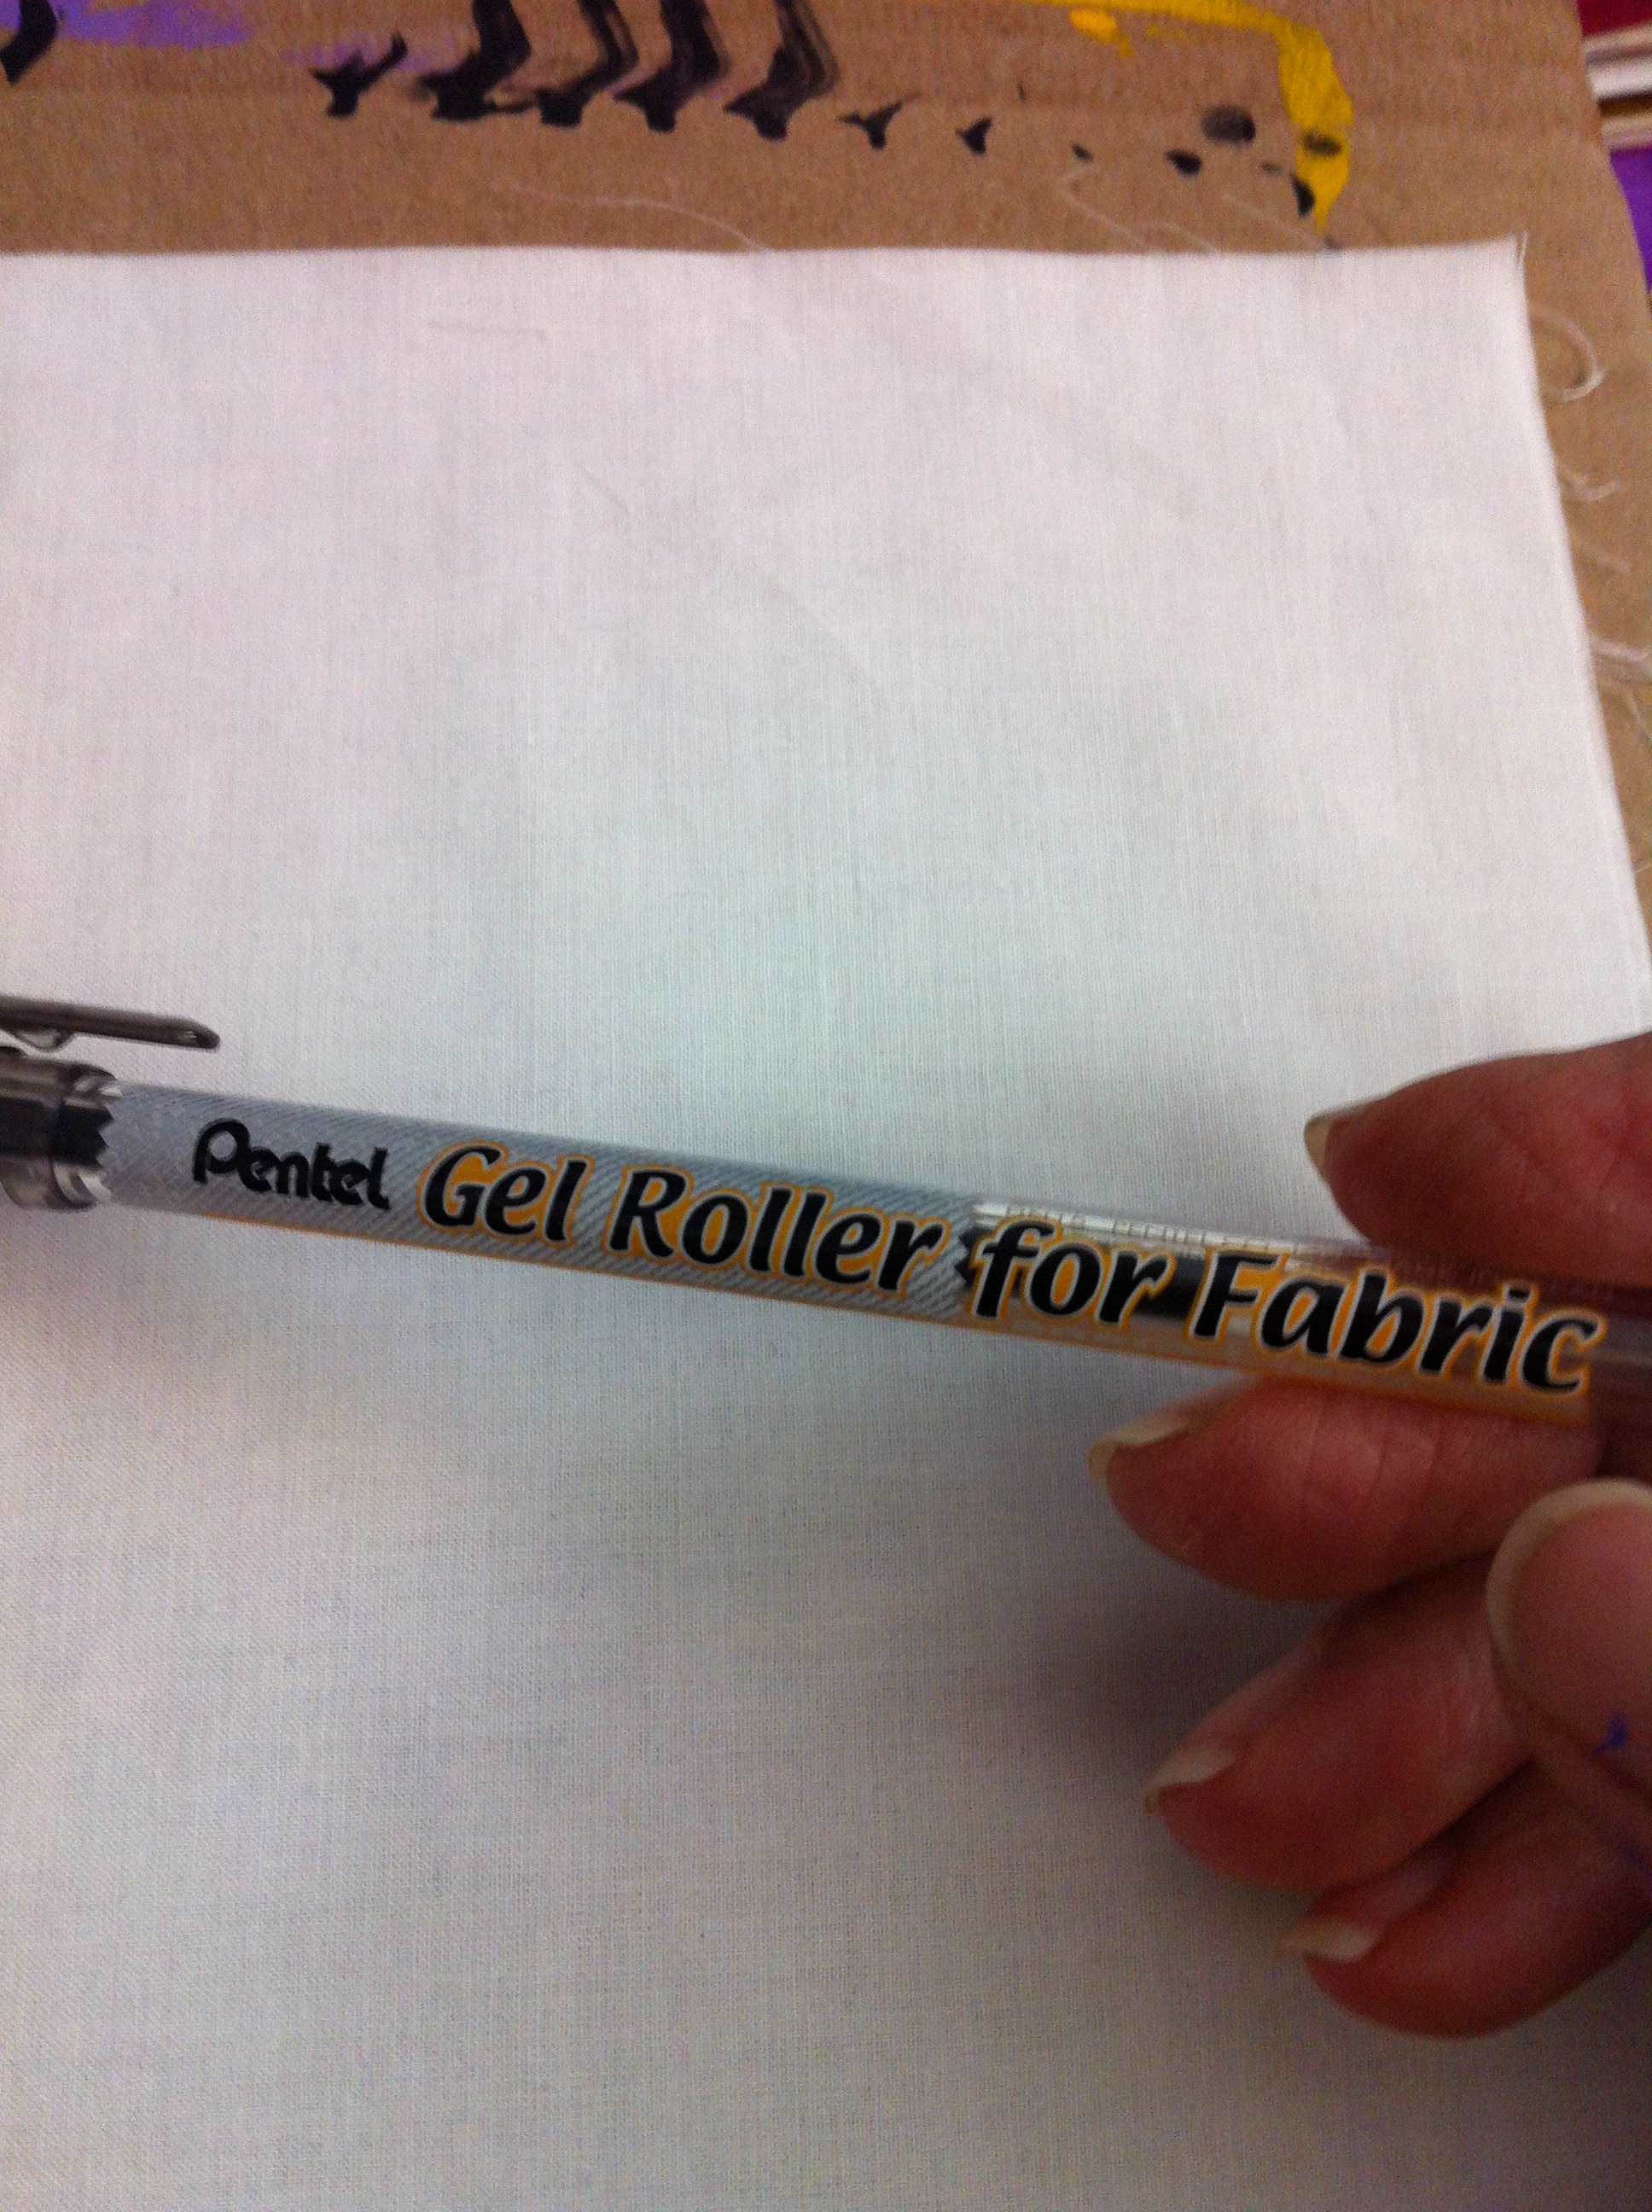 Another option: The hand-written label. I
love these Pentel Gel Roller Fabric Markers. These are
permanent and are really easy to use on most any type
of cloth.
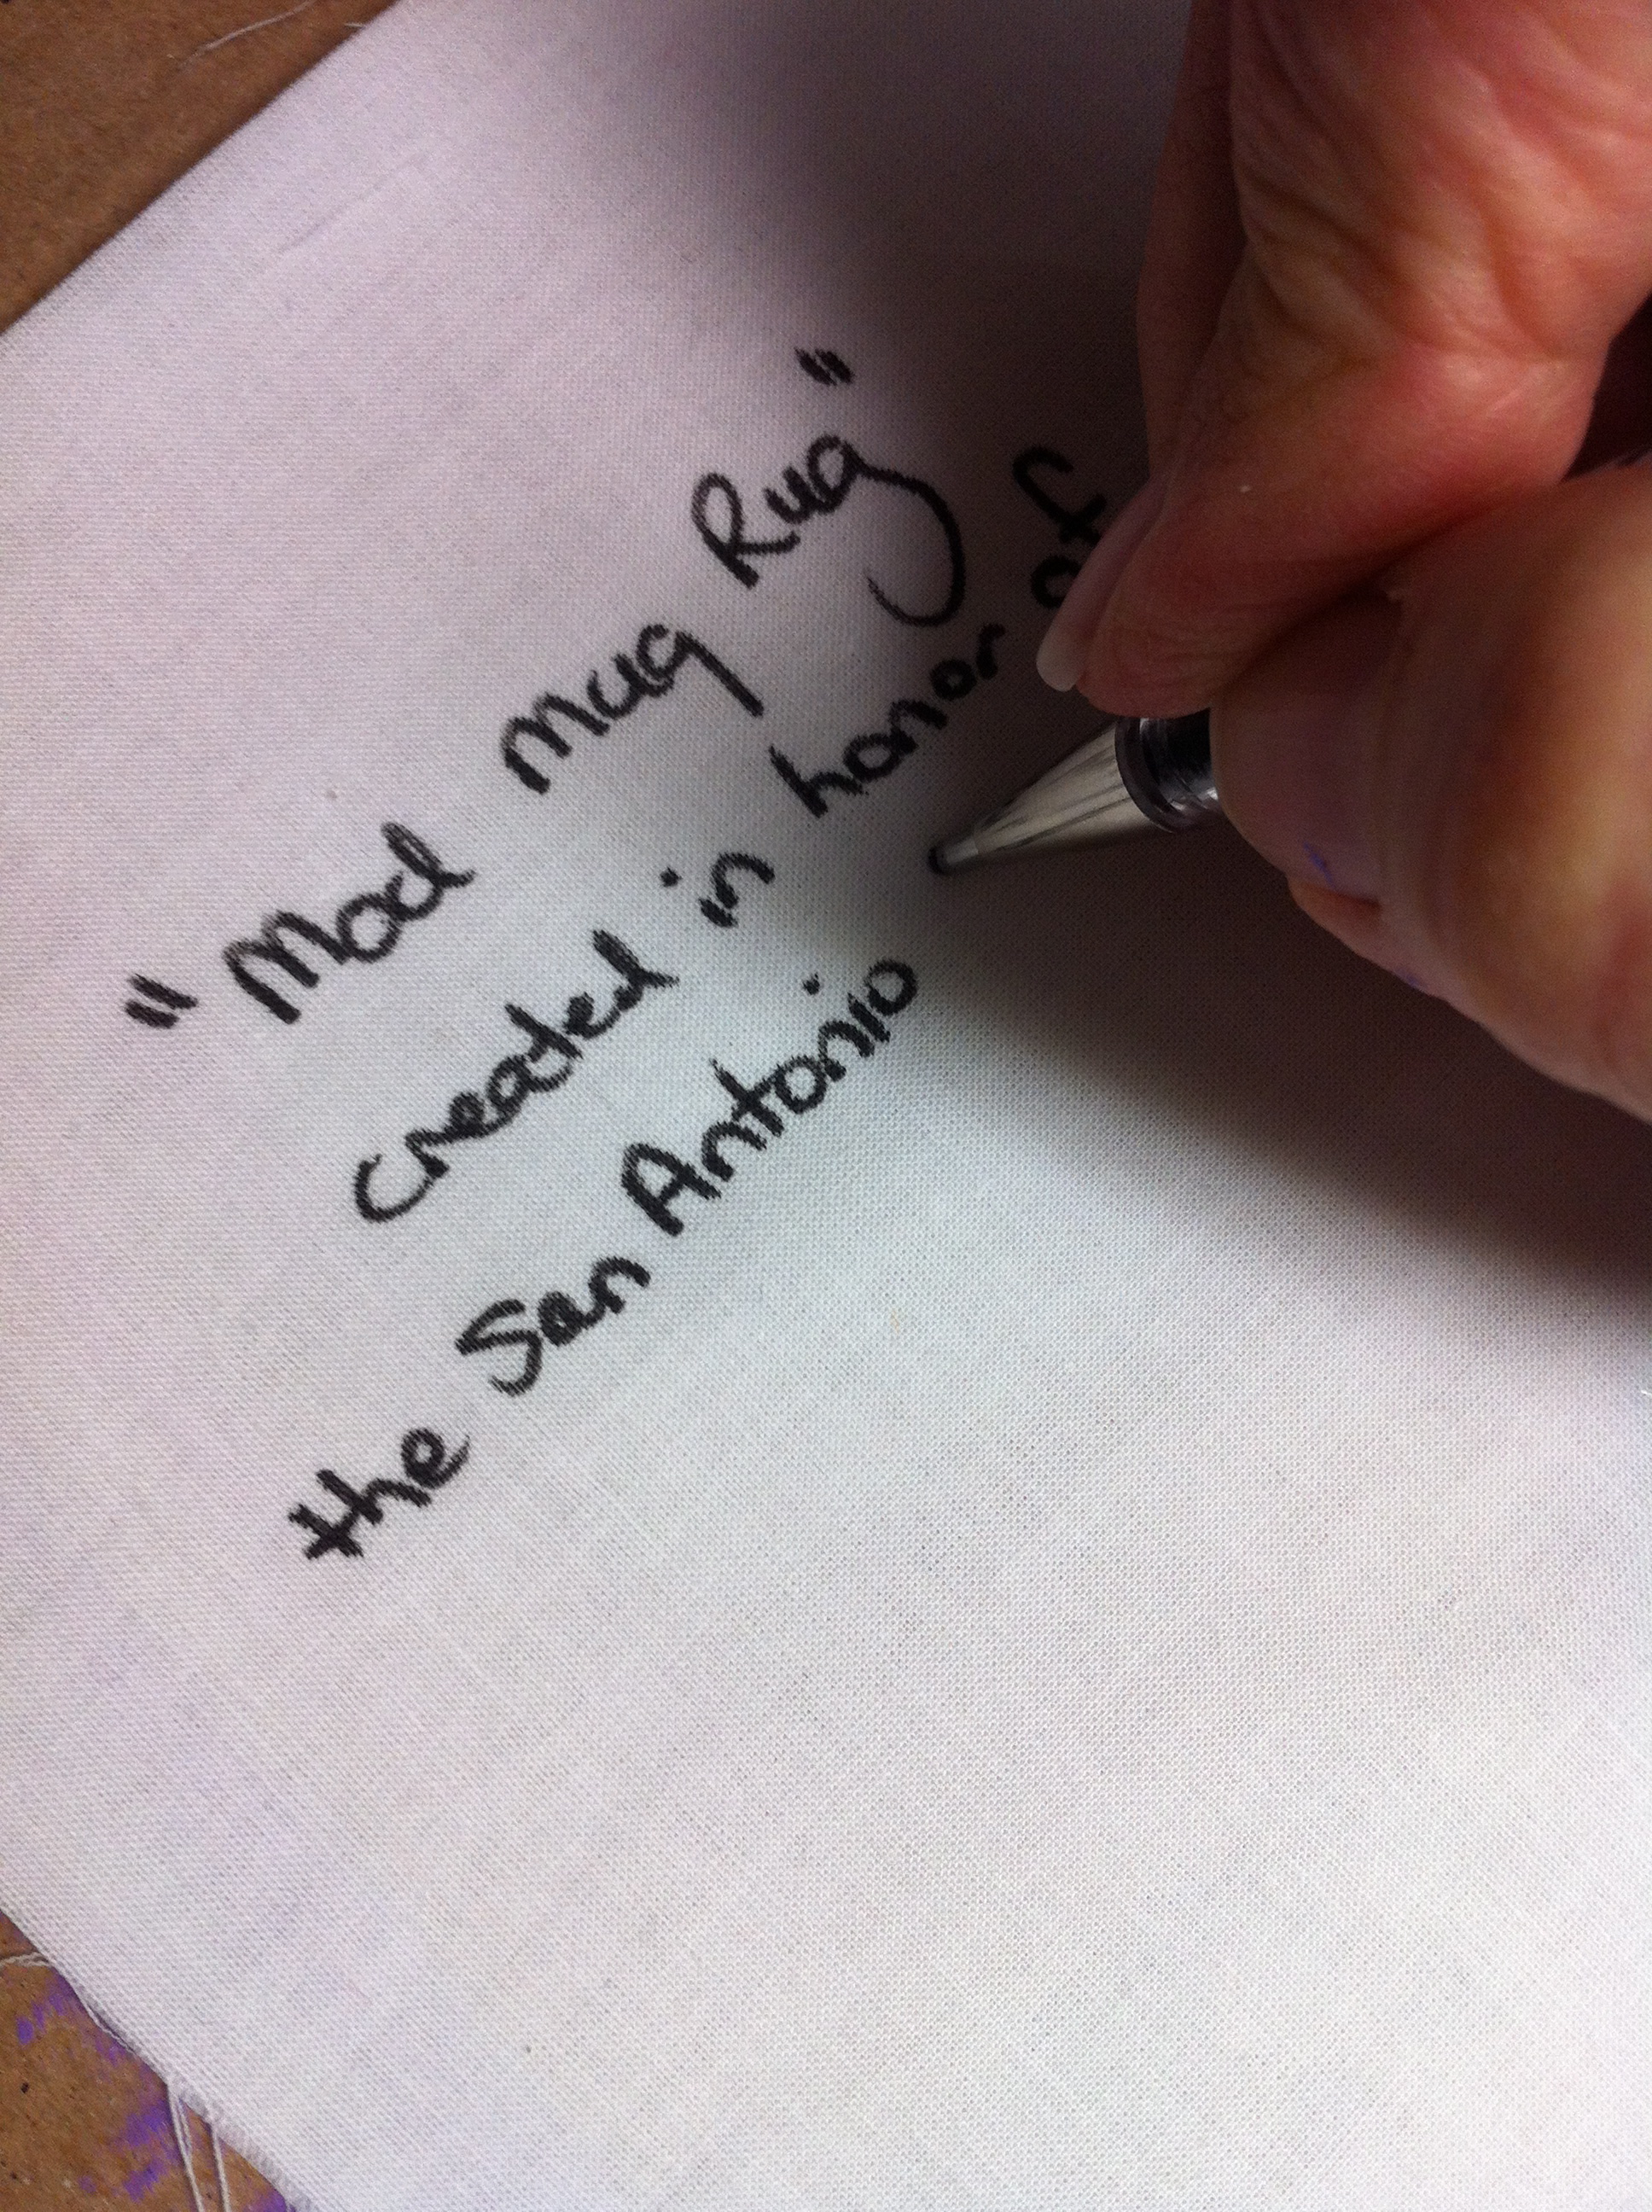 Writing on the label.
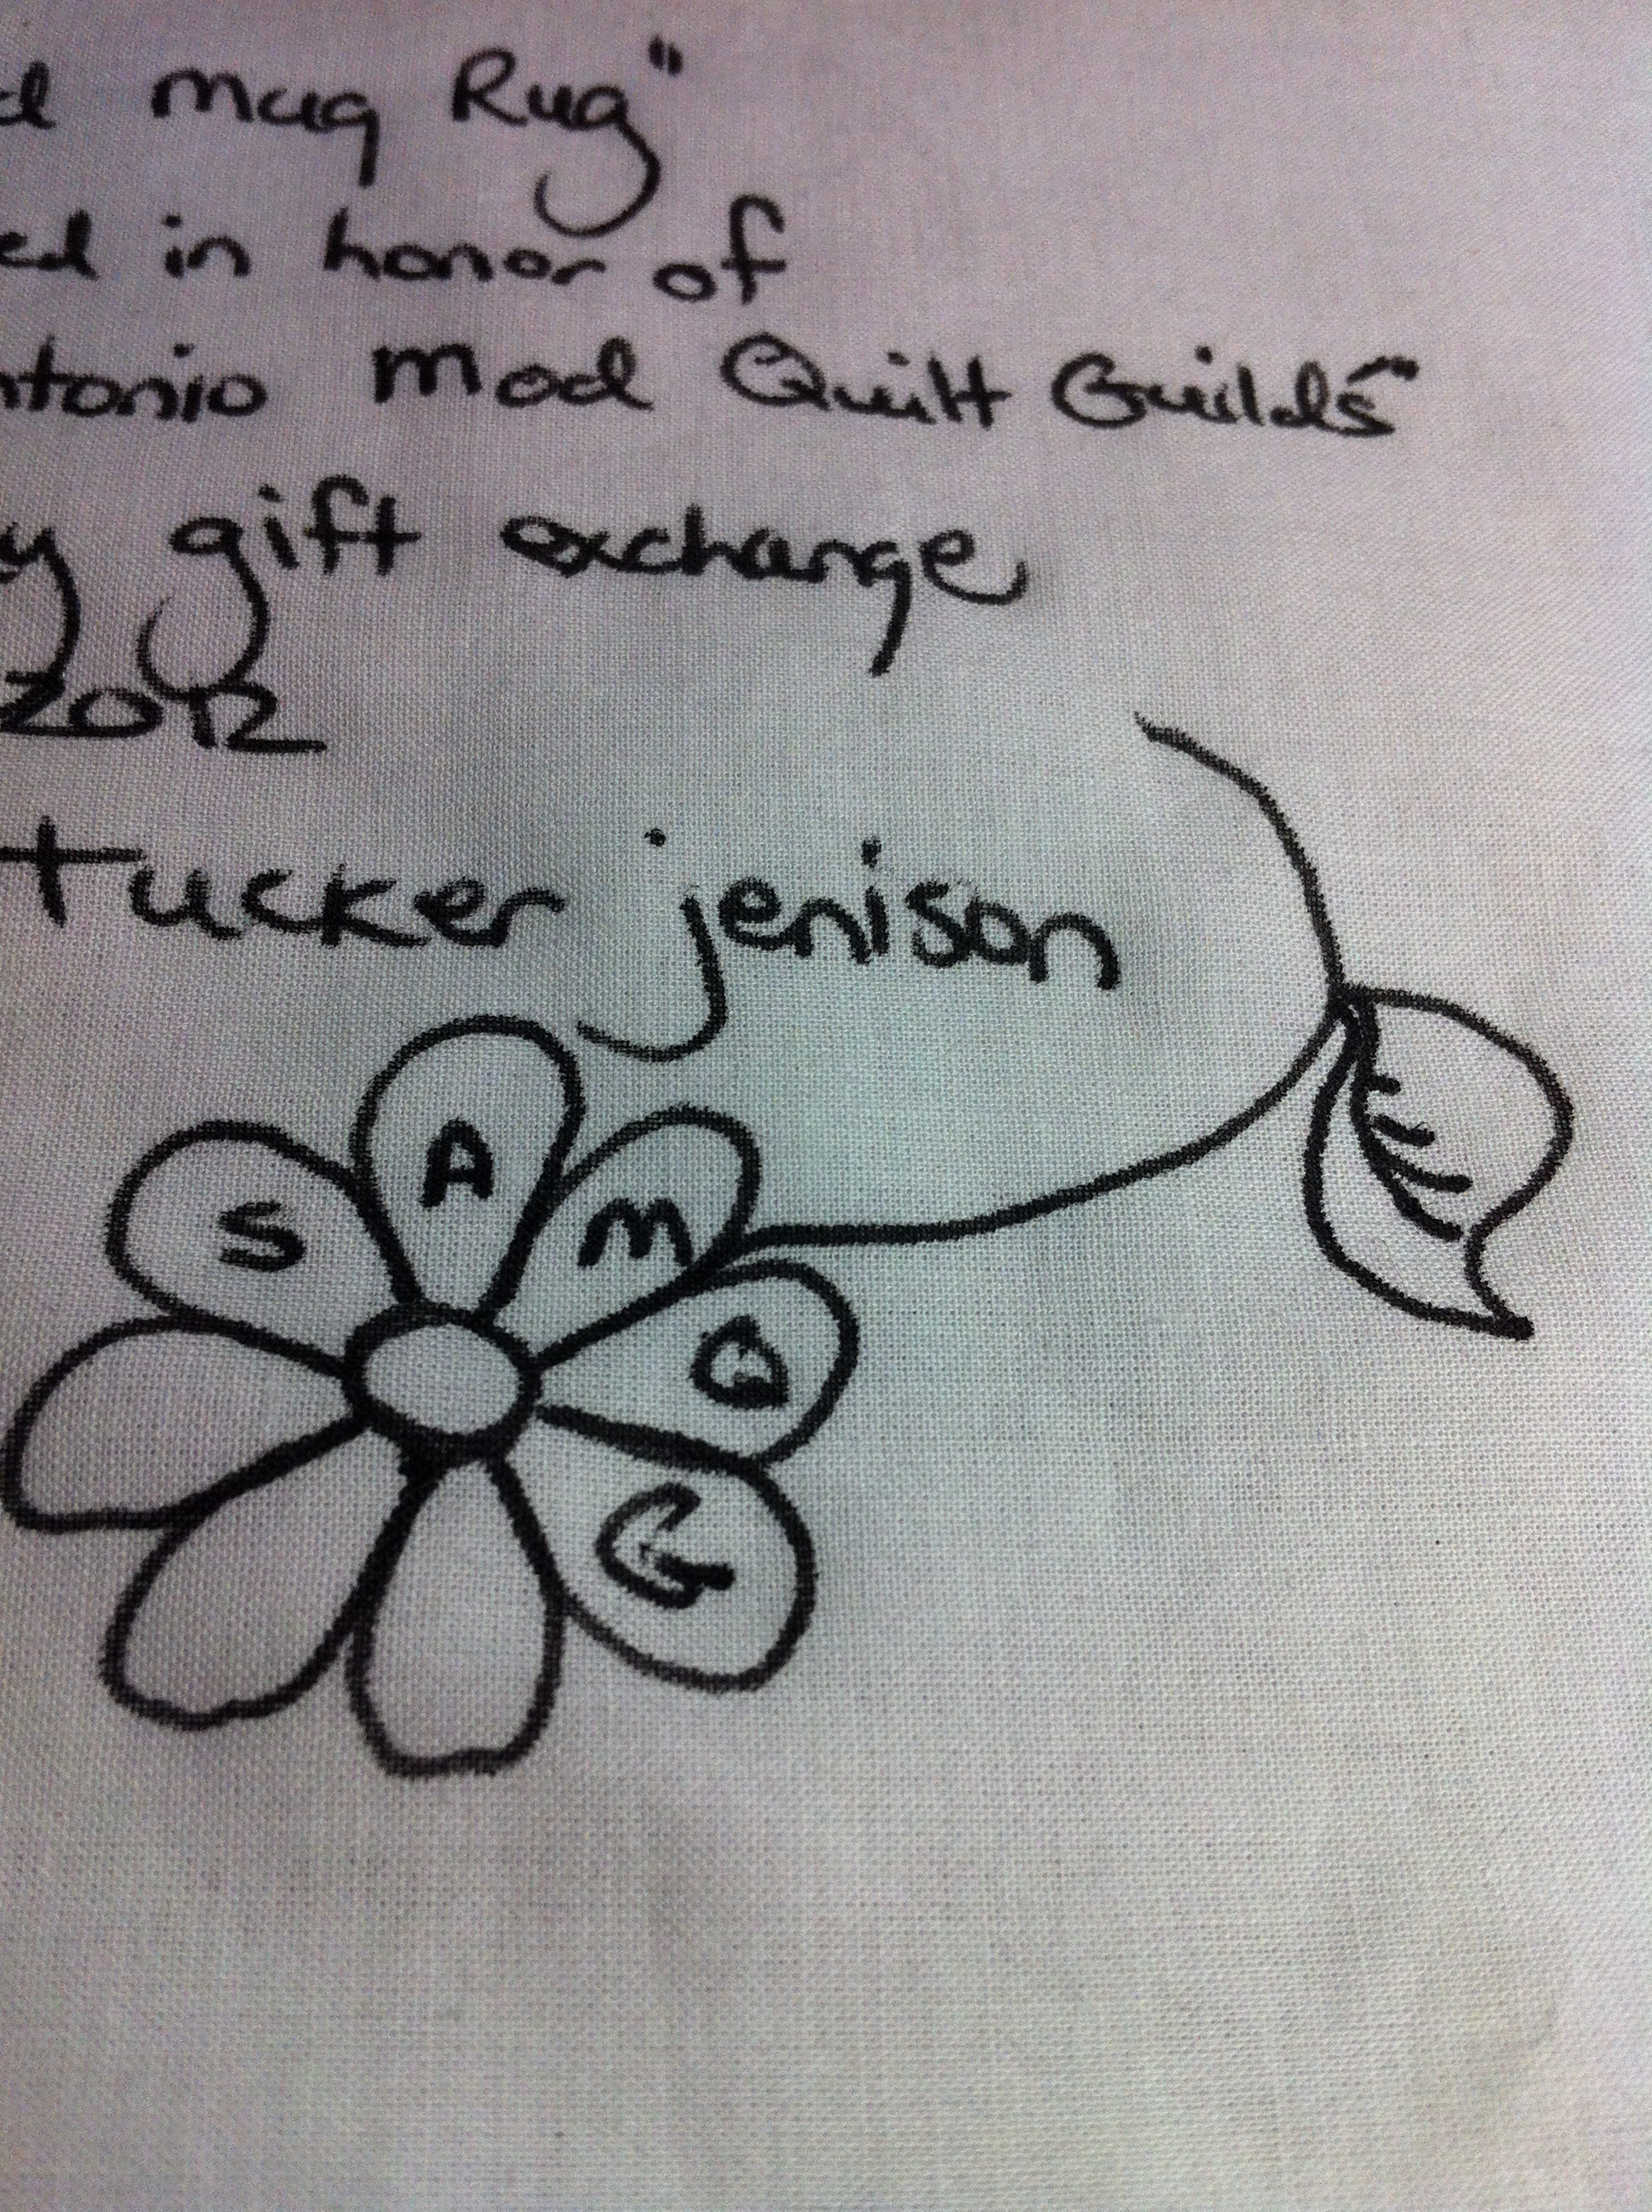 One distinct advantage of the hand-written
label is the ability to add special design elements to it!
I am including 5 examples of labels I have created for
quilts using a wide variety of ideas.
There is no end to the creative possibilities for quilt
labels!
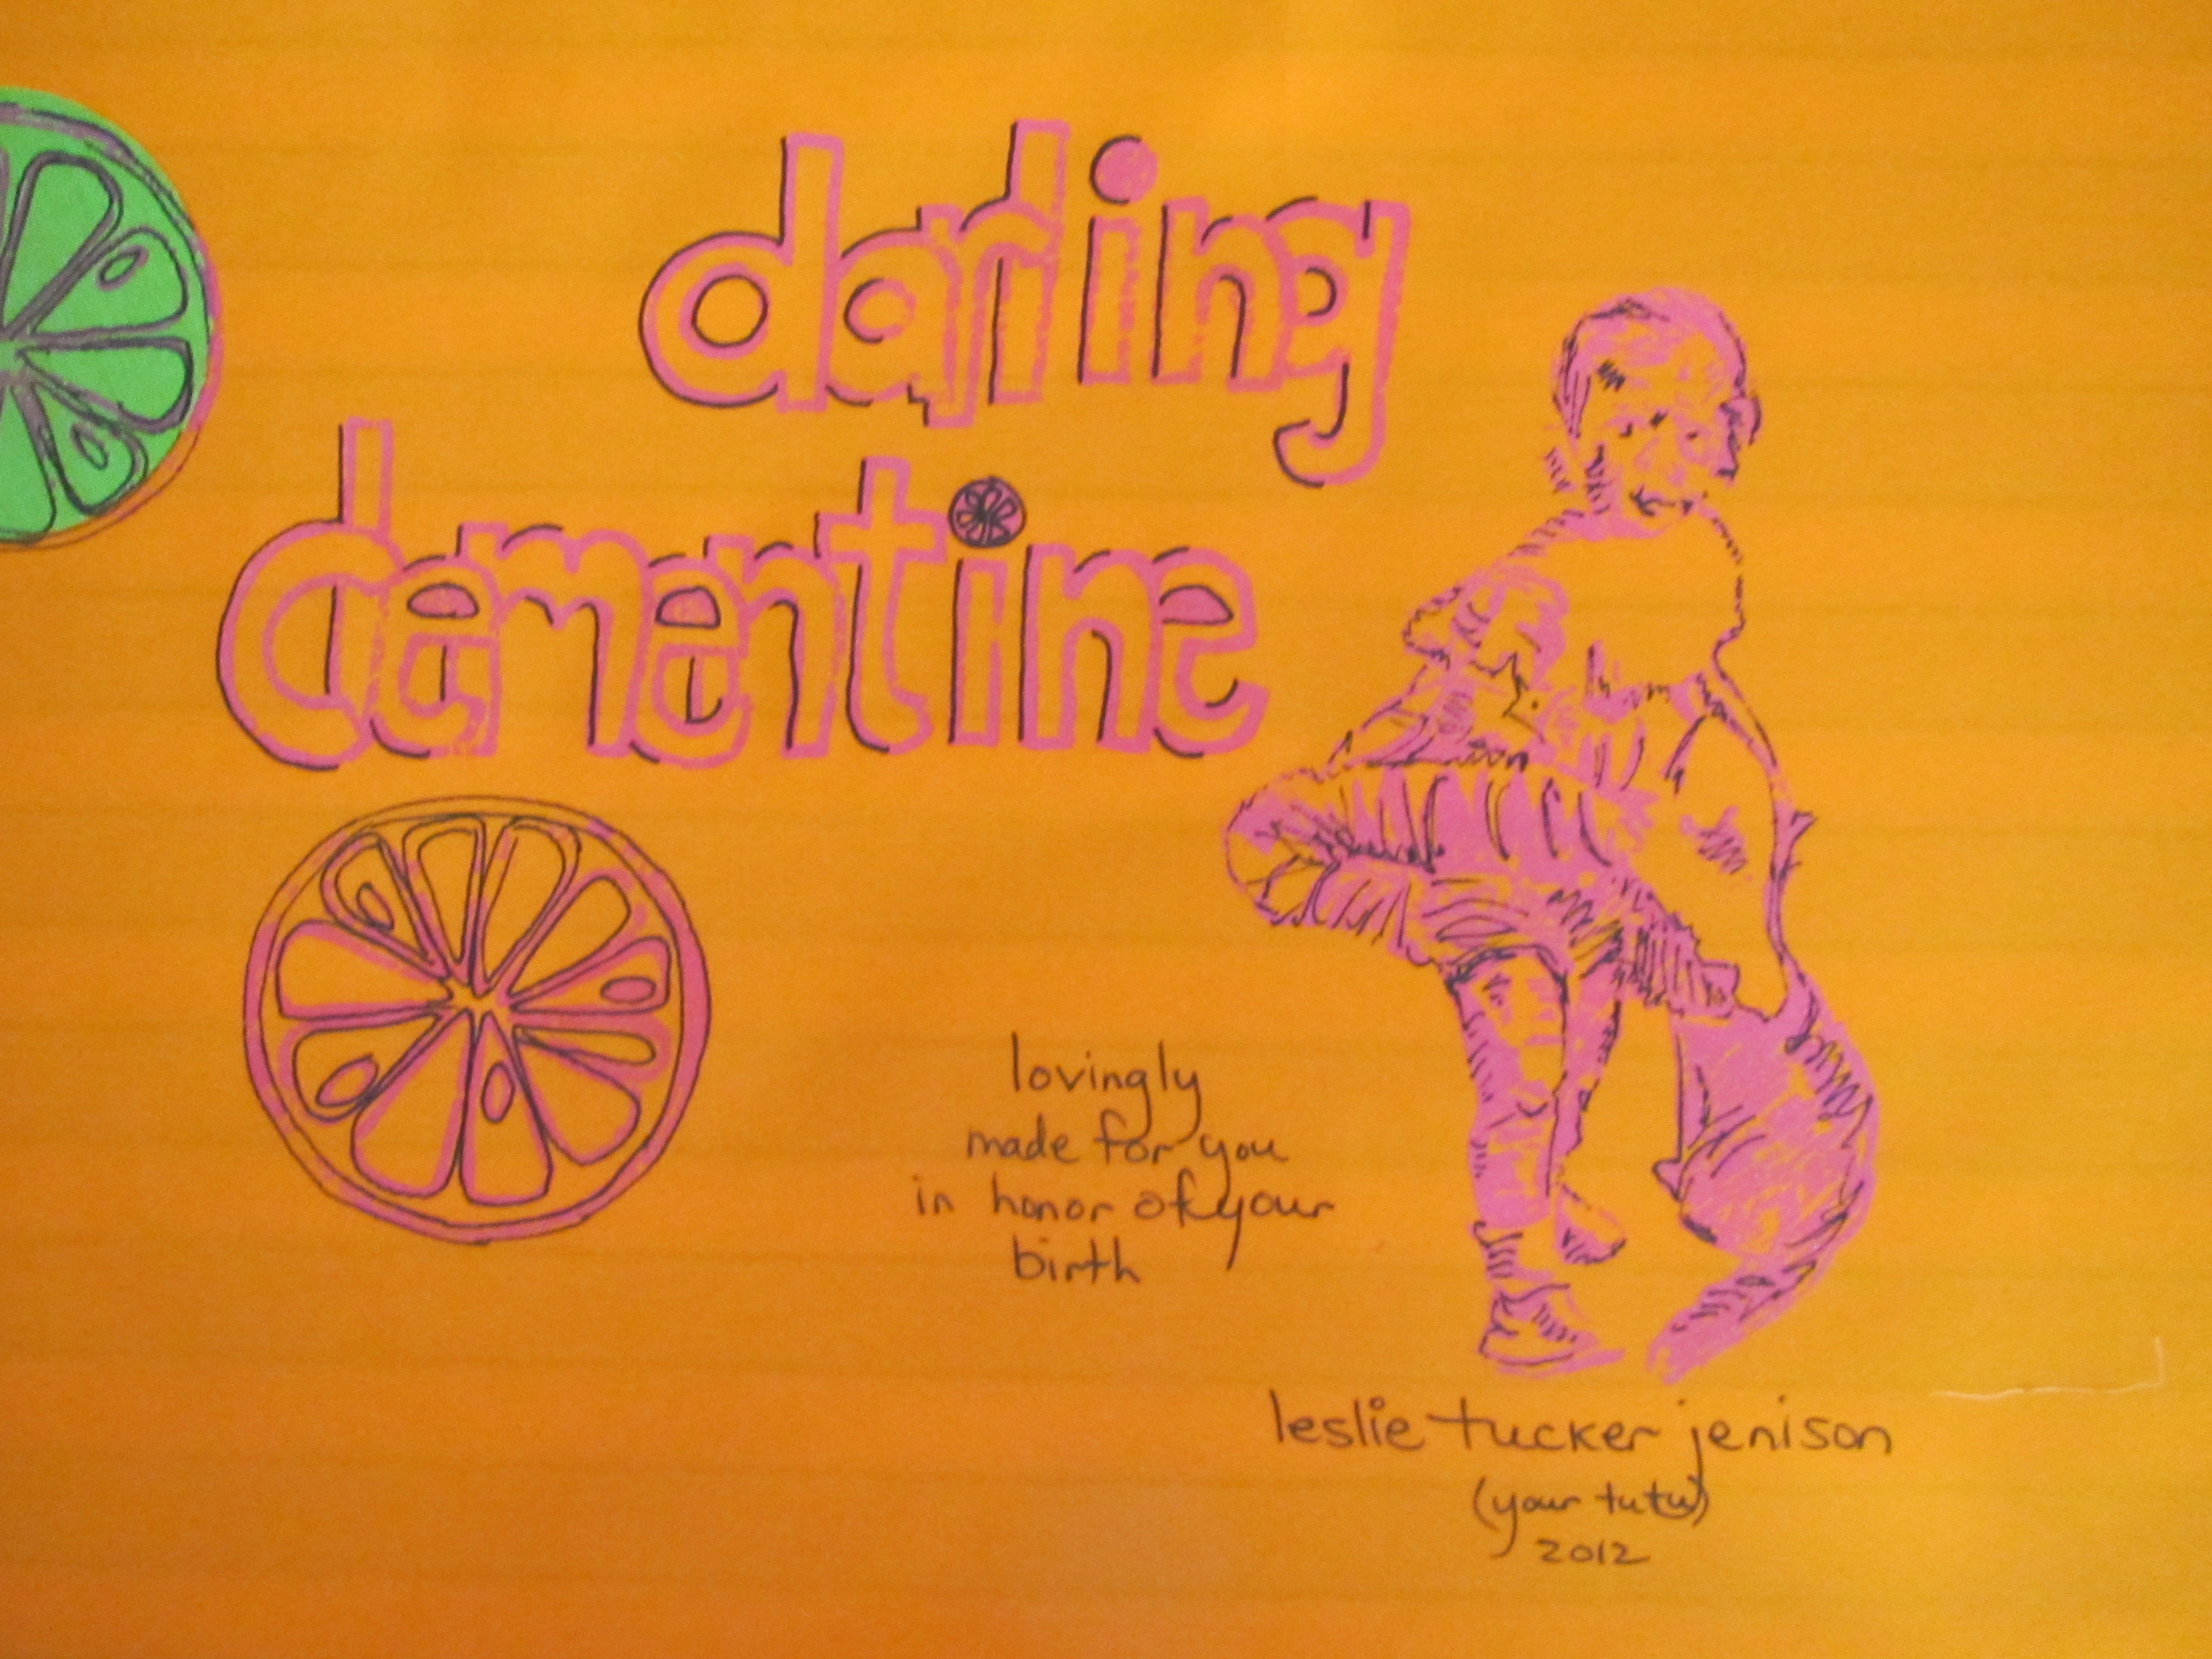
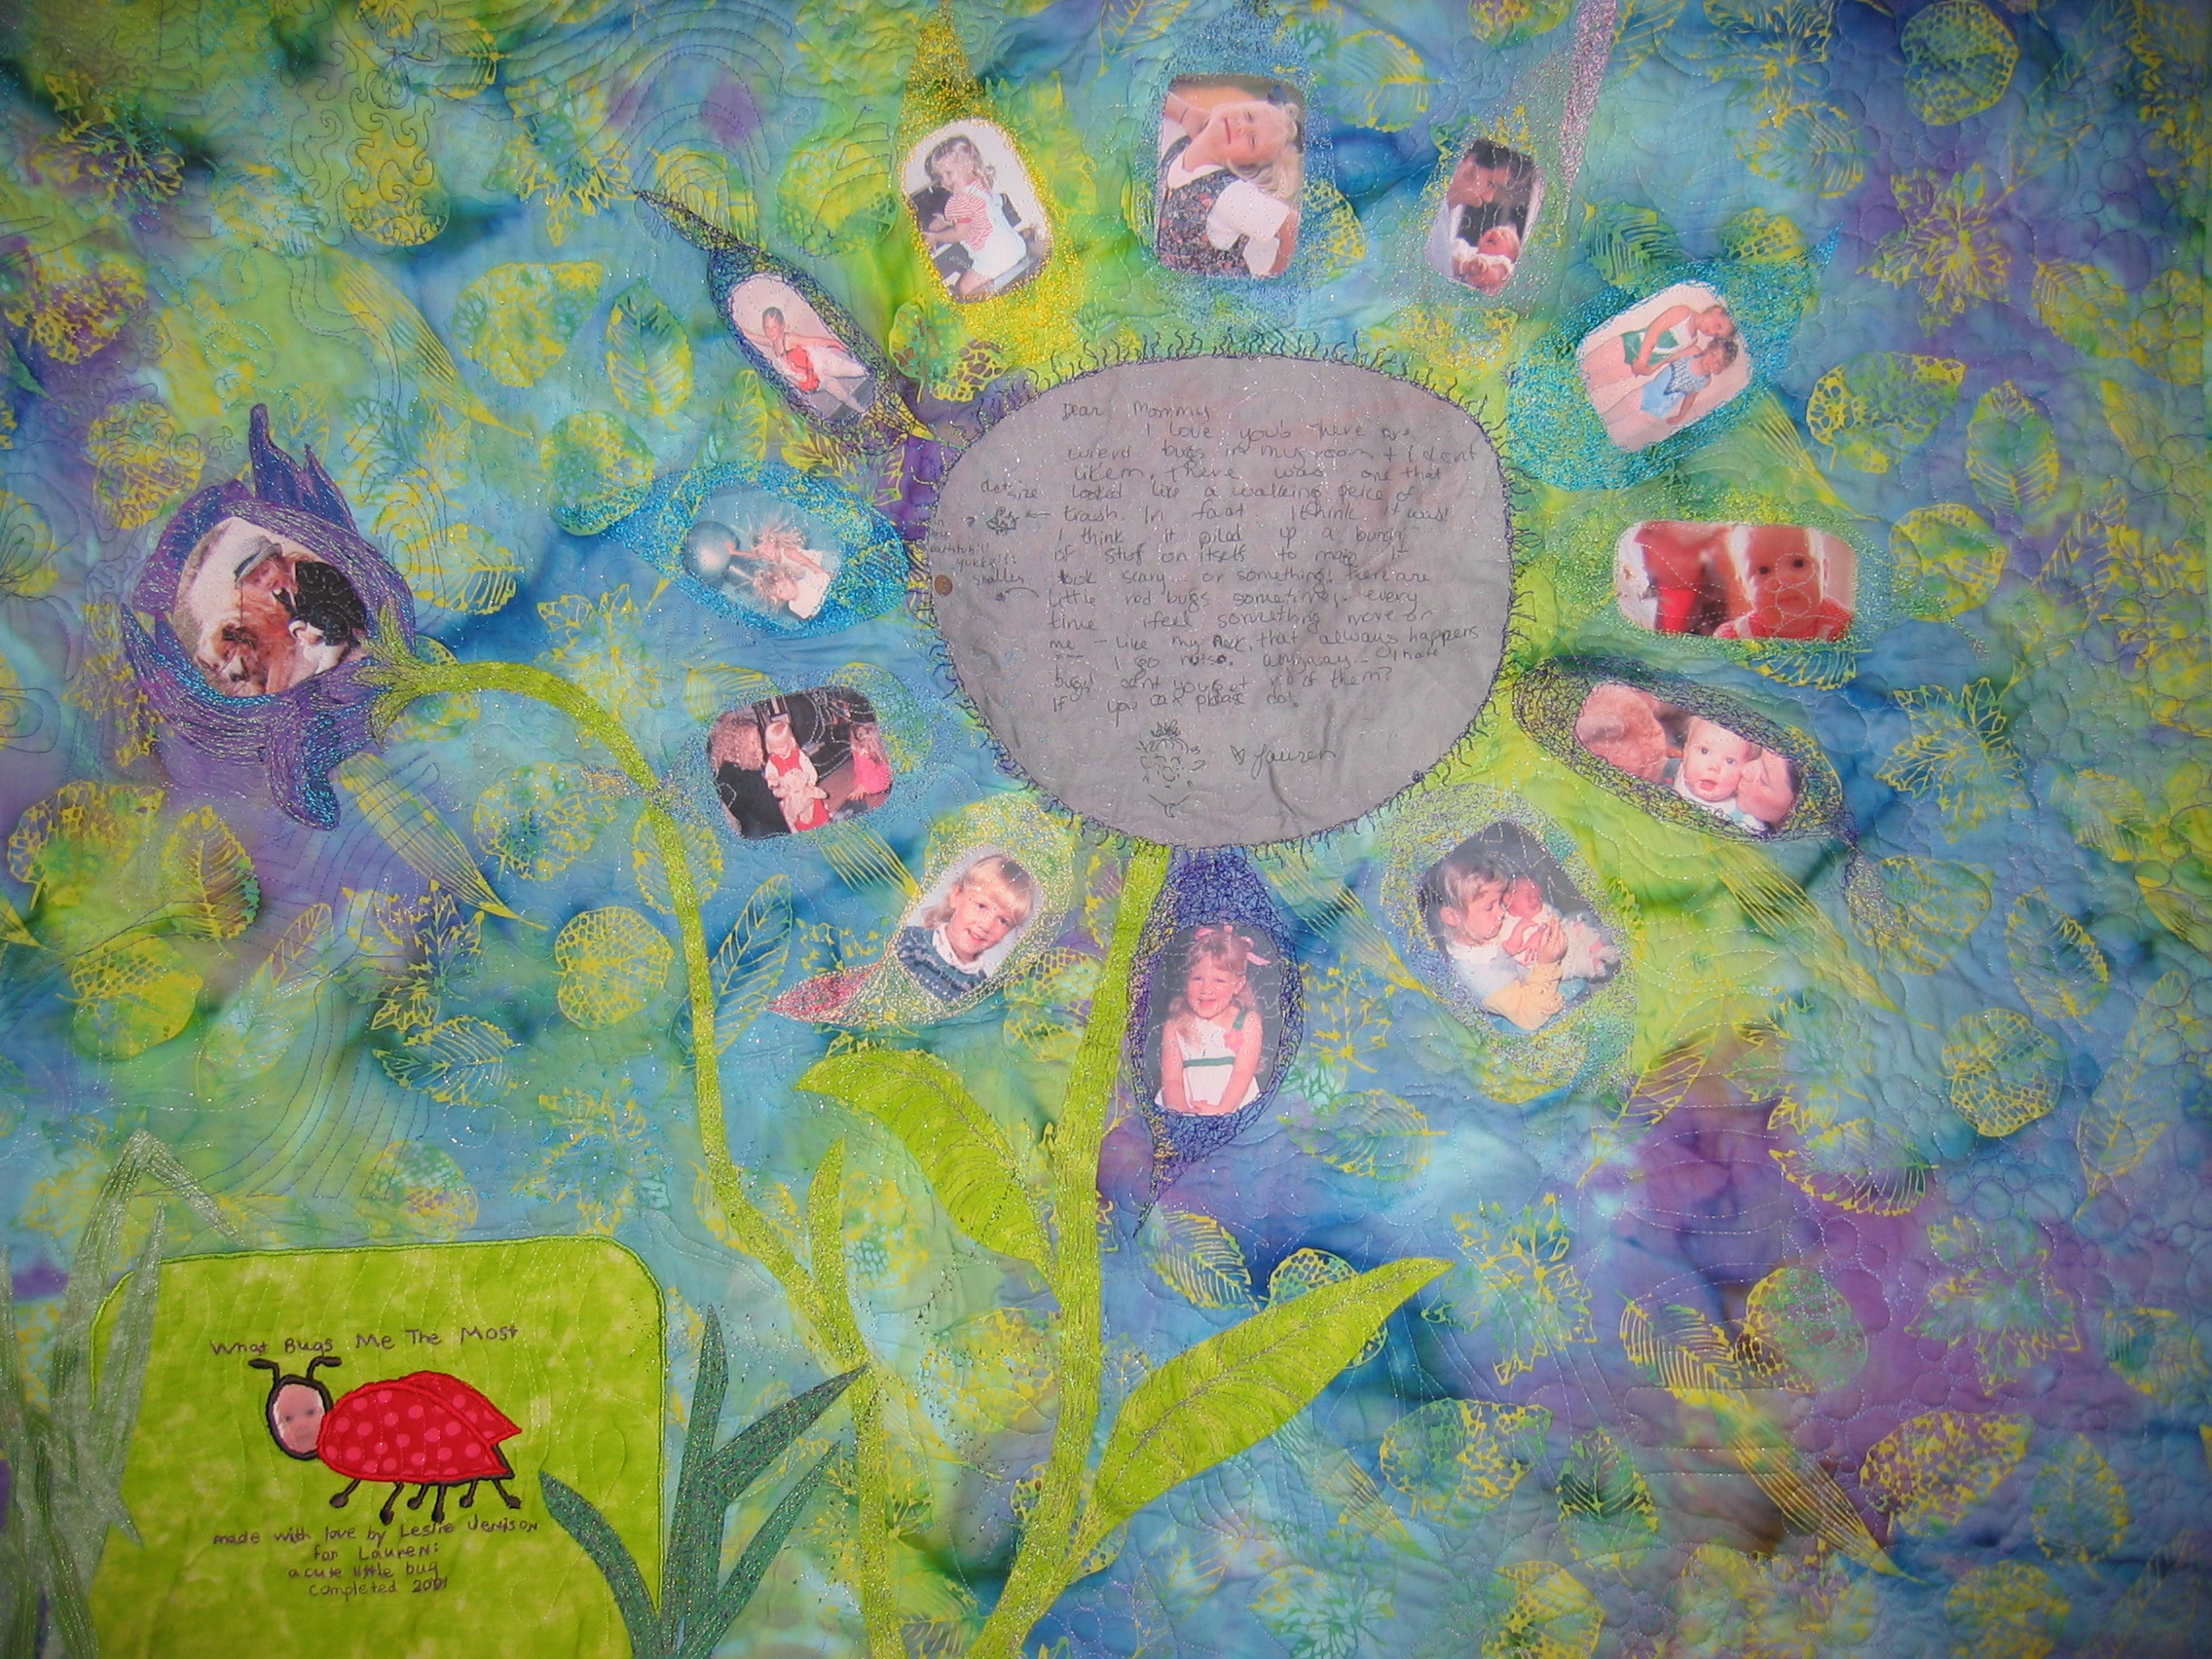 This label graces the back of a quilt created
for one of my daughters using a note she wrote to me as
well as old photos transferred to fabric.
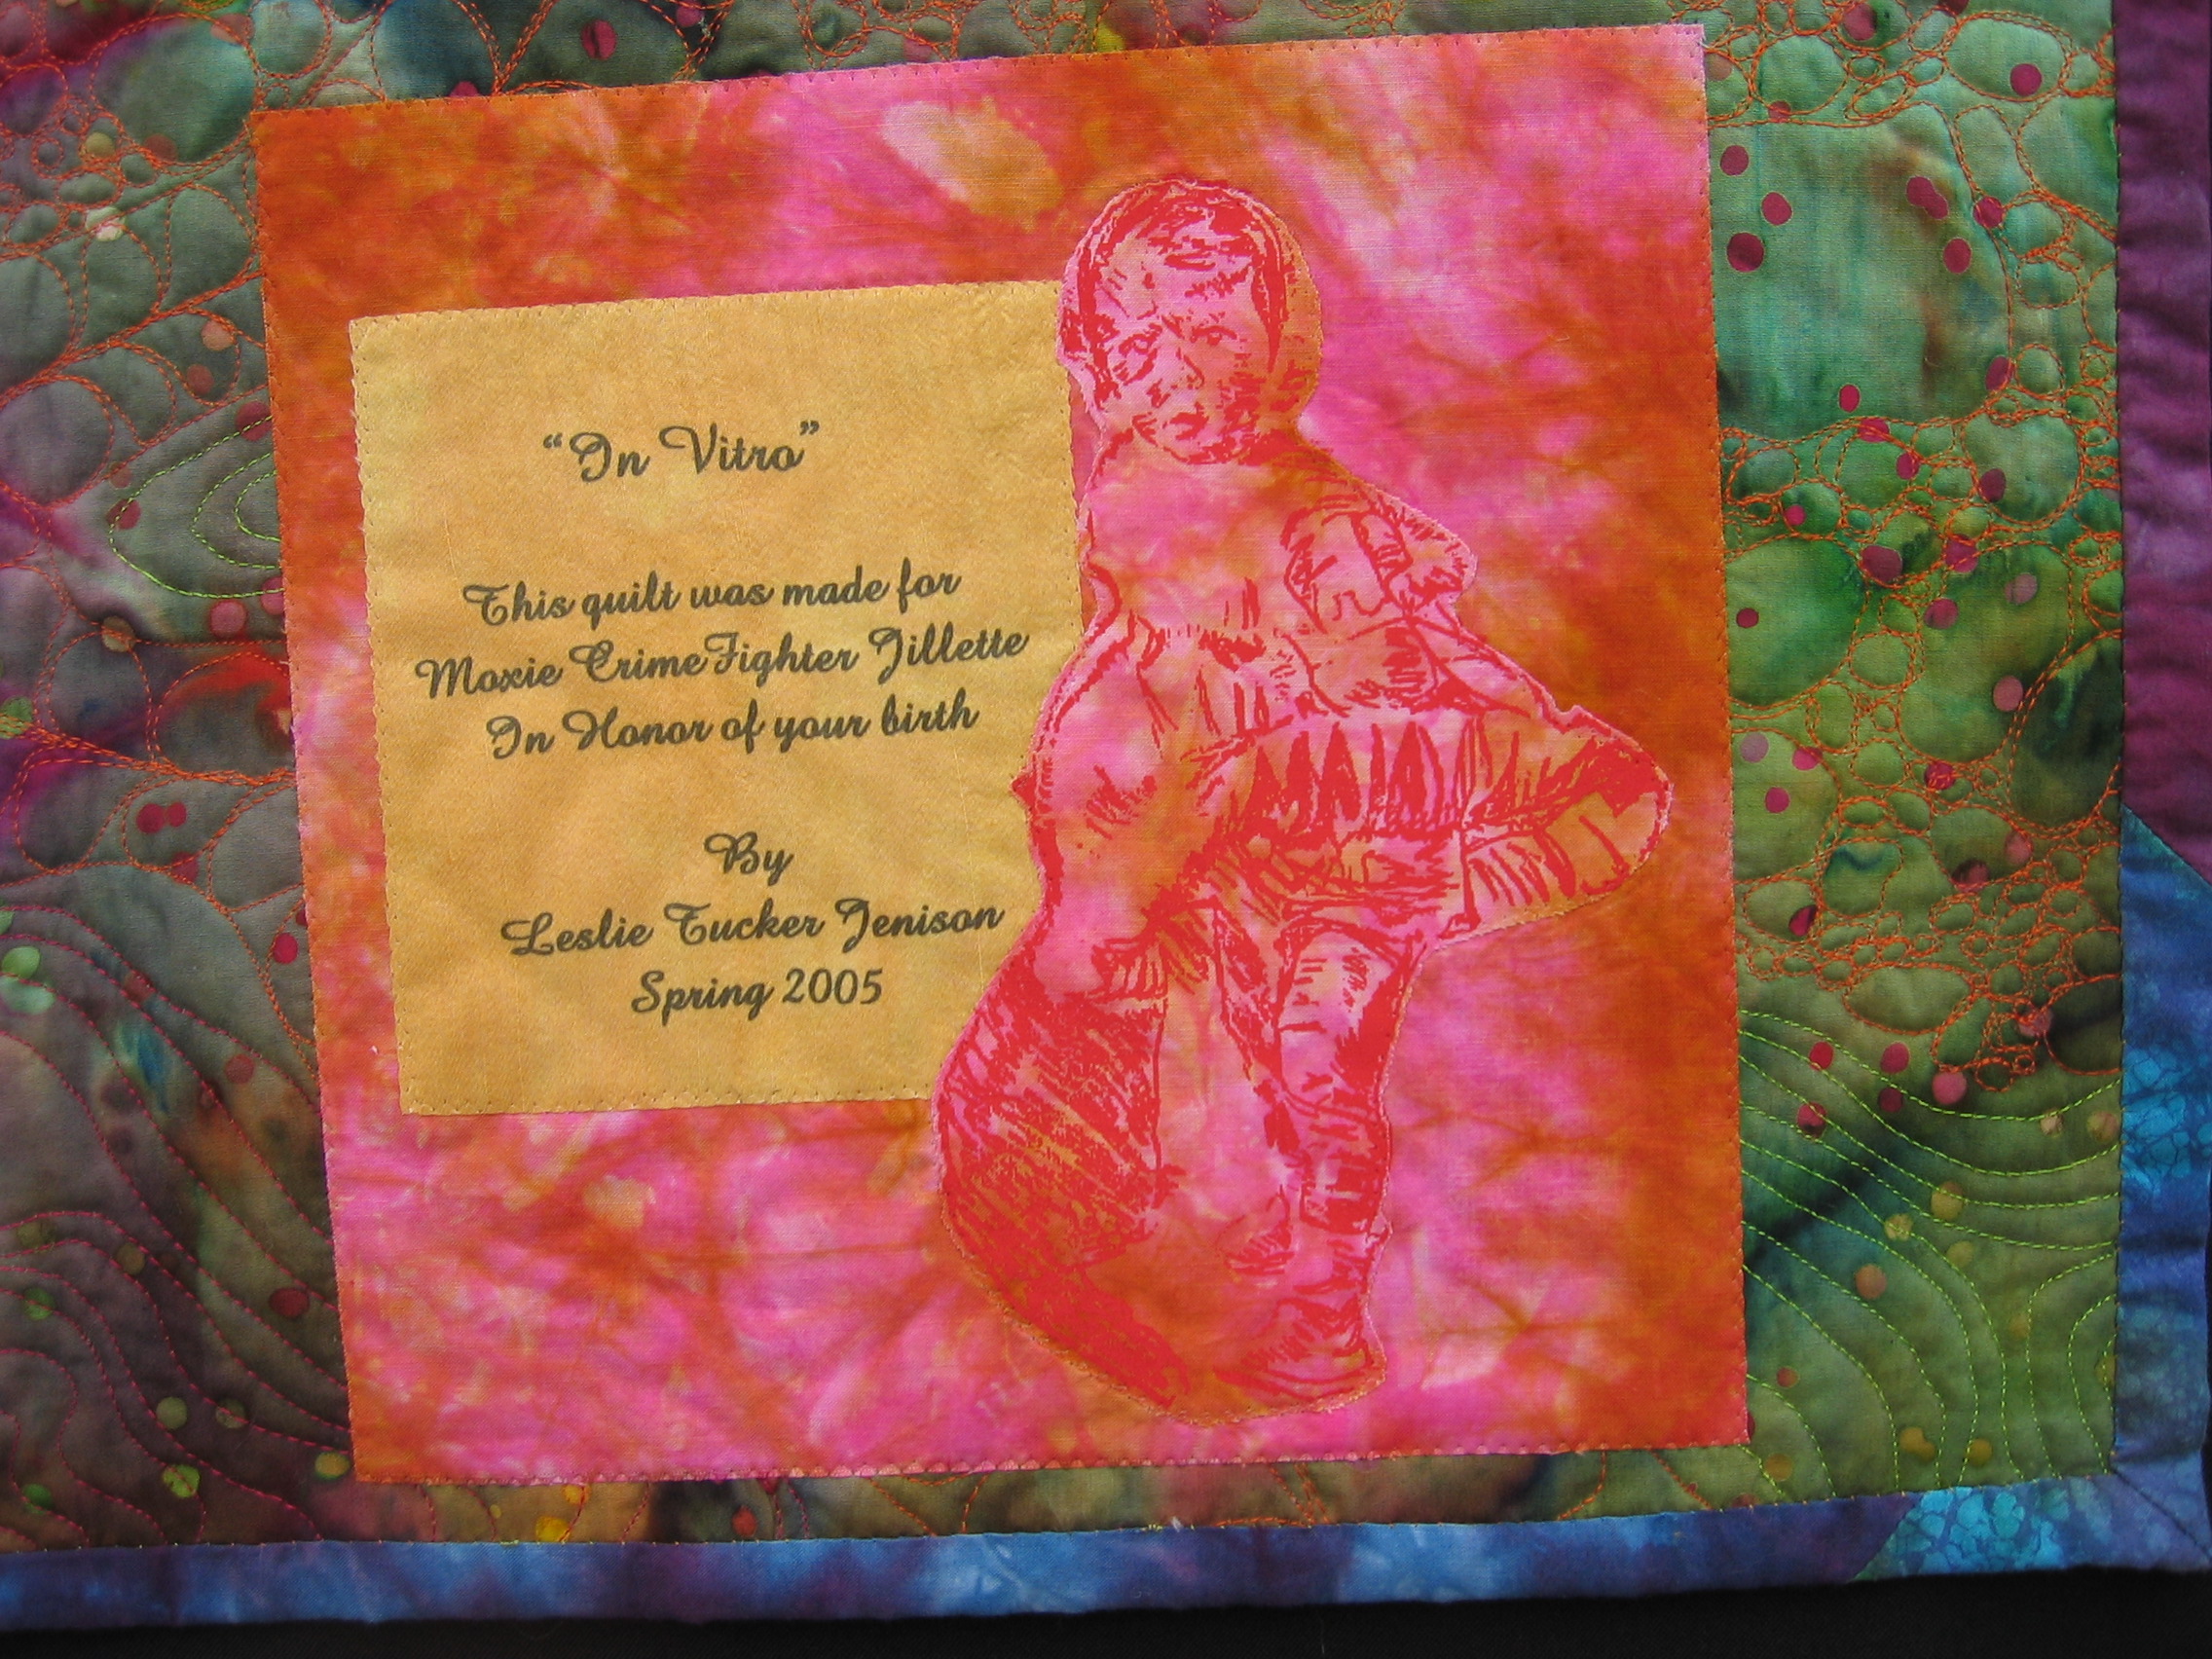
 This label has several thermofax images
printed onto the quilt back prior to quilting, as well as
hand-written information.
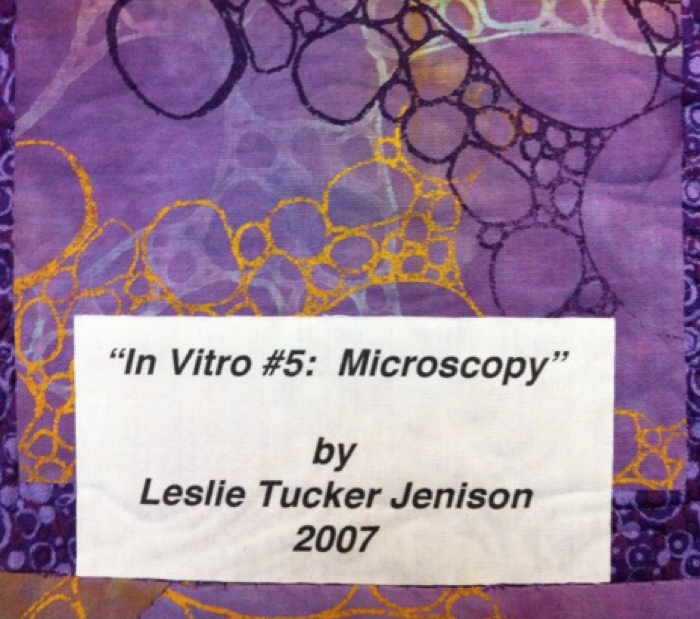
 This label incorporates some stitched
imagery that reflects a component of the quilt surface.
 Another example using screen-printing. The
label was created on a fabric “plaque” which was added
after the quilting was finished.
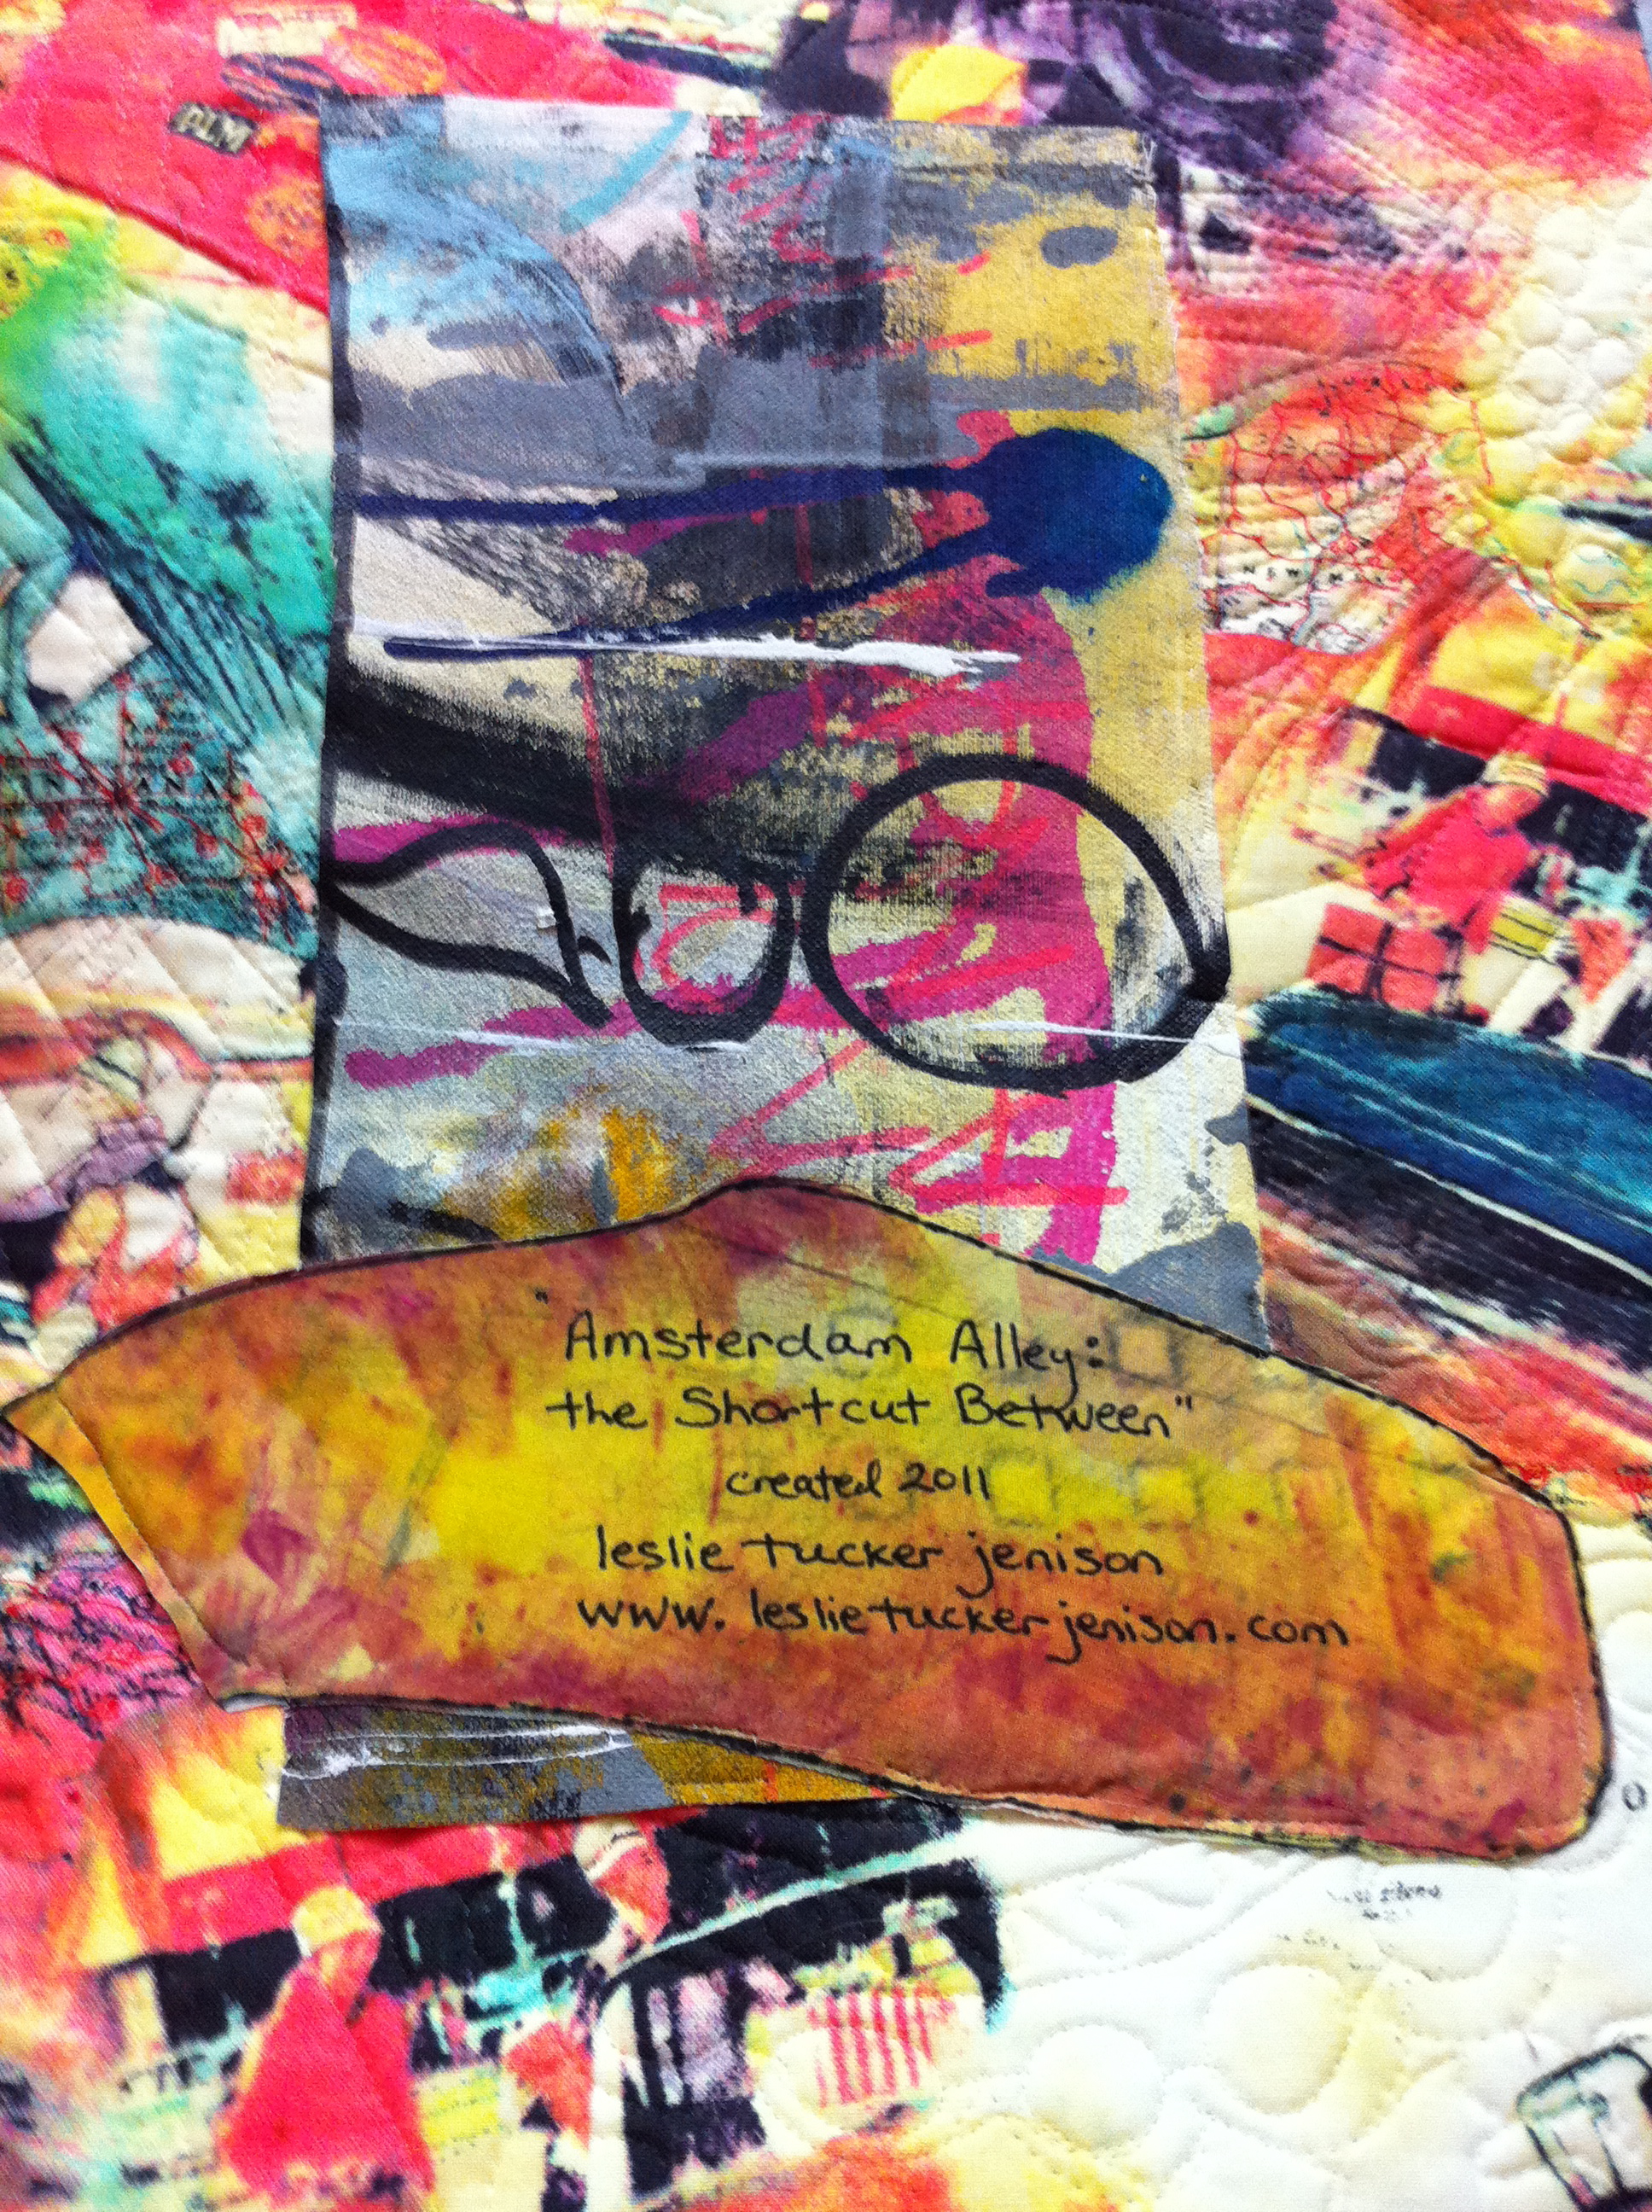 This label uses some “leftovers” from the
quilt surface which were fused & stitched in place after
the quilting.
Finally, I would like to add that, in cases of quilts that
have sleeves and are destined for exhibitions, I add yet
another label that includes contact information: name,
address, contact number, email address, and website.
This may be removed at a later time, but while the quilt
is traveling it assures yet another layer of information.
Leslie Tucker Jenison is a quilt maker & mixed-media artist.
Since moving to San Antonio, Texas, she has incorporated
hand-dyed cloth and personal imagery into her work.
Leslie’s award-winning quilts have been juried into national
and international venues, including a first-place award in the
digital category in Quilts: A World of Beauty, 2012. She
has also participated in creating award-winning group quilts.
She serves on the board of the Quilt Alliance, is a
professional member of the Studio Art Quilt Associates,
Surface Design Association, Art Cloth Network, Texas
Federation of Fiber Artists. Leslie is one-half of Dinner
At Eight Artists, curating exhibitions and workshops with
partner-in-crime Jamie Fingal.
Leslie loves hanging out with her husband and three
daughters, and is also an avid reader, gardener, cook, and a
pilot. Life is good!
Leslie may be contacted at leslie.jenison@gmail.com, or visit
her at
http://leslietuckerjenison.com
and
I am looking for a dvd of quilt labels
Hi Mitzi, the Alliance sells quilt labeling kits, but we don’t offer a DVD of labels. Anyone have a suggestion?