by Emma Parker | Oct 18, 2023 | BOM
Birthday Block of the Month #7: Bonnie Hunter
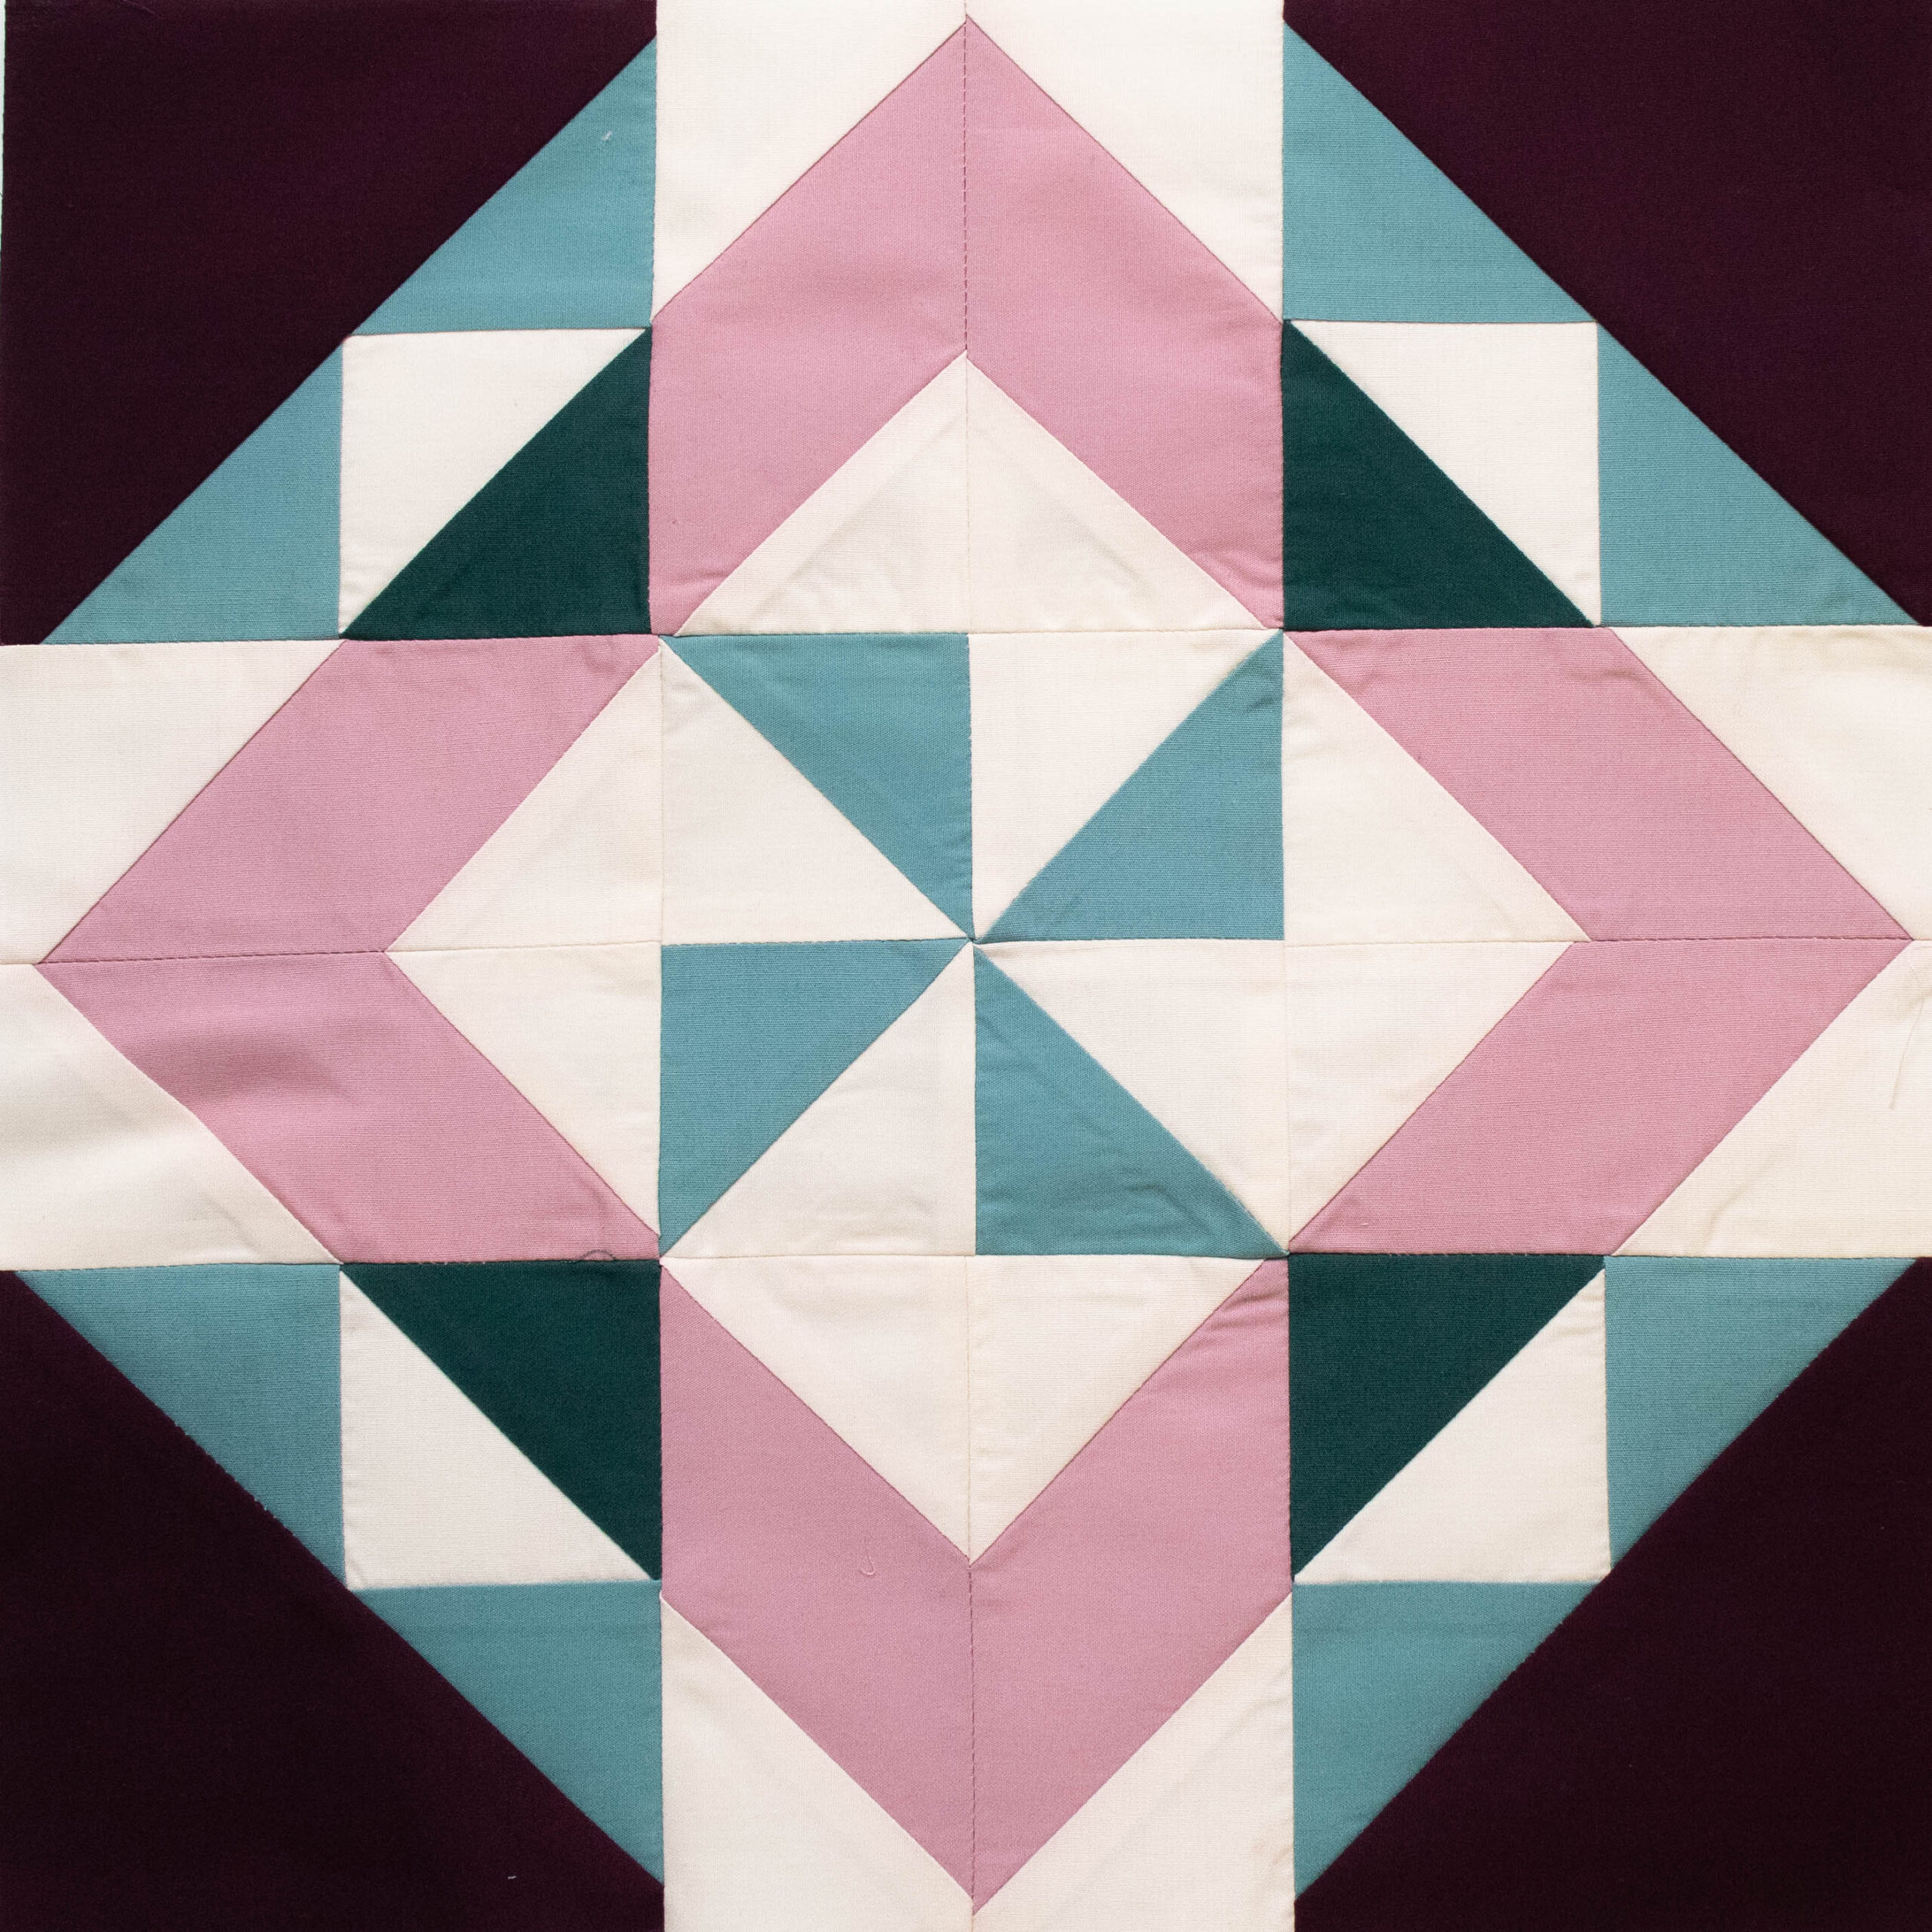
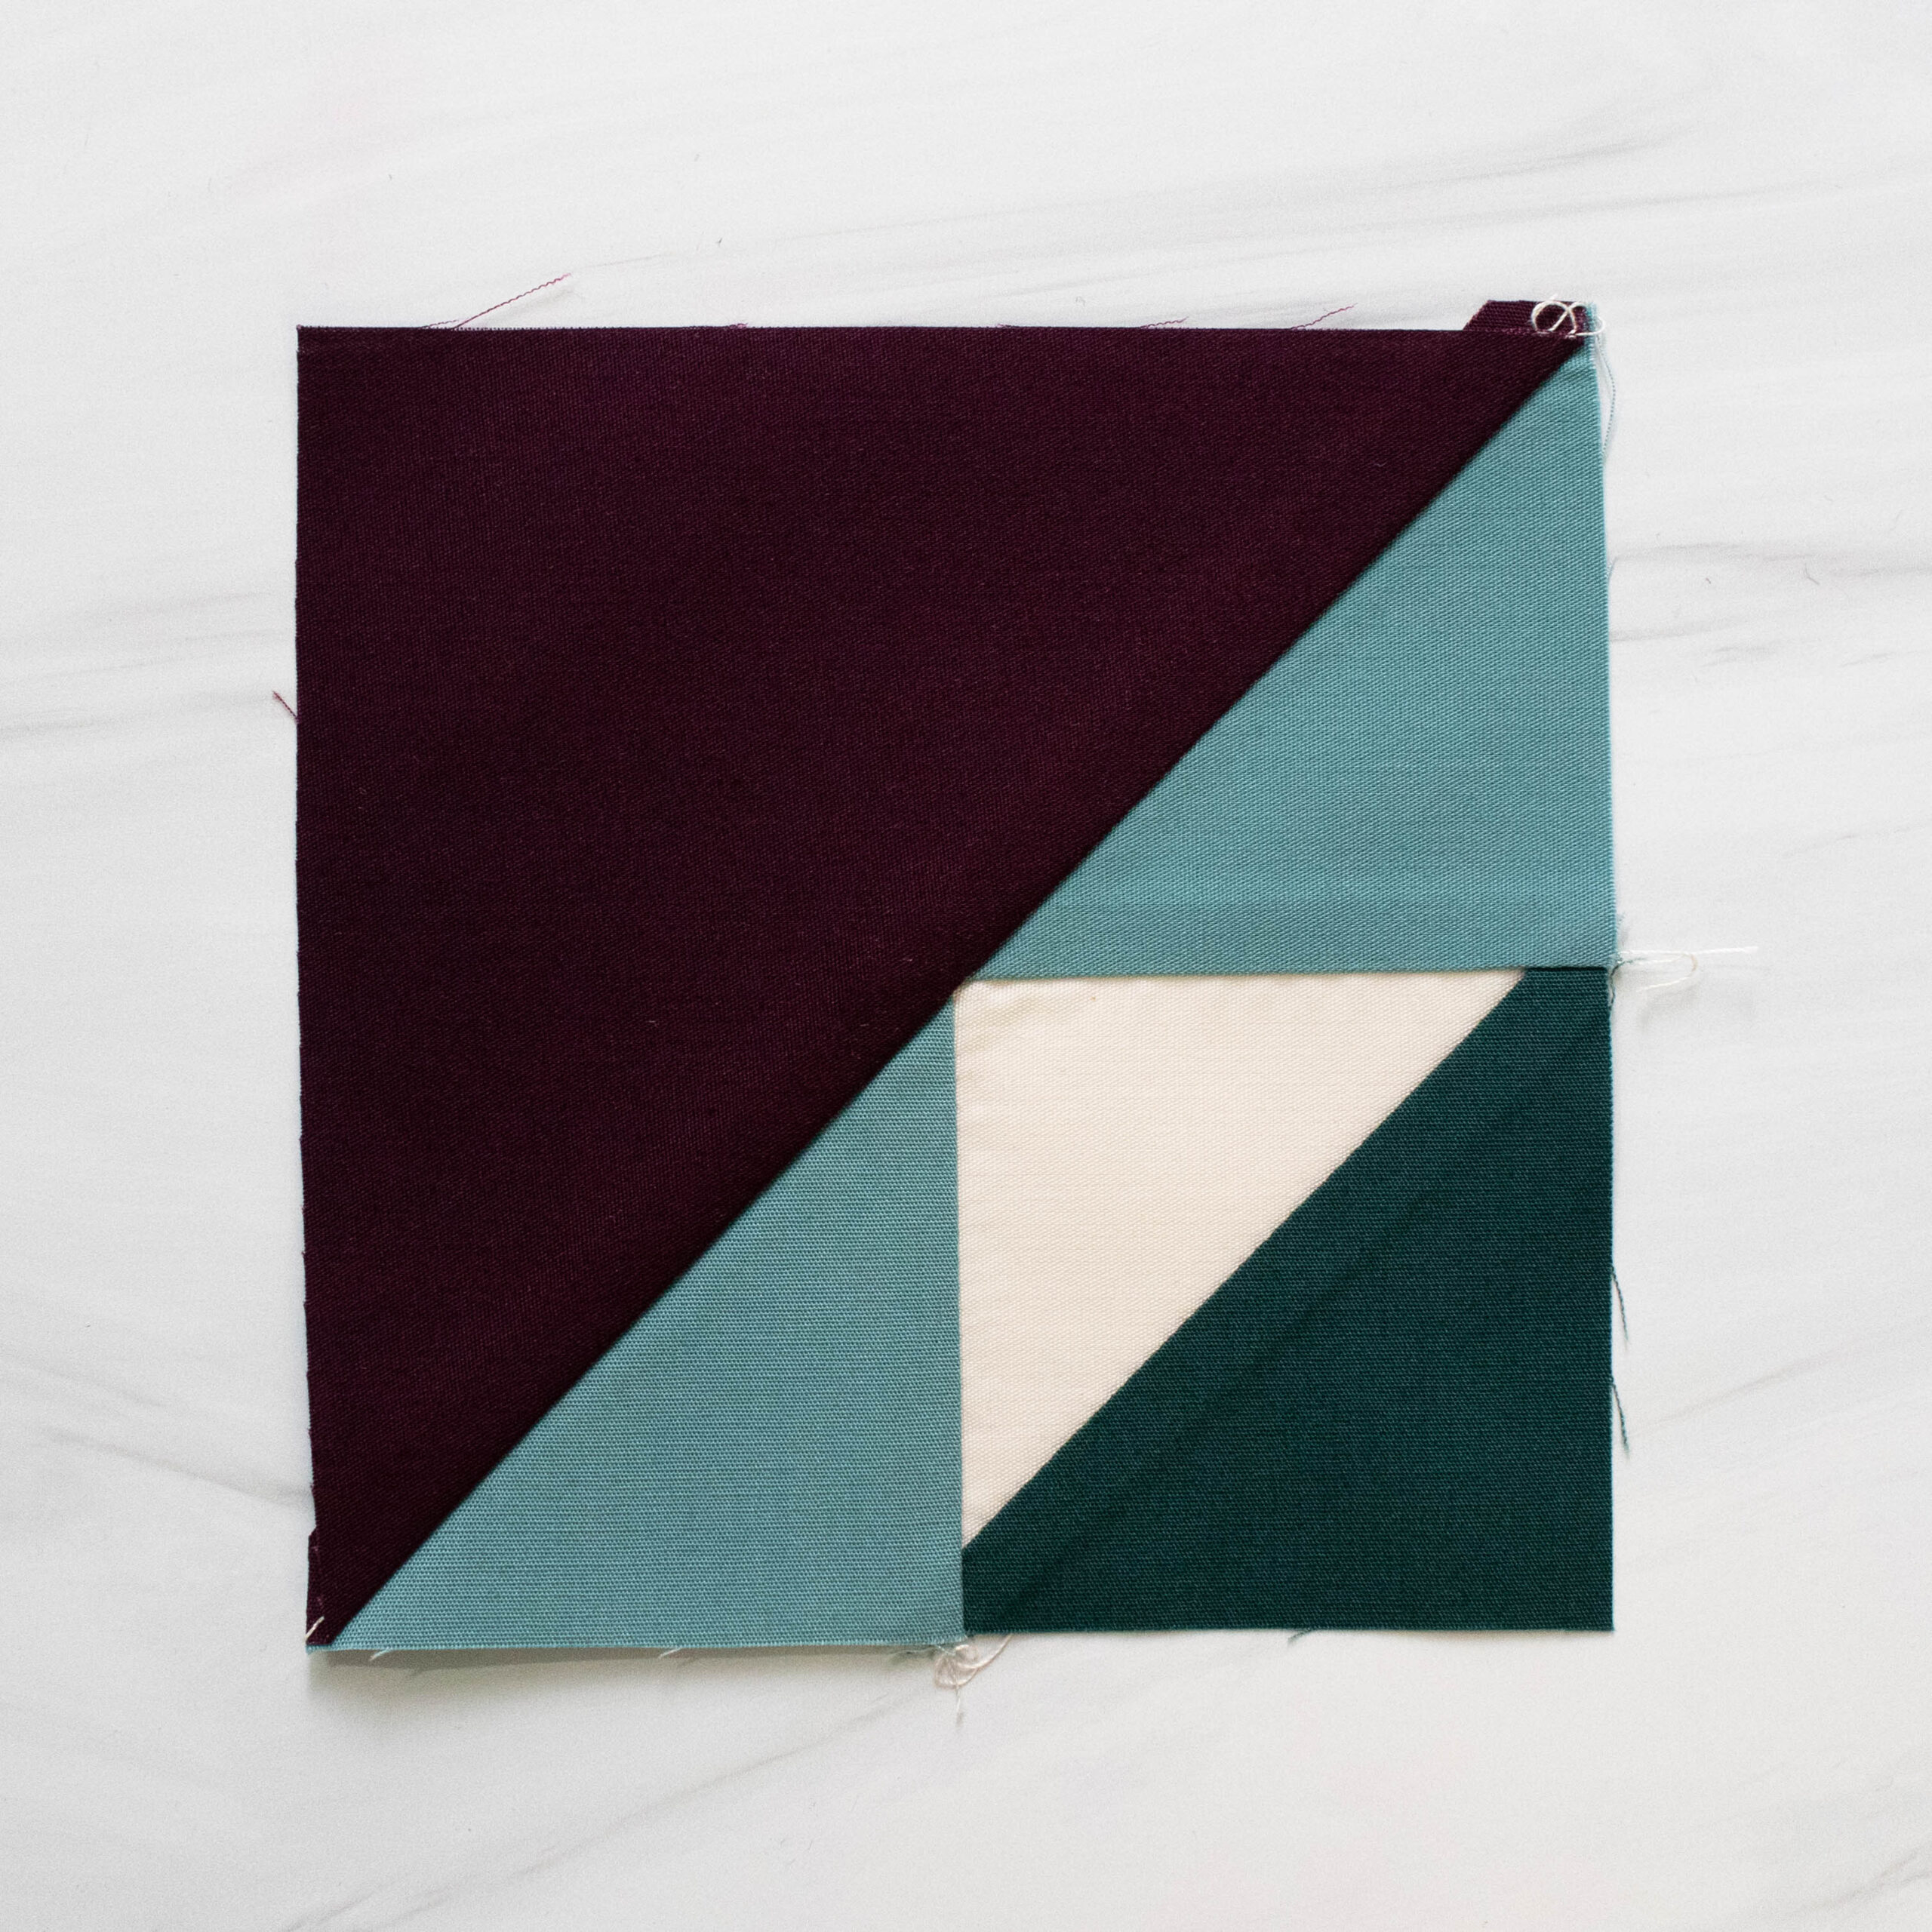
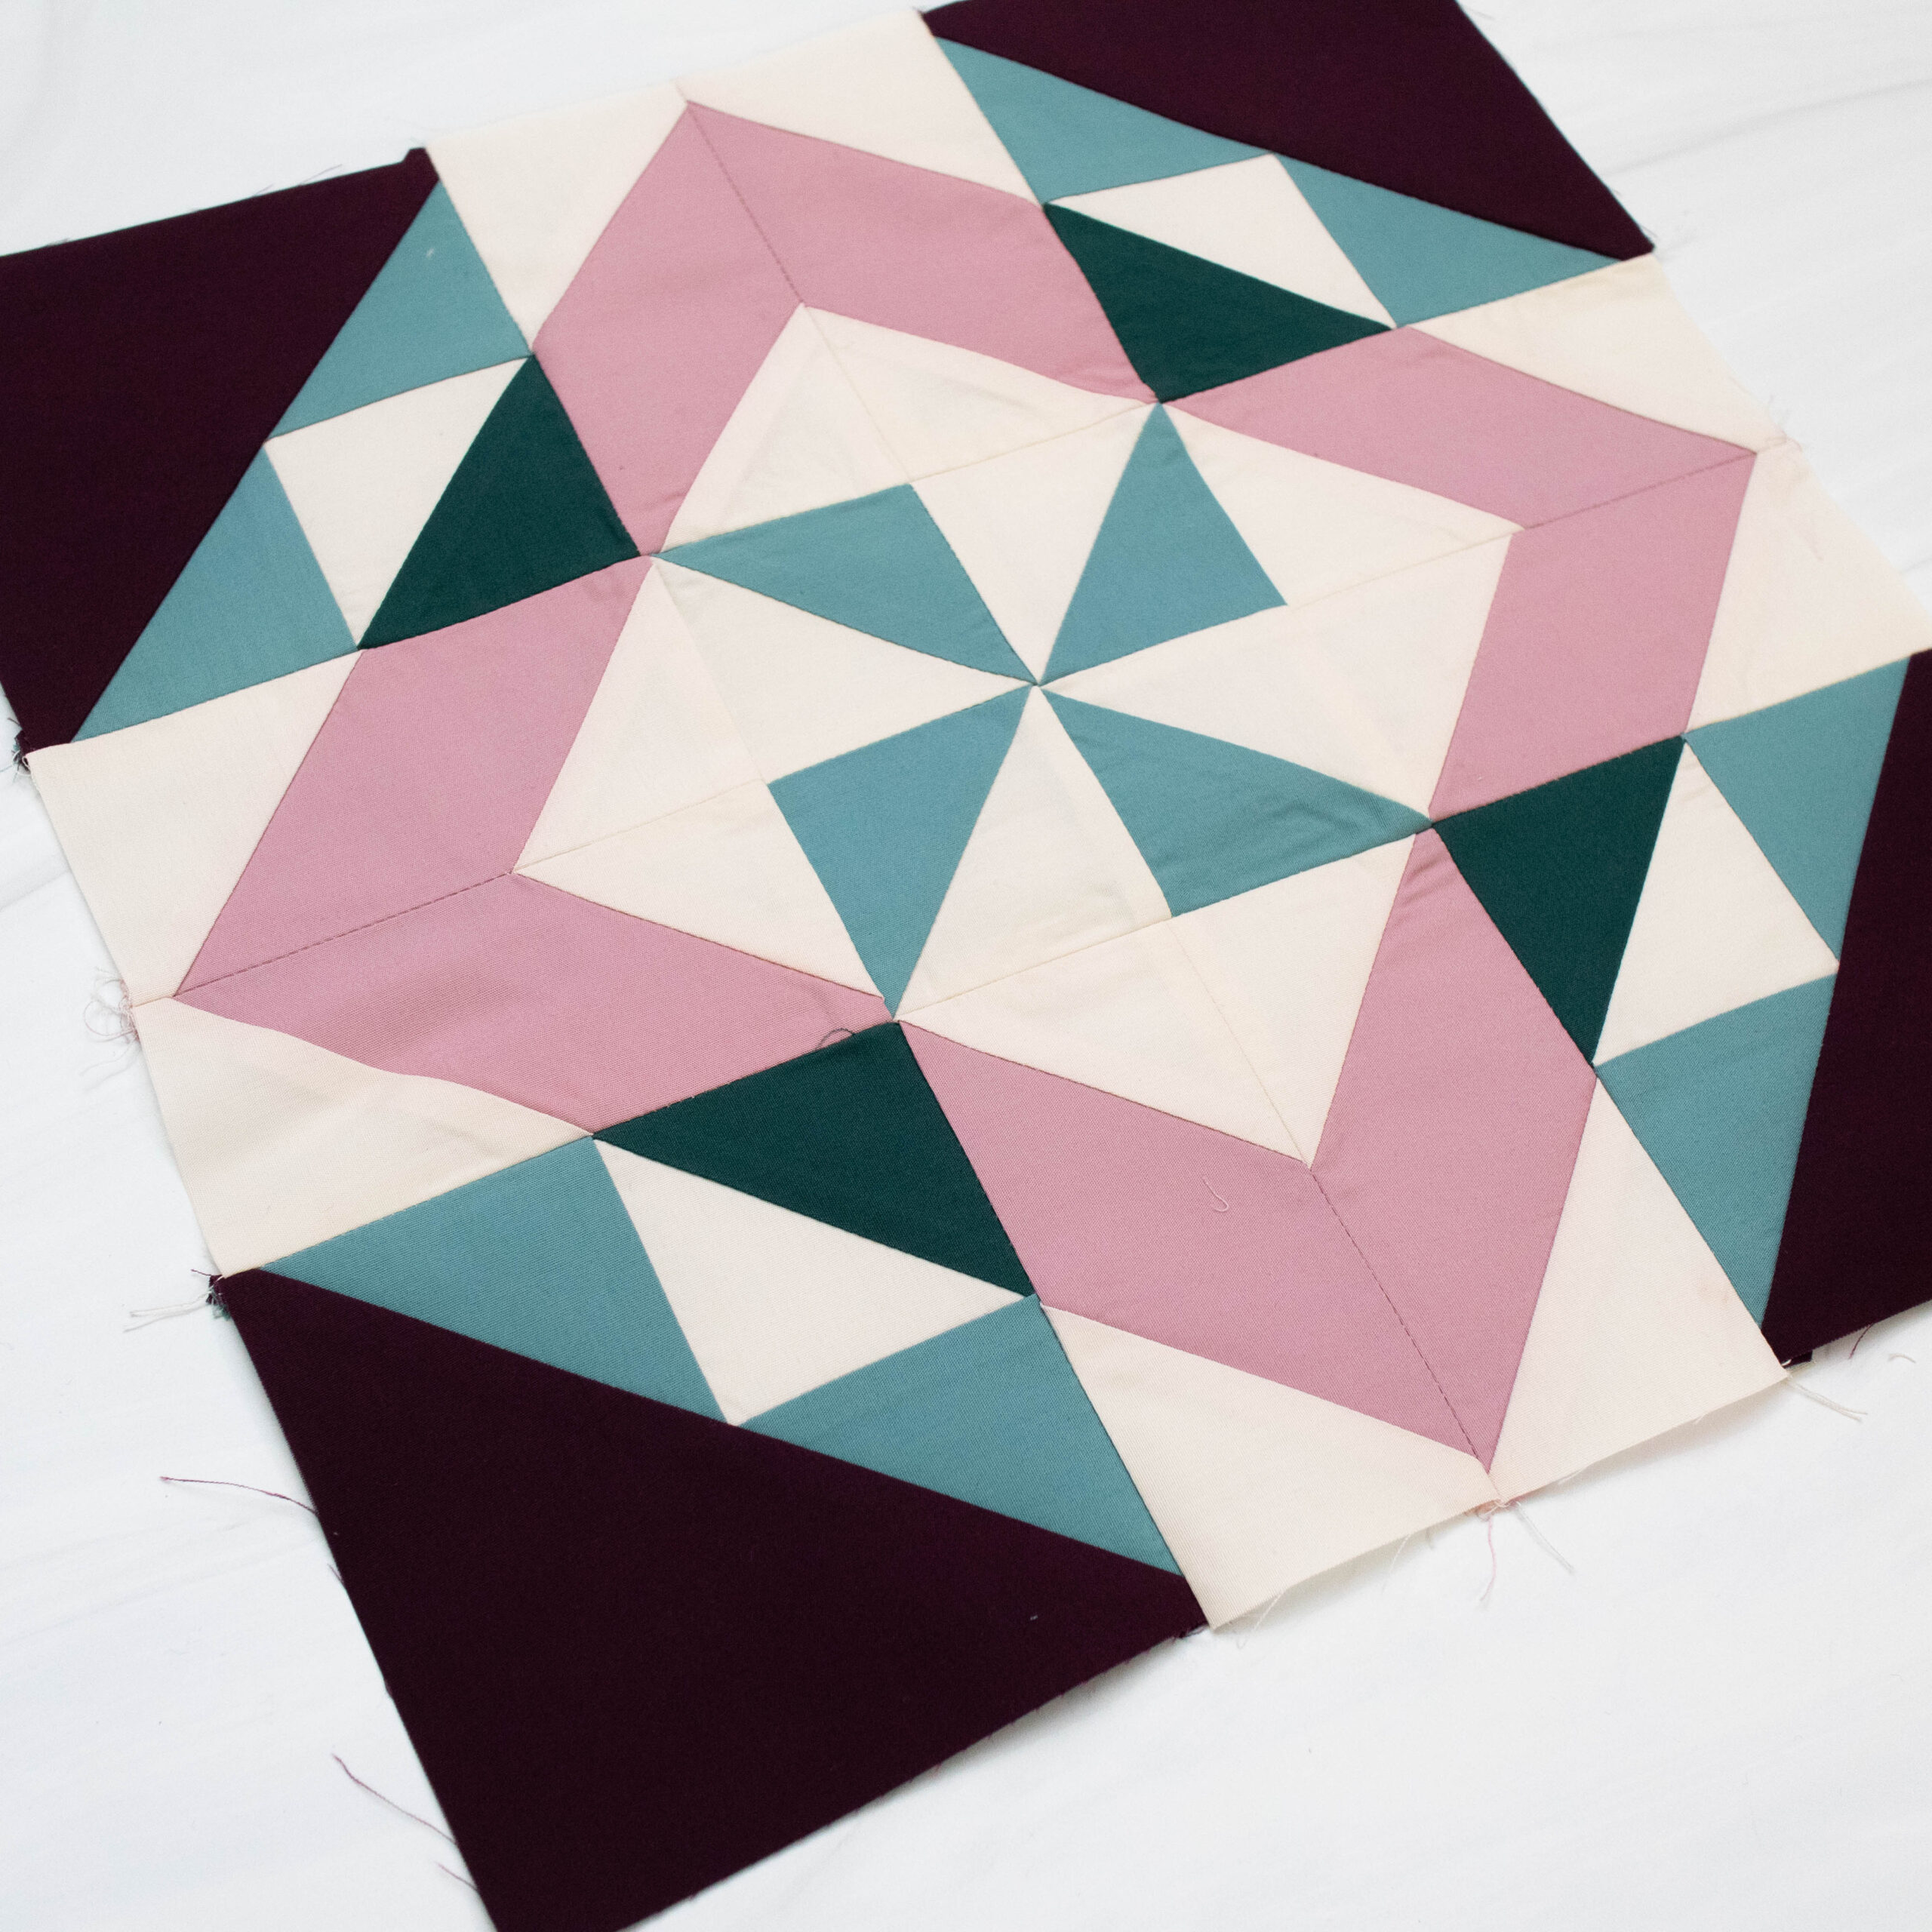
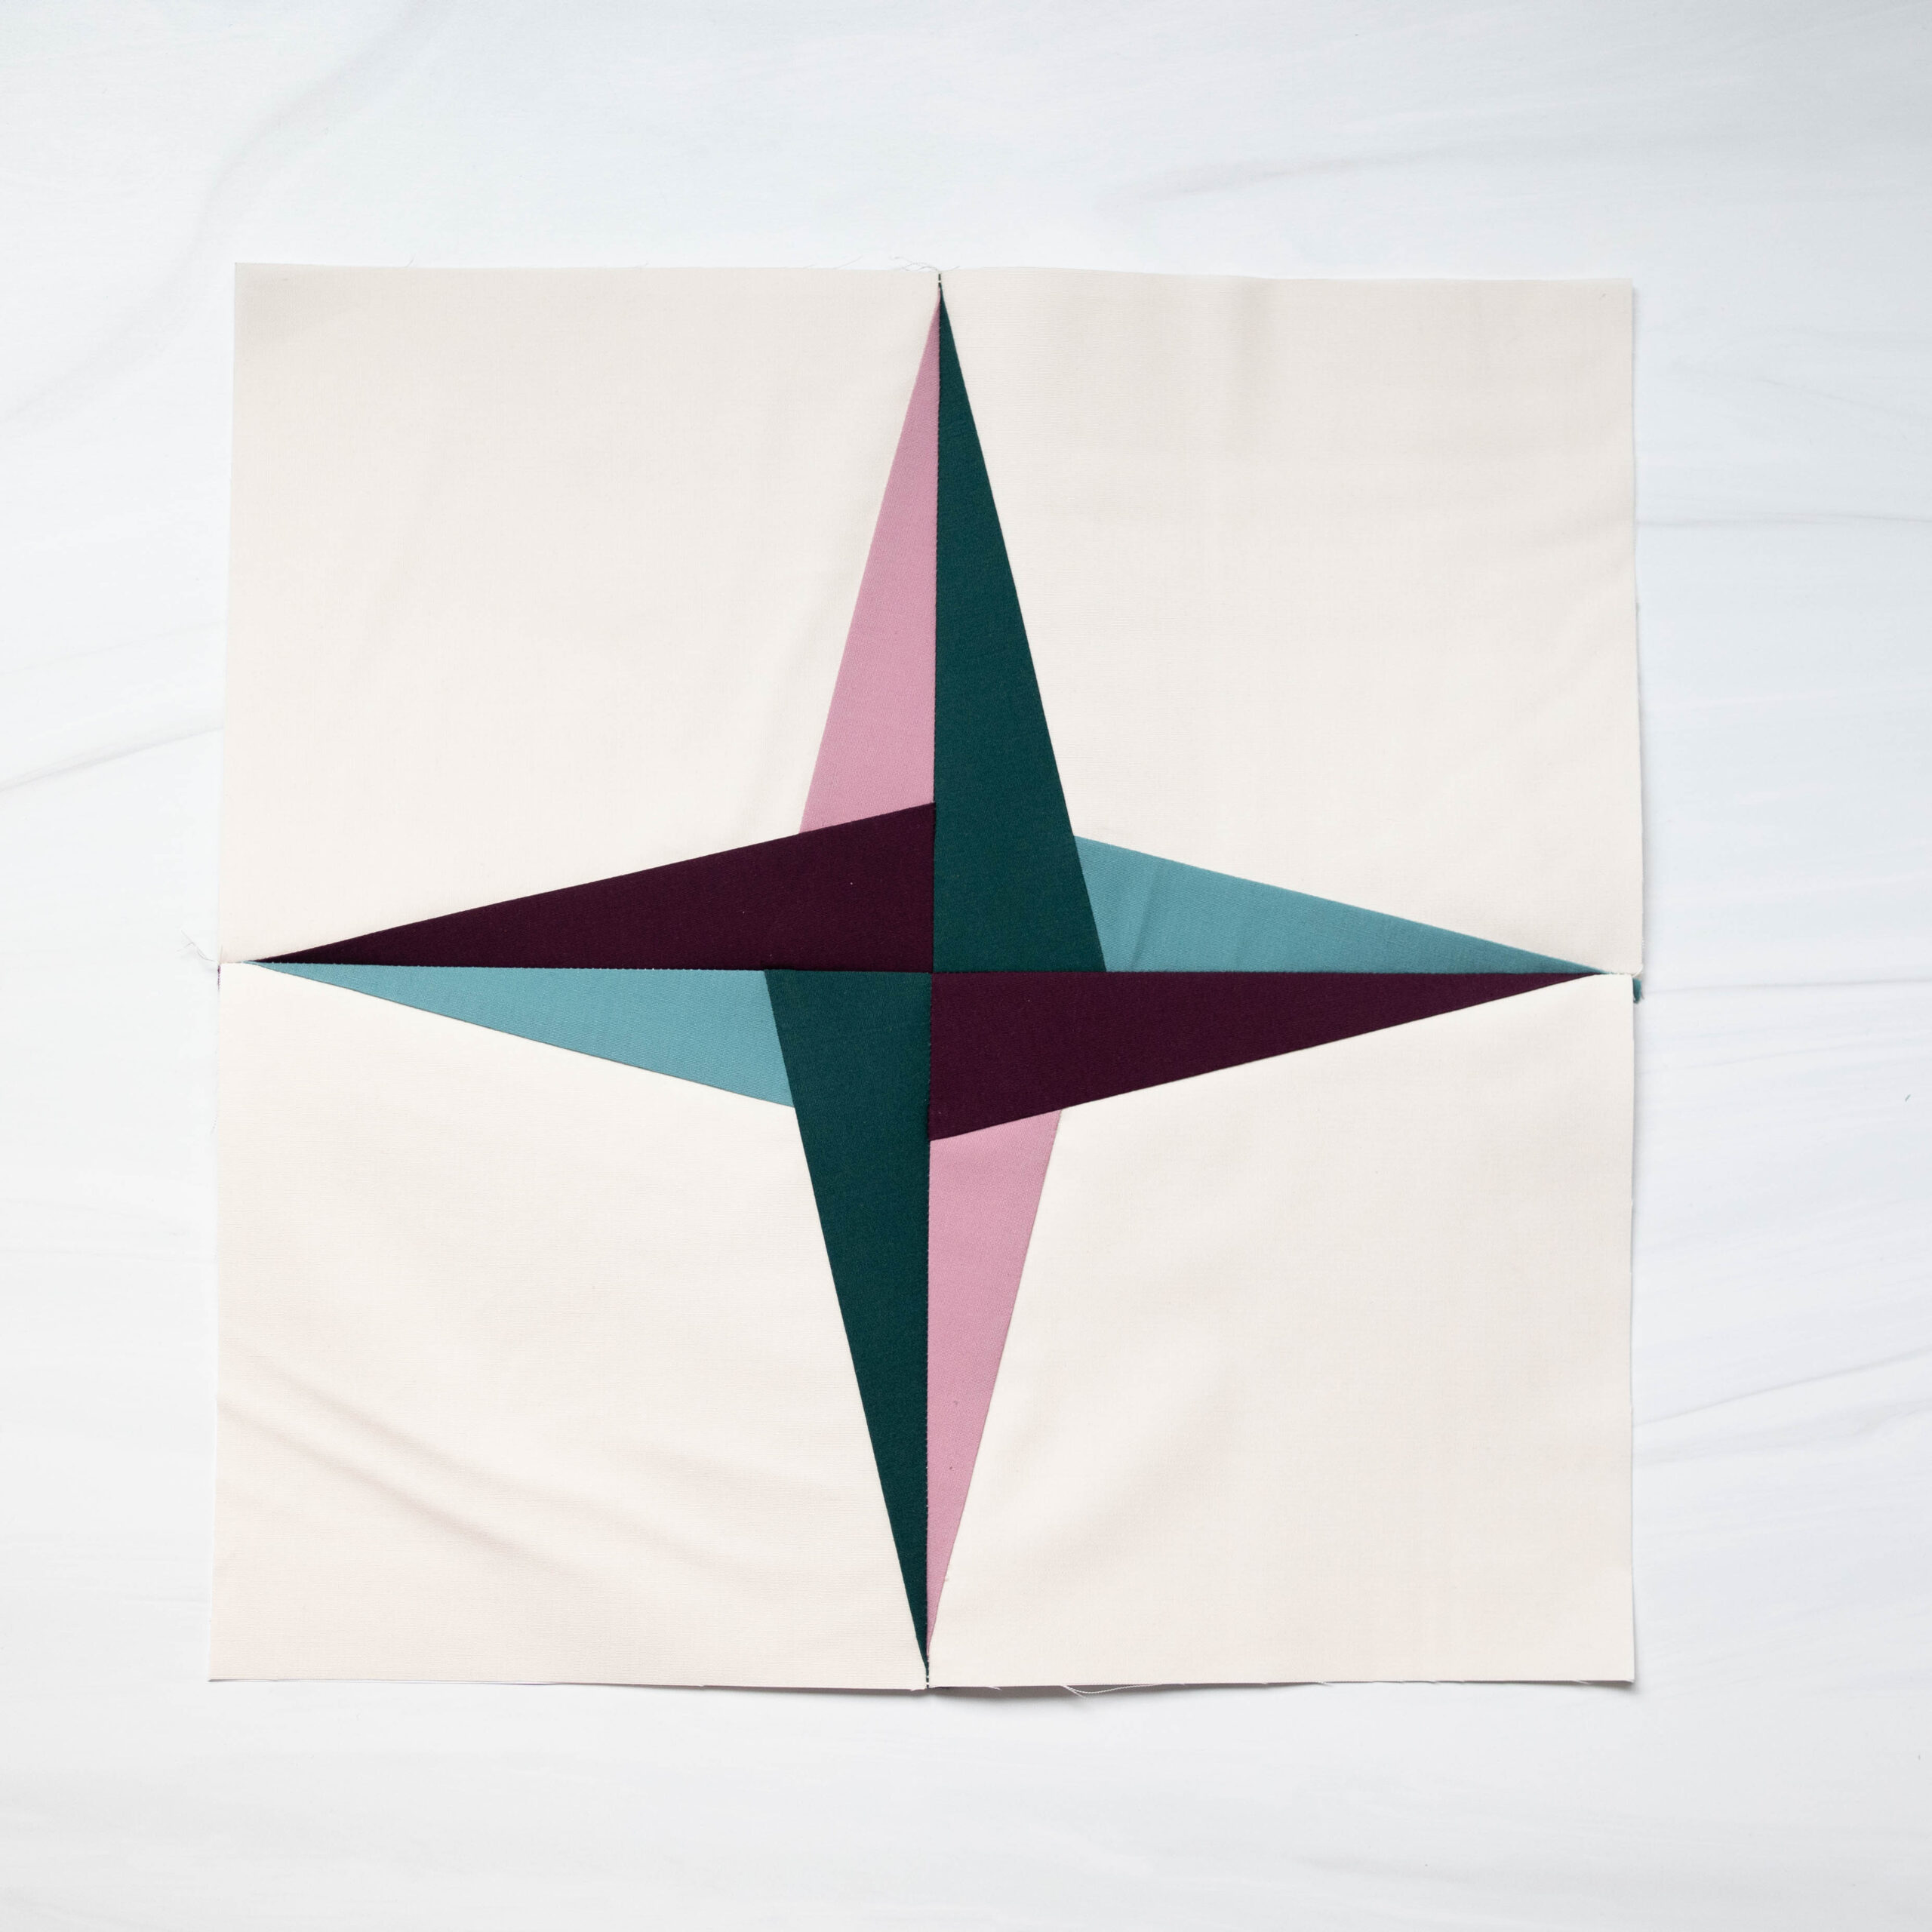
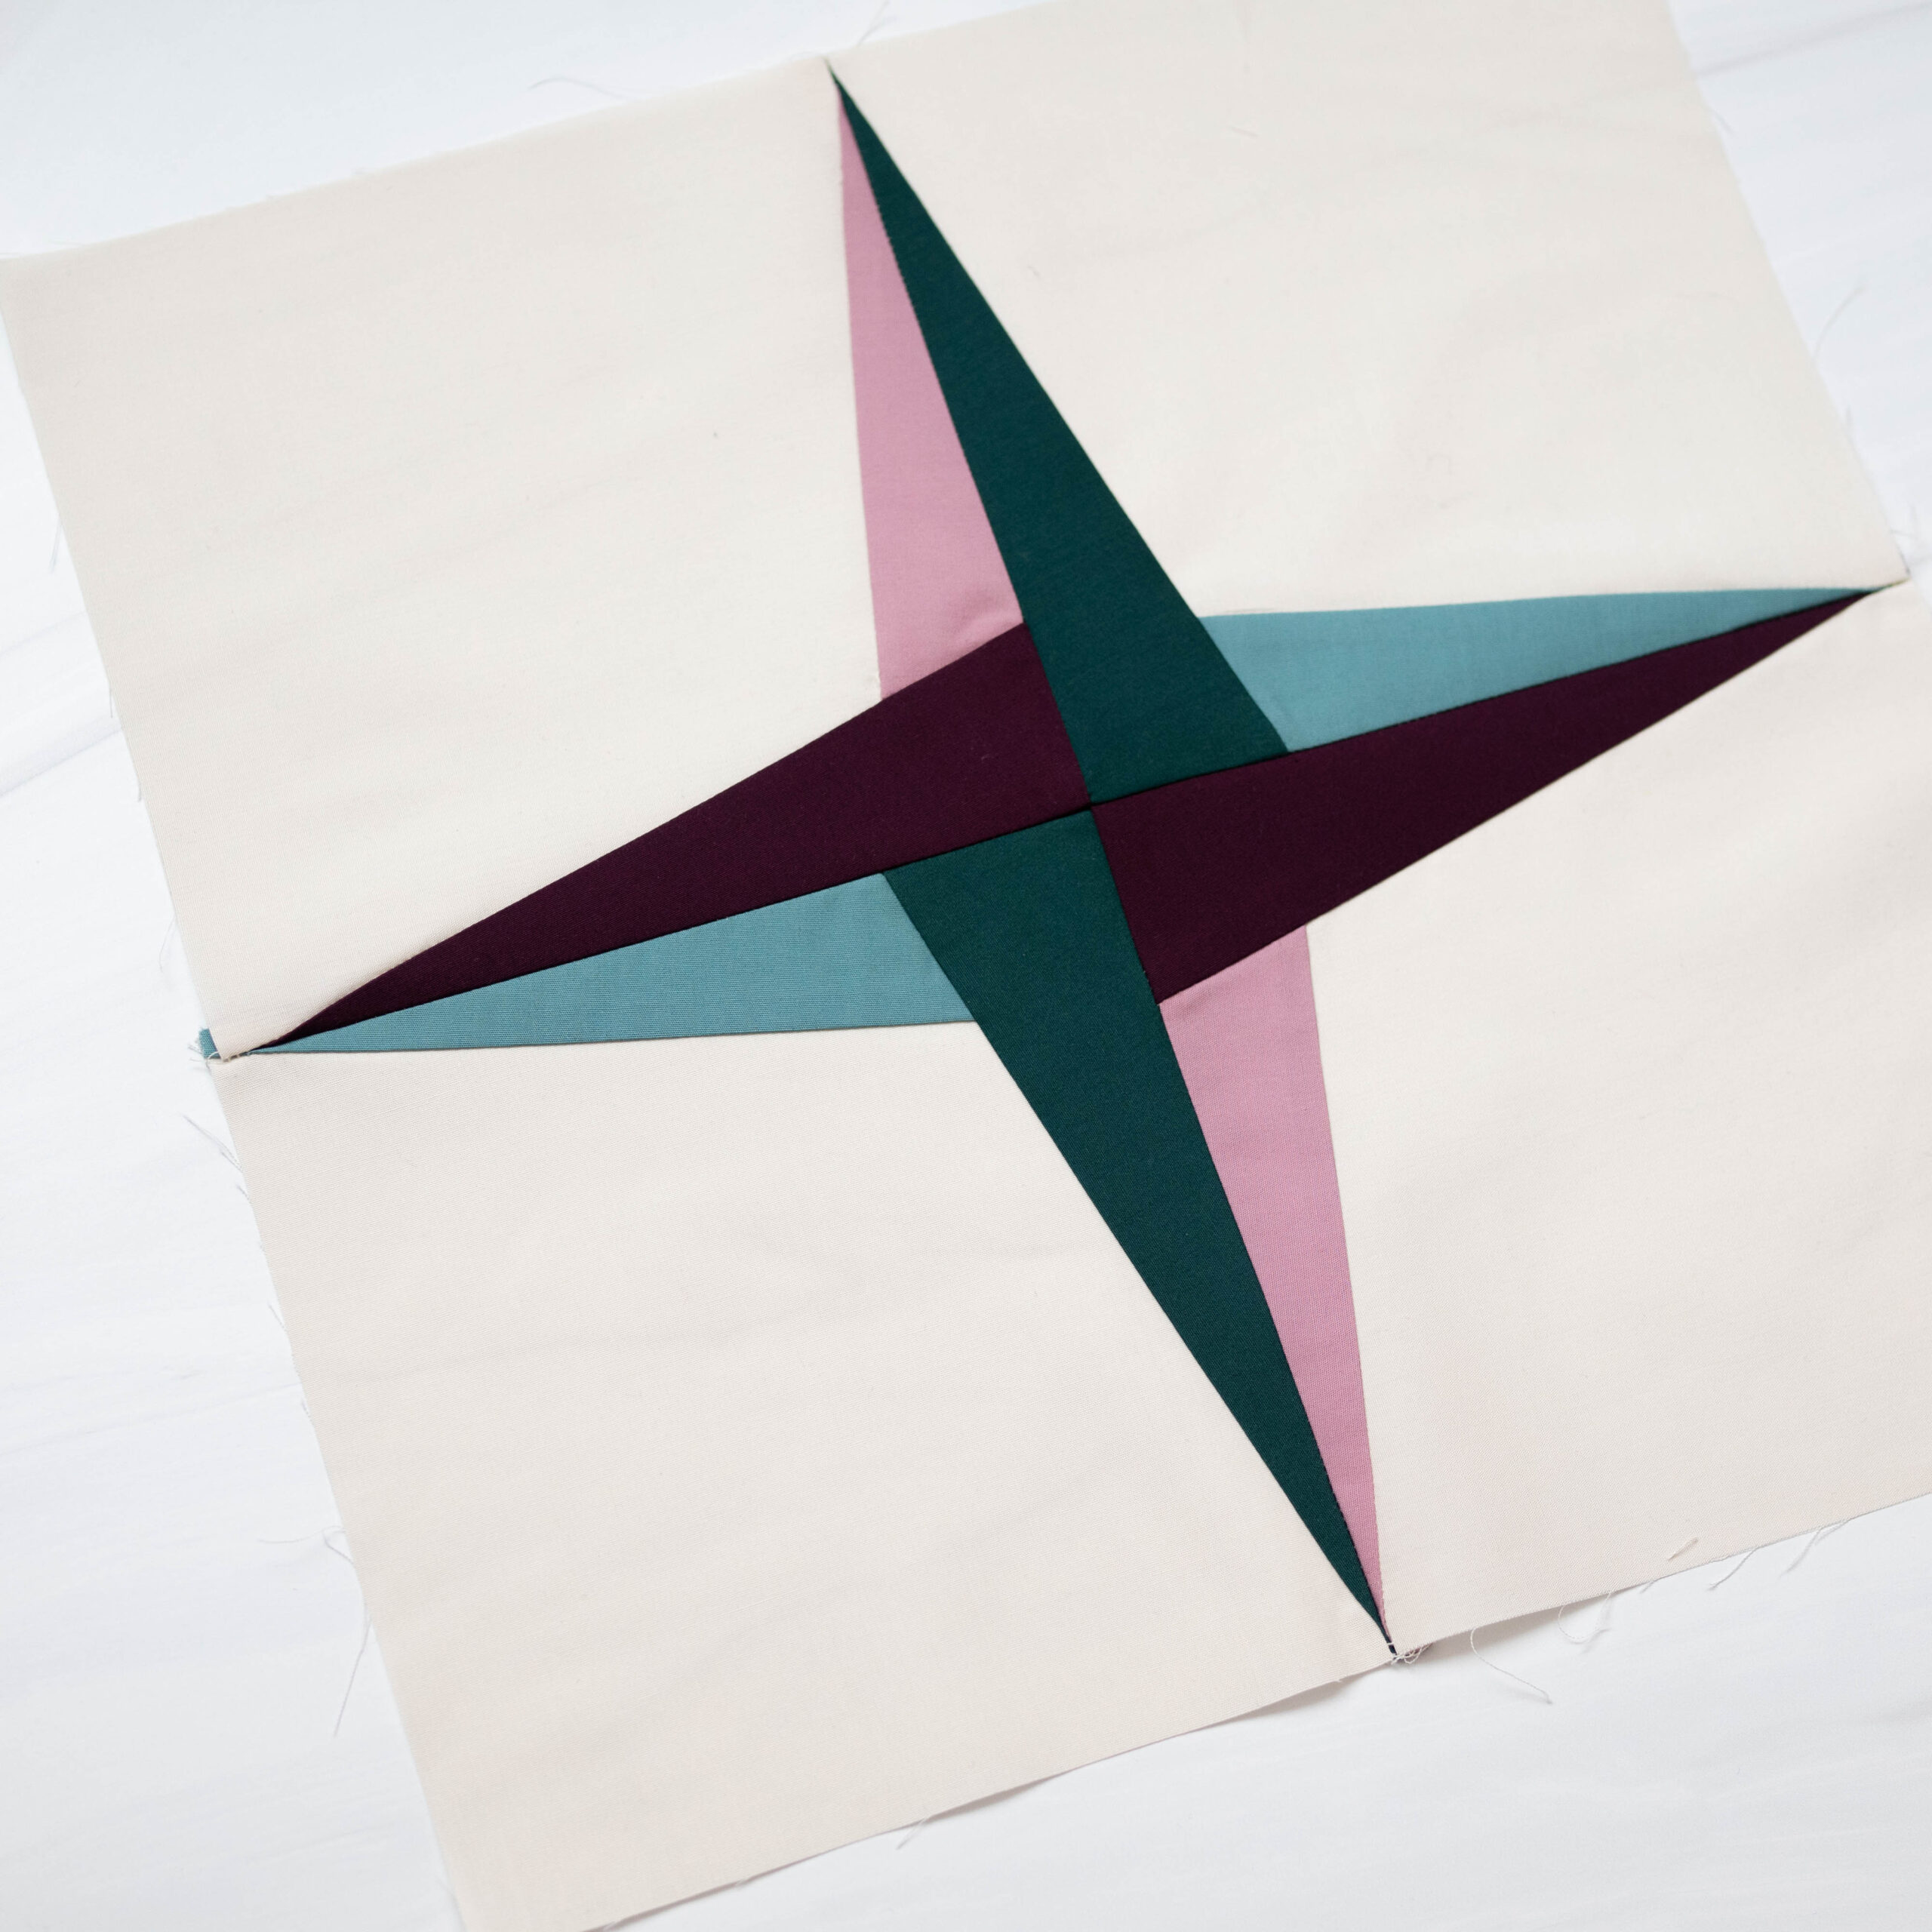
We’re in the home stretch! For Month 7 of the Quilt Alliance’s Birthday Block of the Month, we are starting the final row of our quilt! I can’t believe there are only two months left of our birthday party. This month’s block builds off of many skill-building aspects of previous months, including techniques for precision. Designed by the beloved Bonnie Hunter, this block is playfully called Birthday Girl. And it’s not just the Quilt Alliance’s birthday she’s celebrating — Bonnie turned 61 when she submitted this design for our project! Let’s dive into some tips and tricks to help you create this block as calmly and effortlessly as possible.
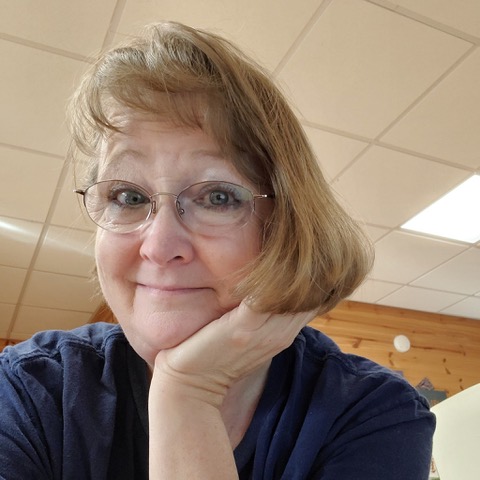
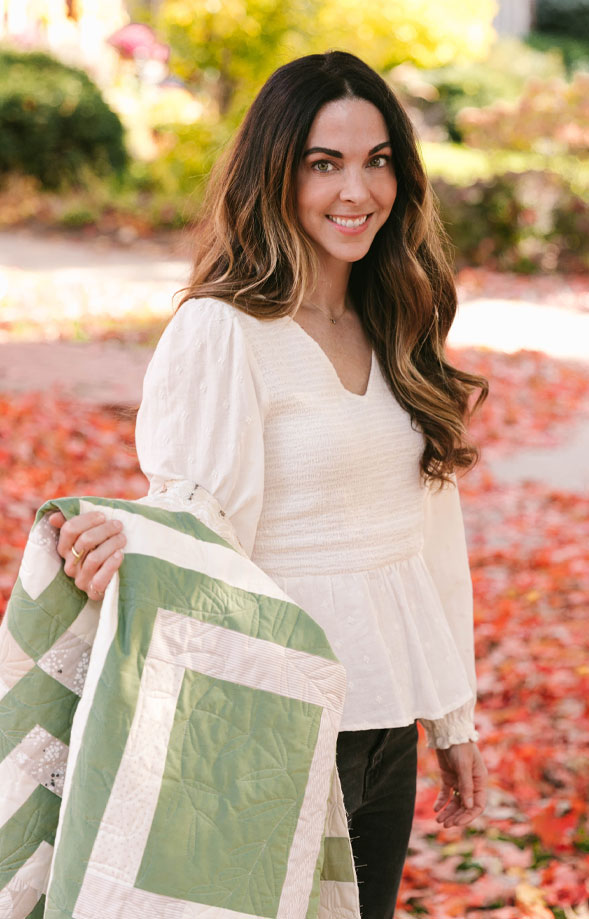
Meet Bonnie Bonnie K. Hunter is passionate about quilt quilting, focusing mainly on scrap quilts with the simple feeling of “making do.” Dedicated to continuing the traditions of quilting, Bonnie enjoys meeting with quilters, challenging quilters to break the rules, thinking outside the box, and finding what brings them joy. Bonnie retired from the quilt teaching & lecture circuit in 2020 after the opening of her dream come true — Quiltville Inn, a big old 1884 victorian house turned retreat center in Southwestern Virginia. Catch up with Bonnie’s doings through her extensive website and almost daily blog. You can follow her on Instagram, Facebook, or on her popular website. One of the Quilt Alliance’s signature projects is the QSOS oral history project, an oral history project which anyone can participate in. Watch the video below to see Bonnie talk about her life and her quilts, and keep reading this blog post to learn a tip for how to document your own quilts!
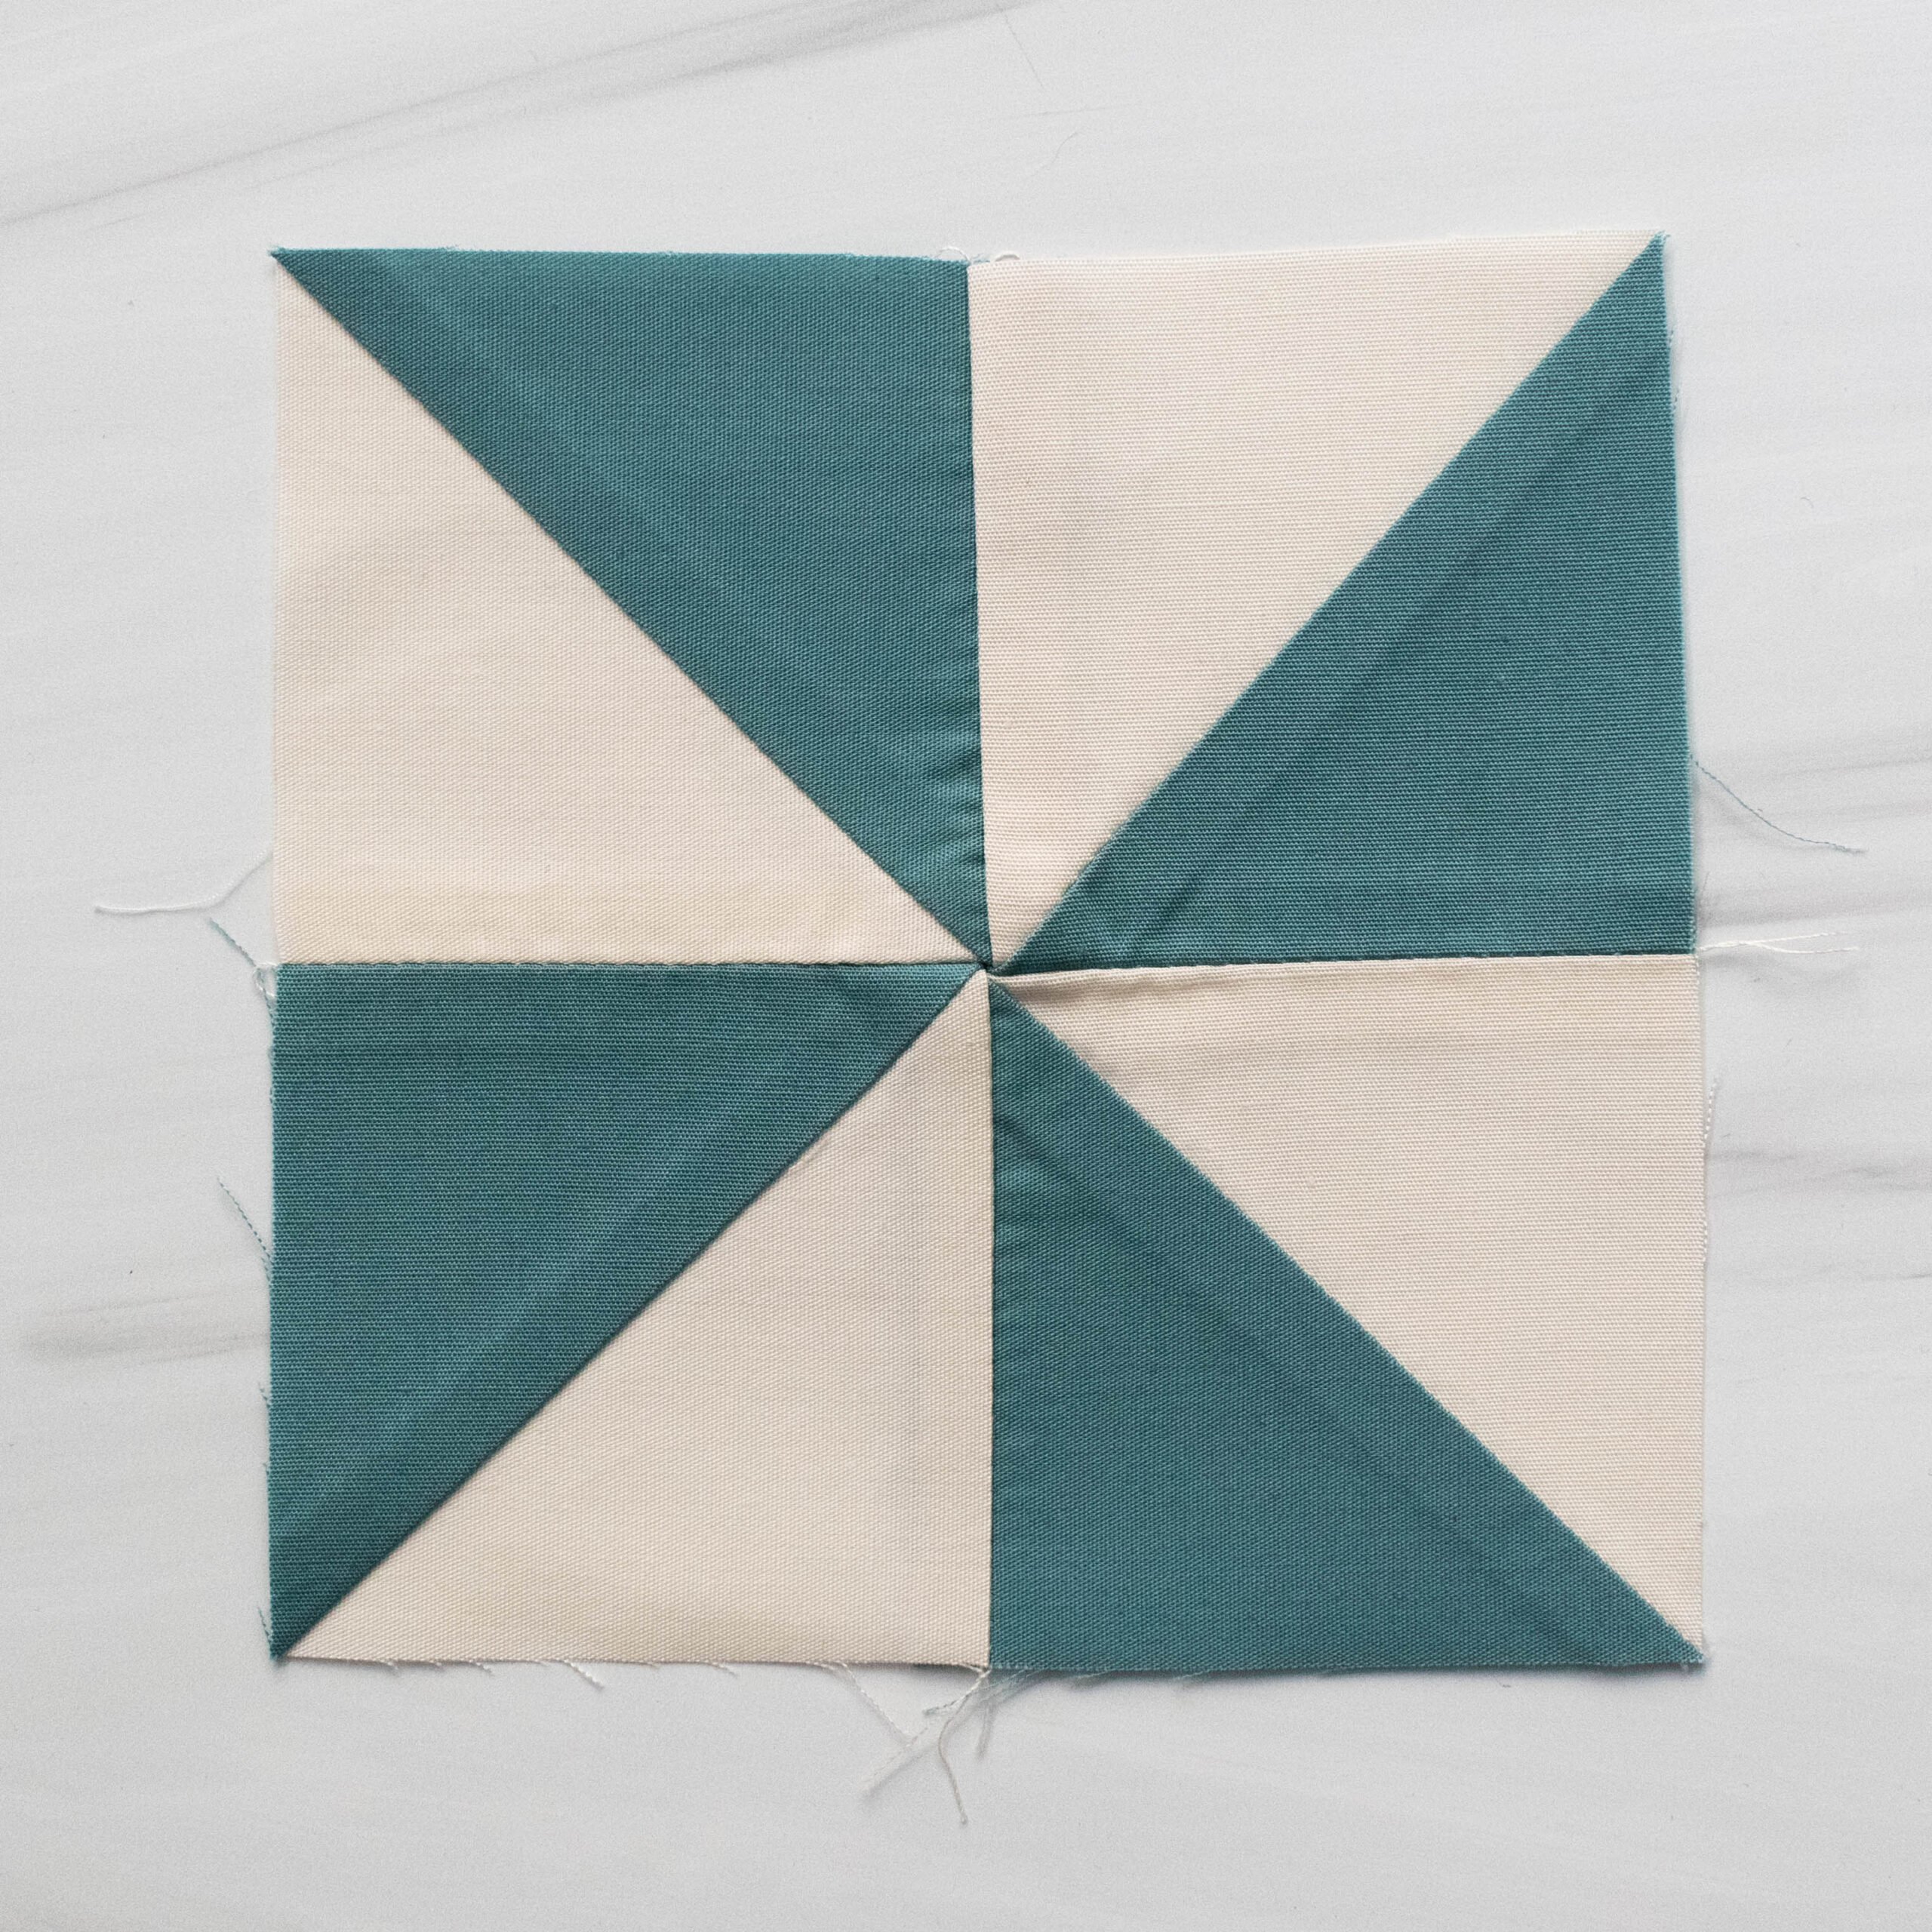
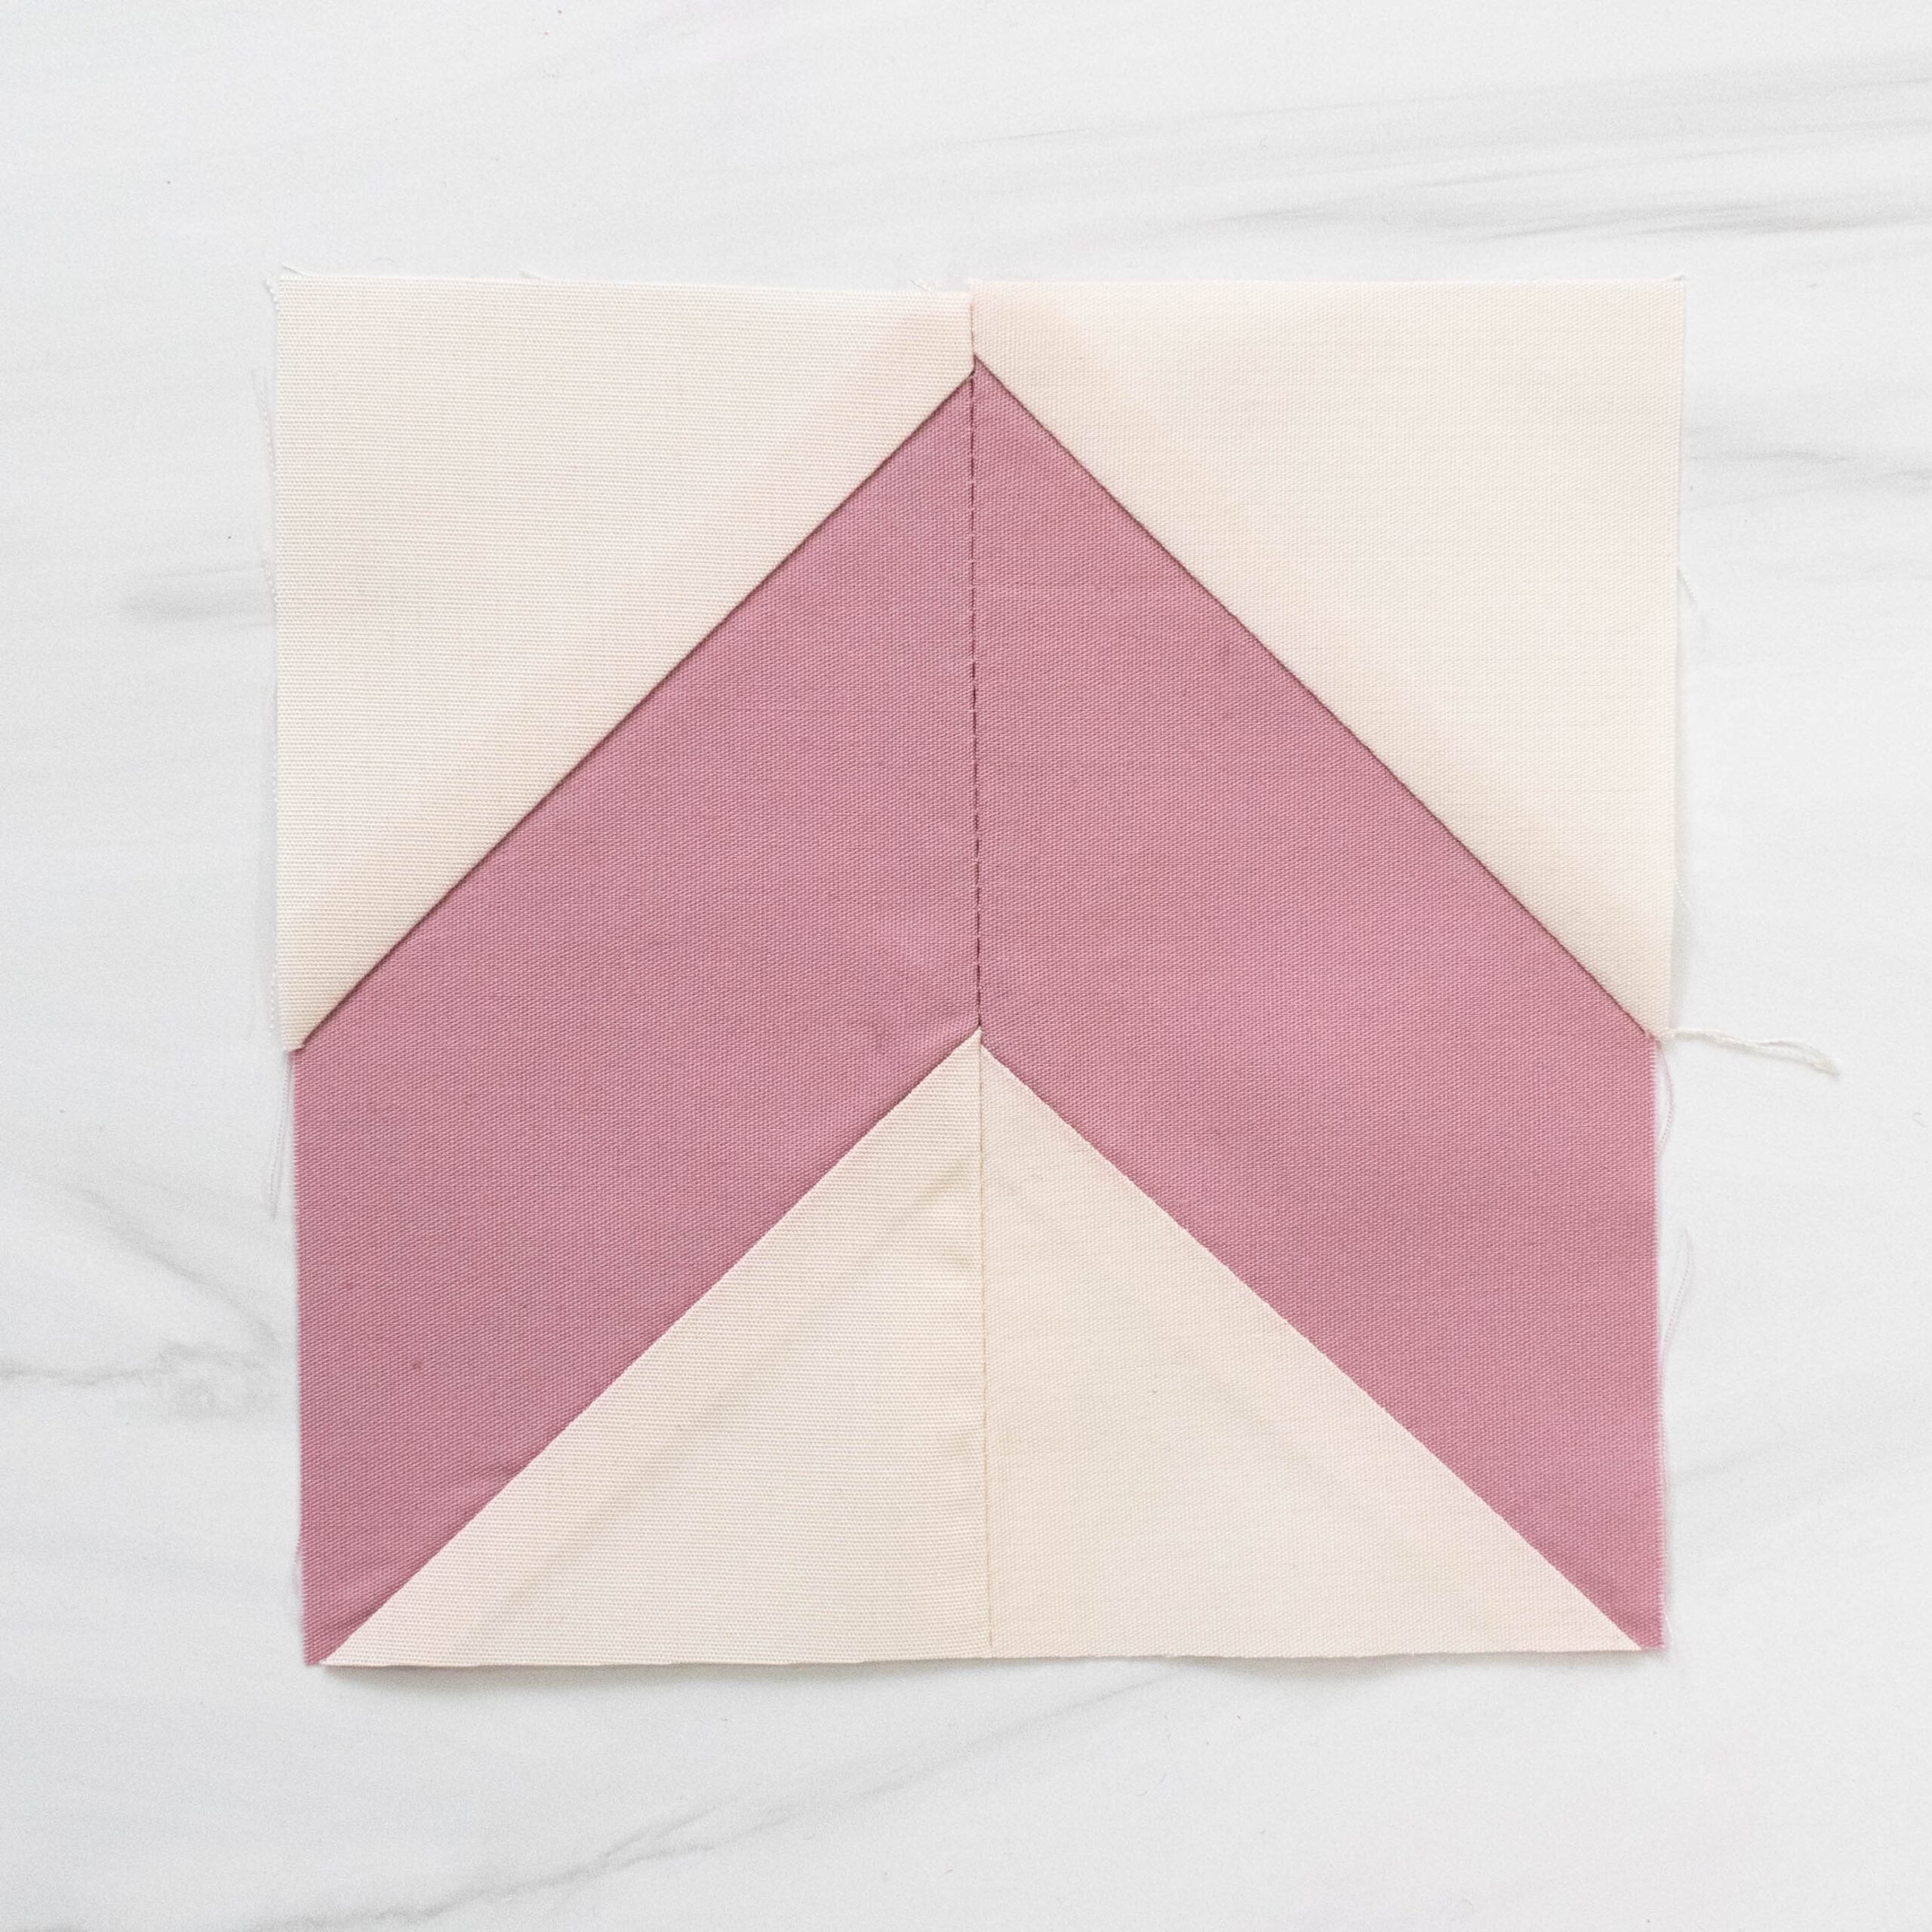
Bonnie’s Top BOM Tips Each month, our Birthday Block of the Month Designers will share their top tips for making the block they designed. Here are three great tips for making this block straight from Bonnie herself. As a reminder, while you’re reading through this post, Bonnie’s Birthday Girl block is made using three block units — a Pinwheel, a Chevron Unit, and a Corner Unit. Let’s take a quick look at those individual components.
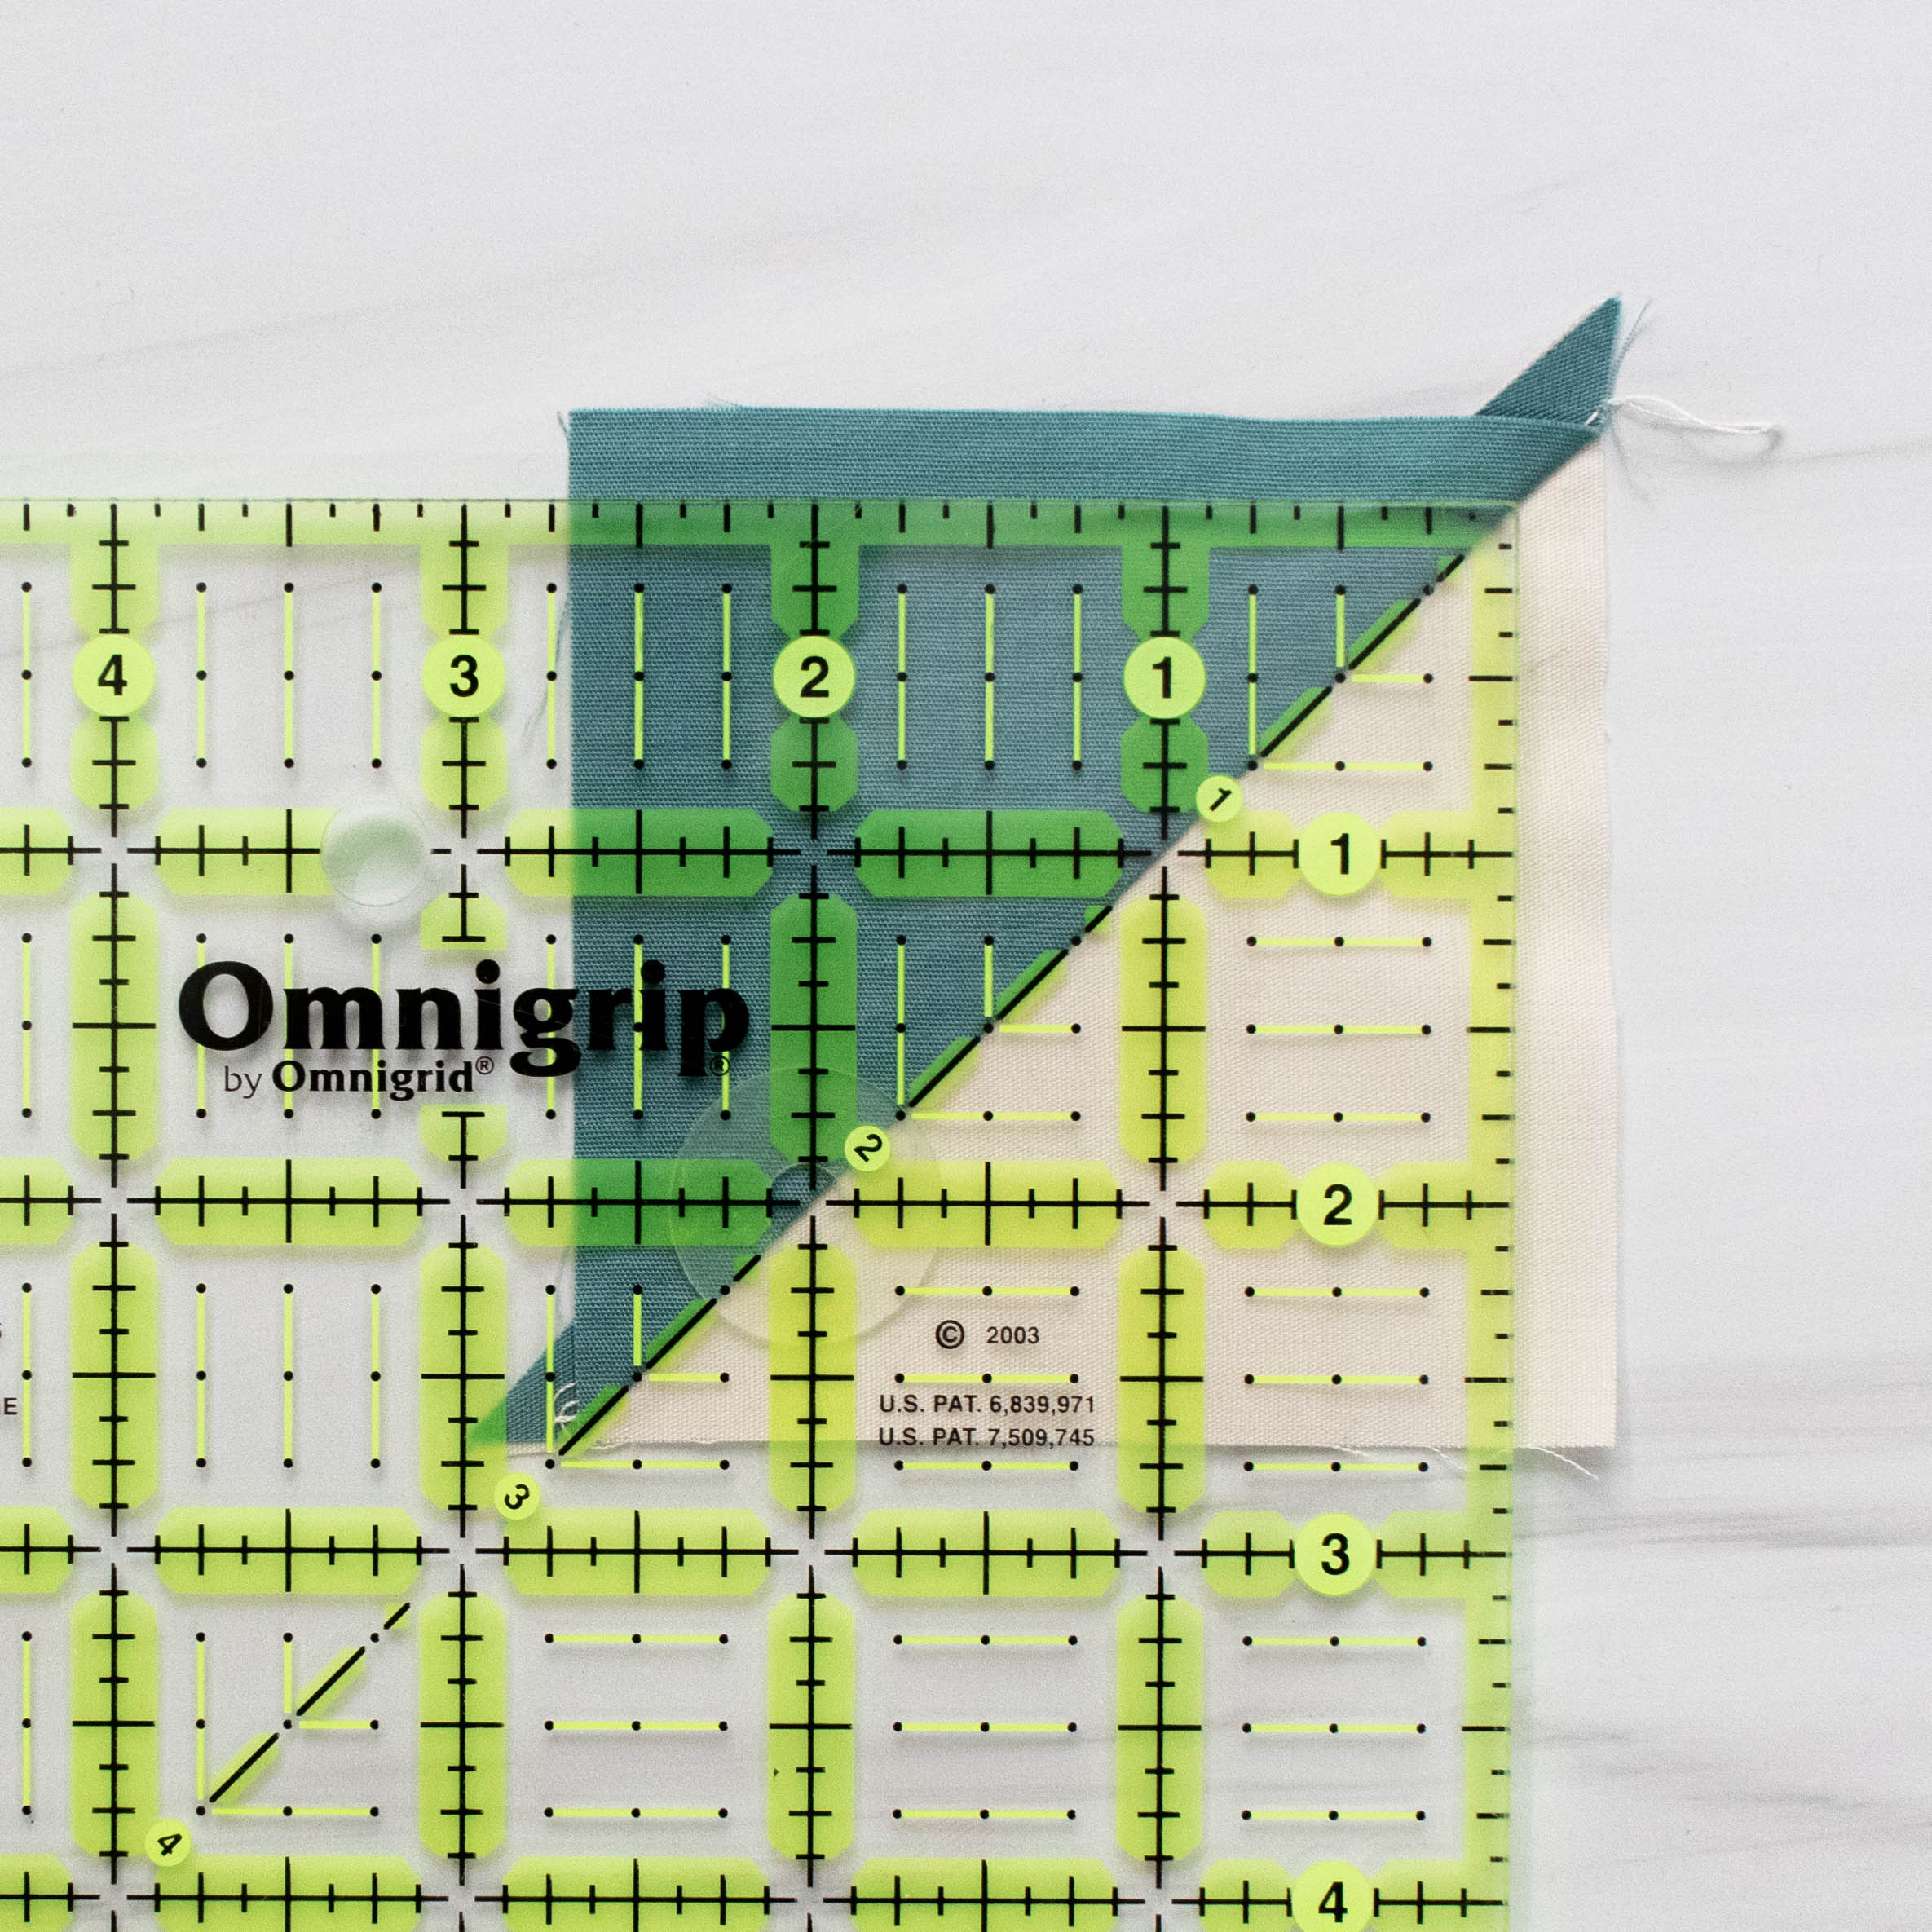
Bonnie’s Tip 1: Trim, Trim Trim As Bonnie says, “My number one tip when working with triangles — TRIM DOG EARS ALWAYS!” Don’t skip this step to save time. It will have a negative impact on the accuracy of your block. This tip will be most important when making the corner unit.
Bonnie’s Tip 2: Cut Accurately Be sure to use ruler lines when cutting instead of mat lines. Quilting rulers are more accurate, and those small ⅛” lines may seem unimportant, but this block uses lots of eighth inch measurements.
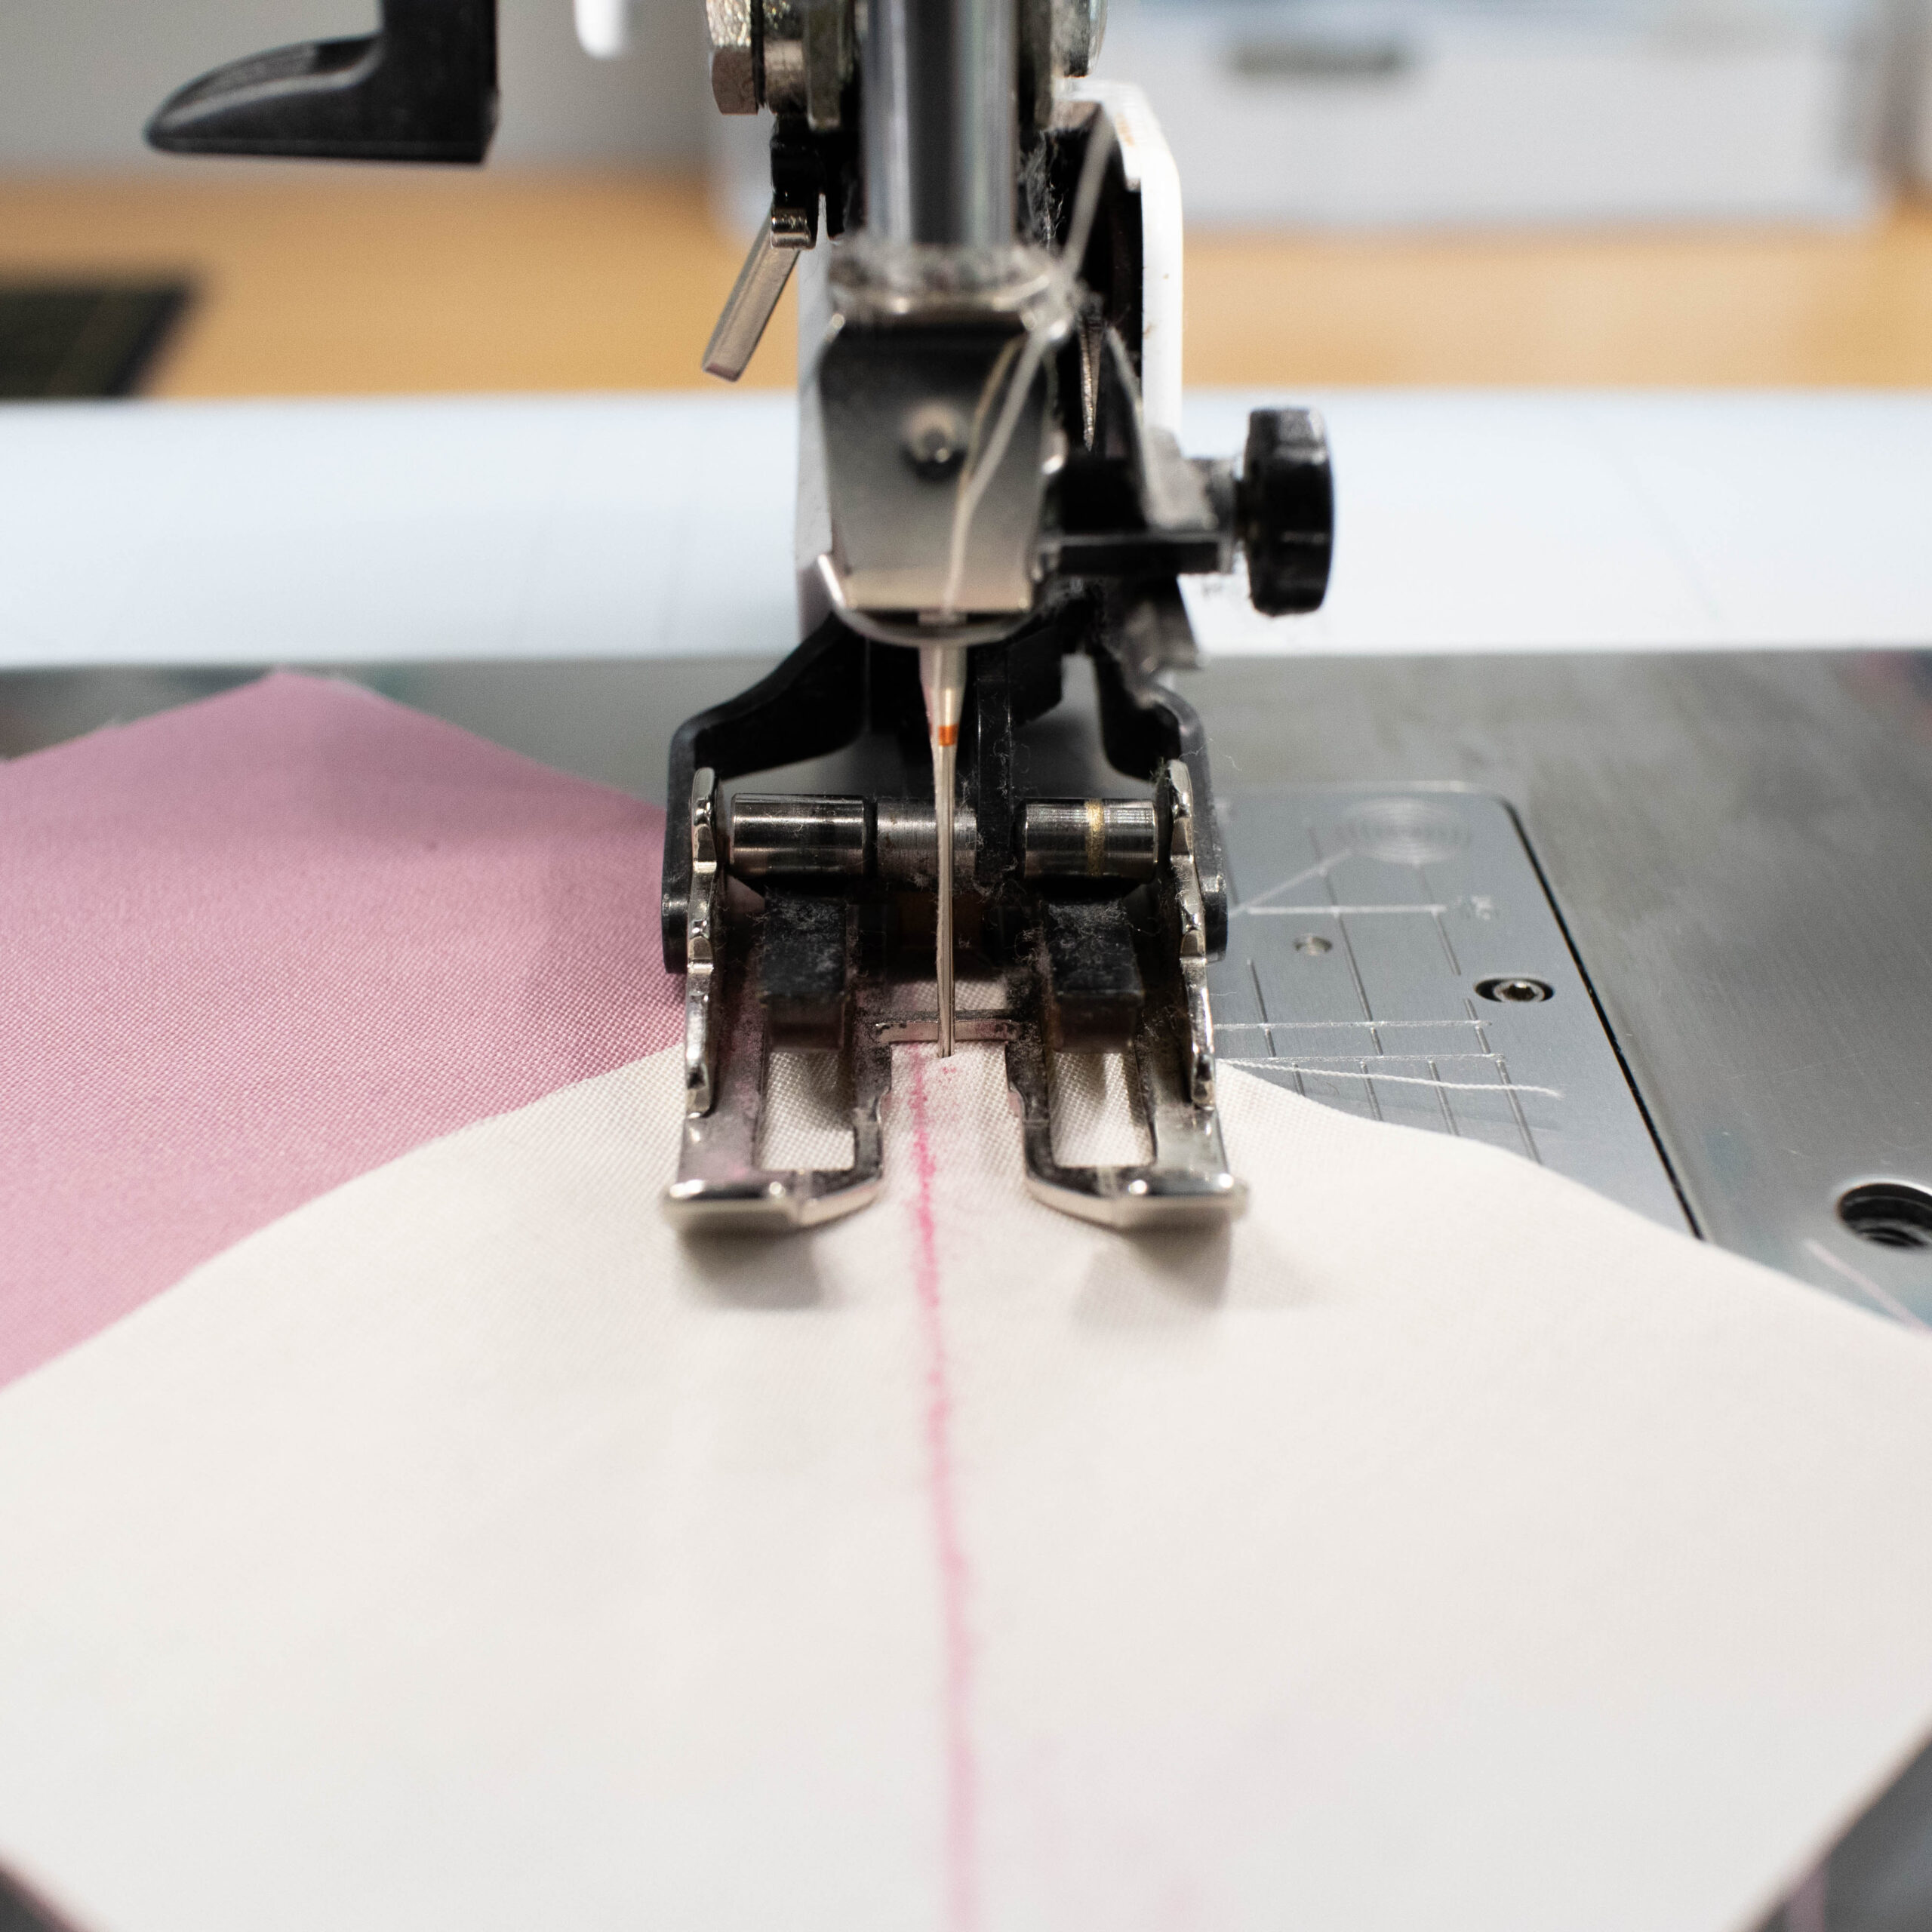
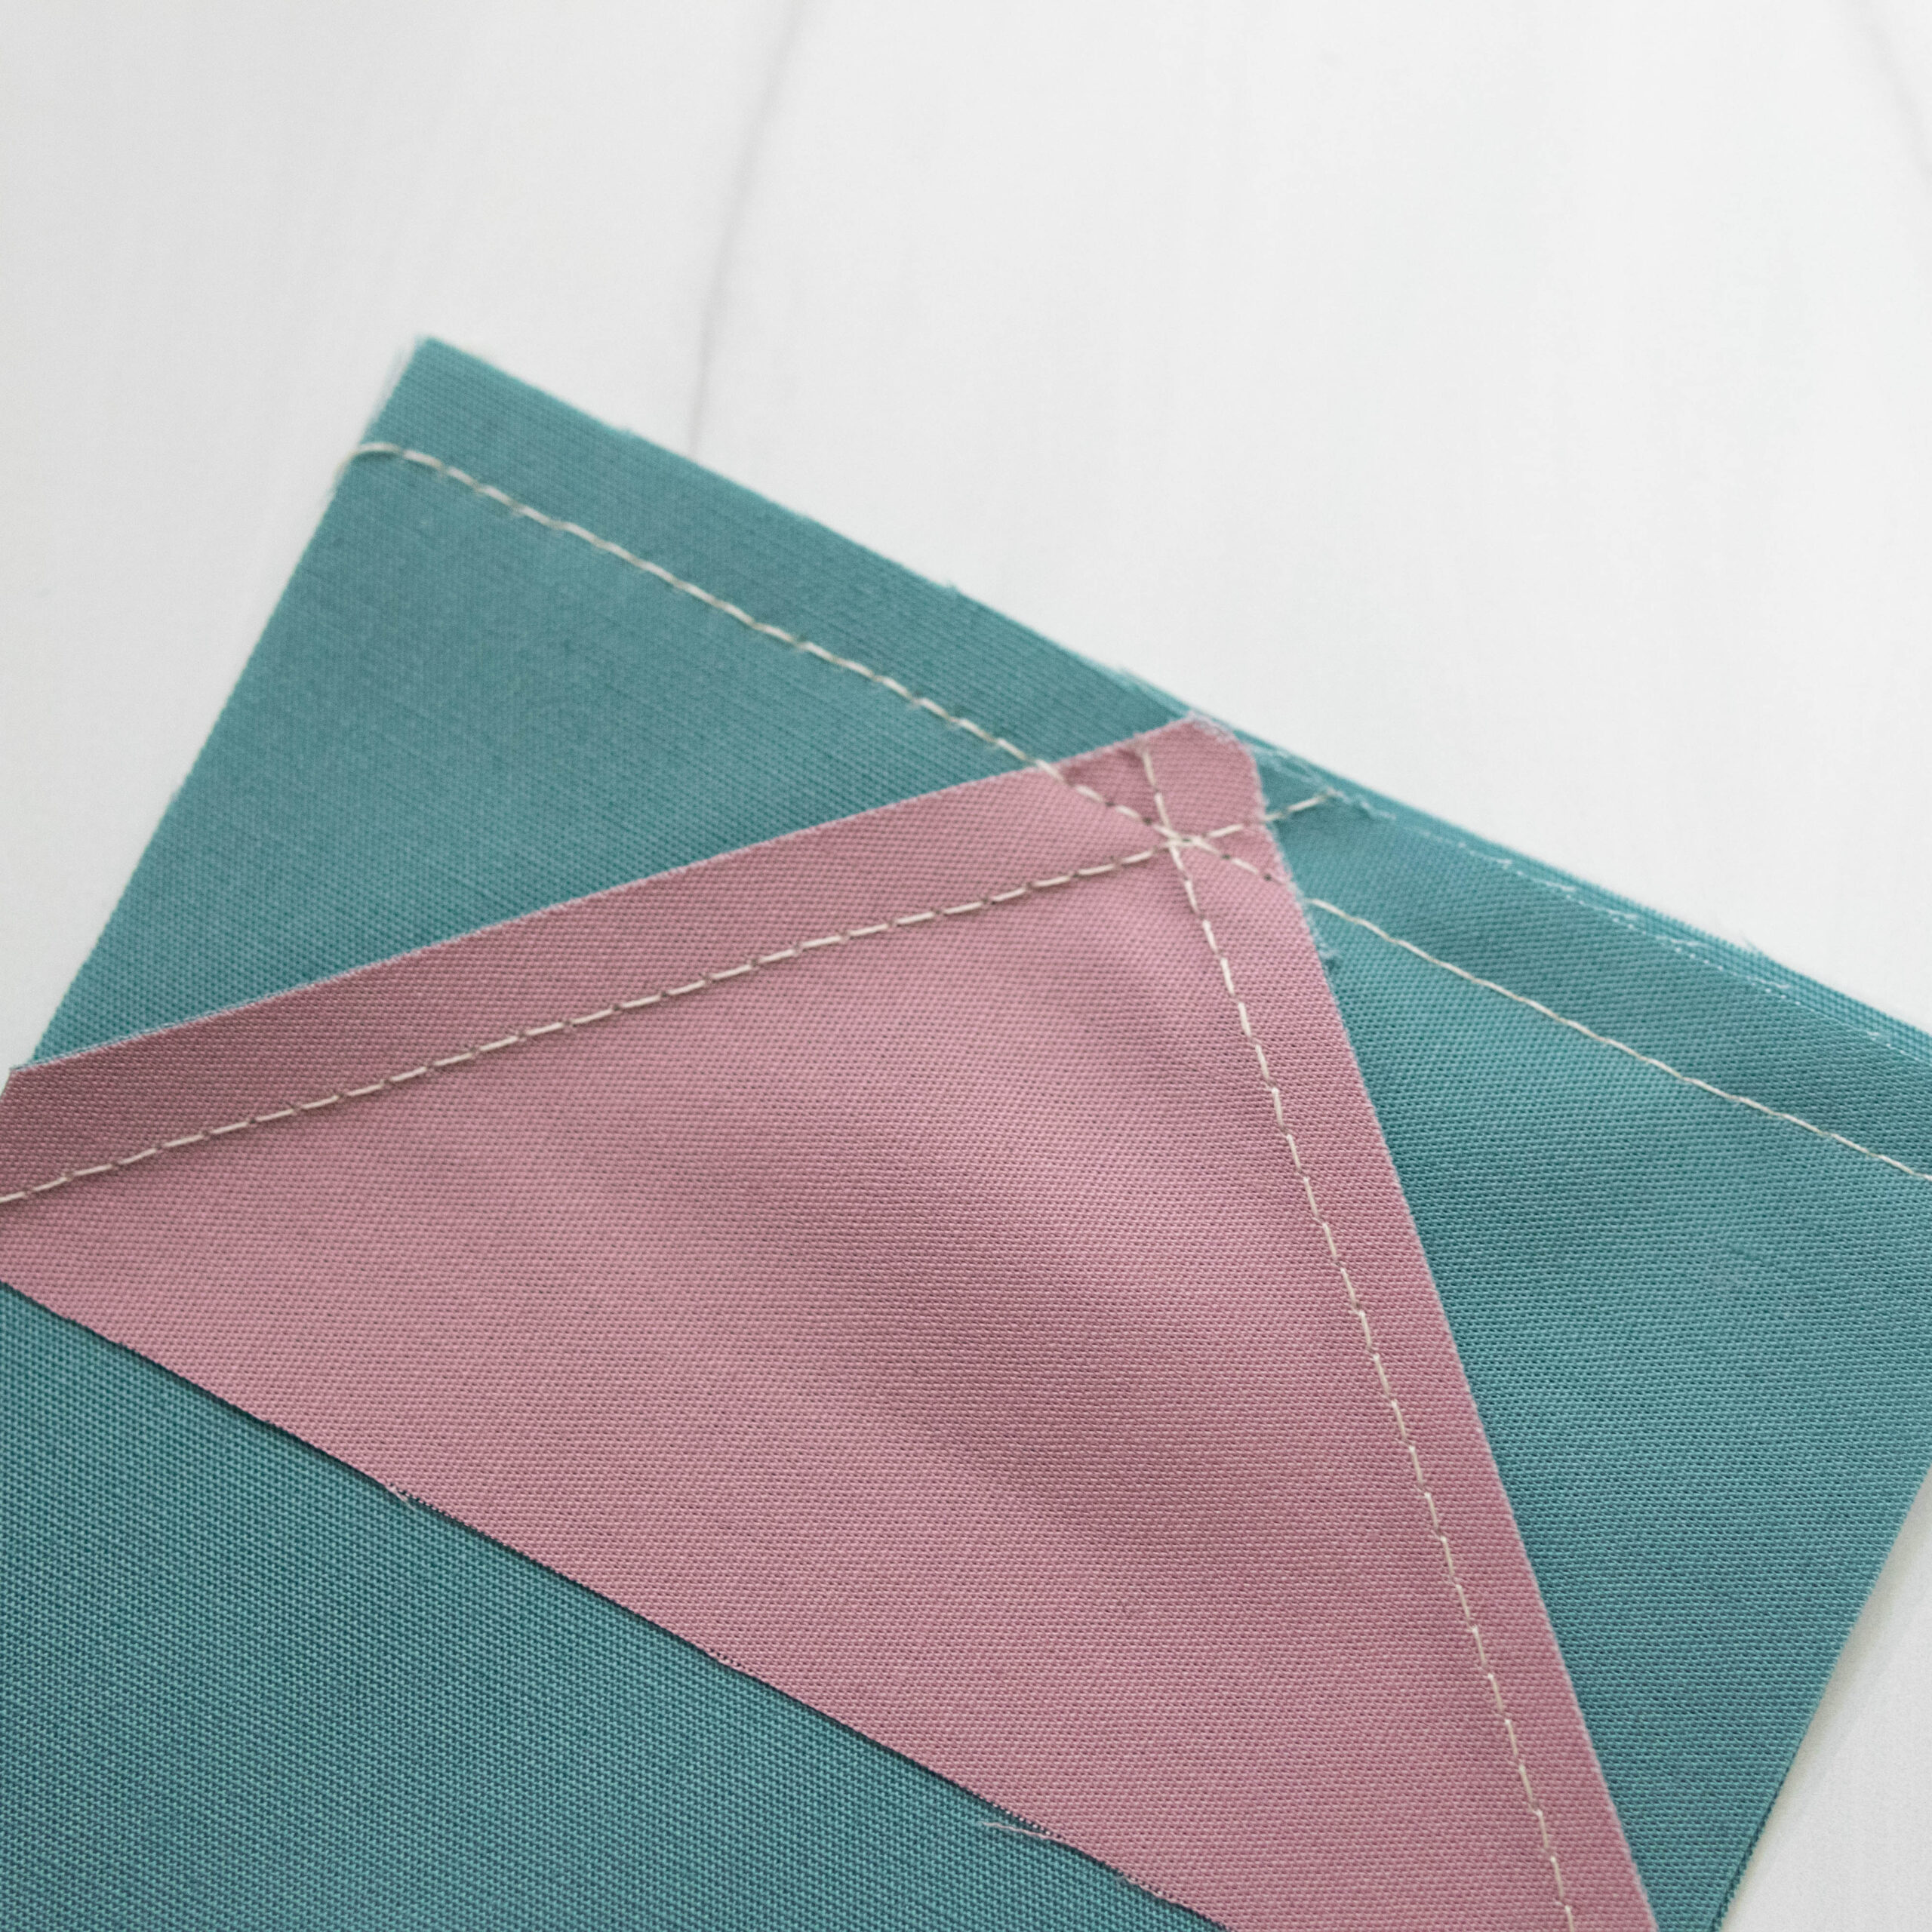
Bonnie’s Tip 3: Don’t Sew On the Line in Chevron Units As Bonnie said, “When making the Chevron Units: If you are drawing a line on a square that will fold over and become the corner triangles, NEVER sew on the line. The line is your fold line, not your stitching line. If you want your triangle to reach all the way to the edges of your base unit, stitch right next to the line – up against the line just barely into the seam allowance. That way your triangle can fold up on the fold line and not run short.”
Quilt Alliance BOM Tips Each month, we share our best tips for making the Birthday Block of the Month as well. These tips come to you from our Birthday Block of the Month host, Quilt Alliance co-president Laura Hopper!
Sew Slow! When making the Chevron Units, your seam needs to be incredibly close to your guideline. To achieve this without sewing directly on the line, slow down while you sew. I enjoy slow sewing — I keep my machine at half speed at all times. But even I slowed down even more when making the Chevron Units to try and focus on accuracy.
Nest Every Seam Possible We’ve covered nesting seams in several previous blog posts, so by now you must be a pro! People often ask me how my piecing is so precise. My best tip is to nest seams! Once I learned to do this, my piecing improved noticeably and I never went back. It is popular nowadays to press seams open. However, doing that does not allow seams to nest and reduces accuracy. Press to the side, ensure that your seams alternate in pressing directions before sewing together, and nest in place. You’ll love your results.
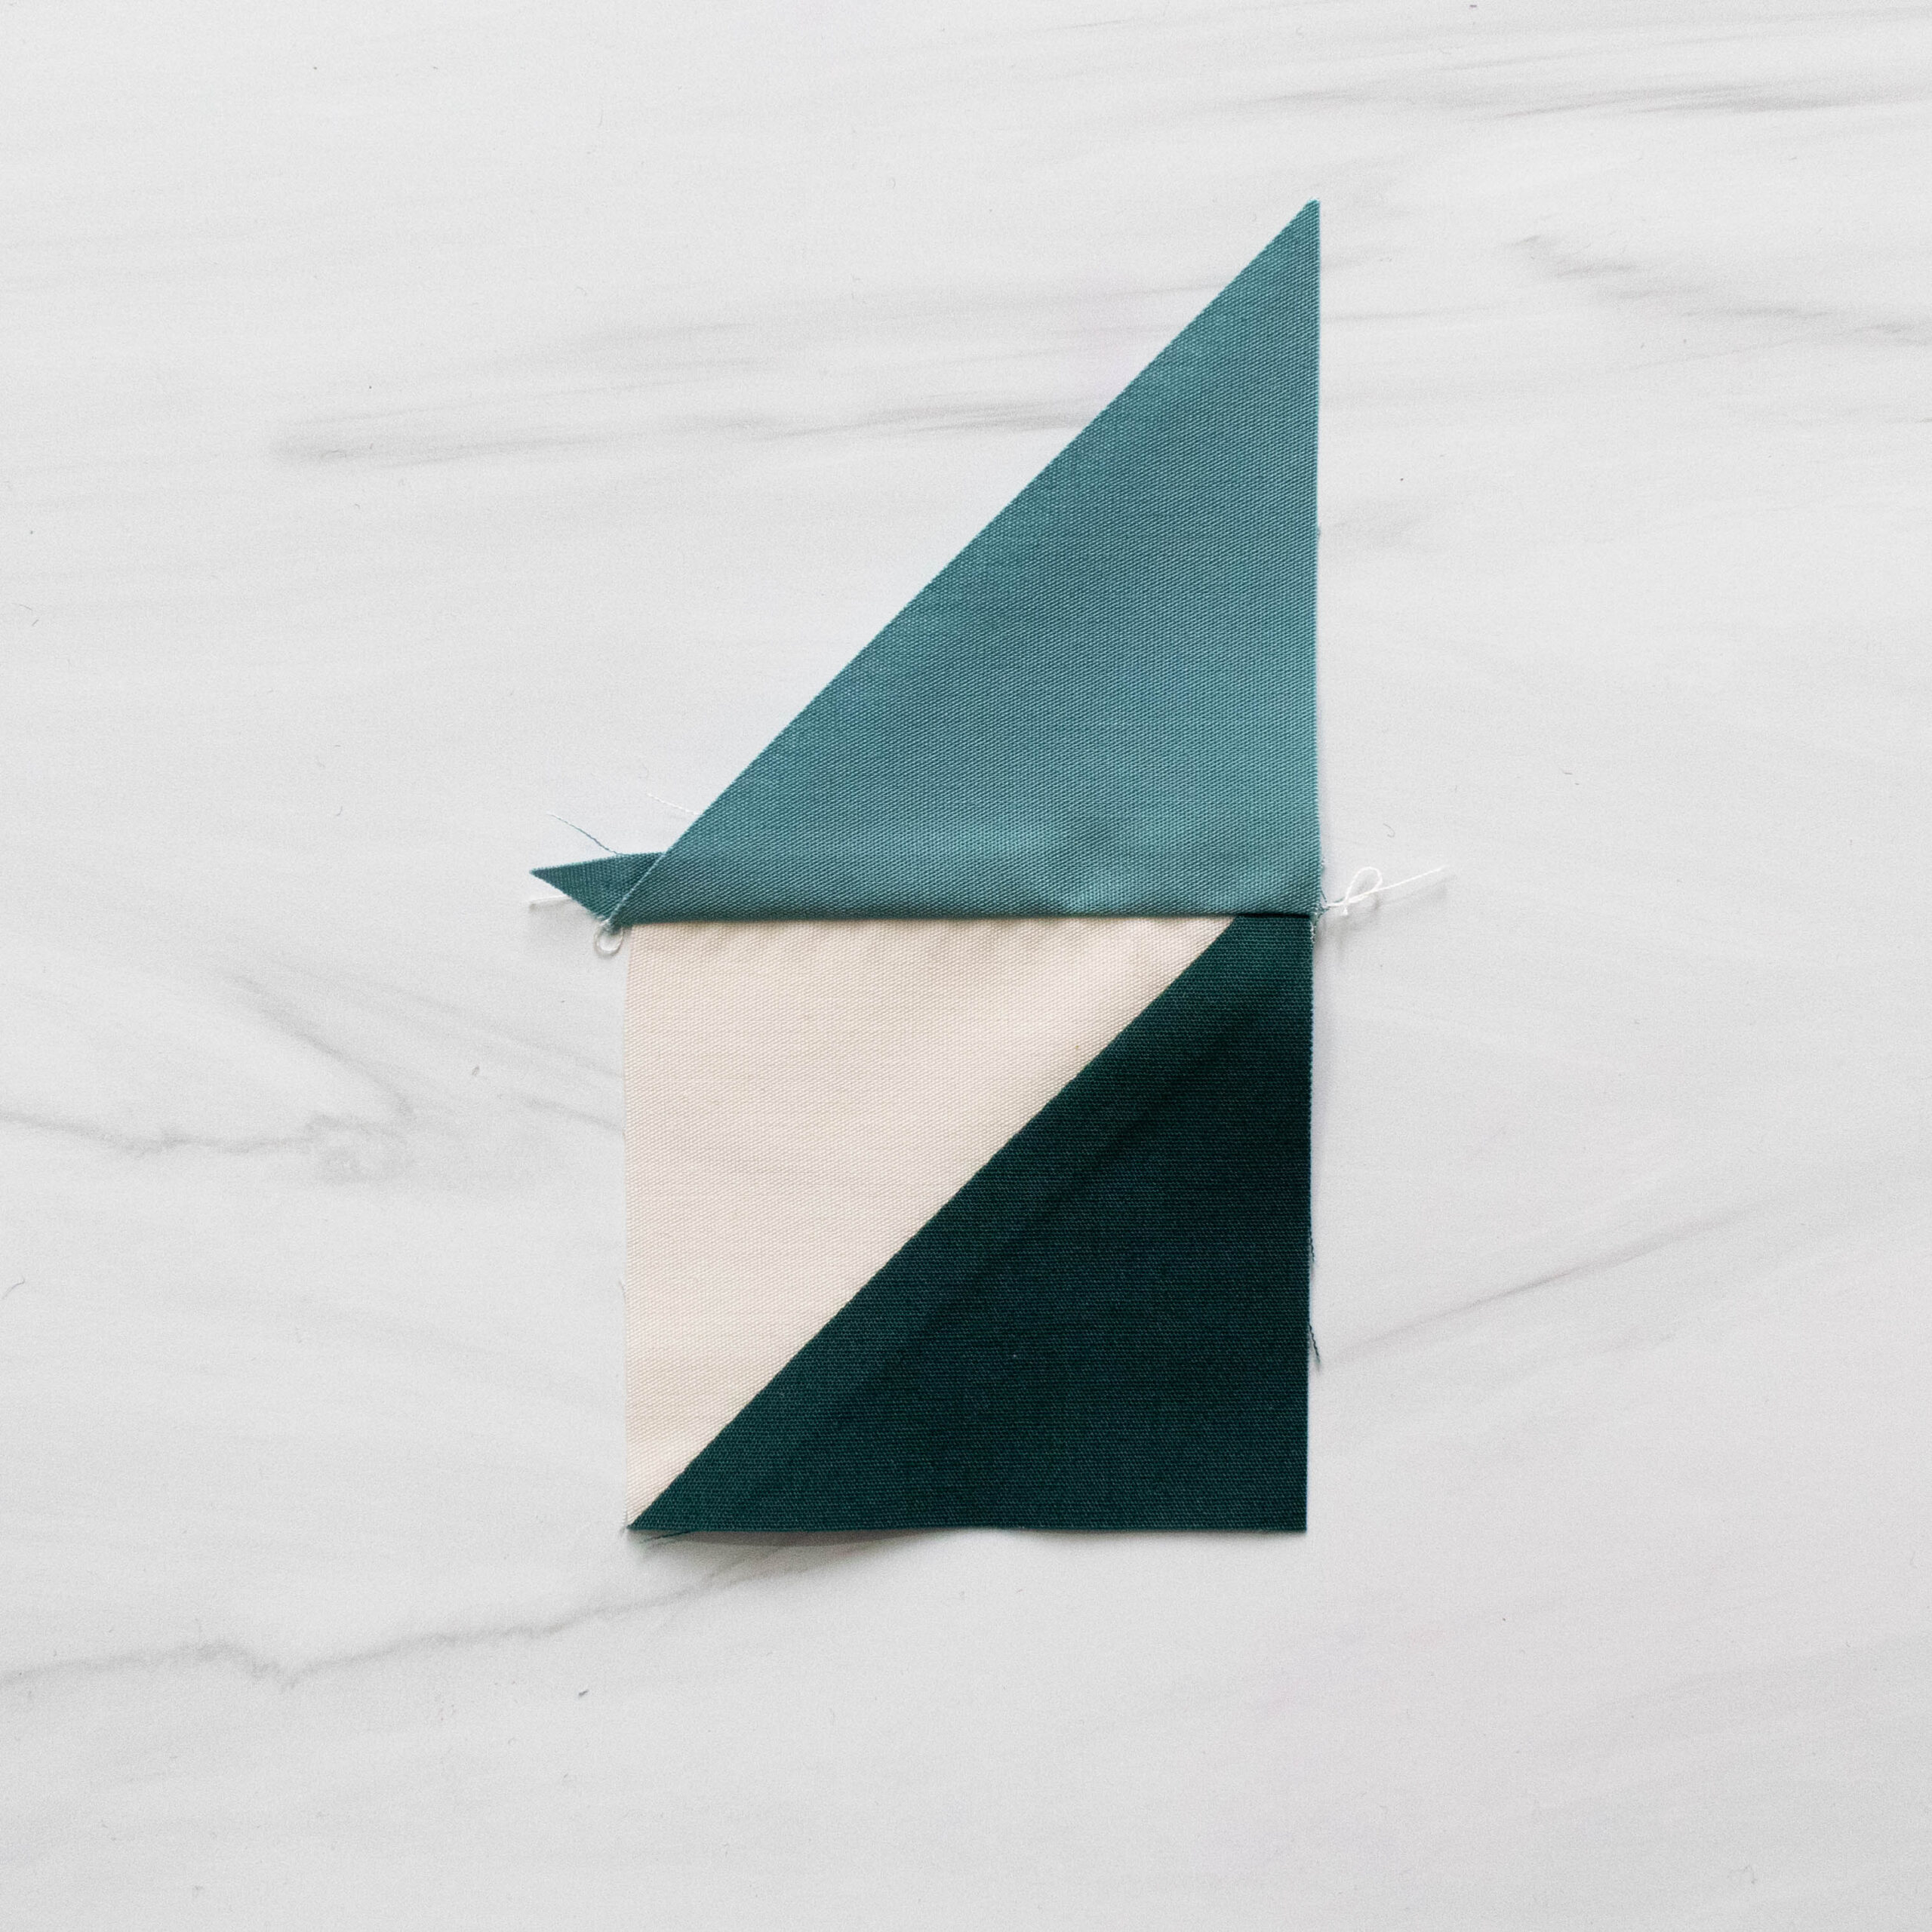
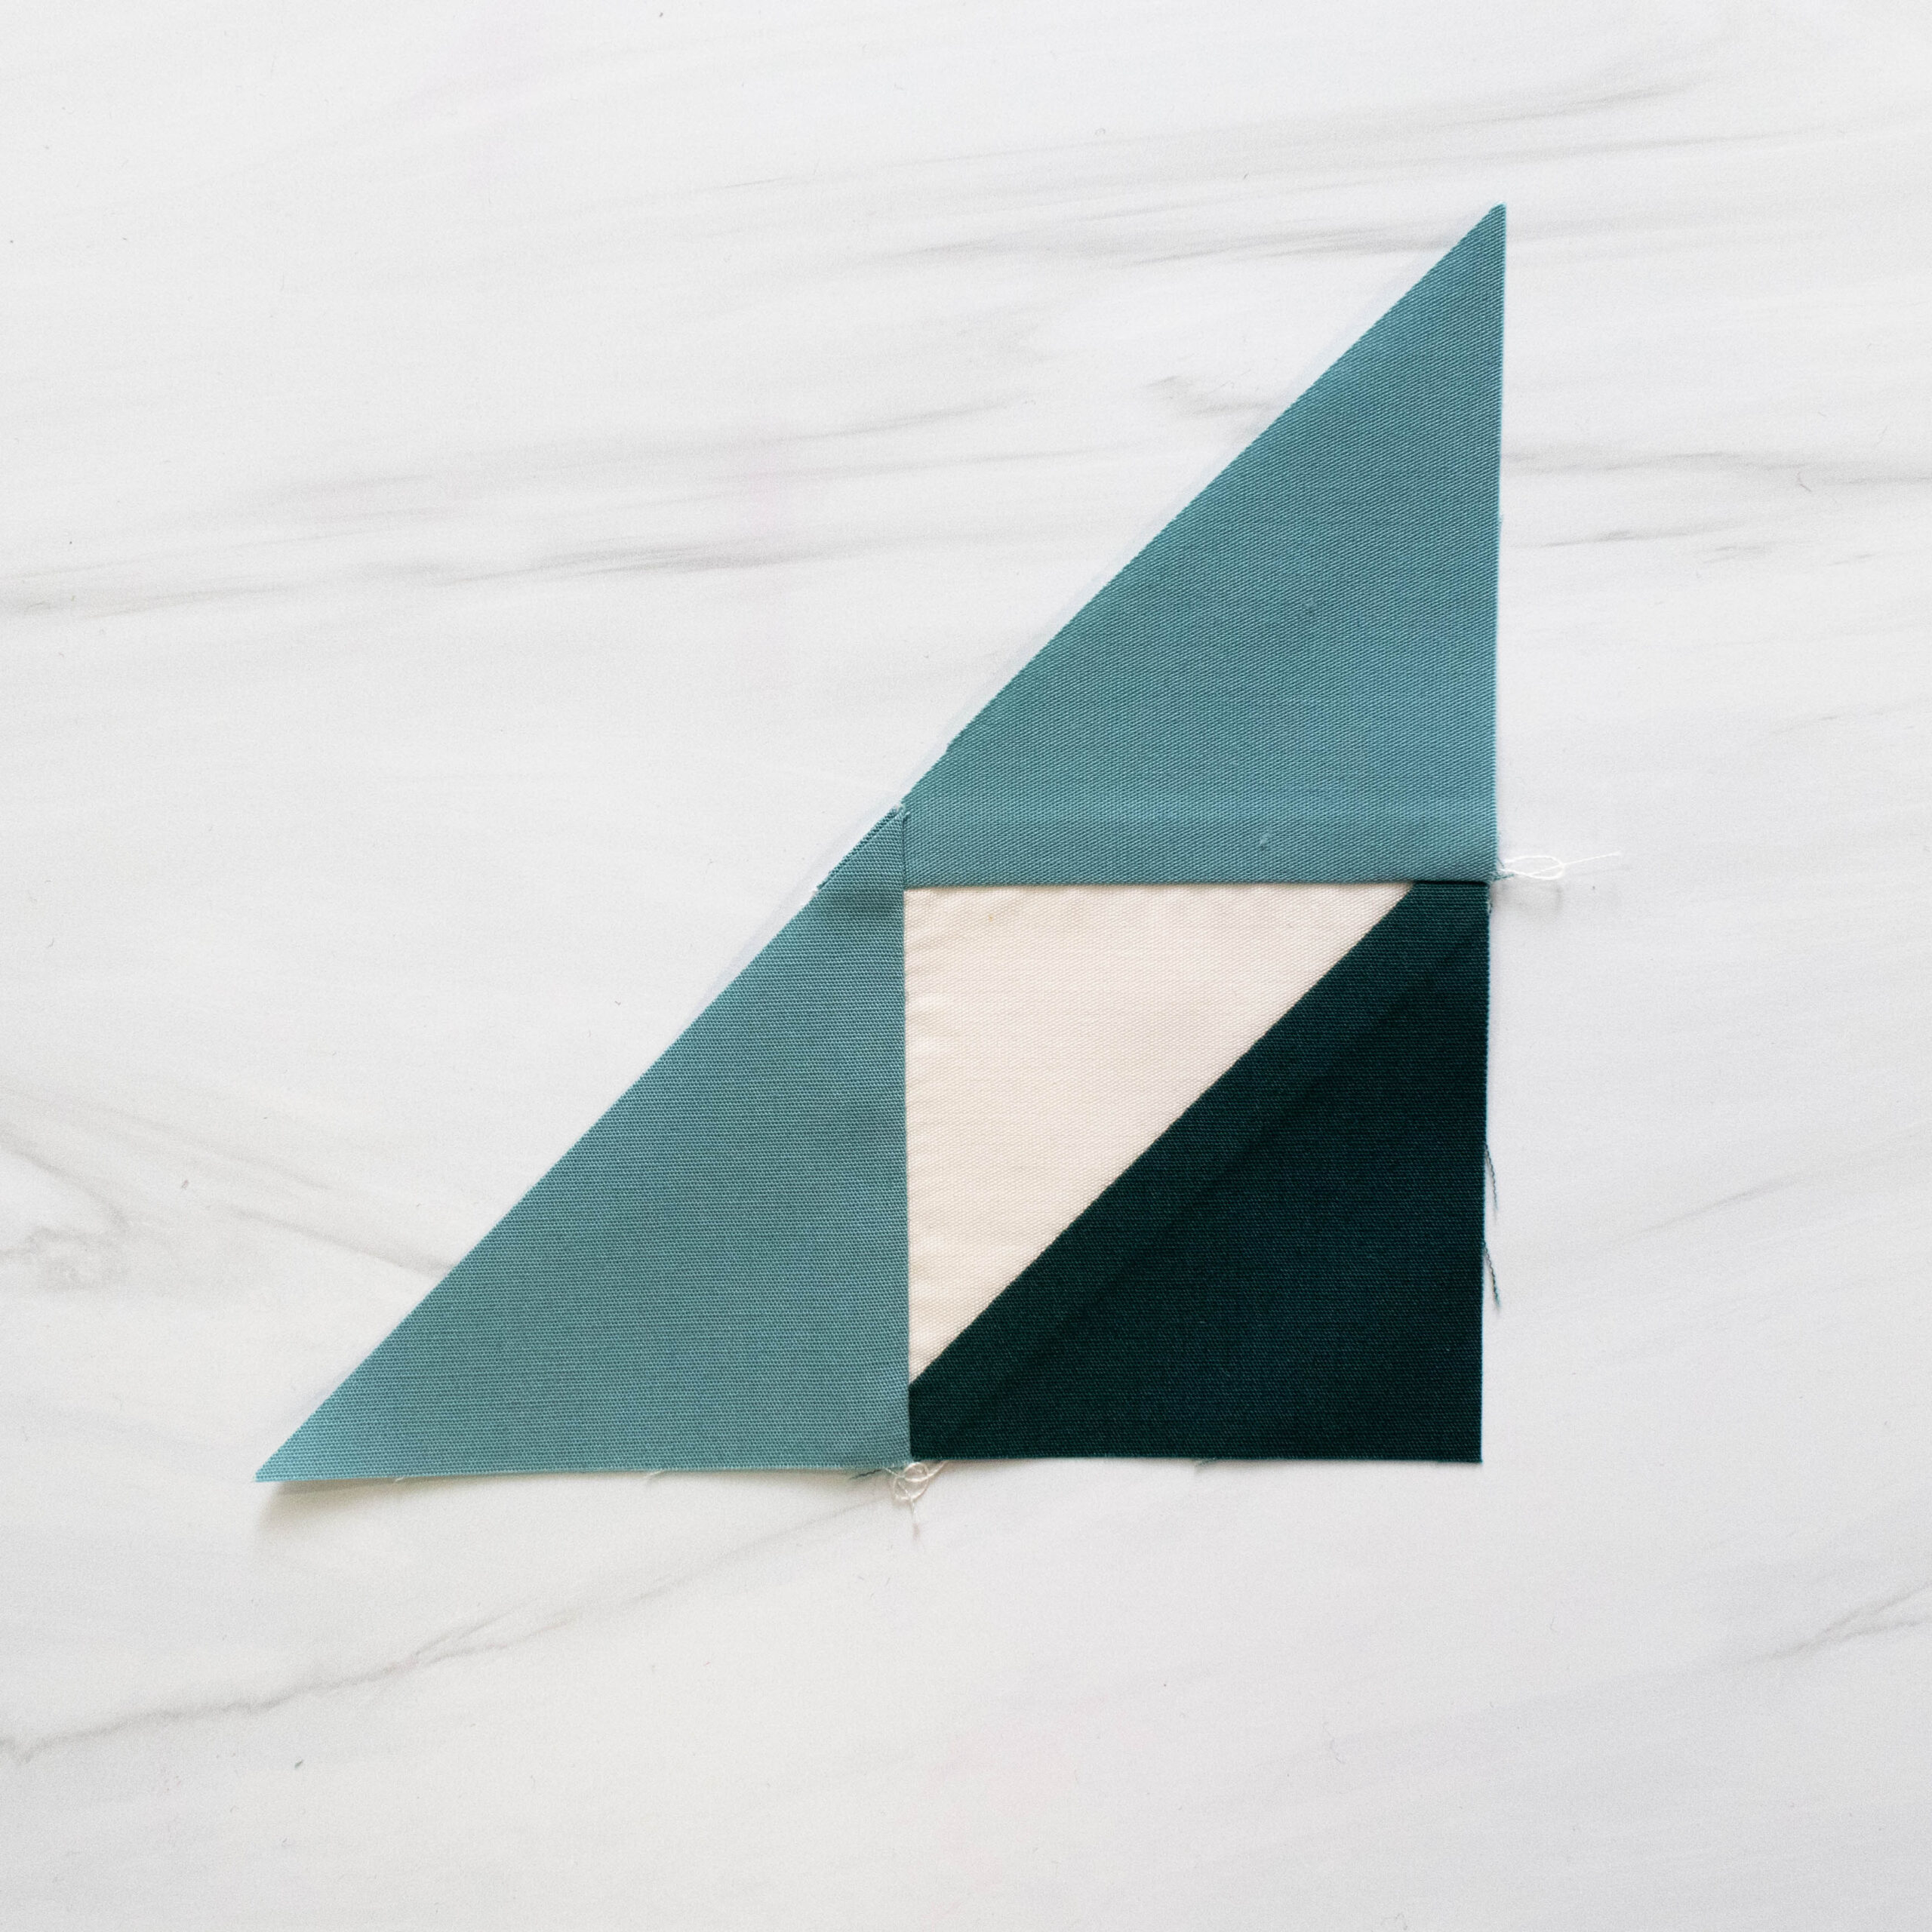
Don’t Get Tripped Up By The Corner Units Look at the picture above. When you get to this step in the PDF, you may think you’ve cut something wrong. I know I did! I double-checked the pattern several times! Typically, when piecing, the two pieces being sewn together are usually the same size. However, when making the Corner Unit, you’ll sew two wing triangles onto a half square triangle (one is shown above), and the wing triangle will be longer. That’s because those long wing triangles are helping to create a seam allowance that will allow you to finish the Corner Unit! Take a look below, left. Do you see where the two wing triangles come together in the center? That’s a quarter inch between the edge and the start of the half square triangle! It allows you to make sure the half square triangle point lines up exactly with the next triangle sewn to the Corner Unit. Check that out below, right.
Know Where To Aim We’ve talked about this tip before, too. It’s almost like this block is bringing together so many skills built in previous months! To get the perfect point shown in the Corner Unit above or in other areas of this block, knowing where to aim your seam is crucial. In the image above, you can see where three seams come together. Before sewing the last long seam, there was an X intersection. I aimed for the center of the X to create the long seam shown in the image above, and the result was a perfect point!
See You in November for Month Eight! Thank you so much to everyone who has participated in the Quilt Alliance’s Birthday Block of the Month so far! Our designer for next month, the eighth block we’re making together, is the innovative Carole Lyles Shaw! Be sure to tag @quiltalliance and @quiltville_bonnie on Instagram with your block photos this month, and use the hashtag #QuiltAllianceBOM. And leave any questions about this month’s block in the comments…
by Emma Parker | Sep 14, 2023 | BOM
Birthday Block of the Month #6: Andrea Tsang Jackson
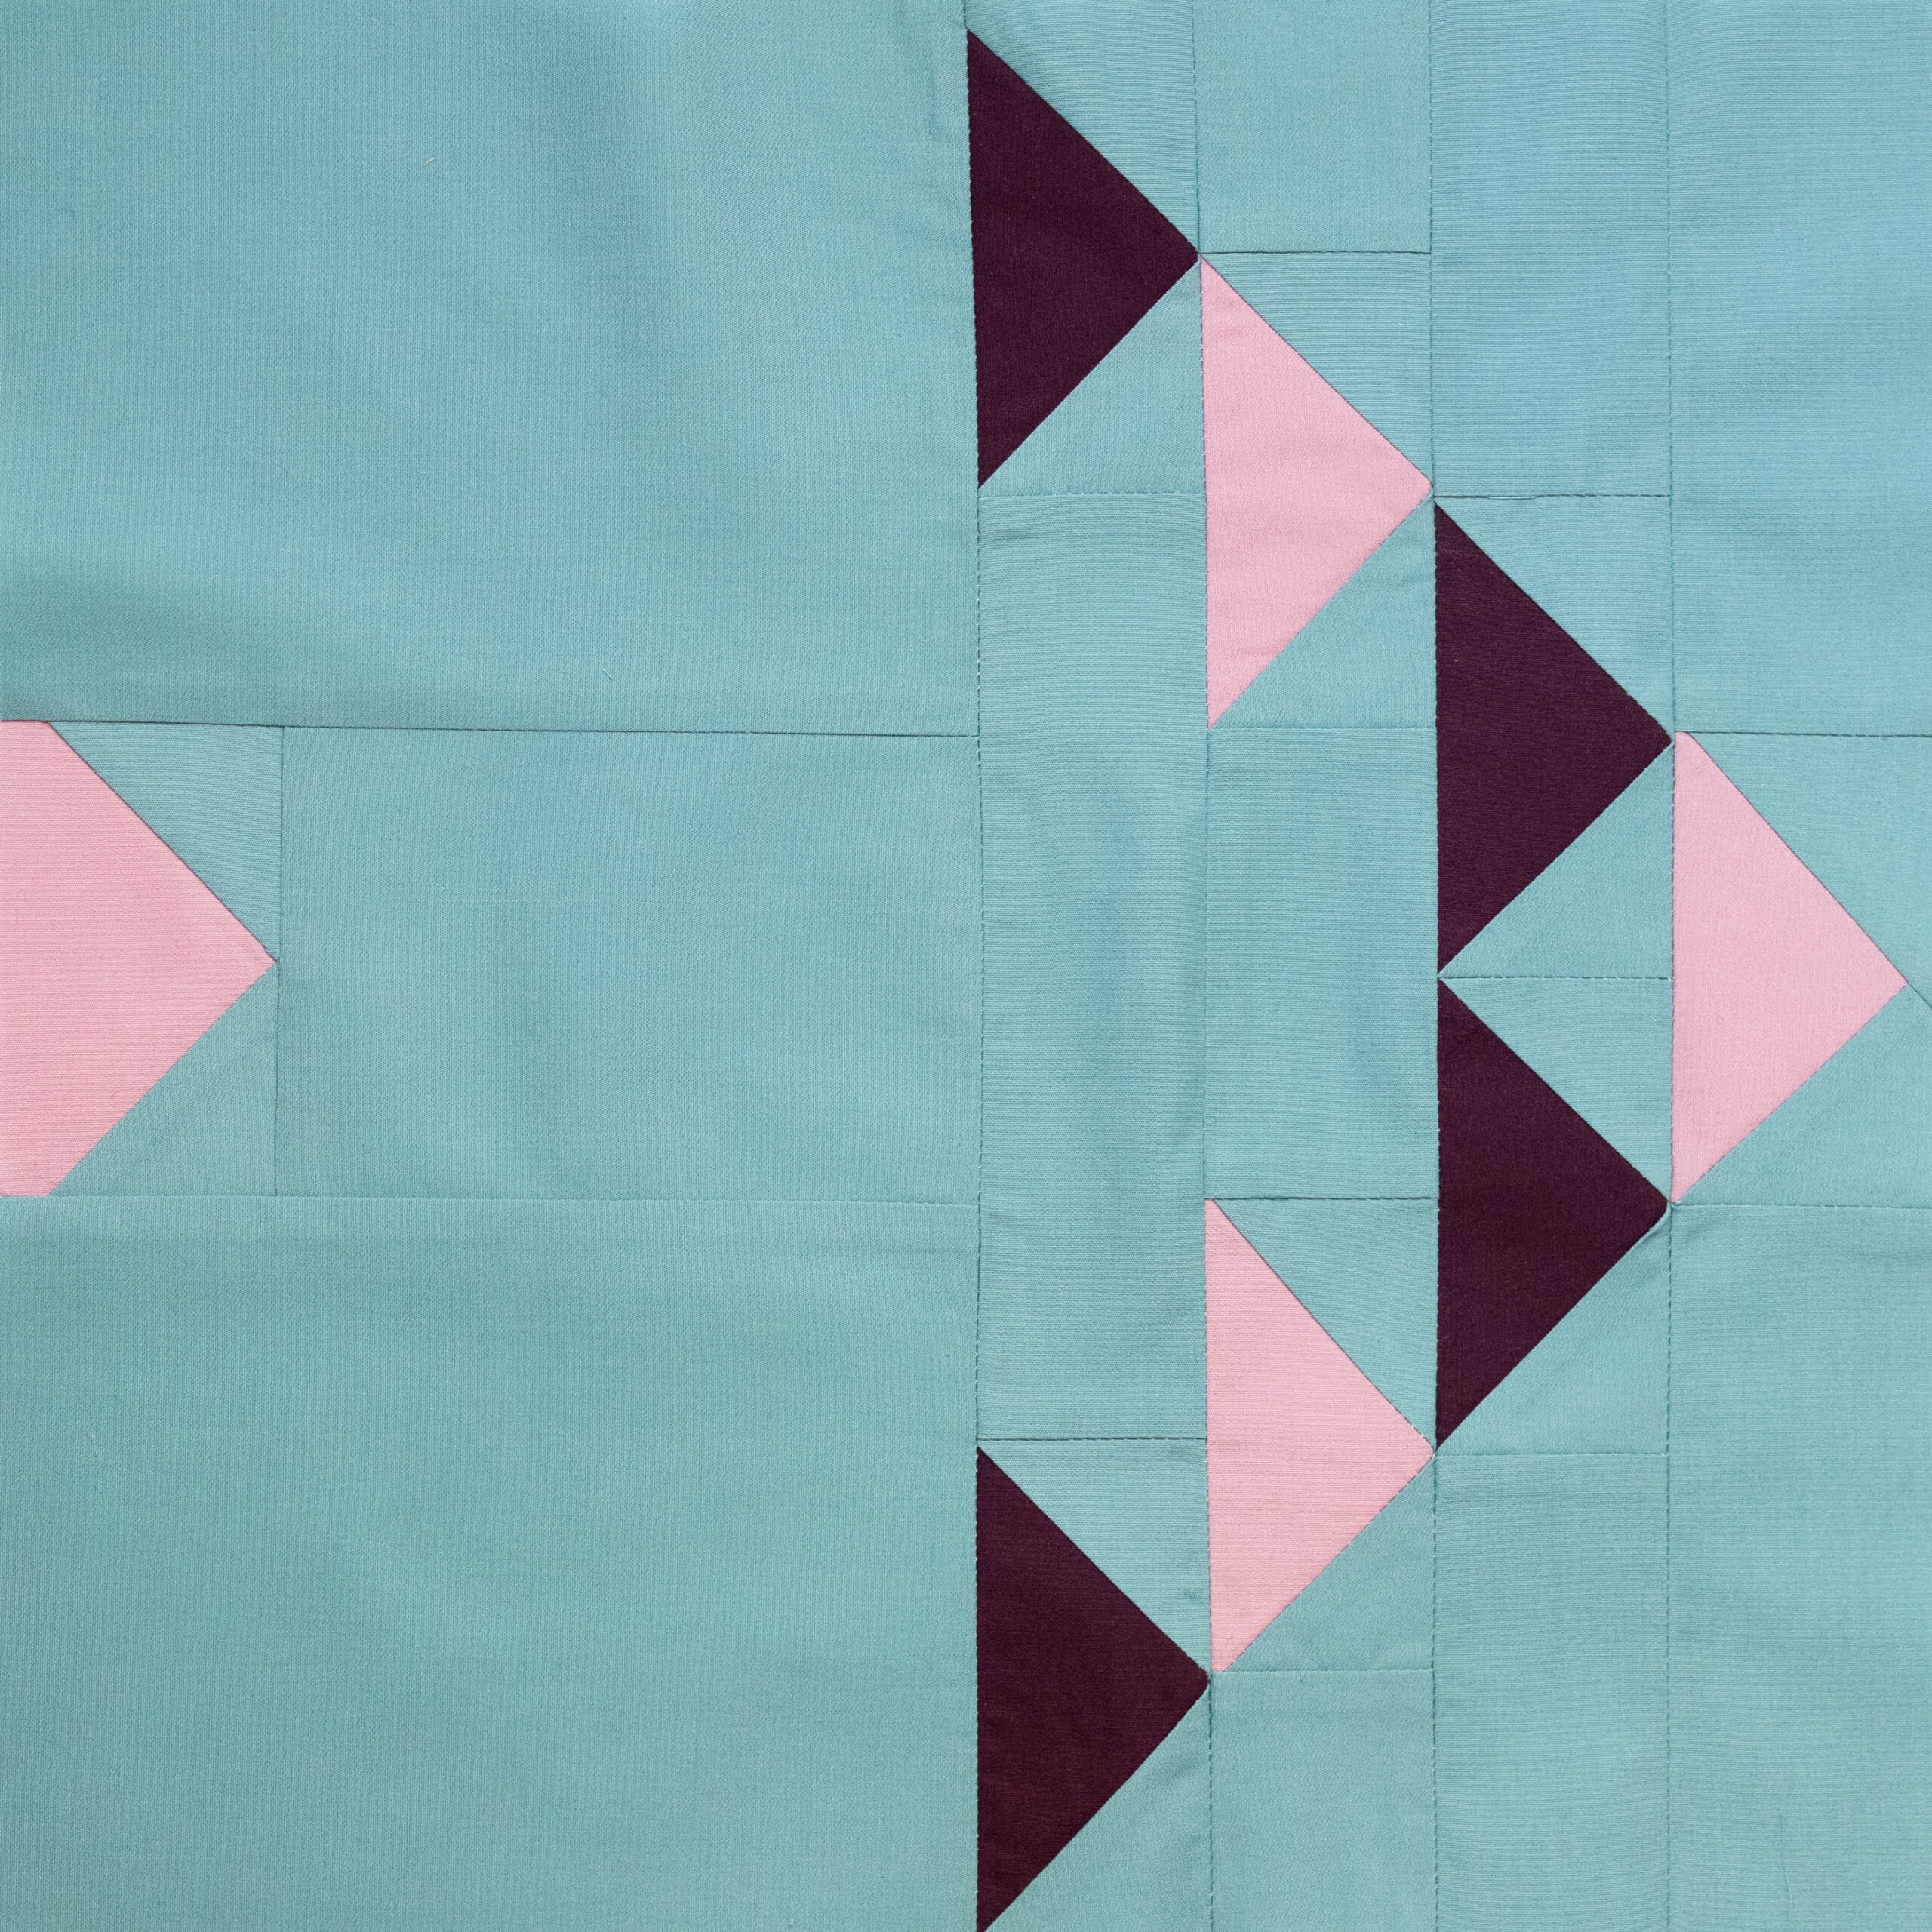
Last month, we practiced accuracy with a no-waste method for making flying geese. We’ll be building on that skill this month as we create smaller flying geese units for this block with a meaningful story. Inspired by her personal journey of starting to quilt by flying solo, before joining a gaggle of quilters in a guild, our designer for this month is the skilled artist and designer Andrea Tsang Jackson of 3rd Story Workshop. Known both as a fine artist and a quilt pattern designer, Andrea pushes the boundaries of quilting through collaborative work, one-of-a-kind design, and larger-than-life public installations. Her work has a timeless quality combined with an effortless calmness. This month’s block is no different. Let’s dive into some tips and tricks to help you create this block as calmly and effortlessly as you can.
Meet Andrea Andrea Tsang Jackson of 3rd Story Workshop is a textile artist, quilt designer, author, and educator based in Halifax, Nova Scotia, Canada. After working in various design fields and settings ranging from architecture to museums, the quilting medium called to her as a way to explore place, belonging, and agency. Her background in architecture has allowed her to understand the design process from a variety of approaches; her training in life has taught her about the beauty in mess. You can follow her on Instagram and find all of Andrea’s patterns on her website. One of the Quilt Alliance’s signature projects is the Go Tell It video documentation project, which anyone can do. Watch the video below to see Andrea talk about her block, and keep reading this blog post to learn a tip for how to document your own quilts!
Andrea’s Top BOM Tips Each month, our Birthday Block of the Month Designers will share their top tips for making the block they designed. Here are three great tips for making this block straight from Andrea herself. Andrea’s Tip 1: Follow Her Easy Flying Geese Tutorial For some new and fun tips about making flying geese, don’t miss Andrea’s no-waste flying geese tutorial. It is such a valuable resource that we included a link in the PDF pattern as well as the blog post! Andrea’s Tip 2: Cut Down the Time It Takes To Cut When cutting the units apart, cut multiple at once using the quickest cutting technique from Andrea’s blog! This tip will cut down your cutting time, especially if you decide to make more flying geese or an entire flying geese quilt after this month’s block. Andrea’s Tip 3: Get the Perfect Trim On Your Geese If you’re making a lot of Flying Geese, a Bloc-Loc Ruler is a wonderful tool to have for trimming them perfectly. However, if you don’t have a Bloc-Loc ruler, keep reading for a step-by-step look at how to trim the geese units with a regular ruler.
Quilt Alliance BOM Tips Each month, we share our best tips for making the Birthday Block of the Month as well. These tips come to you from our Birthday Block of the Month host, Quilt Alliance co-president Laura Hopper! Like last month, my tips for this month are going to focus on making the flying geese units. Let’s dive in!
Sew with a Scant Quarter Inch In Andrea’s tutorial, she specifically mentions using a scant quarter inch. If you’re new to this style of sewing, it’s easy breezy. Instead of aiming for an exact quarter inch seam allowance, you’ll aim for that seam allowance to be just a few fibers smaller. Trust me when I say it sounds harder than it is! Also, don’t forget our tip from last month — know where your intersections are located. In the image above, you can see how to sew a seam through a flying geese X to ensure that you get a perfect point. See how great the point is below!
[et_pb_image src=”https://quiltalliance.org/wp-content/uploads/2023/09/BOM-Month-6-16-scaled.jpg” title_text=”BOM Month 6-16″ _builder_version=”4.22.1″ _module_preset=”default” global_colors_info=”{}”…
by Emma Parker | Aug 16, 2023 | BOM
Birthday Block of the Month #5: Suzy Williams of Suzy Quilts
In the first four months of the Quilt Alliance’s Birthday Block of the Month celebration, we’ve had delightful quilt blocks that stretch our skills, and for month five we have something we haven’t seen before in this sew along — two classic quilt blocks coming together to create one new, almost three-dimensional shape! Created using a nine patch and flying geese, this block by popular designer Suzy Williams of Suzy Quilts is so eye-catching, you may want to make it more than once! It’s why this block was used in the introduction PDF for the BOM as an example of making one of our blocks into an entire quilt. And it’s easier than it looks! Let’s dive into some tips and tricks that will help increase your accuracy to get the perfect 3D illusion in your block.
Meet Suzy Suzy Williams is the founder of Suzy Quilts, a quilt pattern company and blog that is rooted in a deep love for the heritage and tradition of quilting and a desire to craft unique, contemporary textiles. Suzy uses her graphic design background to transform conventional sewing into a fresh, personal interpretation of minimal, modern design. Since its founding, Suzy Quilts has published over 60 quilt patterns and over 500 blog posts, growing an organic community of enthusiastic quilters along the way. Suzy is also a fabric designer with Art Gallery Fabrics. You can follow her on Instagram, join the popular Suzy Quilts Patterns Facebook group, and find all of Suzy’s patterns plus blog posts filled with free tutorials and sewing tips on her website.
Suzy’s Top BOM Tips Each month, our Birthday Block of the Month Designers will share their top tips for making the block they designed. Here are three great tips for making this block straight from Suzy herself. Suzy’s Tip 1: Learn from the best! If you’ve never made flying geese before, you may not know that there are multiple ways to create this simple block! In this month’s pattern, we use Suzy’s no-waste 4-at-a-time method. But you can visit her website and learn other ways to create the flying geese units (just be sure to adjust the cutting requirements accordingly). Suzy’s Tip 2: Use a Great Ruler Piecing accuracy isn’t just about your seam allowance. It’s also about cutting! Especially when trimming in the final step of creating the flying geese units, you want to be sure your ruler is a helper, not a hindrance. Check out this post from Suzy’s blog all about different types of quilting rulers to find one that’s right for you! Suzy’s Tip 3: Good Pressing Increases Accuracy Pressing may not be everyone’s favorite part of quilting, but without knowing and practicing great technique, your piecing accuracy can decrease. Accuracy is crucial to this block to create the 3D illusion, so be sure to read this post and watch the video tutorial about how to press seams in a quilt.
Quilt Alliance BOM Tips Each month, we share our best tips for making the Birthday Block of the Month as well. These tips come to you from our Birthday Block of the Month host, Quilt Alliance co-president, and Suzy Quilts team member, Laura Hopper — that’s me! You can read my blog posts on the Suzy Quilts website here. And keep reading for the tips I came up with as I was making a sample block from Suzy’s design!
Know Where To Sew Step 7 for creating the flying geese units may be the most confusing part of this block pattern. You know, the one that looks like the picture here. But if you know where your seam should go, it’s much more clear! The picture above shows the two seams sewn on both sides of the guideline in Step 7. Do you notice how they both go to the open triangular spots between the pressed seam and the square you’re adding? Lining your seams up perfectly with those open points is the first tip for getting accurate flying geese.
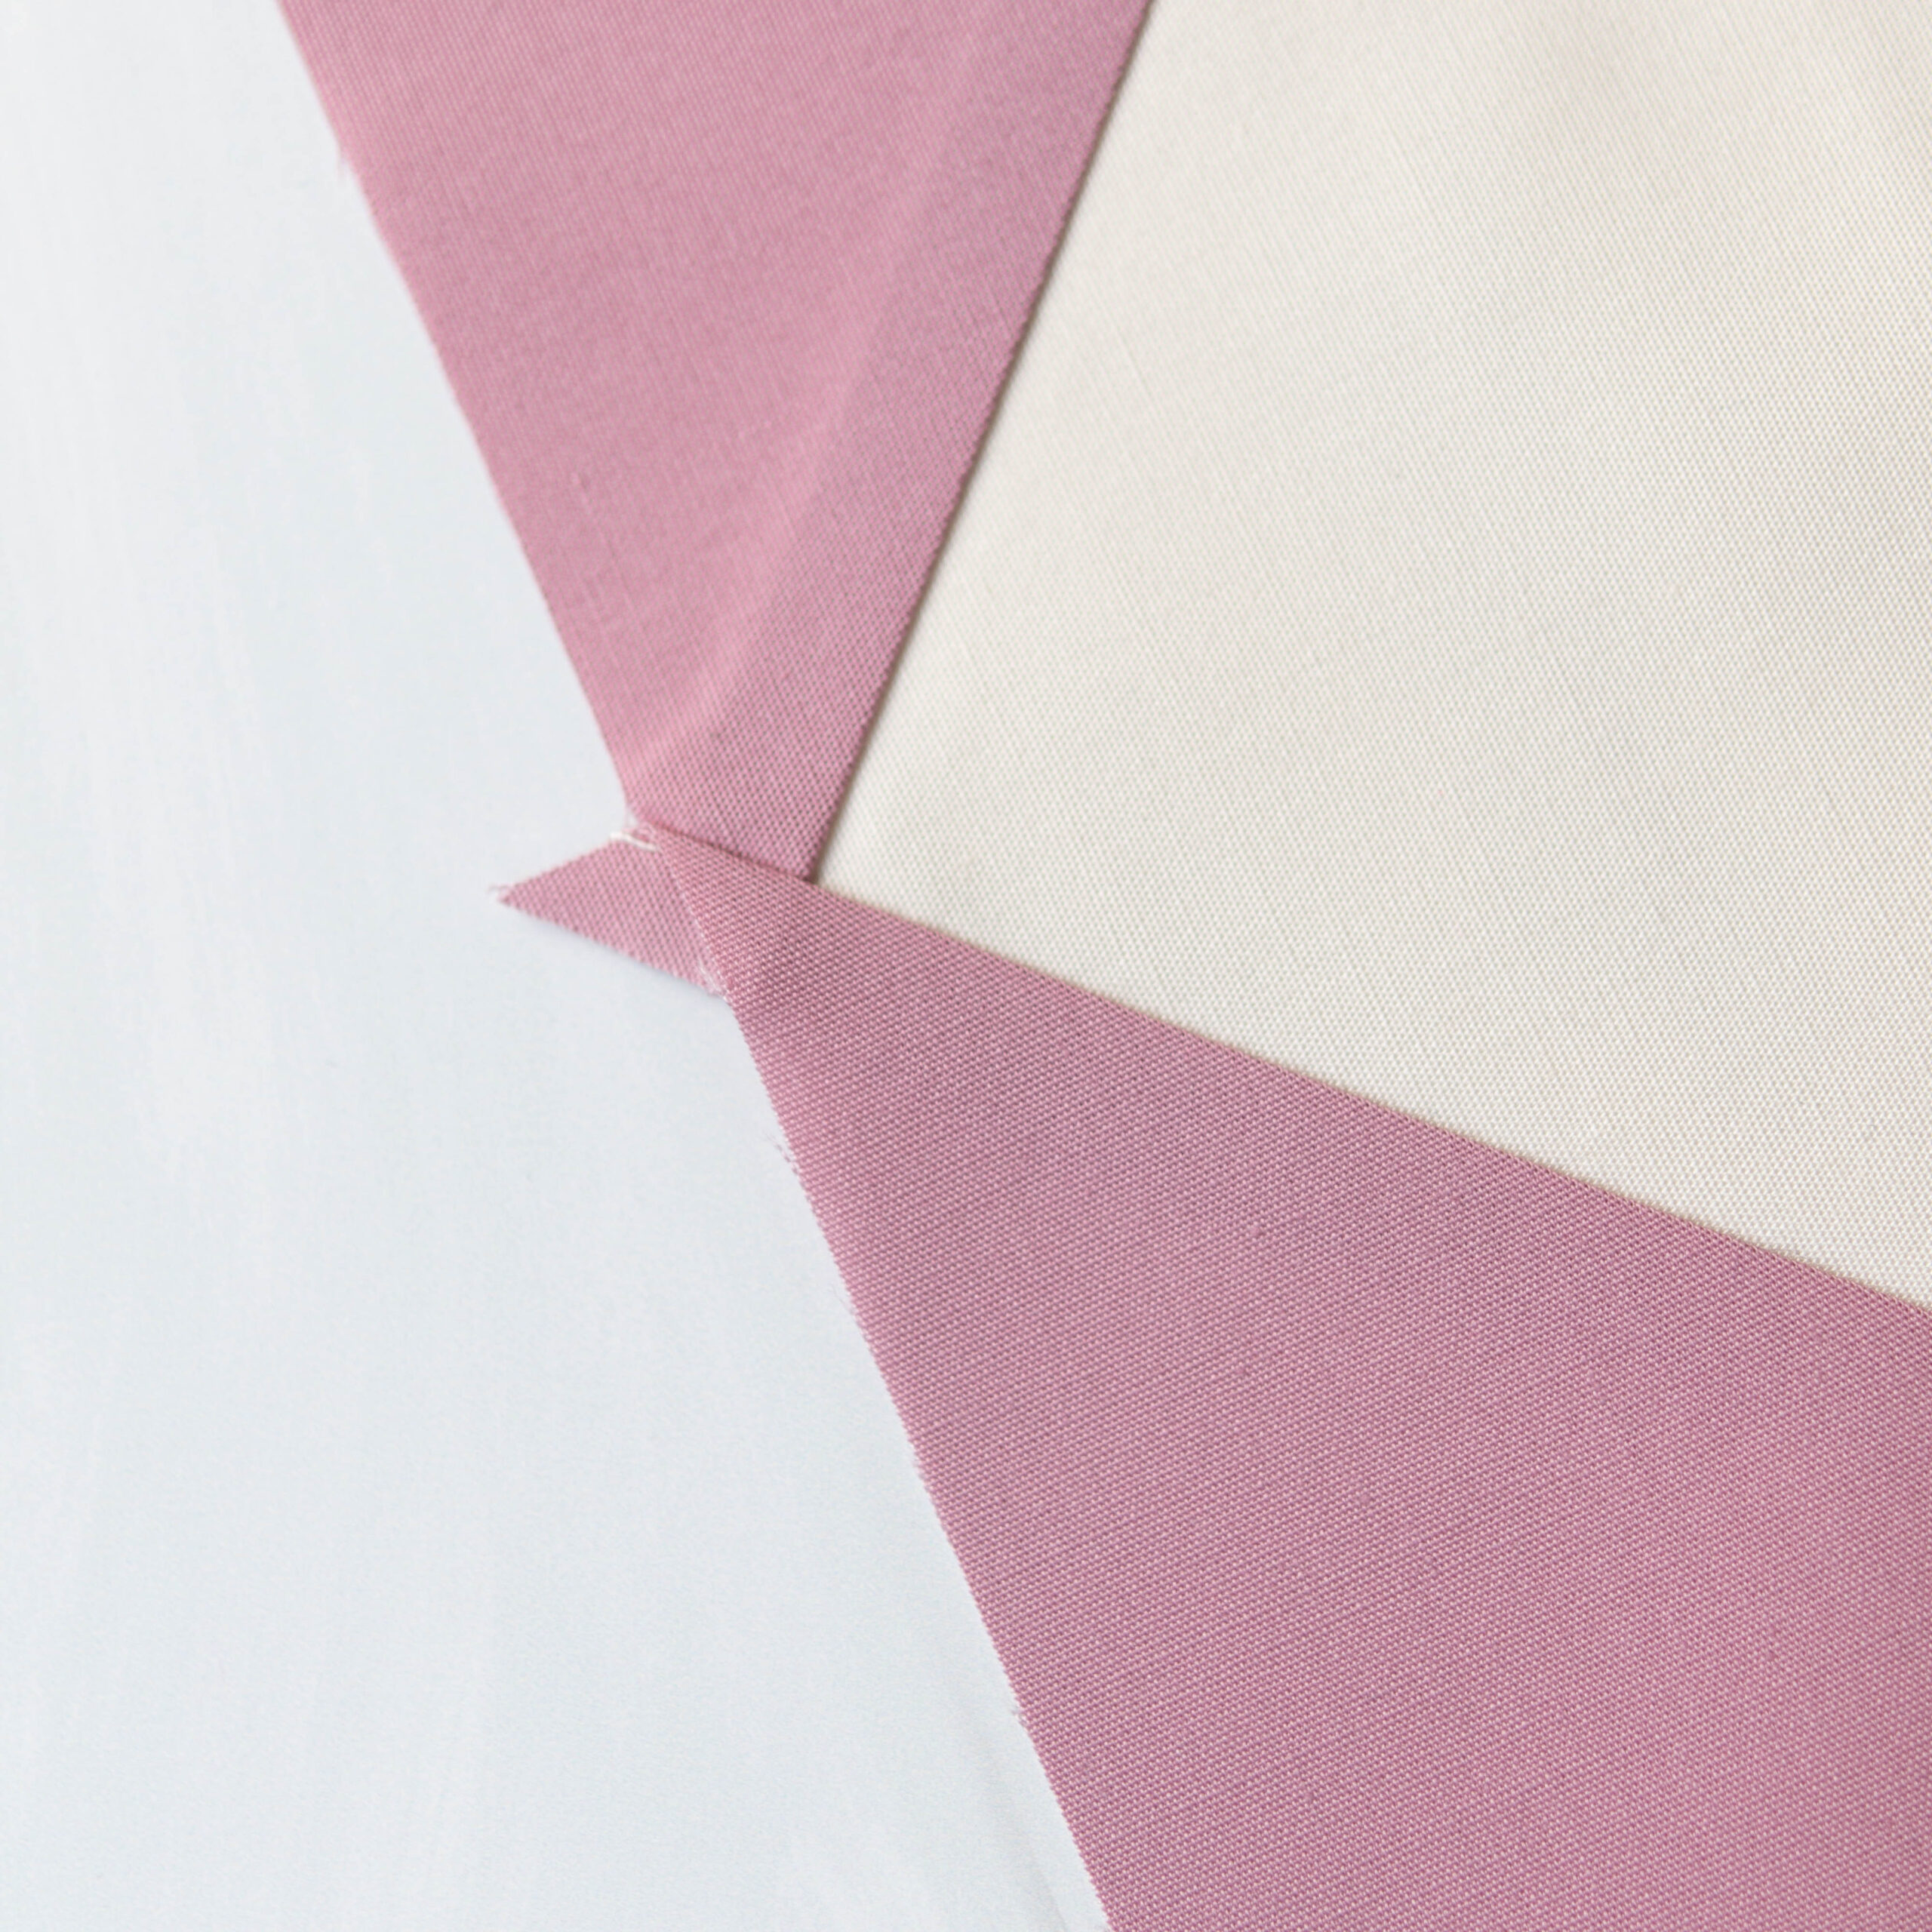
Finger Pressing Improves Accuracy We’ve gone over finger pressing before during this BOM, but I can’t say enough good things about it. It really works! Pressing seams with your iron right off the bat decreases accuracy because you have less control of how the seam is moving and you also have less visibility to check that the seam is falling exactly where you’d like. With a block like no-waste flying geese, you need every single fiber possible to ensure that you have accurate points. Controlling that seam is a huge help! To finger press, start with the block right side up. Gently use your fingers to fold over the seam as you plan to press it, then gently press down with your fingers until you’re happy with the result. Give the seam a quick press with your iron to set it, then turn it over and press as you normally would (I highly recommend using steam and a tailor’s clapper to set seams on the back). When making no-waste flying geese, I finger press ever single seam before pressing with an iron. The picture above shows how accurate the flying geese points can be with finger pressing! If your points look less accurate than this, try finger pressing the next unit.
Know Where to Aim When Sewing Flying Geese When it’s time to assemble the block, you’ll need to sew the flying geese to other units. Make sure to aim for the intersection shown above! Do you see how the seam is stitched through the X shape created by the flying geese? If your seam runs exactly through that X, your flying geese points will be perfect. Check out the results below! Isn’t that a beautiful point? I just love sewing a seam and seeing this result. It’s so satisfying!
Quilt Documentation Tip Every quilter has a story to tell. What was your first quilt? When did you decide that quilting was your hobby of choice? How has your quilting journey evolved over the years? Or if you’re a brand new quilter, what are your goals? Suzy did a QSOS oral history for the Quilt Alliance where she shares her story. Watch the video while you’re working on this quilt and reflect on your own quilting journey and how you can record it. Have you considered writing your quilting story in a journal and then using that journal to track the other quilts you make? What a wonderful gift for future generations to find!
Quilt Documentation Tip: Each month, we’ll bring you a quilt documentation tip in these blog posts. These tips will help you not only learn more about the Quilt Alliance but also learn how to preserve your own quilt stories. Your quilts matter and we want to help you preserve and share their stories! Ricky’s block is focused on beginner quilters, and since this month is the first in our Block of the Month, we want to encourage you to document your very first quilt. The journeys we all take towards becoming quilters are all unique. Share yours in a DIY Go Tell It Video, just like the video Ricky made about this block. To learn how to make your own Go Tell It video, head to the Go Tell It DIY page here. You’ll see that documenting your own quilts is much easier than you might…
by Emma Parker | Jul 20, 2023 | BOM
Birthday Block of the Month #4: Sheri Cifaldi-Morrill
Learning a new quilting skill can seem intimidating at first. But with a great teacher, you’ll feel supported and flourish! That’s where this month’s Quilt Alliance Birthday Block of the Month designer comes in. Sheri Cifaldi-Morrill, known for her growing and beloved pattern company Whole Circle Studio, is one of the most comprehensive and patient quilt teachers you can find — and that’s perfect for foundation paper piecing (FPP), which we’ll be doing this month! We’ve focused on piecing fabric together for all of our previous months. This month, we’re adding paper as a foundation to create an astonishingly accurate quilt block. But if you’ve never done FPP before, you’re in the right place. Sheri has been a Quilt Alliance supporter for years and she’s here to teach you everything you need to know to succeed!
Meet Sheri Sheri Cifaldi-Morrill of Whole Circle Studio is a designer who creates quilts that are both decorative and functional, blurring the divisions between art, design, and craft. After working in graphic design for over 20 years, she taught herself how to sew and discovered a passion for designing and making modern quilts. This exploration led her to pursue new opportunities and work with her hands to start her own studio business, specializing in the design of custom modern quilts, patterns, surface design illustration, and products. You can follow her on Instagram, find her patterns on her website, and be sure to sign up for her excellent newsletter! One of the Quilt Alliance’s signature projects is the Go Tell It video documentation project, which anyone can do. Watch the video below to see Sheri talk about her block, and keep reading this blog post to learn a tip for how to document your own quilts!
Sheri’s Top BOM Tips Each month, our Birthday Block of the Month Designers will share their top tips for making the block they designed. Here are three great tips for making this block straight from Sheri herself. Sheri’s Tip 1: Learn from the best! If you’re an FPP beginner or need a refresher on the technique, Sheri has an extensive 40-minute free class for foundation paper piecing on her website. I’d recommend everyone who does this block watches the class! While she isn’t making the same block as our Quilt Alliance Birthday Block of the Month, you will learn valuable tips even if you’ve done FPP before. The best thing about this video class is that you’re able to see each and every step of the FPP process on a fairly similar block to the one you’re making this month. Because you are basically sewing upside down with FPP, it can feel confusing at times. The process has never been more clear to me (Laura Hopper, BOM host) after viewing her video and seeing her walk through making 1 FPP template! I’ve done my fair share of foundation paper piecing in the past, but I still decided to watch Sheri’s full video before making my test block. I learned so much and my block turned out better because of it! You’ll see this video referenced in this month’s PDF download as well because it is invaluable to the process of making this month’s block — or making any other FPP blocks in the future! Sheri’s Tip 2: Shorter is Better When foundation paper piecing, reduce your stitch length to 1.5. This shortened stitch length will make it easier to remove paper at the end. It also helps your seams stay strong while the paper is being pulled out. Sheri’s Tip 3: Don’t Be Afraid of your Seam Ripper Have your seam ripper handy and be prepared to use it! Even the most experienced paper piecers will need one at times — including me! One of the things that can be hard to get used to with foundation paper piecing is making sure that your fabric doesn’t move once it’s under the paper you are using as a foundation. As you can see in the picture here, my fabric slipped as I was sewing the mauve fabric to the neutral fabric. Here’s a closer look: Whoops! You can see that things started out well and part of the seam is on the mauve fabric. But as I sewed on, the fabric slipped off of the seam I was sewing. No problem — seam ripper to the rescue! I redid this seam and it looked perfect in the end.
Quilt Alliance BOM Tips Each month, we share our best tips for making the Birthday Block of the Month as well, and this one is funny because our best tip is the same as Sheri’s first tip — make sure to watch her video tutorial on foundation paper piecing! But don’t worry, we have even more tips to help you along the way. Our tips this month are entirely about the neat tools that can help make foundation paper piecing easier!
Extra Tools Aren’t Required — But They Help! If you don’t want to invest in extra tools for this block because you don’t know if you’ll enjoy foundation paper piecing yet, that’s completely understandable! You can make foundation paper piecing work with tools you already have. However, it is a very specific technique that is made easier with the help of a few affordable notions. Here are some that I enjoy. Add-A-Quarter ruler: This ruler has a raised line along one long edge that measures exactly one quarter inch. It is designed to bump up again the edge of a folded piece of paper as you’re making a foundation paper piecing block. It allows you to know that you’re trimming your fabric to an accurate quarter inch. Seam roller: You can press your fabric as you’re working on your block, but if you’d rather not go back and forth to your iron so much, a seam roller will be your best friend. I use mine so much that I splurged on a very nice on from Modern American Vintage. Fabric glue pen: This is a helpful way to secure the first piece of fabric for a foundation paper pieced block to the paper, as Sheri demonstrates in her video. My personal favorite is made by Bohin. Tweezers: Removing paper at the end of creating an FPP block is so satisfying! What a wonderful way to celebrate being finished with a block. However, sometimes tiny bits of the paper can get stuck in the seams. Tweezers can help remove these papers — just be sure not to accidentally pull out any stitches. Tracing wheel: Pulling the paper out at the end of making a foundation paper pieced block can be challenging. Reducing your stitch length is the biggest help, but I also like going over all of the lines on the paper for an FPP block with a tracking wheel which makes little perforations in the paper. This not only makes it a little easier to rip the paper out, but it also makes it very easy to fold the paper while making the block! Note: This will leave little marks on your cutting mat, so use an old one or the back of yours. Check out what that looks like below!
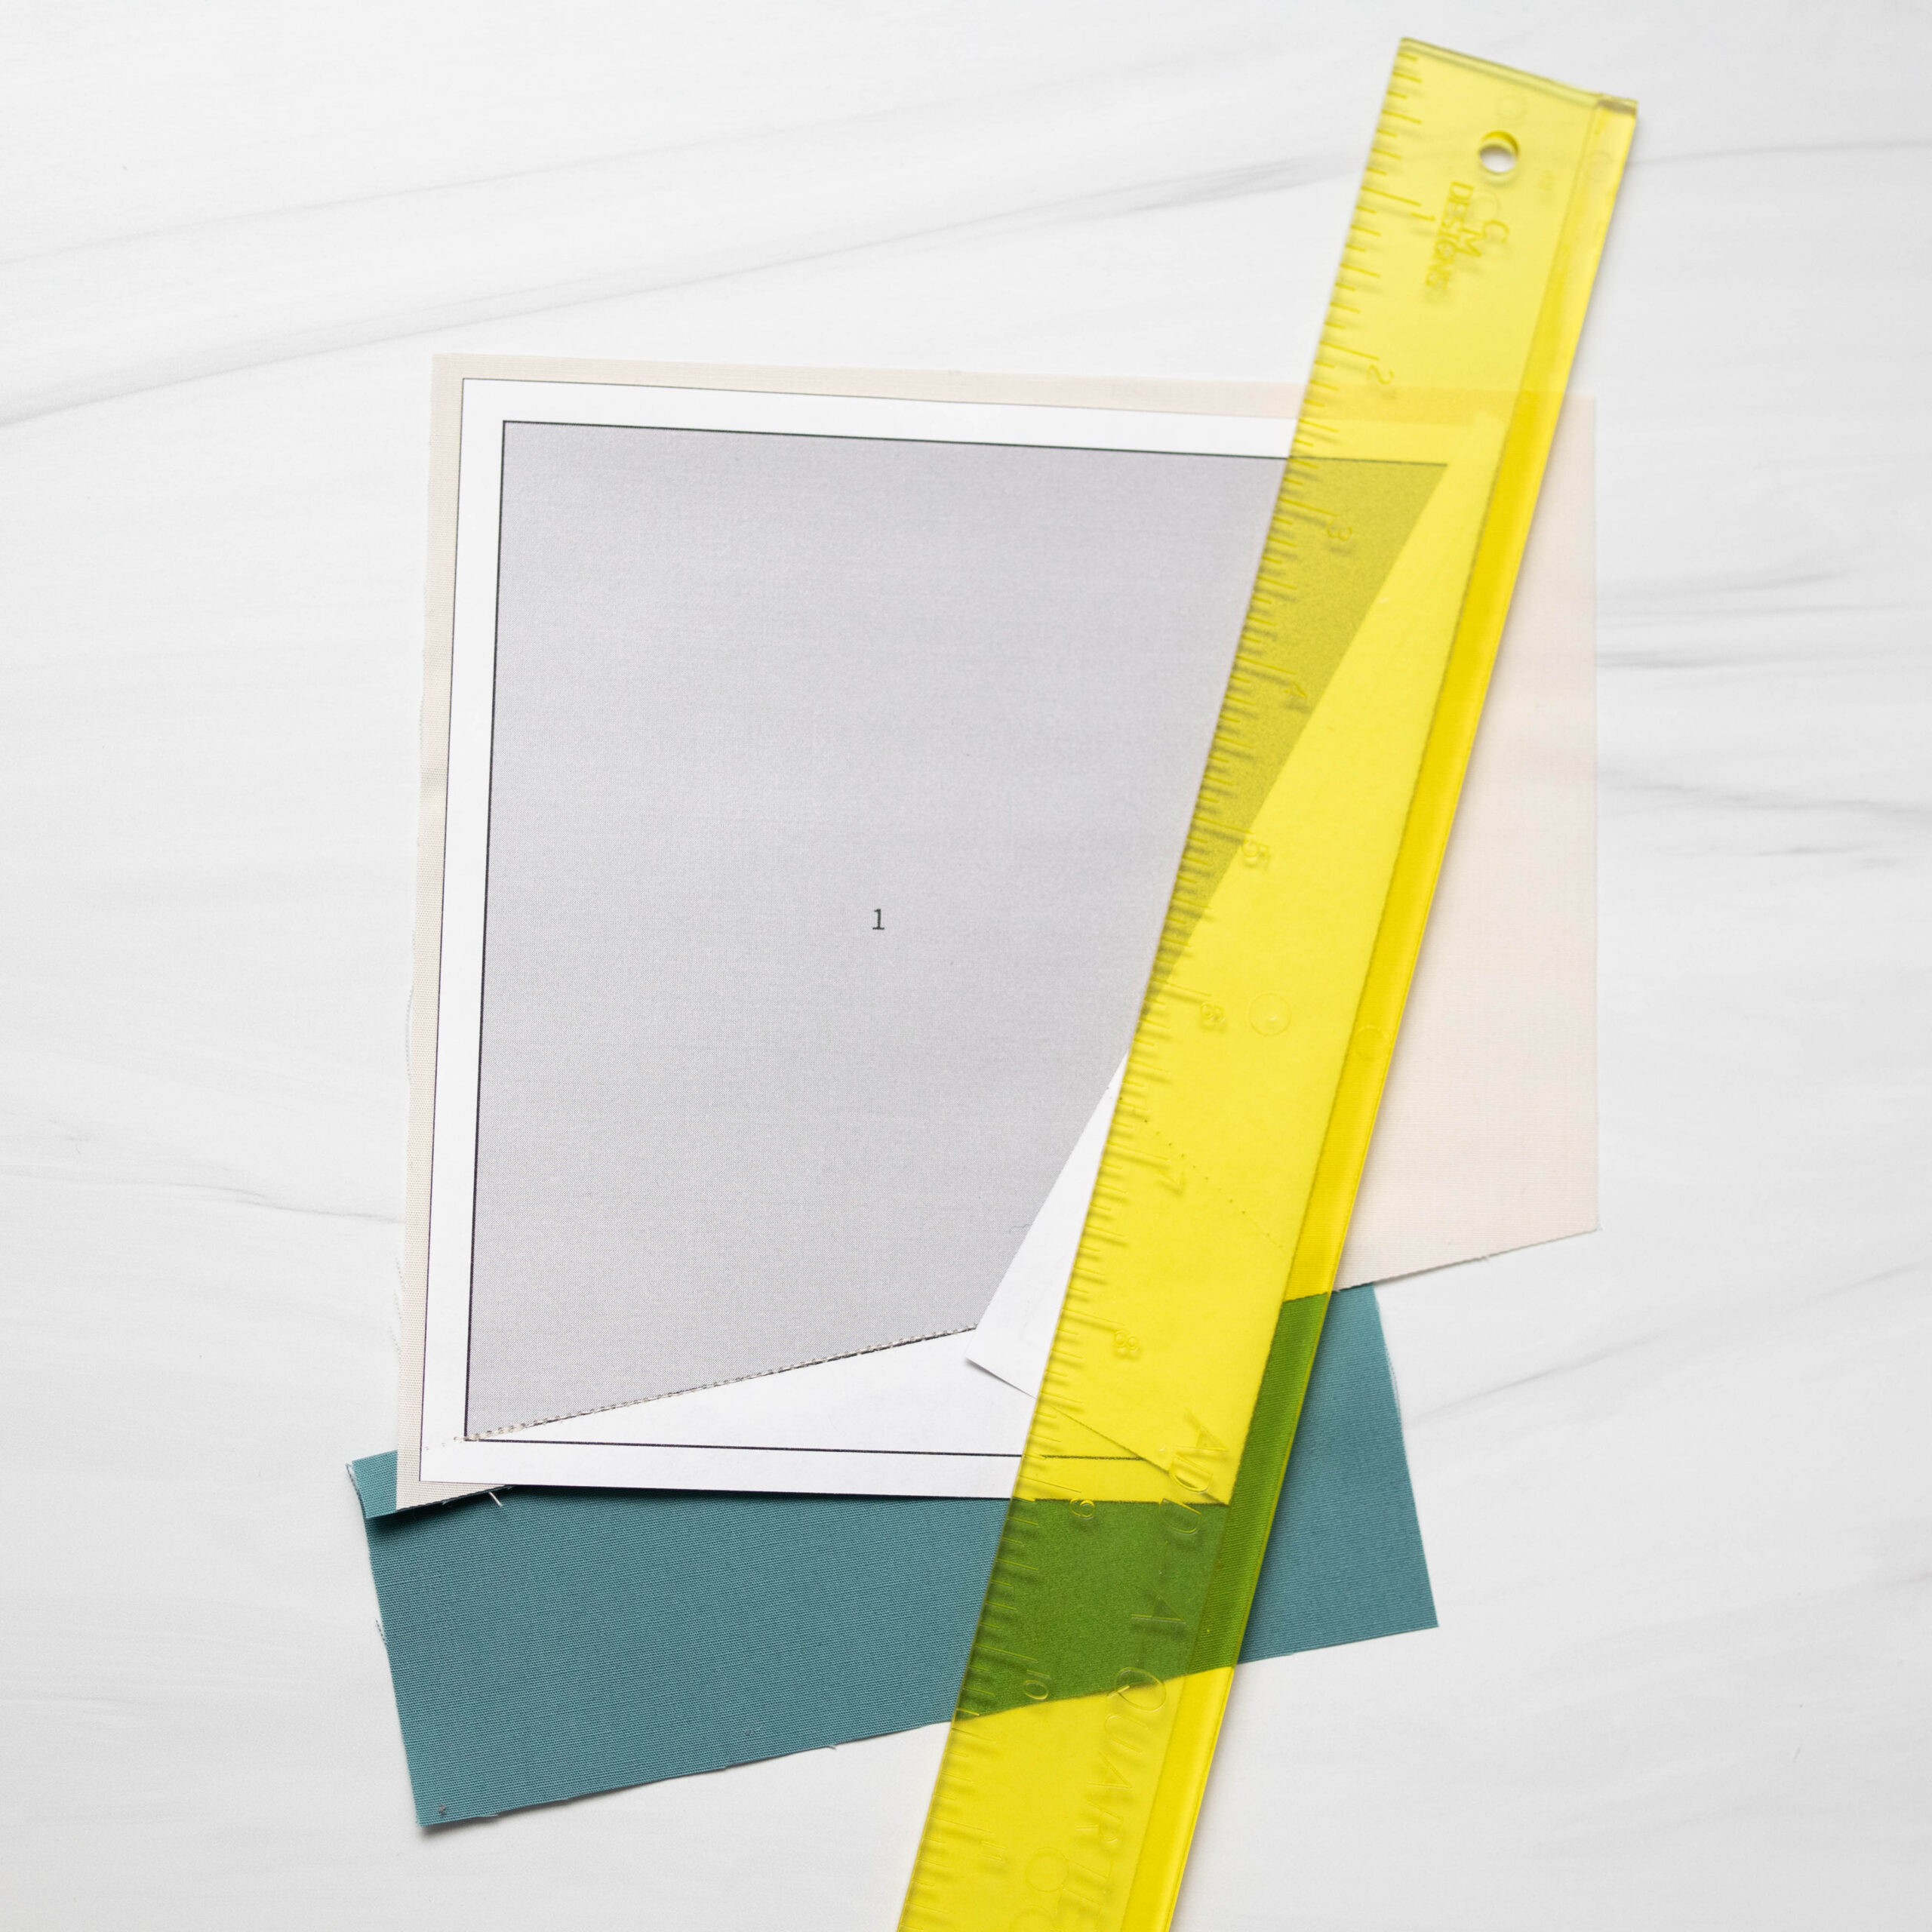
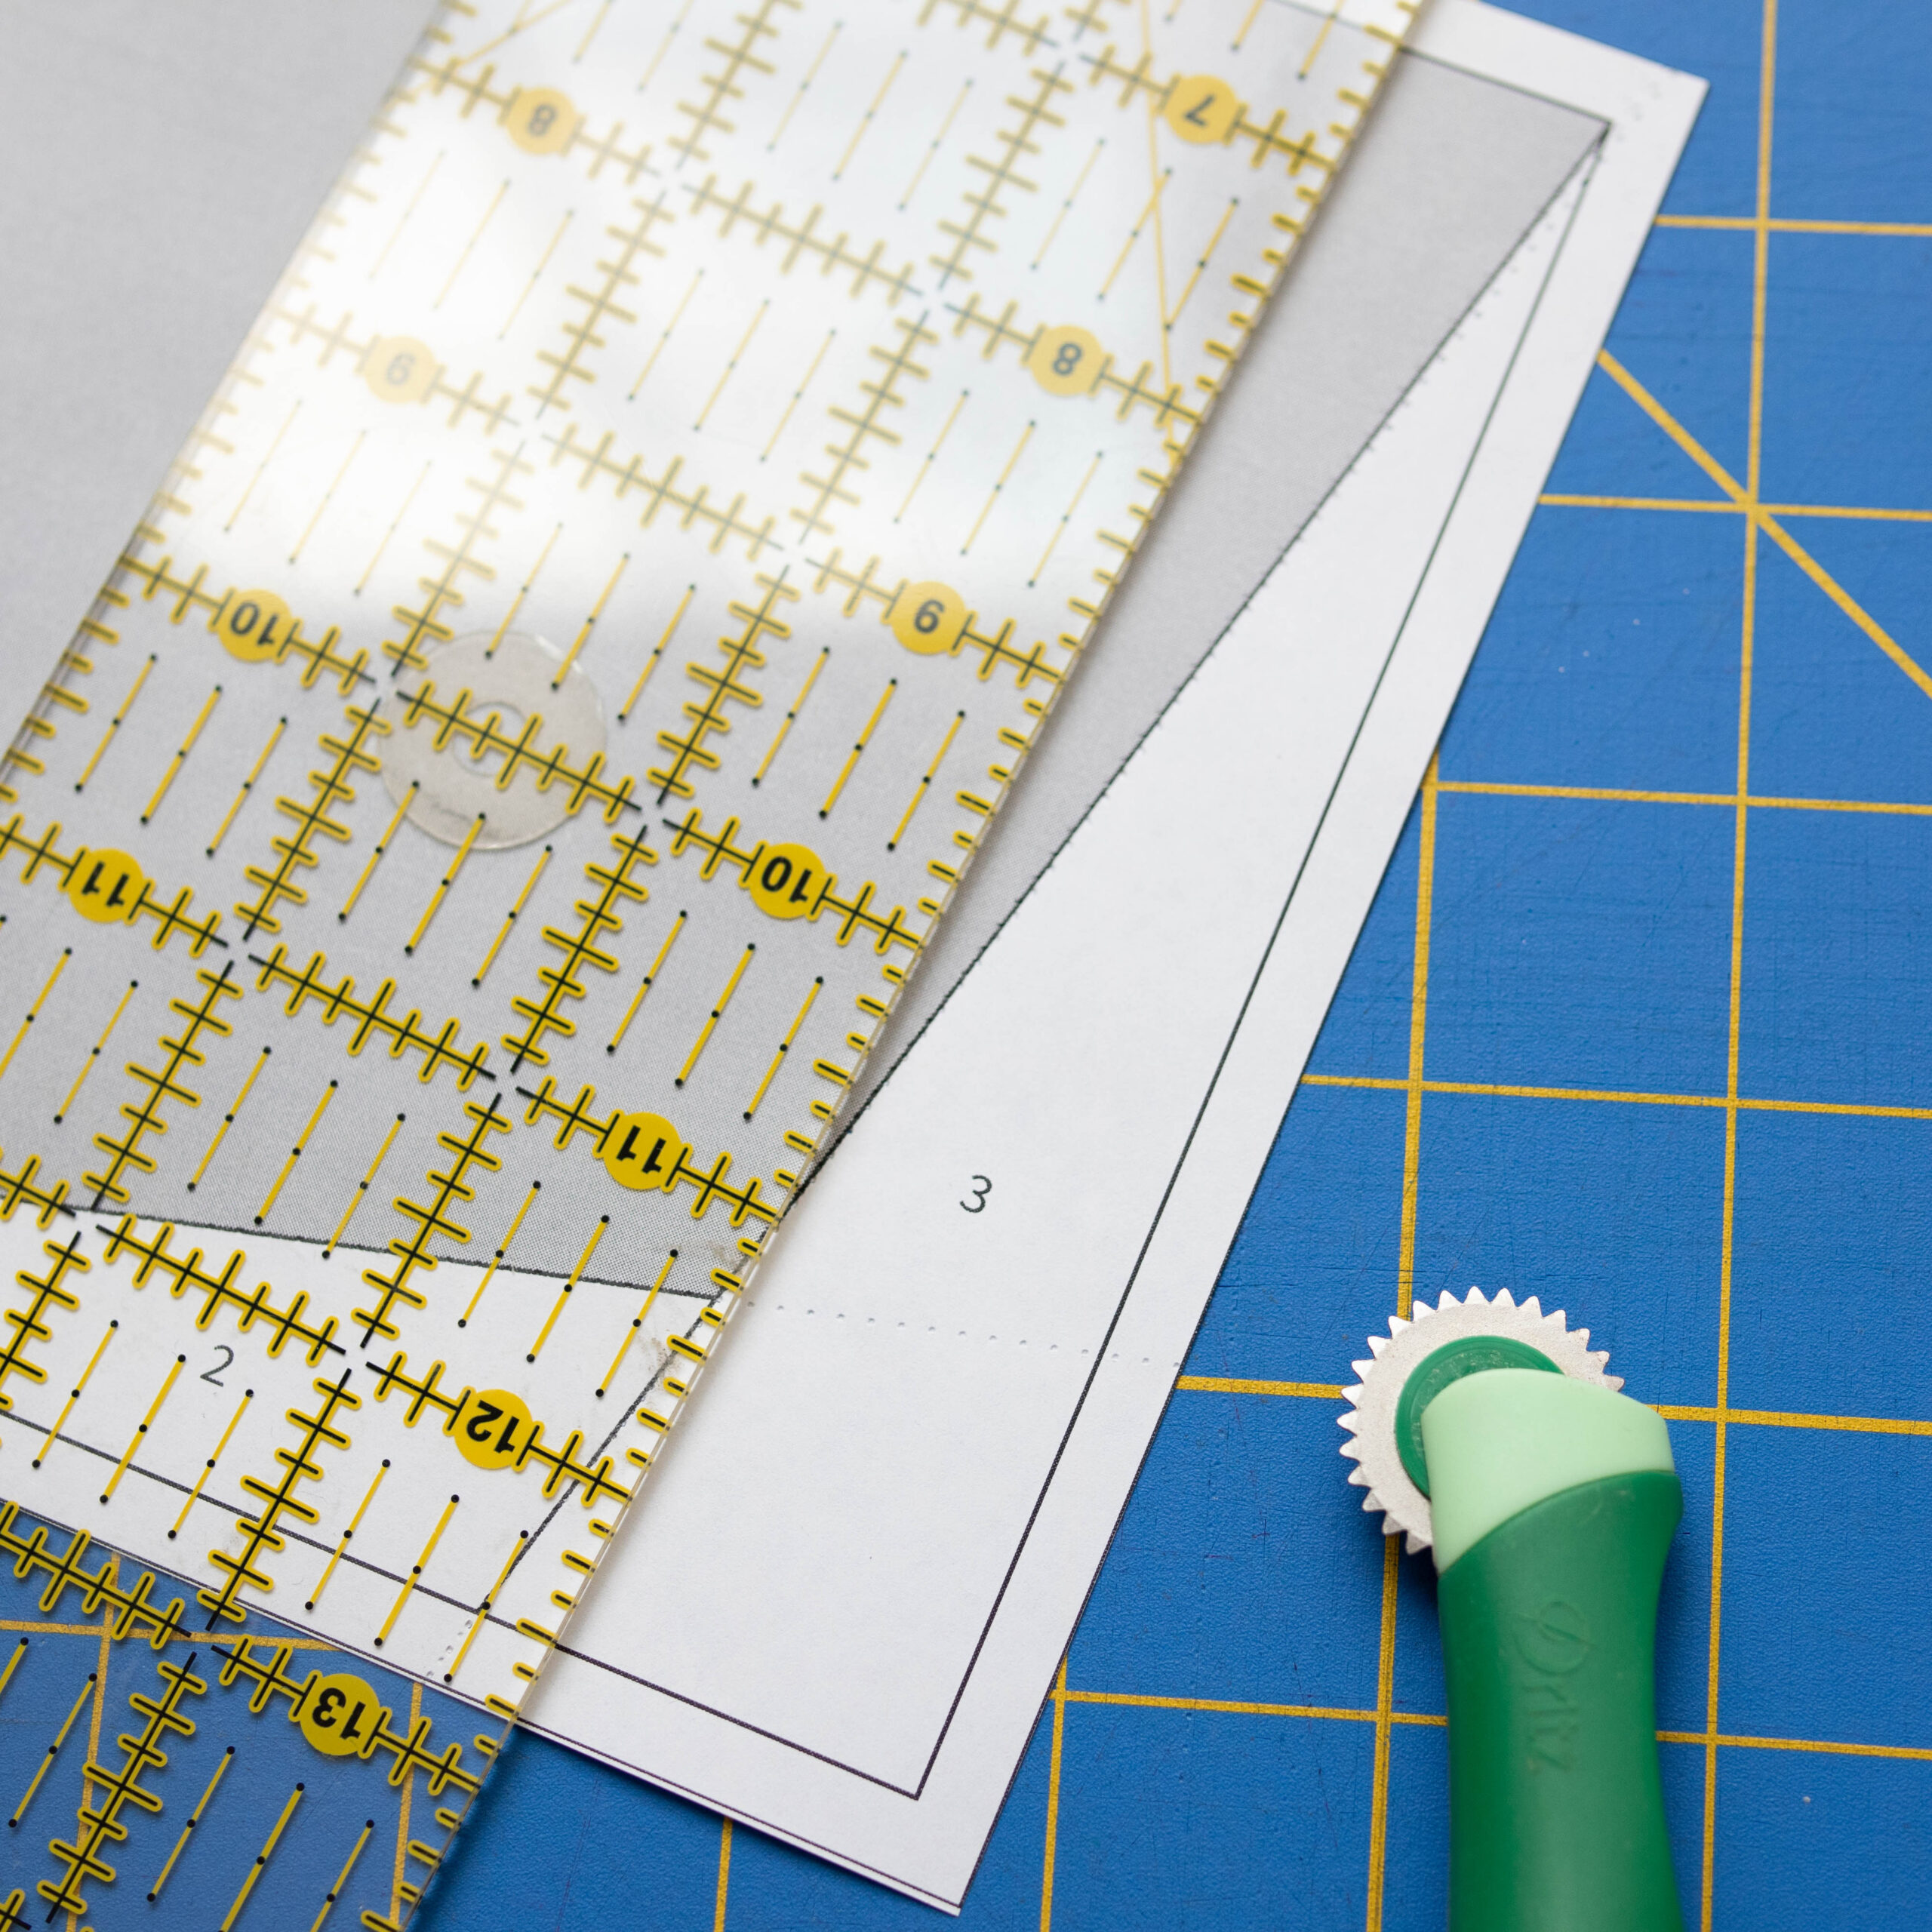
And here’s the Add-A-Quarter ruler giving me that perfect quarter inch. You can see the ridge on the right hand side and how it lines up with the folded edge of the paper. Now all I have to do is trim the fabric to the right of the ruler! Easy breezy! As we mentioned, it’s absolutely ok to skip the extra tools. Instead of an Add-A-Quarter, you can use a regular acrylic ruler. Instead of a new seam roller, try your iron out. Instead of a glue pen, try using a pin to hold fabric in place. And instead of a tracing wheel, try pre-folding the paper. That’s absolutely ok! But these tools which may be new to you will take you far if you enjoy foundation paper piecing.
Quilt Documentation Tip Have you ever tried a new technique? It can be a little scary at first — what if it doesn’t work or doesn’t make sense? What if it doesn’t look just like the designer’s picture? Ack! One thing that might help you work through the anxieties of learning something new, while also documenting your process and personal quilting experiences, is to journal or write about your quilts. Check out the Quilt Alliance’s Textile Talk that focuses on writing about quilts! And don’t miss the announcement for our upcoming virtual Quilters Take a Moment event…there may be a workshop you’ll enjoy!
Quilt Documentation Tip: Each month, we’ll bring you a quilt documentation tip in these blog posts. These tips will help you not only learn more about the Quilt Alliance but also learn how to preserve your own quilt stories. Your quilts matter and we want to help you preserve and share their stories! Ricky’s block is focused on beginner quilters, and since this month is the first in our Block of the Month, we want to encourage you to document your very first quilt. The journeys we all take towards becoming quilters are all unique. Share yours in a DIY Go Tell It Video, just like the video Ricky made about this block. To learn how to make your own Go Tell It video, head to the Go Tell It DIY page here. You’ll see that documenting your own quilts is much easier than you might…
by Emma Parker | Jun 15, 2023 | BOM
Birthday Block of the Month #3: Pat Sloan
Are you ready to have some fun with this month’s Quilt Alliance Birthday Block of the Month? Our designer of the month, Pat Sloan, knew you needed a smile, so she designed this block she calls “A Dash of Fun,” inspired by the classic Churn Dash block. The Quilt Alliance is an organization that celebrates all quilters. And what better way to demonstrate that than by going from last month’s improvisational block designed by Zak Foster to this month’s block from Pat Sloan which is rooted in quilt history?
Meet Pat Sloan Known as “The Voice of Quilting,” Pat Sloan is a quilt designer, author, fabric designer, and popular podcast host. Her passion is hosting sew alongs and YouTube videos. For 10 years, Pat produced and hosted a podcast for American Patchwork & Quilting Magazine. She’s also the host of Aurifil’s Designer of the Month program and has published patterns independently and through magazines including McCall’s Quilting, Quilters World, and Quilting Arts. With her daily YouTube videos and large internet community, join Pat to be inspired to make quilts that you love! You can follow Pat on her website, Facebook, or popular YouTube channel. One of the Quilt Alliance’s signature projects is the Go Tell It video documentation project which anyone can do. Watch the video below to see Pat talk about her block, and keep reading this blog post to learn a tip for how to document your own quilts!
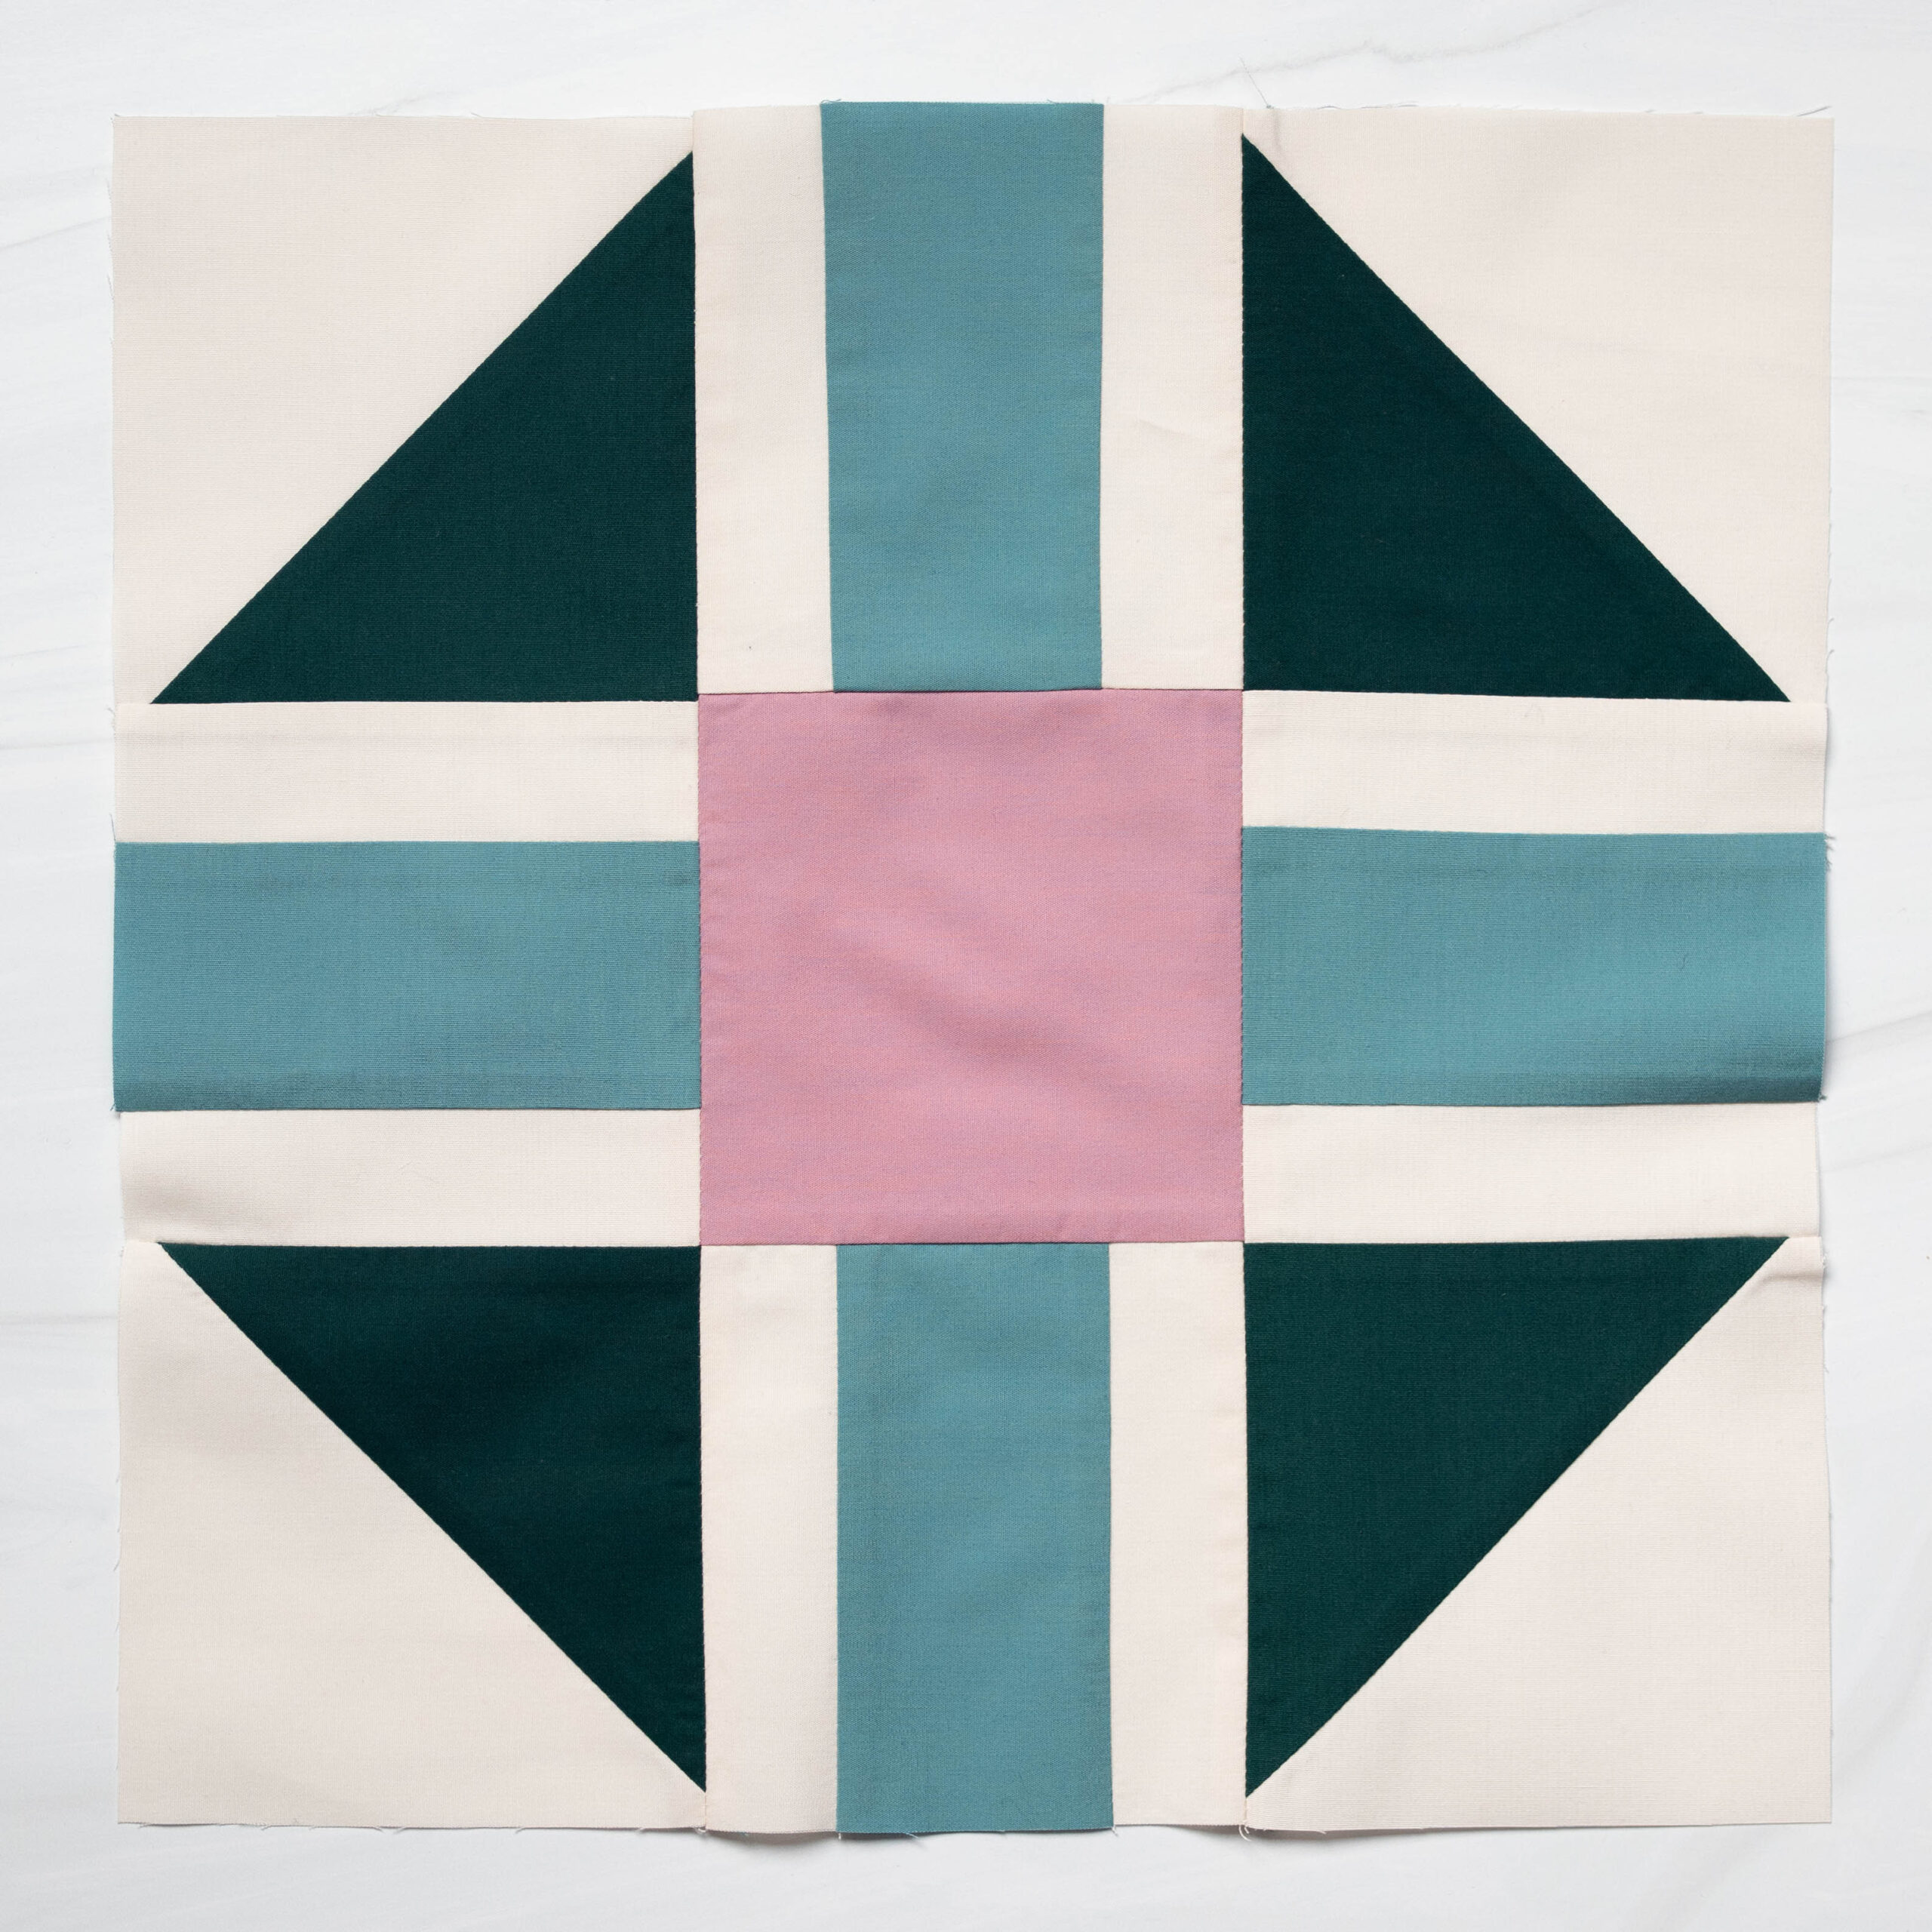
Pat’s Top BOM Tips Each month, our Birthday Block of the Month Designers will share their top tips for making the block they designed. Here are three great tips for making this block straight from Pat herself. Pat’s Tip 1: Try a Specialty Ruler When making half square triangles 2 at a time I love using the Quilt In a Day Triangle Square Up Ruler, it makes them so easy and ‘fun’ to do! Pat’s Tip 2: Follow Your Own Creativity This month’s pattern uses the same color for the stripe unit, but you can also let your creativity run wild! Audition a few color combinations for the center stripe in the unit. Pat’s Tip 3: Highlight a Fun Print Try fussy-cutting the center block to showcase a favorite print.
Quilt Alliance BOM Tips I had so much fun making this block, and I know you will too! Pat designed a block that is not just fun, but it’s also fast and easy enough for even a first-time quilter to make. Trust me when I say that you’ll be done with this block before you can say Churn Dash! But if you want a little extra help, keep reading for tips that will help your block go smoothly.
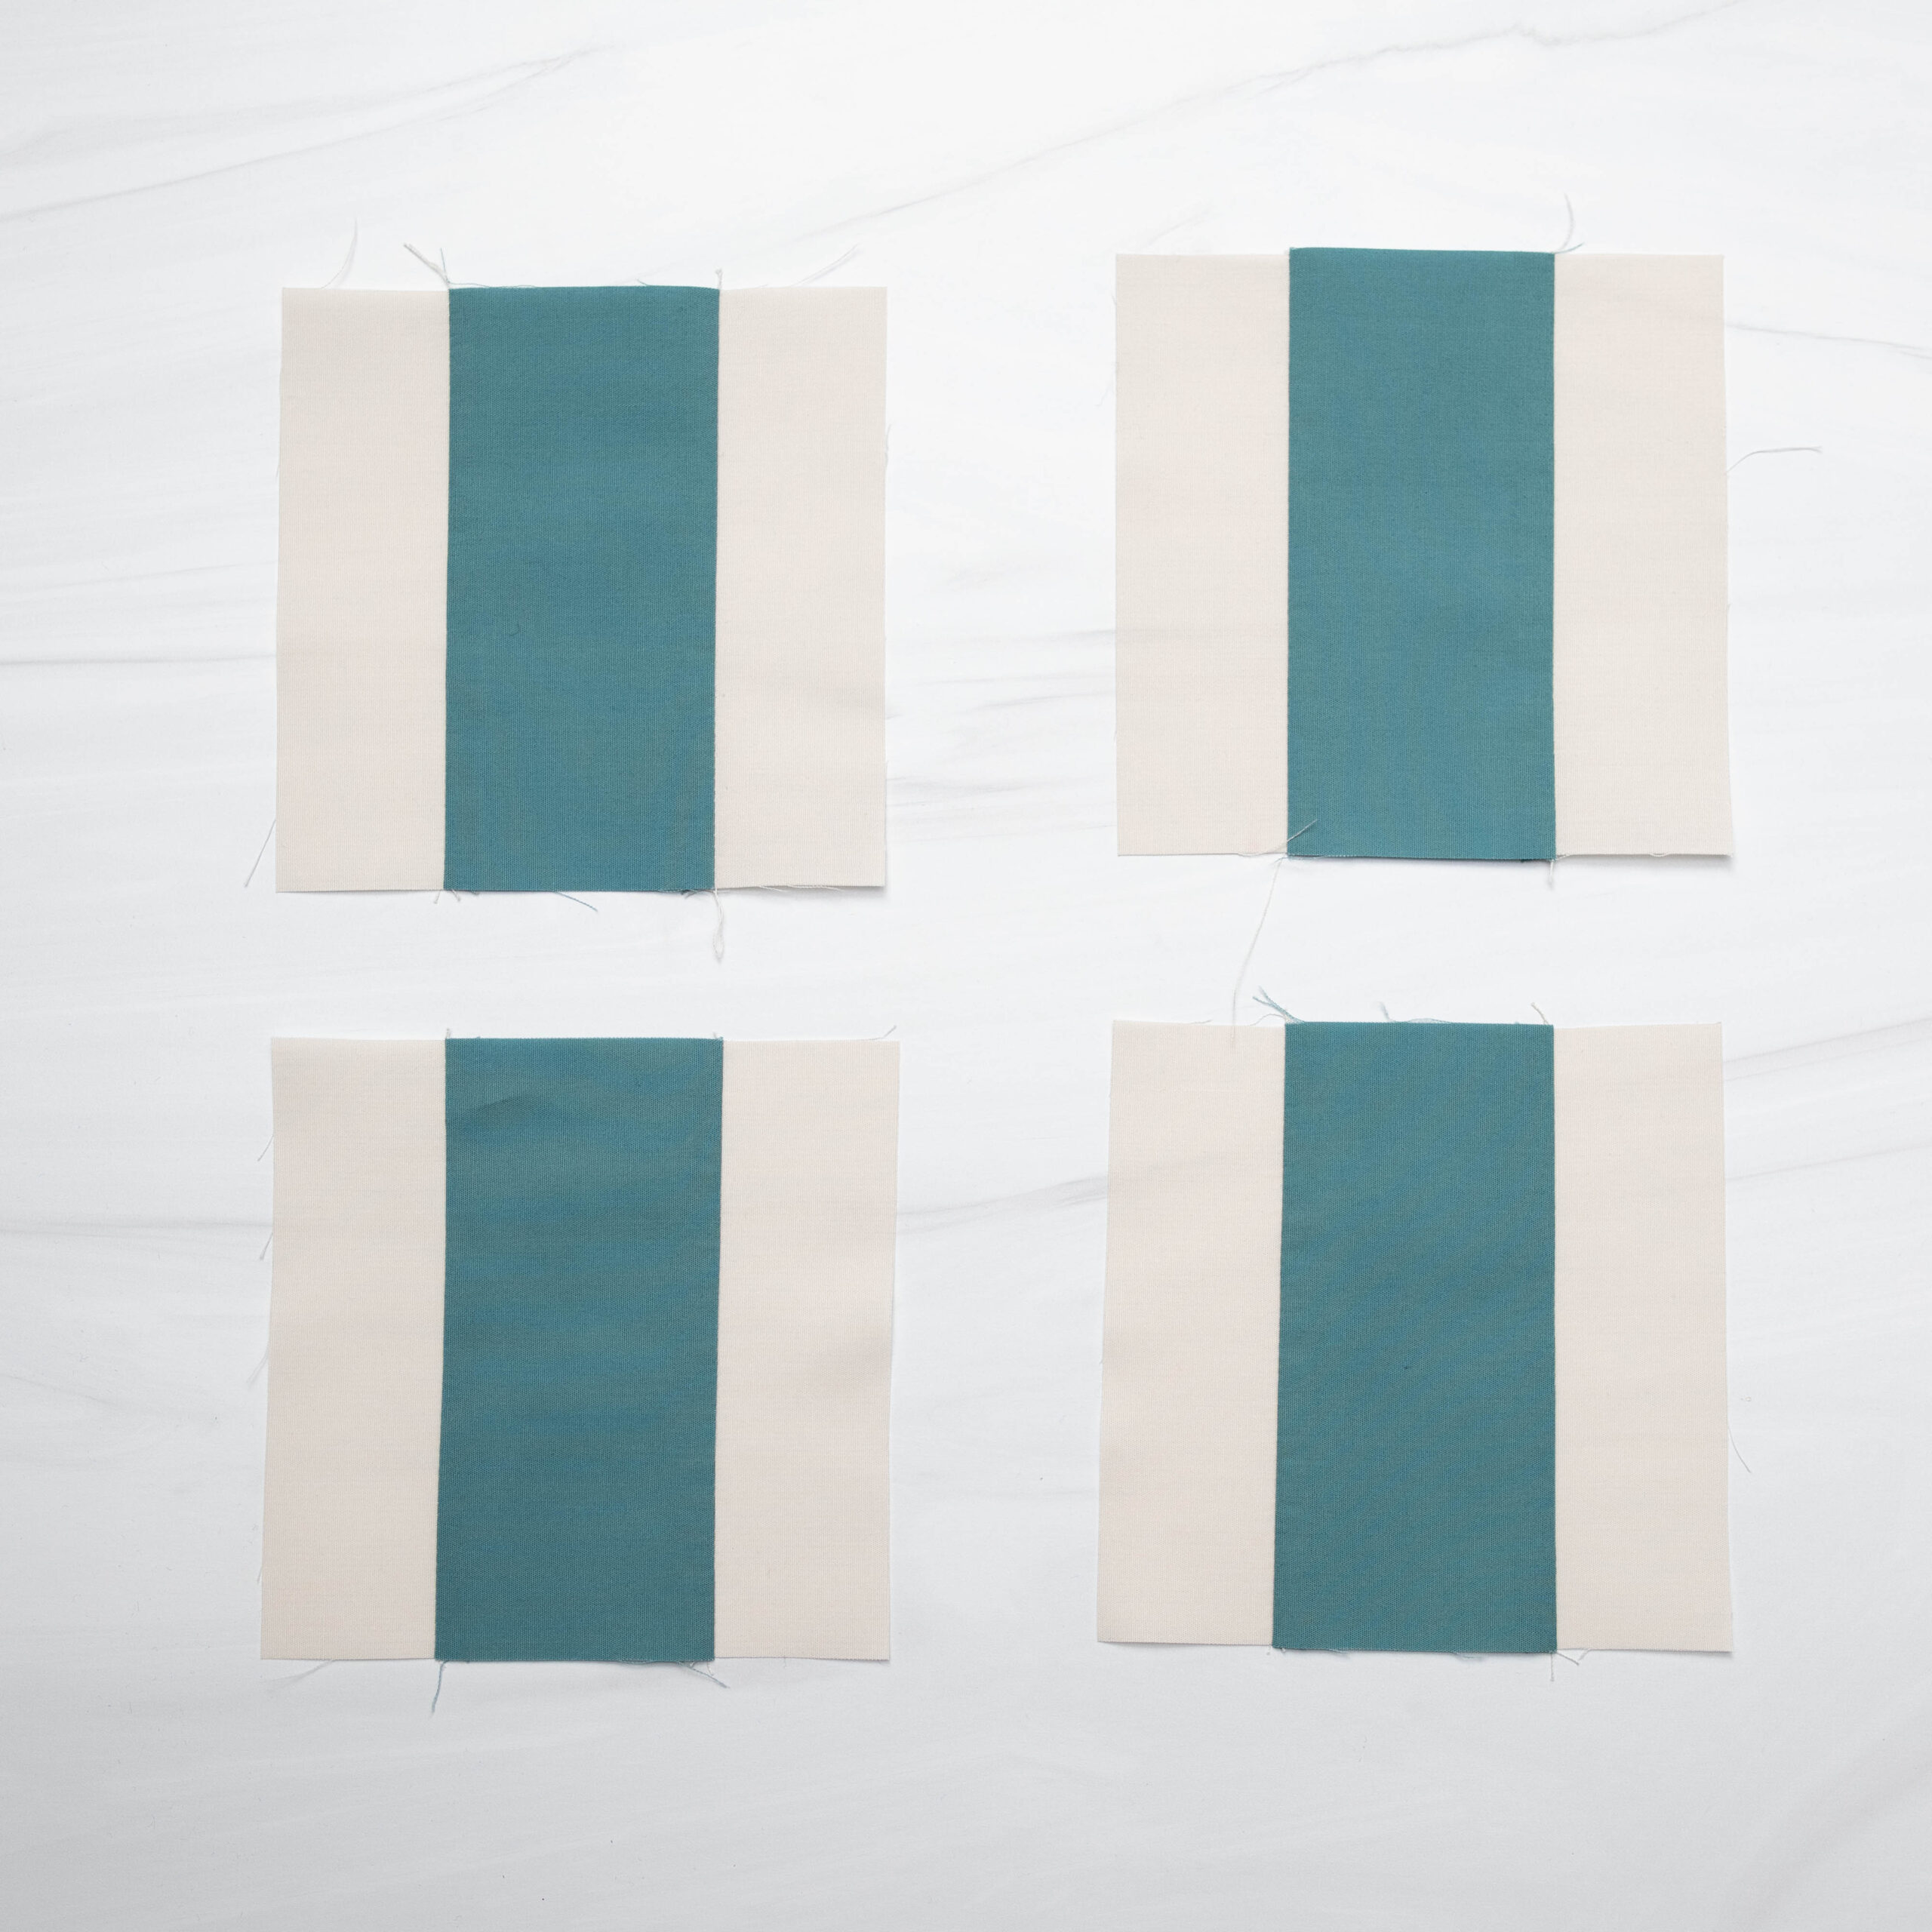
Experiment With Fabric Selection You’ll notice in the PDF pattern for this month that it’s the first time we are not using all five fabrics for the block. That will happen again in future blocks and we worked very hard to make sure that the quilt as a whole looked visually balanced between blocks that use each color and blocks that leave out one color. However, we also love to see your creativity shine! Instead of using the same color for all four stripe units, try using two or even four colors! Instead of using the same color for the HSTs, cut two different colorful fabrics so that you have two different colors. And as Pat suggests, try fussy cutting the center square to highlight a fabric you love!
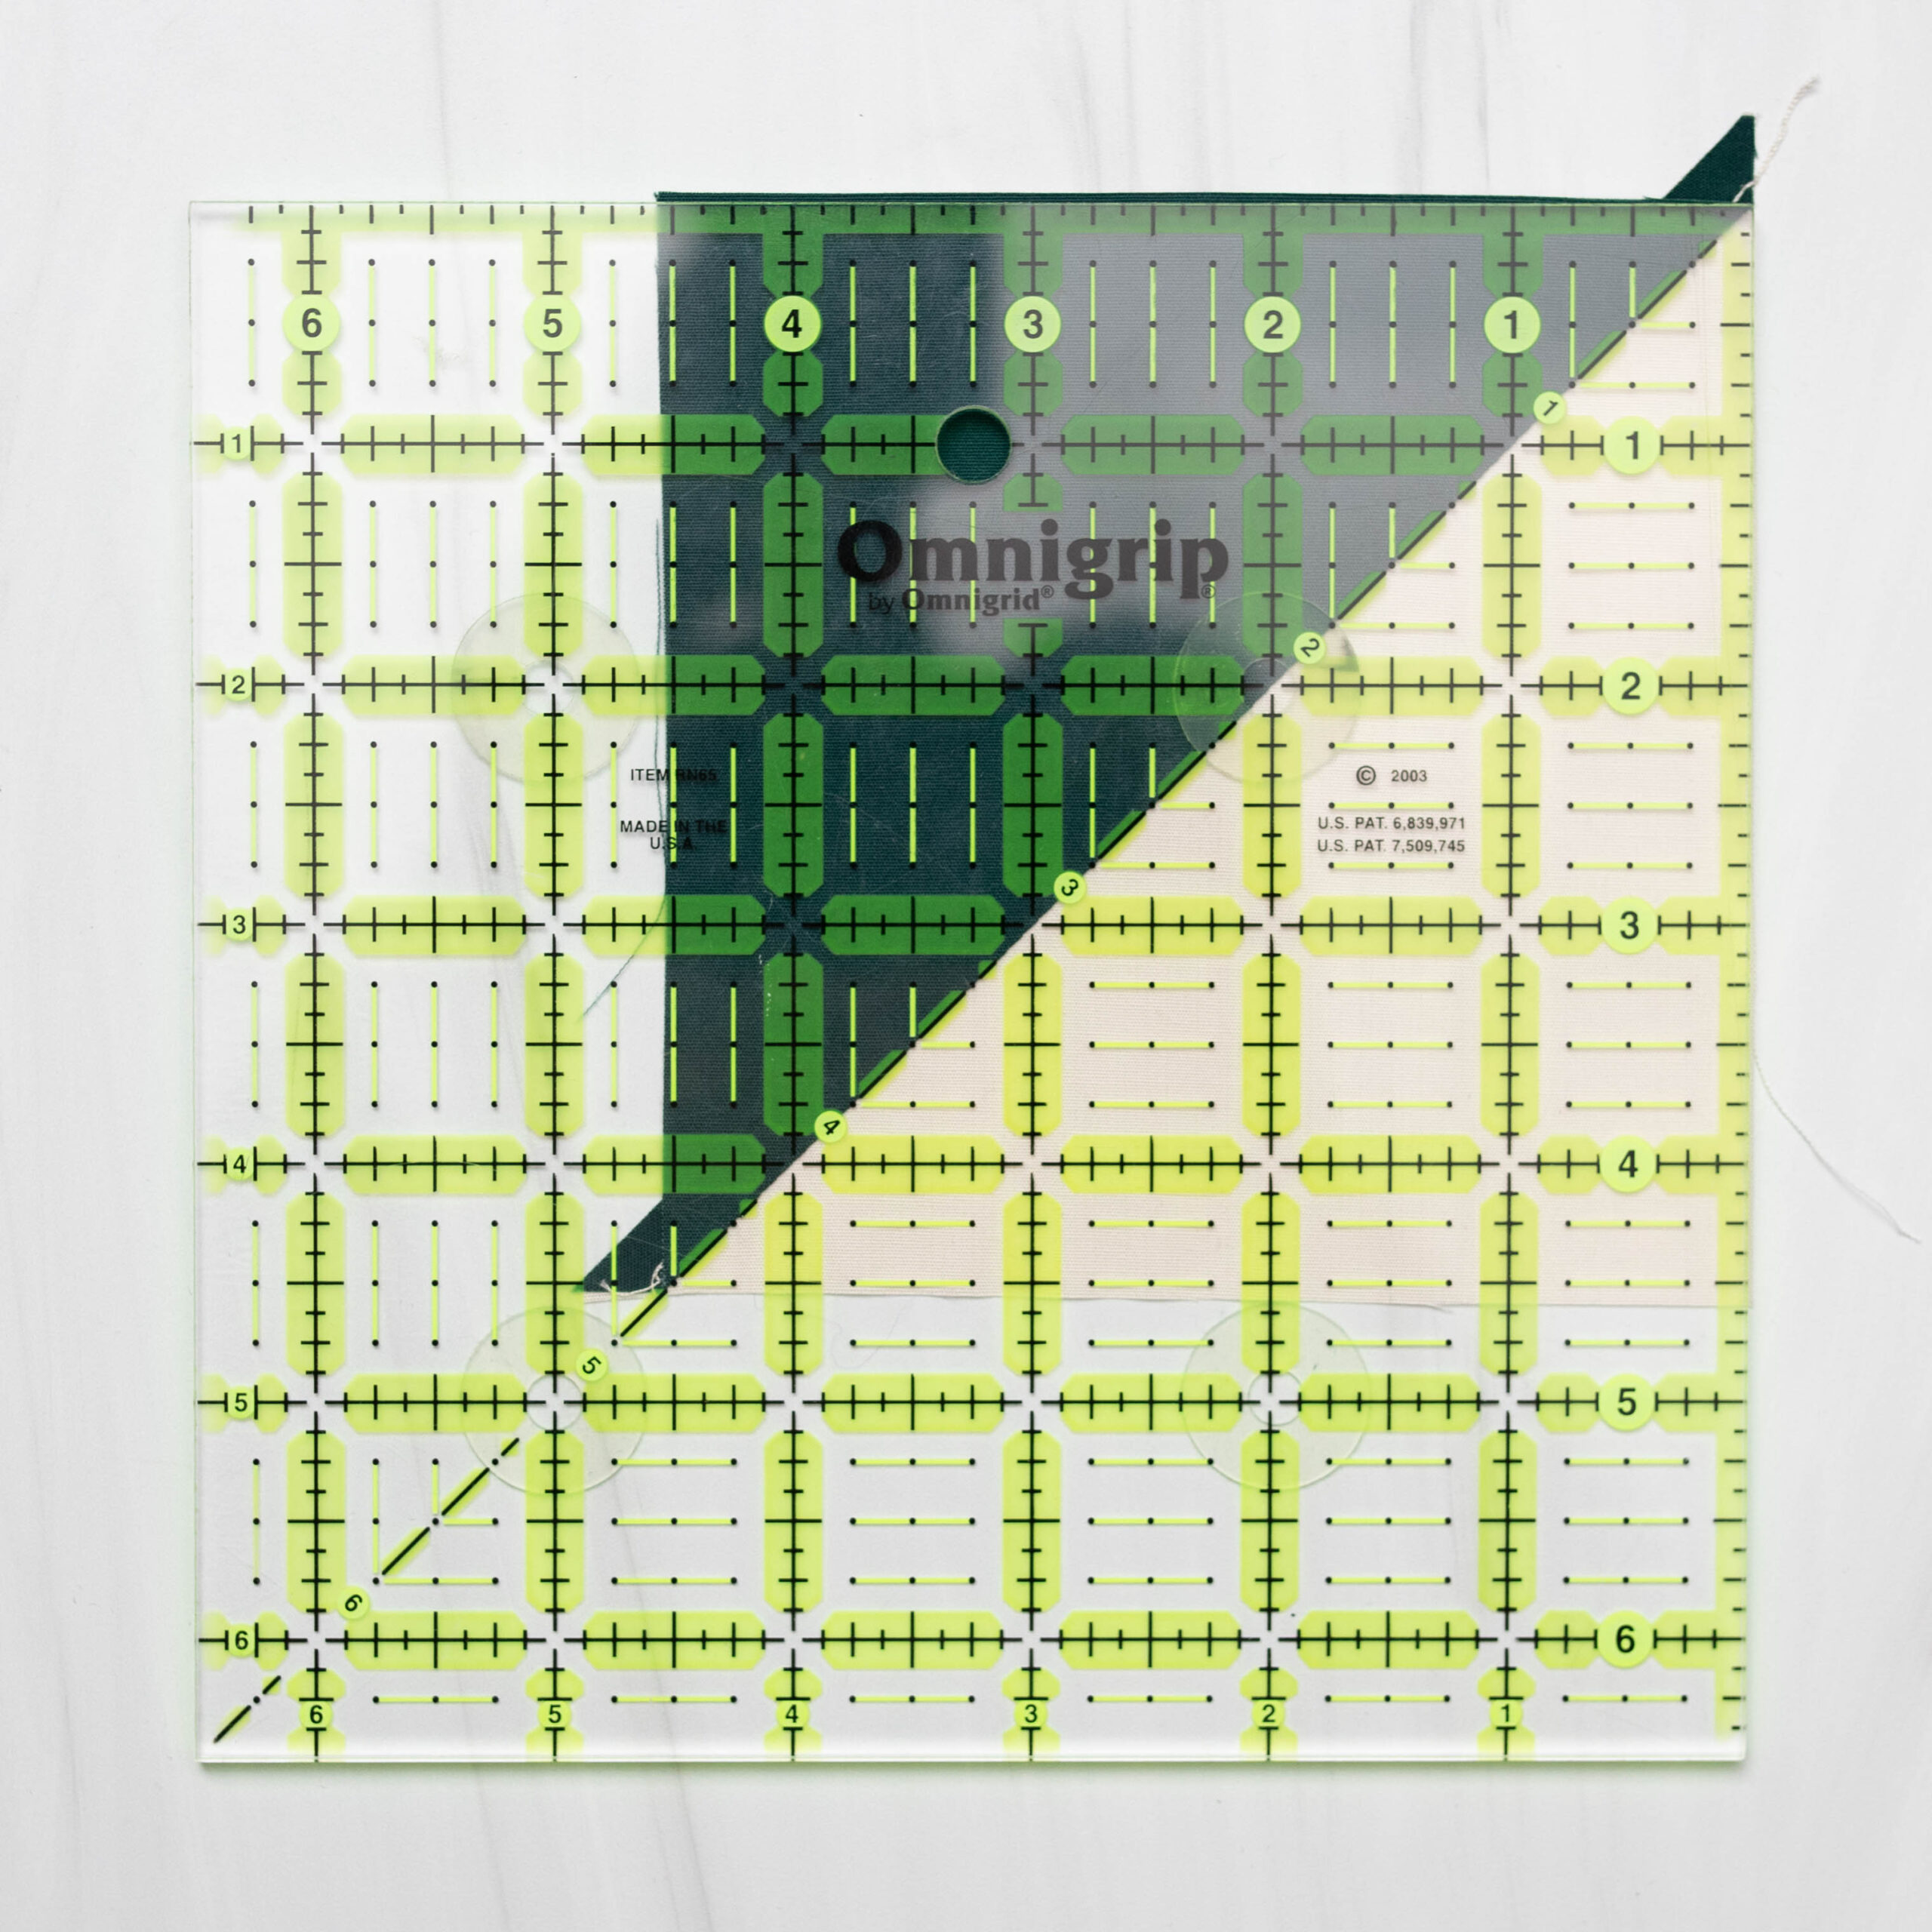
Finger Press the Half Square Triangles The picture above shows the final step of making the half square triangles (HSTs) in this block, which is trimming them down to size. As you can see, you’ll have very little extra fabric when trimming. In order to make sure the HSTs finish at the correct size, try finger pressing the seam before pressing with an iron. Finger pressing will help ensure that you aren’t losing valuable fabric in the diagonal seam of the HST. When pressing with your fingers, you’ll be able to feel if that seam is too bulky, and you can help gently work that out before setting the seam with your iron.
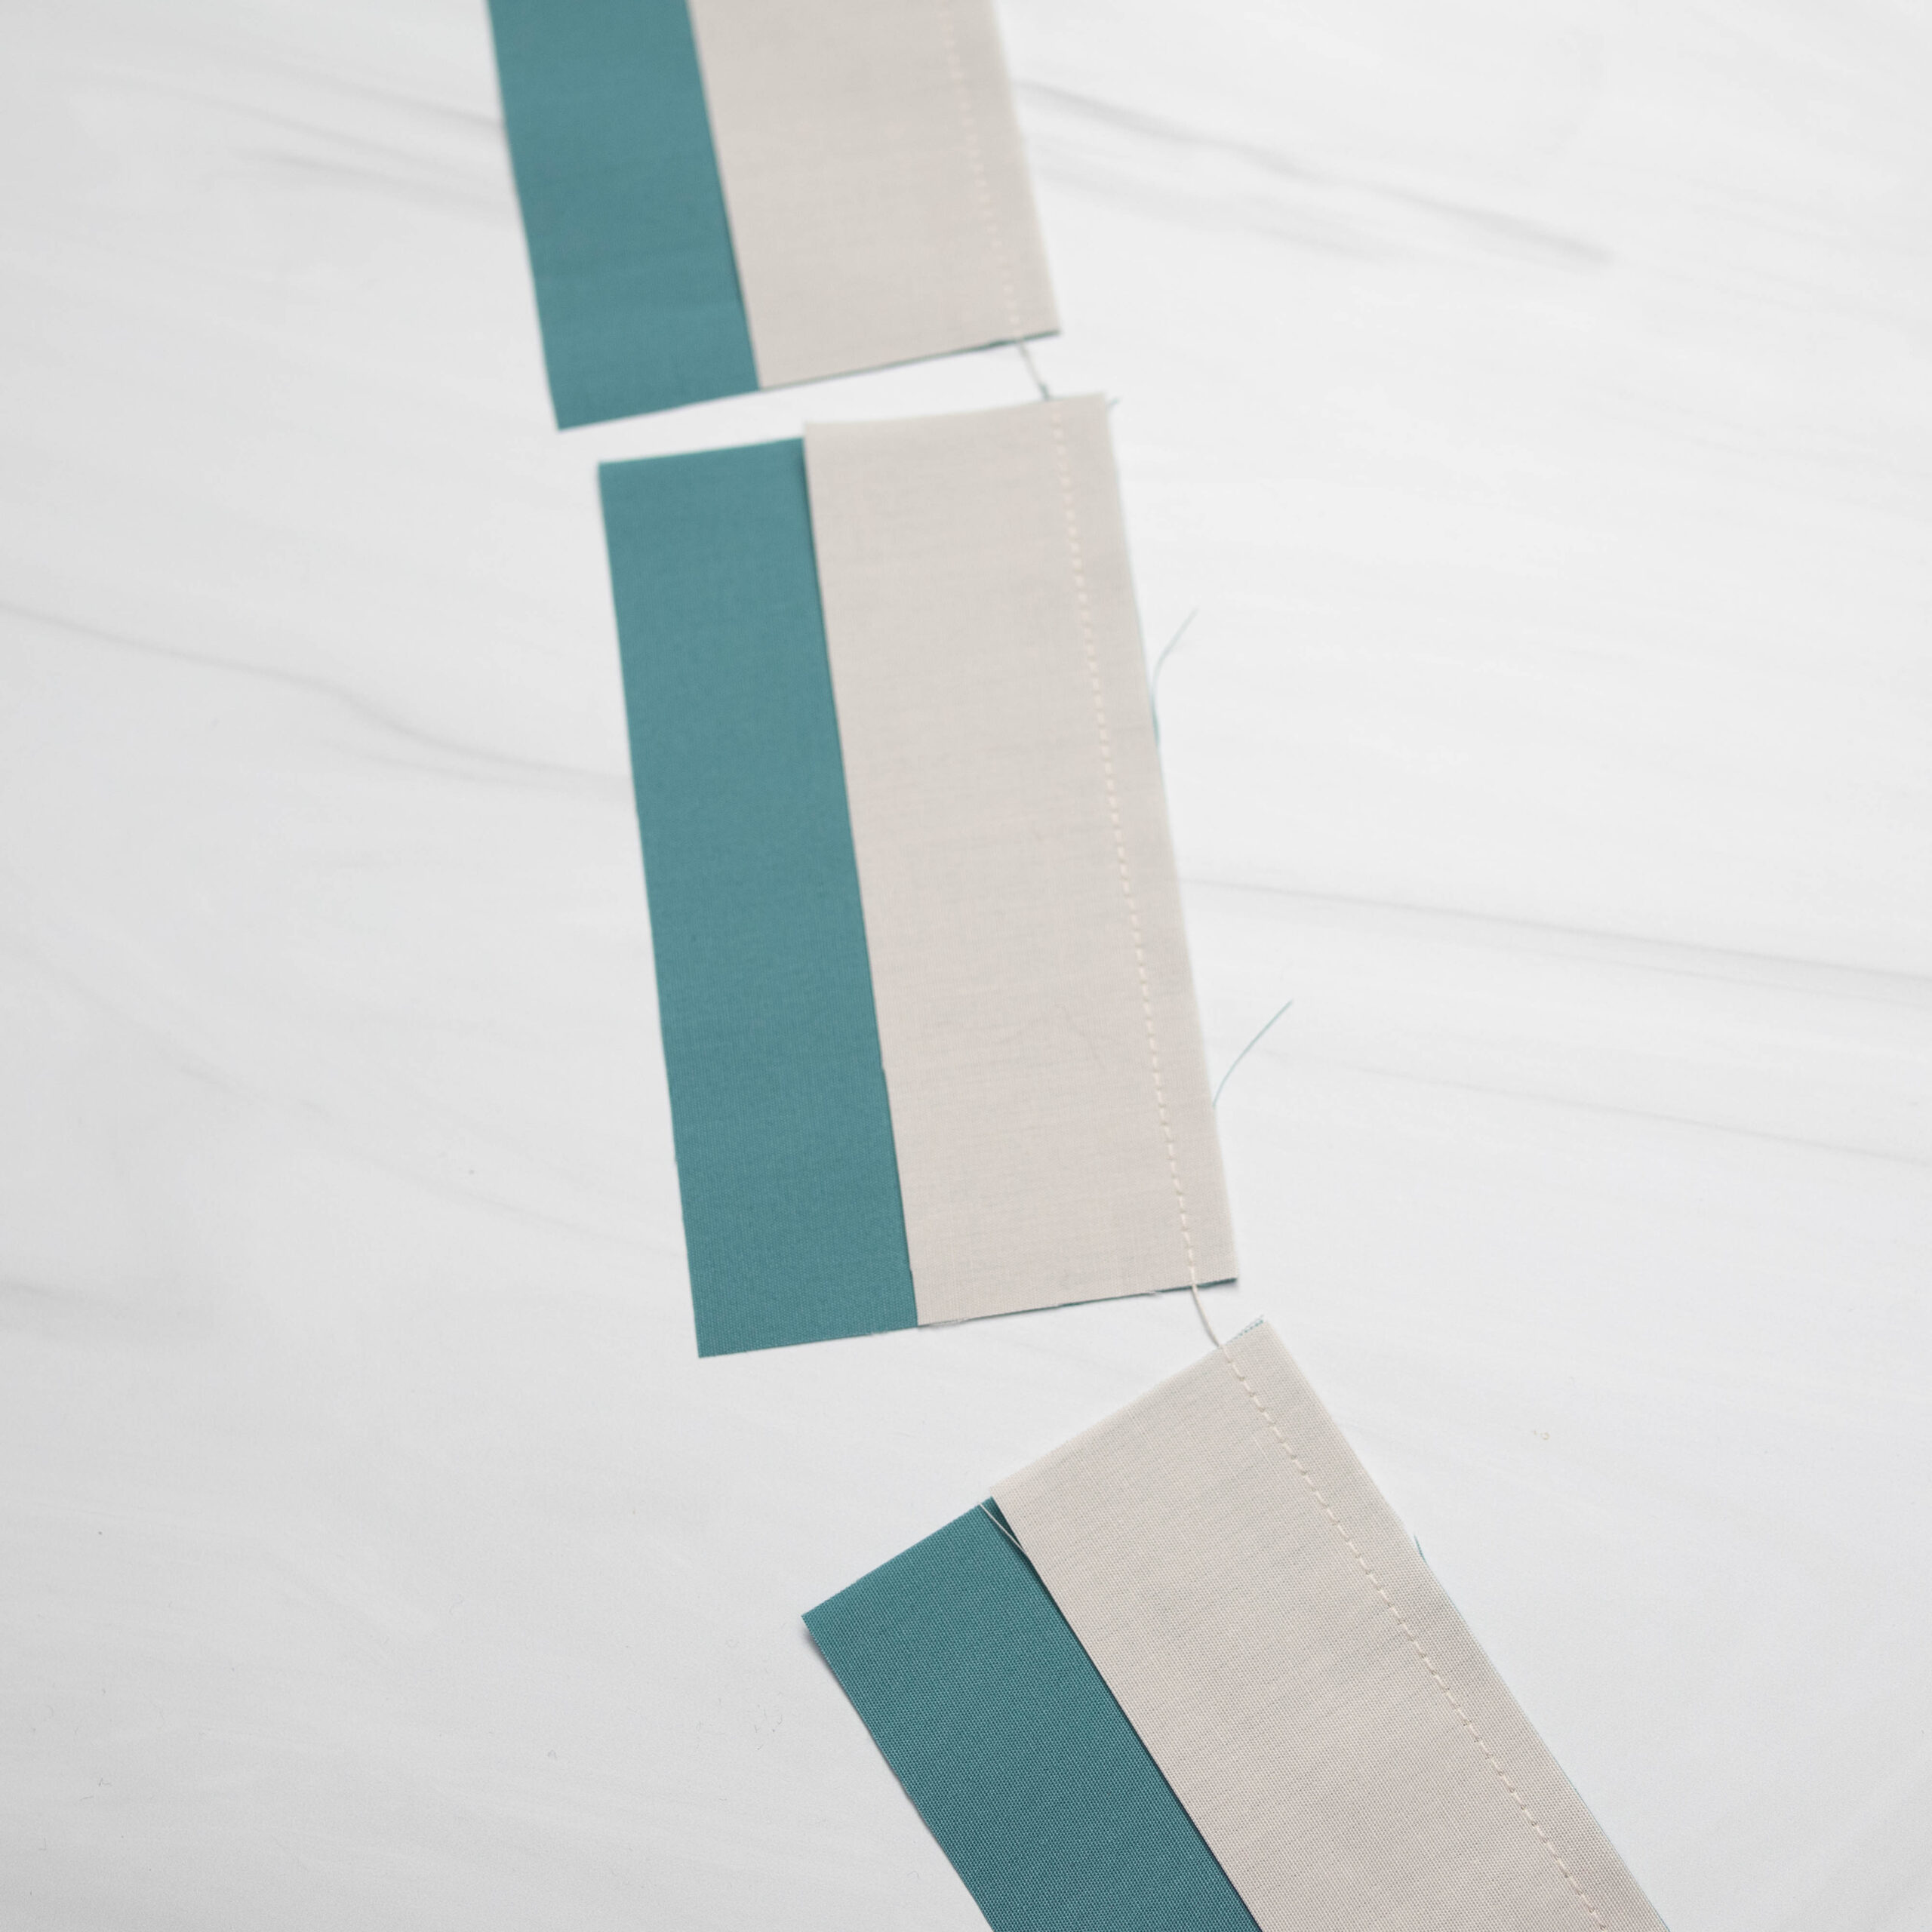
Chain Piece the Stripe Units You’ll save time and have even more fun making this block if you chain piece the stripe units! If you’ve never chain pieced before, click here for a video tutorial.
Quilt Documentation Tip Pat Sloan’s “A Dash of Fun” block is inspired by a traditional Churn Dash block. Have you ever made a quilt inspired by quilt history? Have you tried modifying a quilt block to create something new? If so, consider adding that information to your quilt label! If you keep a quilt journal or photo album, you could even include a picture of the traditional quilt block that inspired your work. For more information about what to add to a quilt label, check out the Quilt Alliance’s guide to making a simple quilt label here!
Quilt Documentation Tip: Each month, we’ll bring you a quilt documentation tip in these blog posts. These tips will help you not only learn more about the Quilt Alliance but also learn how to preserve your own quilt stories. Your quilts matter and we want to help you preserve and share their stories! Ricky’s block is focused on beginner quilters, and since this month is the first in our Block of the Month, we want to encourage you to document your very first quilt. The journeys we all take towards becoming quilters are all unique. Share yours in a DIY Go Tell It Video, just like the video Ricky made about this block. To learn how to make your own Go Tell It video, head to the Go Tell It DIY page here. You’ll see that documenting your own quilts is much easier than you might…
by Amy Milne | May 12, 2023 | Community Quilt Days, News
Community Quilt Days: Place, Culture, Stories and Quilts!
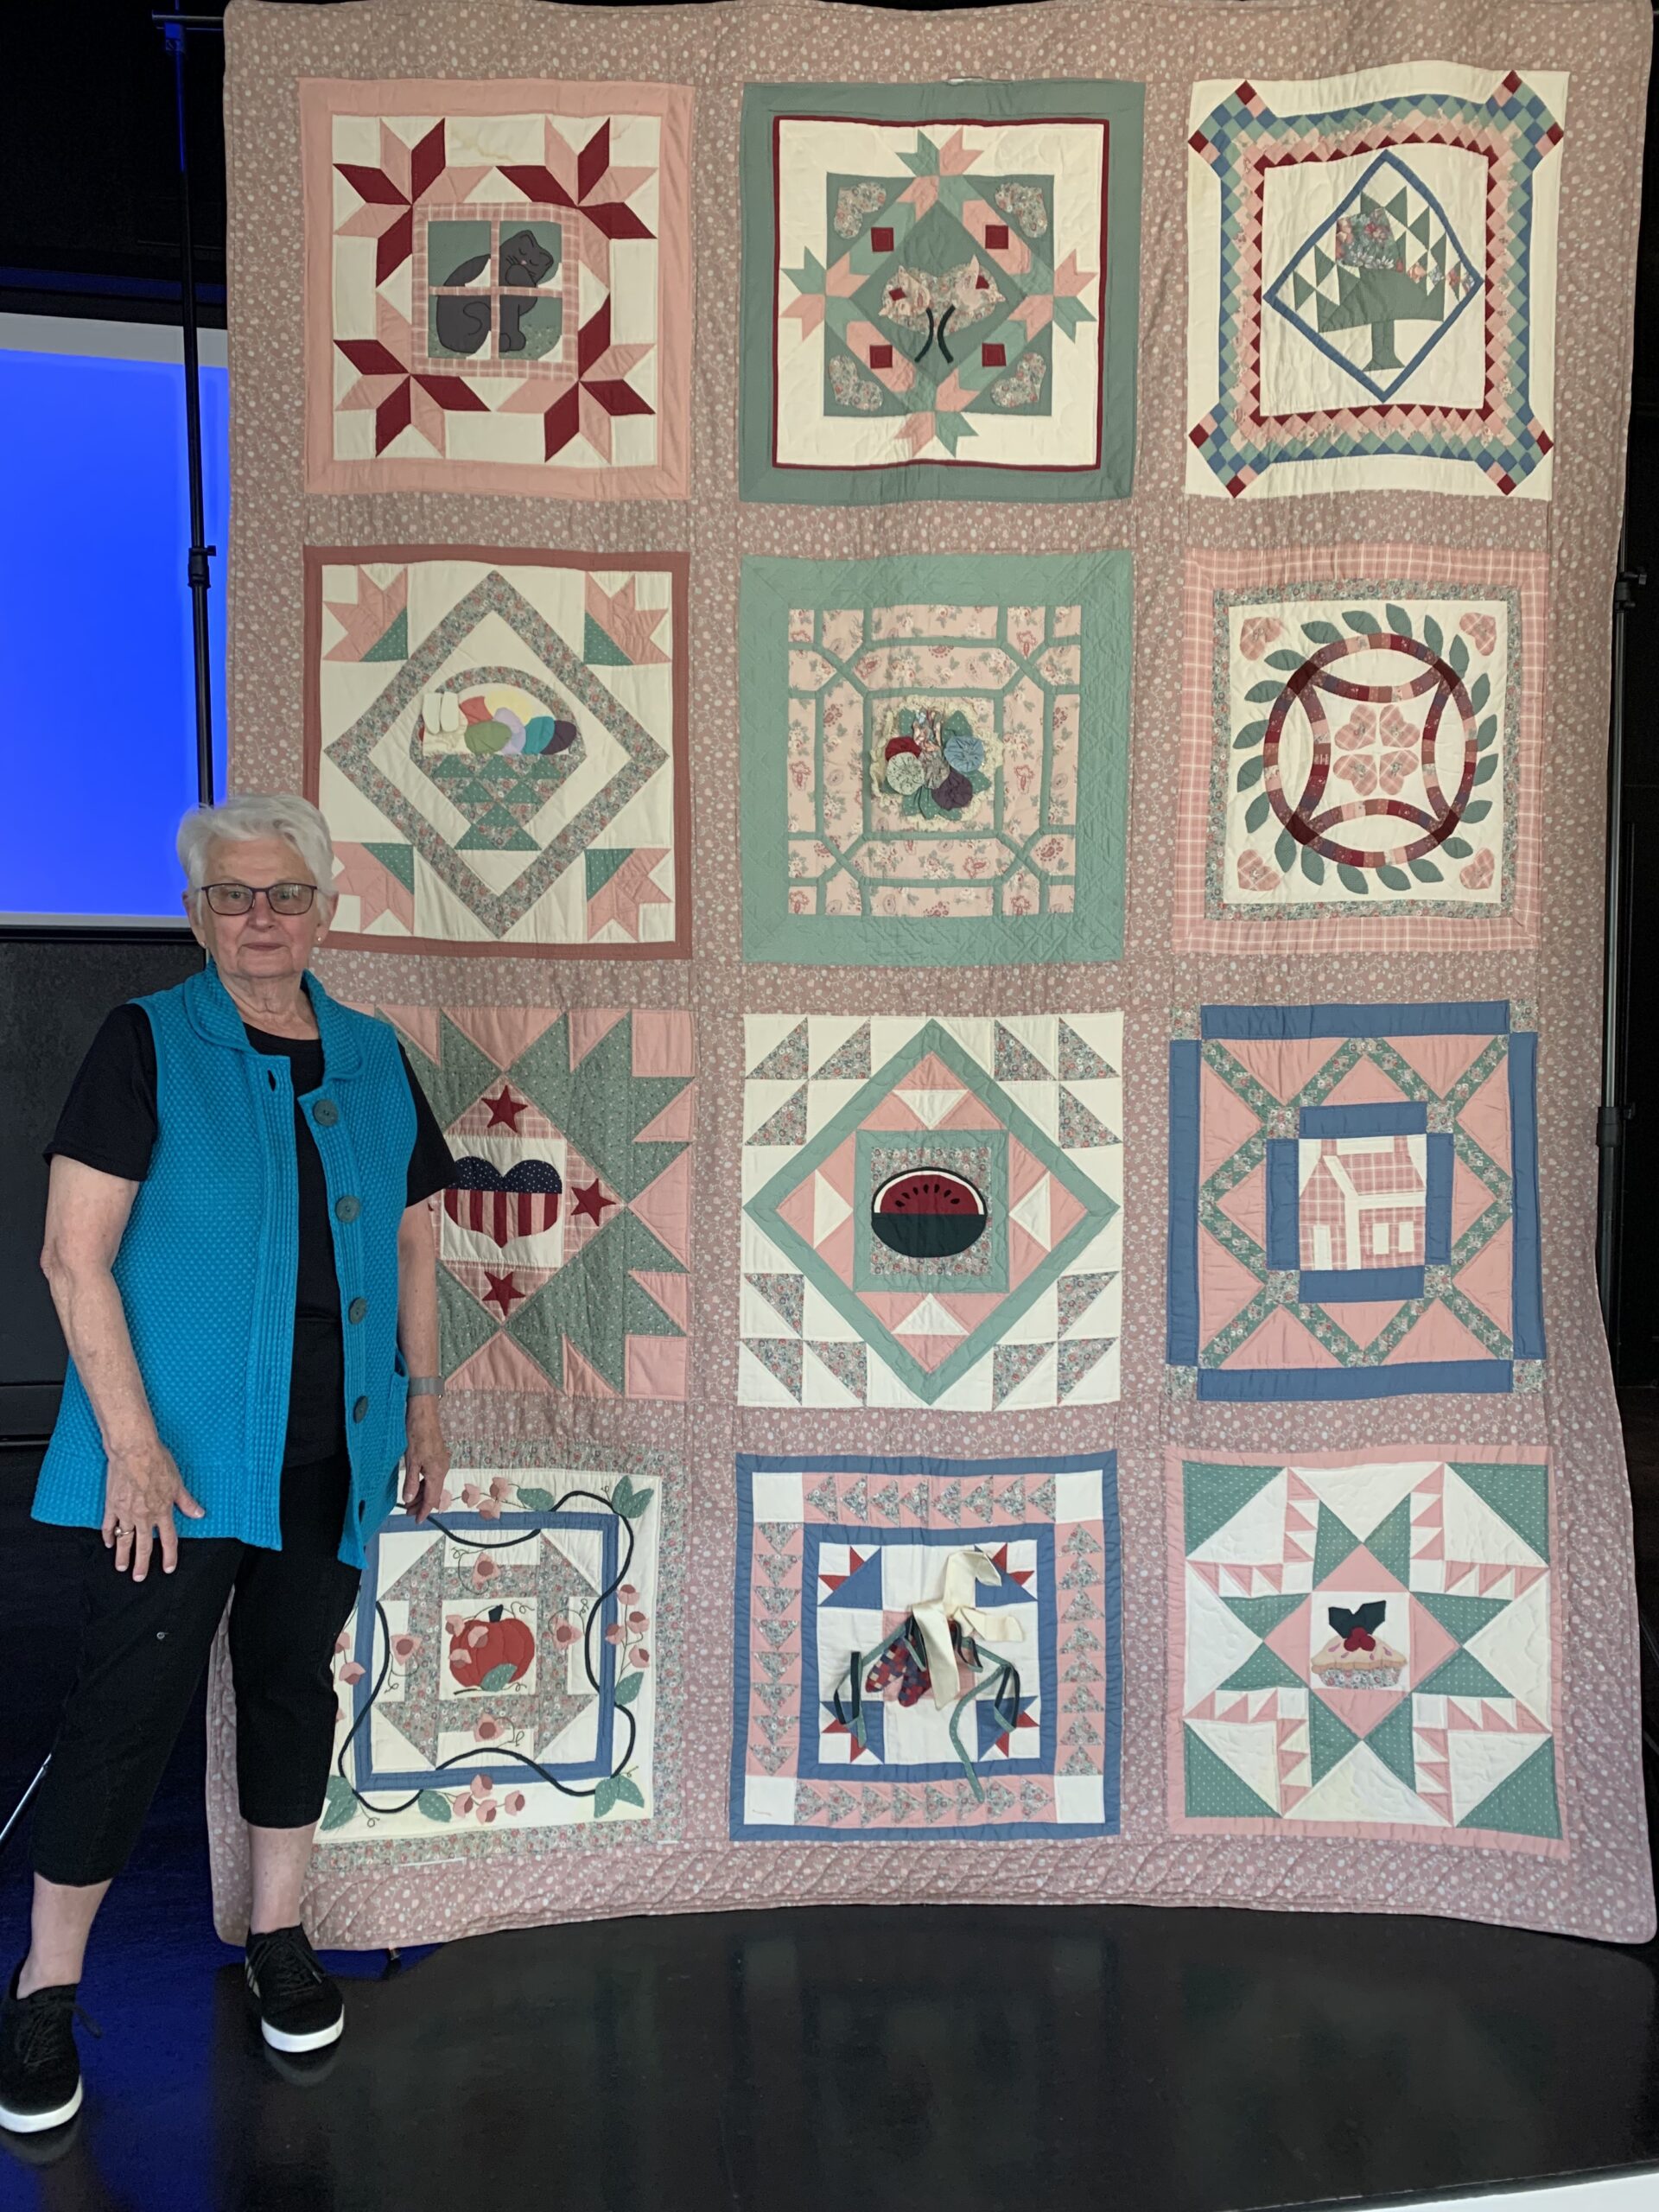
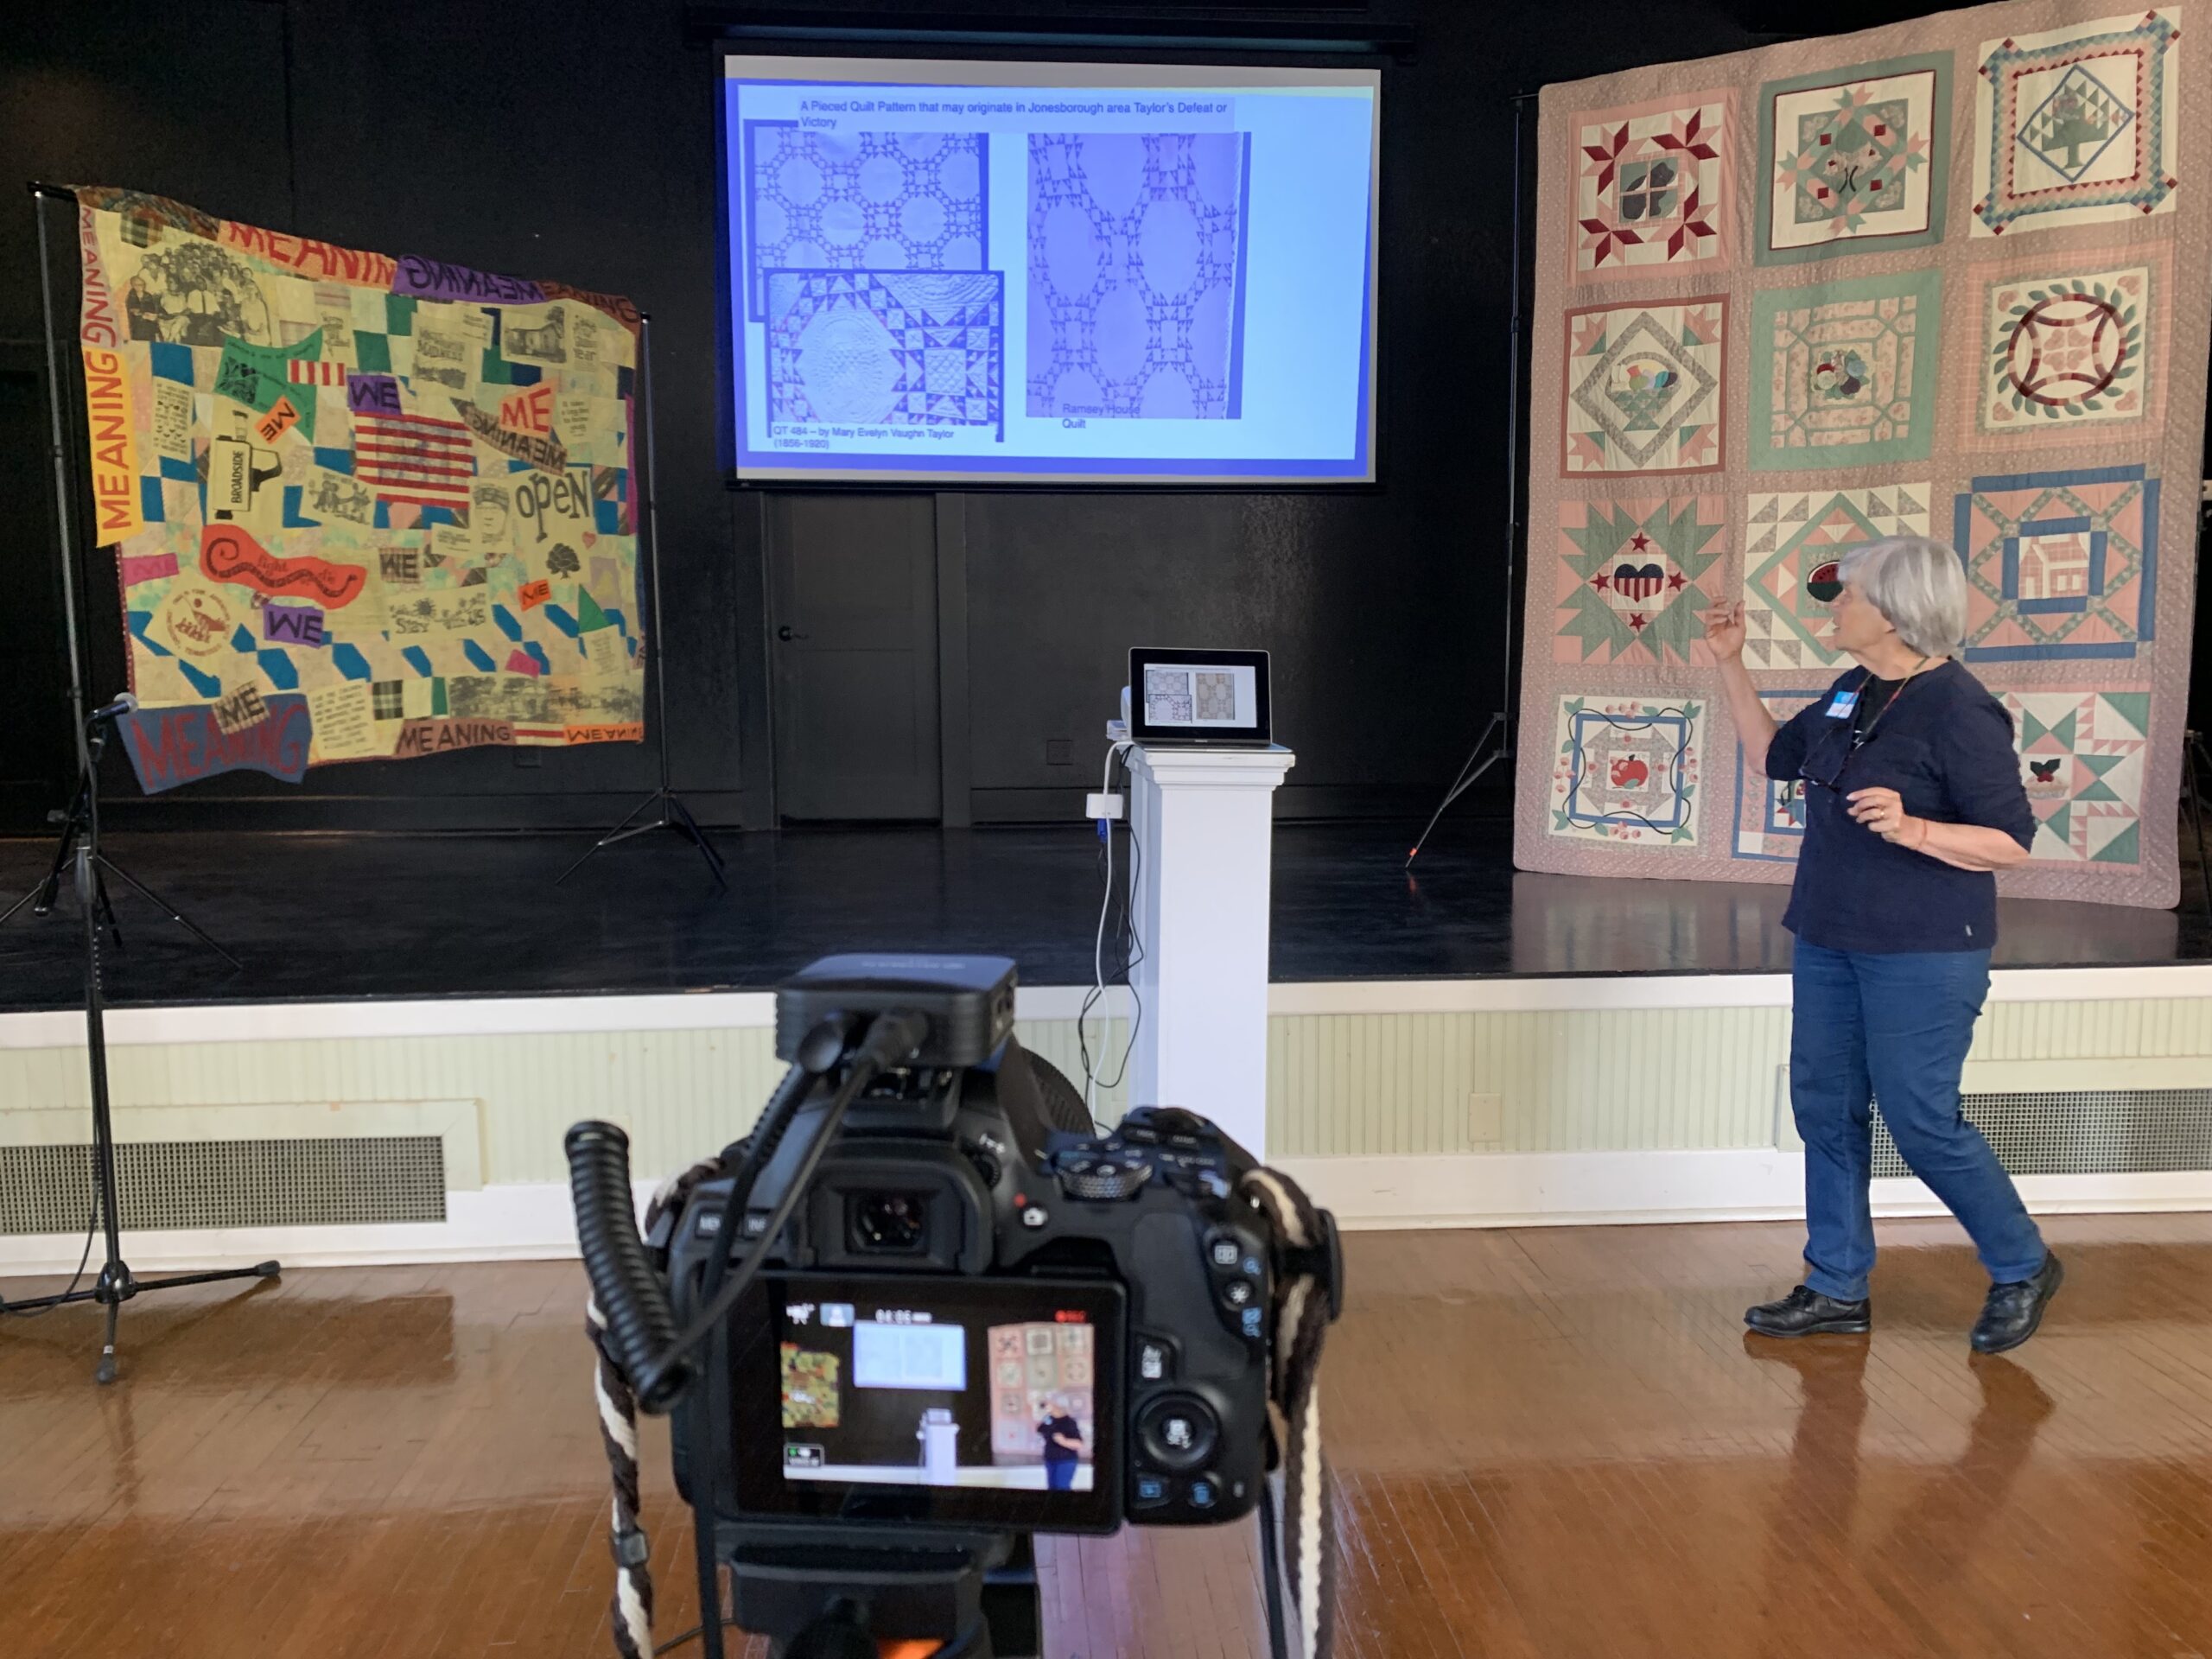
Quilt Alliance staff are hitting the road again today with camera equipment, quilt stands, a coffee urn, a fresh batch of Deb Josephs’ tasty homemade cookies and a cue card that reads: “Hi, my name is ____ and I’m telling my quilt story at the McKinney Center in Jonesborough, Tennessee and today is Saturday, May 13, 2023.” Jonesborough is Tennessee’s oldest town, and home to the International Storytelling Festival. You’ll find Tennessee Quilts, a shop and retreat center co-owned by Linda Crouch-McCreadie in the historic downtown. Linda and fellow Tennessean, quilt historian and longtime Quilt Alliance board member, Merikay Waldvogel, were featured last Saturday on the first day of our Community Quilt Days event in Jonesborough. Linda (pictured top right with her first quilt) was interviewed for the QSOS oral history project, and Merikay (pictured bottom right) gave a fascinating lecture on Tennessee quilts. She told the story of Margaret Hays, a Jonesborough woman who designed quilt patterns for Mountain Mist batting in the late 1920’s and early ‘30’s. Rebecca Proffitt, director of the nearby Reece Museum at Eastern Tennessee State University, brought an example of one of Hays’ designs along with another contemporary quilt in the Reece collection by artist Marge Gregg, made in the 1960’s and 2010’s. We’ll resume the quilt sharing and documentation activities today at the beautiful McKinney Center, a renovated 1940 school that was once the grade-school for Black students in Jonesborough until integration in 1964.
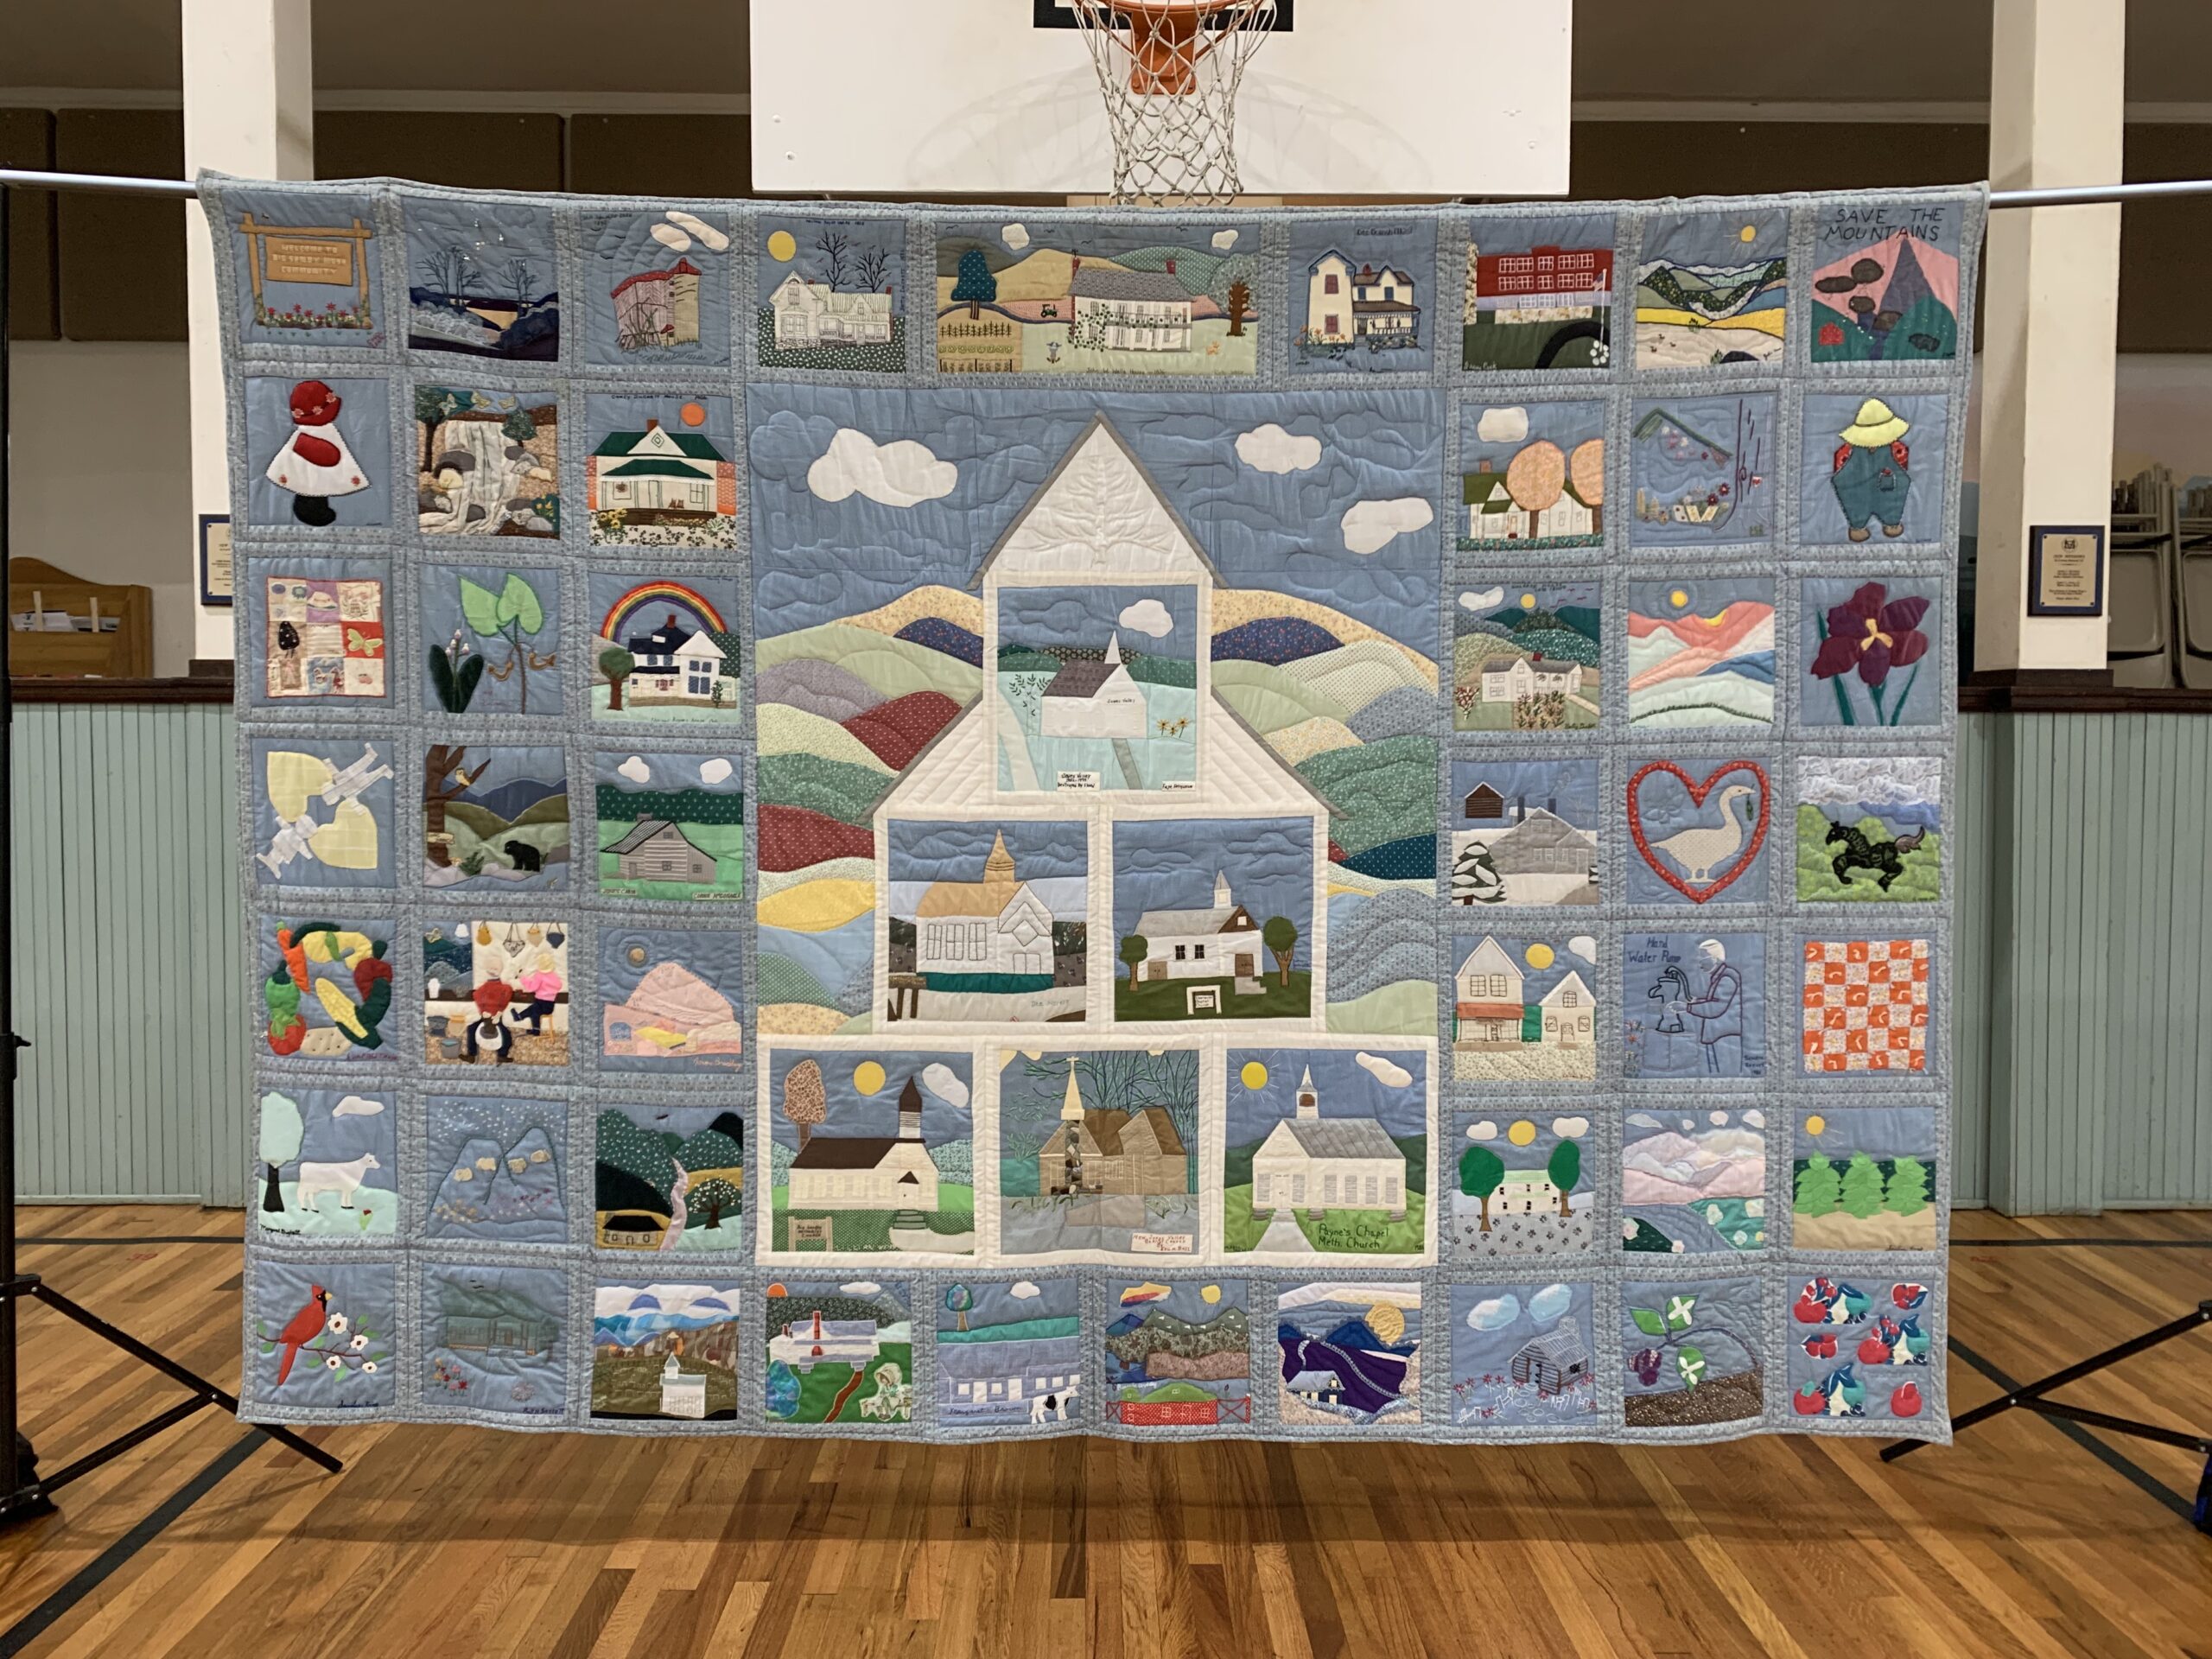
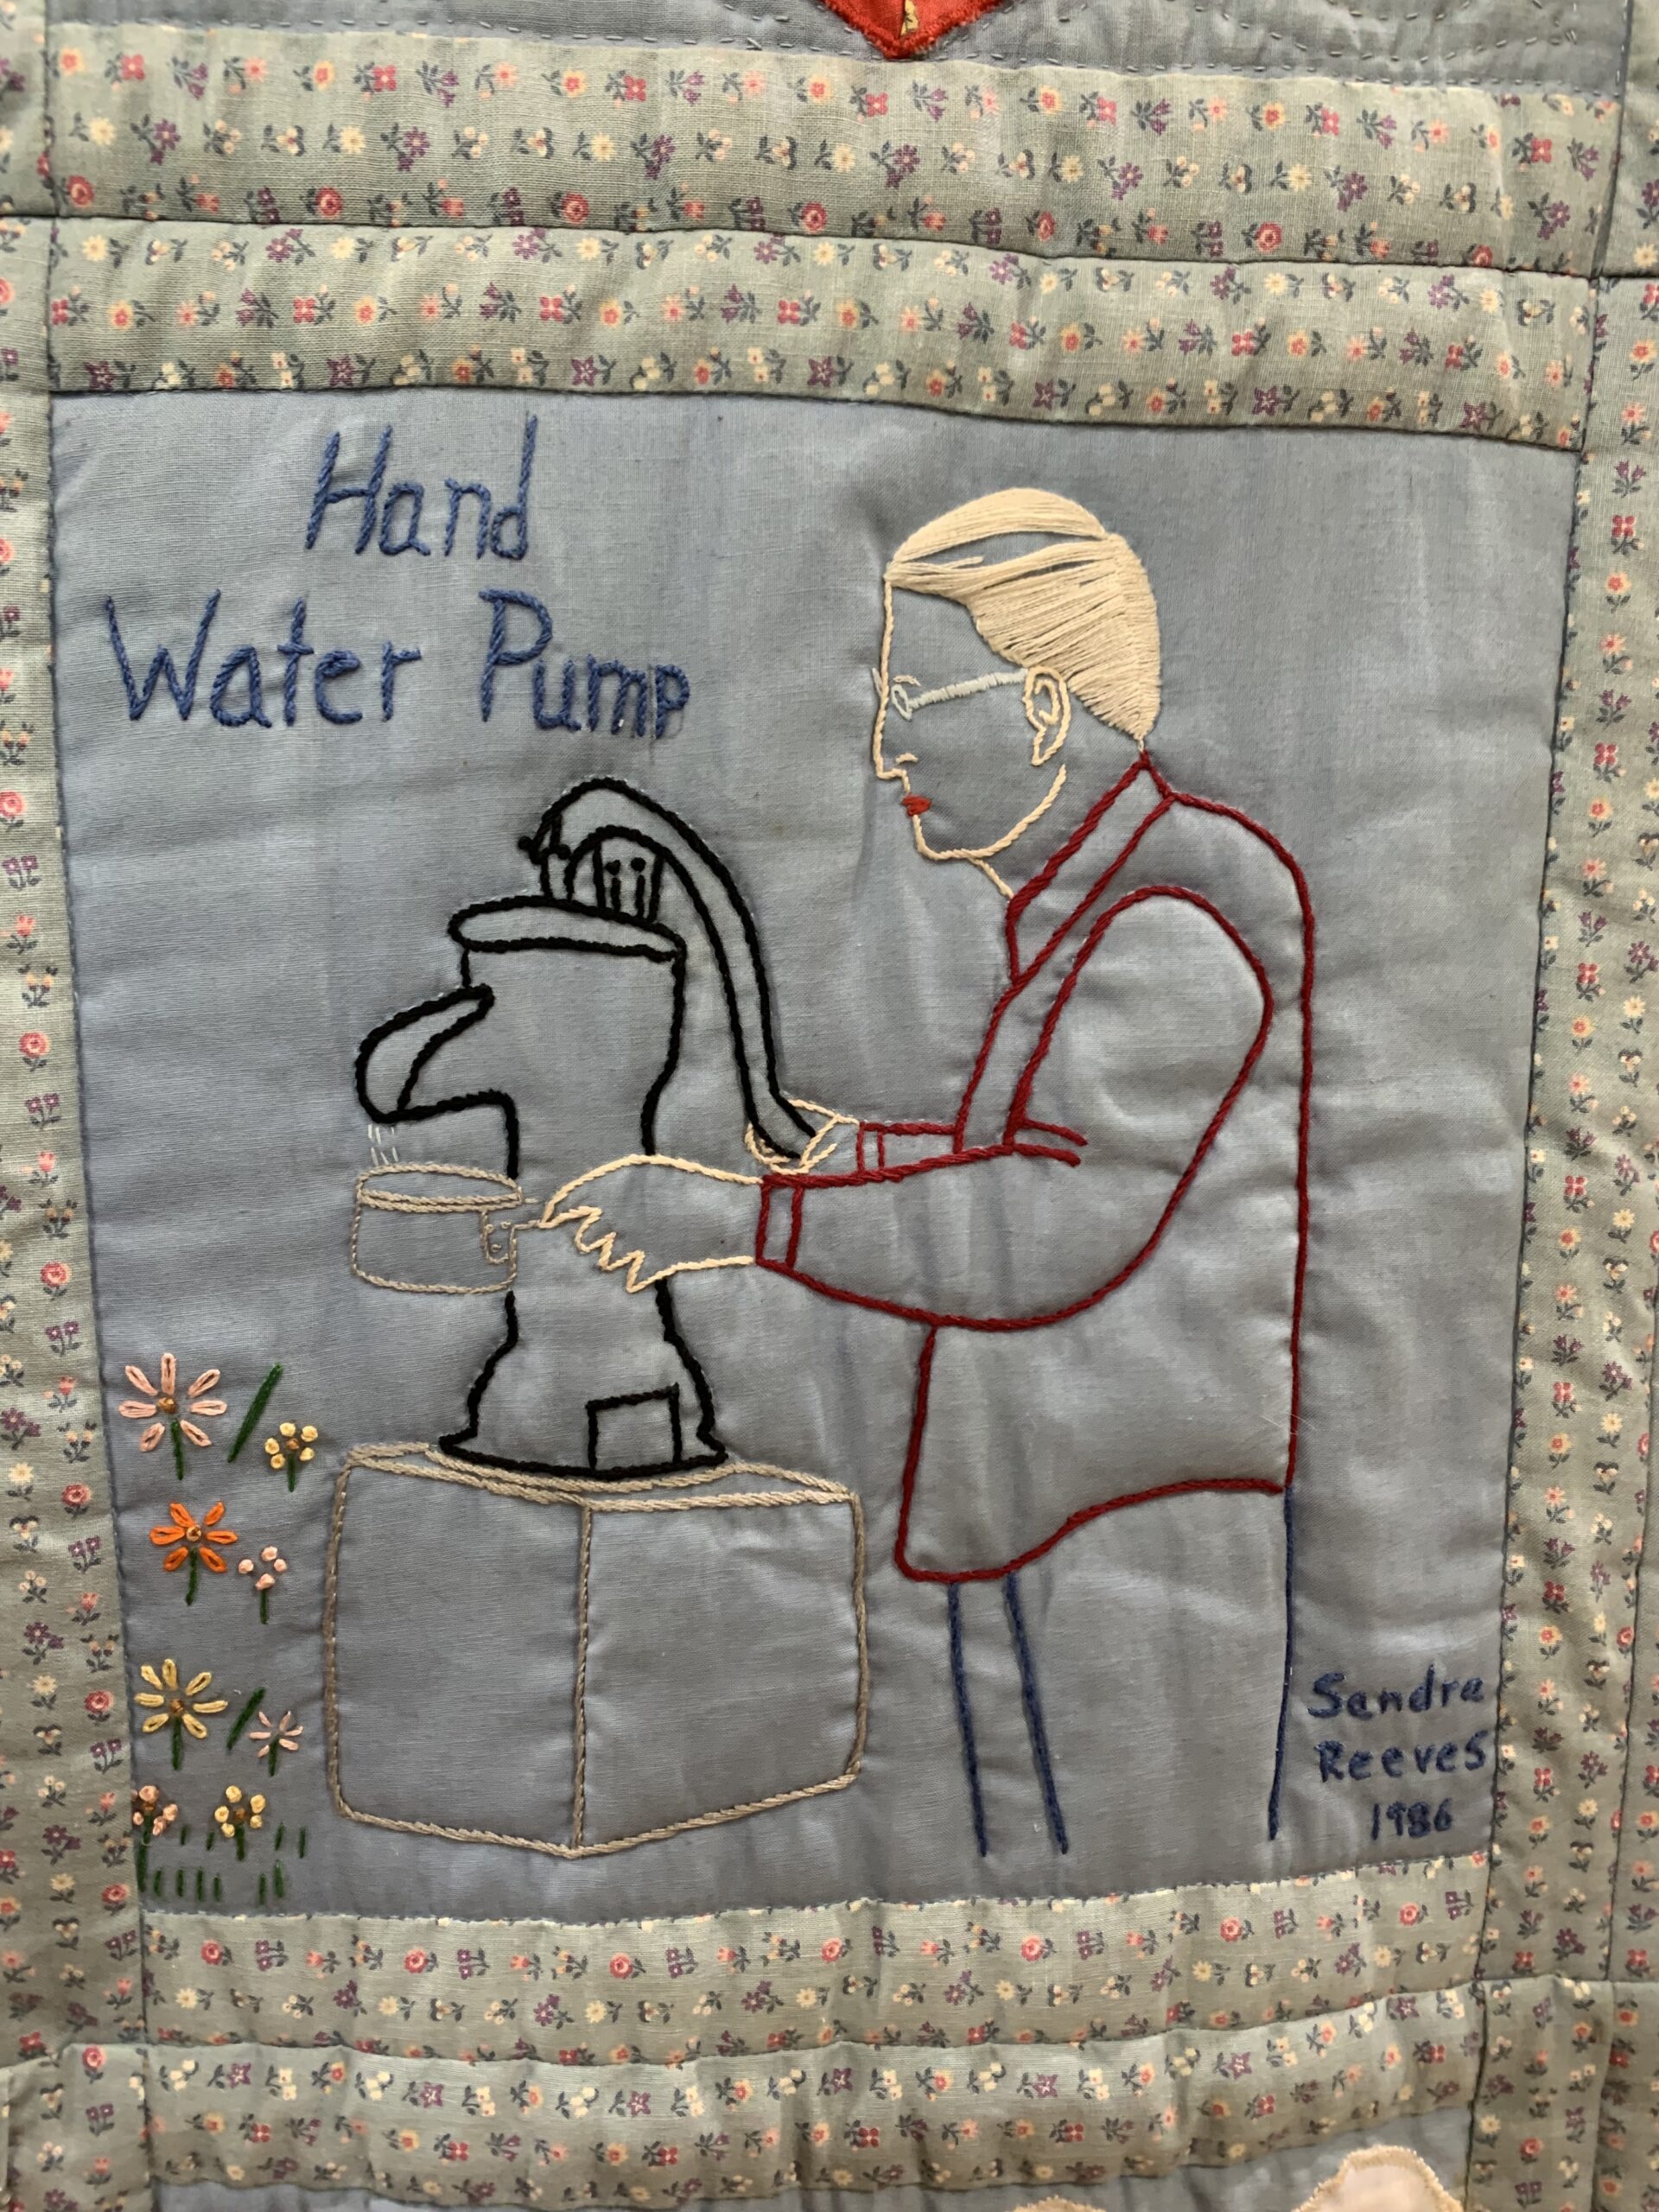
Another renovated school, the Sandy Mush Community Center, served as our event site on April 23 and 30 when we documented quilts, quilters and community history in Leicester, North Carolina, a hilly Appalachian farm community about 18 miles northwest of Asheville. One of the 30 quilts documented was a special collaborative quilt titled “A Celebration of Sandy Mush.” It was made in 1986 by over 40 women in the community determined to show developers planning to build a high-level nuclear waste site in Sandy Mush just how special and beloved their community was. The community’s unprecedented opposition to the dump site caused developers to cancel their plans later that year. The group quilt and other quilts made by Sandy Mush residents hang along the perimeter of the community center’s gymnatorium space. Artist Norma Bradley, a former Sandy Mush resident, and artist and quilt appraiser Connie Brown, played important roles in planning the presentation for this site. Norma and other makers of the collaborative quilt were invited to tell the story of their block and the experience of making the quilt to protect Sandy Mush. One of the makers came with her son and together they shared quilts made by four generations of family members.
Community Quilt Days are a great way for any place or group to celebrate and document the things that connect them: place, culture, stories, and quilts! This project, supported by grants from South Arts and the NC Arts Council, has focused on Appalachian communities, a region close to our home base, to learn how to create a flexible model for Community Quilt Days. Join us in Hazard, Kentucky on May 27 for the next Community Quilt Day. Our partners there include artist Nicole Musgrave, Emily Jones Hudson, founder and director of the Southeast Kentucky African-American Museum & Cultural Center, and the owners and staff of the Appalachian Quilt & Craft shop. You can sign up on our website…
by Emma Parker | May 11, 2023 | BOM
Birthday Block of the Month #2: Zak Foster
Sometimes getting started on a new project is the hardest part. But you did it! We made it past the first month of the Quilt Alliance Birthday Block of the Month! One thing that makes the Quilt Alliance special is that we celebrate all kinds of quilts — art quilts, modern quilts, traditional quilts, narrative quilts, and of course, improv quilts. That’s why we chose an improvisational block designed by beloved quilter Zak Foster as the second block of our BOM series!
Meet Zak Foster Raised in rural North Carolina and now living in Brooklyn, New York, Zak is a community-taught artist whose work draws on Southern textile traditions and repurposed fabrics. He practices an approach to design that is intuitive and improvisational. He is especially drawn to preserving the stories of quilts and specializes in memory quilts and burial quilts. His work has been featured on the red carpet of the Met Gala, the Metropolitan Museum of Art, and more. His QUILTY NOOK community connects and inspires quilters and makers worldwide. You can follow Zak on his website, QUILTY NOOK, and on Instagram.
Zak’s Top BOM Tips Each month, our Birthday Block of the Month Designers will share their top tips for making the block they designed. Here are three great tips for making this block straight from Zak himself. Zak’s Tip 1: Trust the Process Play around with how you arrange your columns, but don’t get too fussy. It’ll be beautiful no matter how your stack them together. Zak’s Tip 2: Find Visual Interest in Unexpected Places Consider using the back side of the fabric. Sometimes that can offer a nice subtle variation. Zak’s Tip 3: Finger Pressing Goes a Long Way As I’m sewing my first pieces together, I rarely iron. Pressing with my thumbnail is a lot easier at this stage. However, I always try to iron the columns before sewing them to each other. It helps everything fit together true.
Quilt Alliance BOM Tips Looking for even more tips to make this block? Keep reading — we’ve got you covered! Here are even more tips and tricks to help you make the second block in our Quilt Alliance Birthday Block of the Month, especially for quilters who may not have made an improvisational quilt block before. Use Scissors for an Improvisational Look One of the best ways to get an improvisational look for your block this month is to cut your pieces with scissors. In your PDF download, there is a chart showing strips you can cut to create your own fabric sizes. If you need more help, there is a cutting guide with approximate sizes to come close to the look of Zak’s original block. Using your scissors to cut with either of those charts (or using your fingers as a guide as Zak suggests!) is key to making an improv block. Use a Ruler If You Want Help with Improv Cutting If cutting freehand with scissors feels intimidating, use a ruler to cut your shapes instead! Vary the size of your cuts using your fingers as Zak suggests (or following the cutting guide) and let loose. Improv cutting is a fun way to unwind and experiment with your quilting. Many of the most beautiful quilts use improv piecing and don’t focus on precision piecing. If you’ve never tried improv quilting before or just want to dip your toe in, using a ruler to cut can help build your improv confidence. You can see the difference in the look and feel of the two blocks above. My block, made using the cover quilt colors, was cut was a rotary cutter and ruler as an example for quilters who would prefer to cut that way. Zak’s block shows more of the uniqueness of his own hand, between the way the pieces are cut and how they are hand pieced. Try a Seam Roller If you have hand or wrist pain, like arthritis or tendonitis, you may find finger pressing painful. Instead of finger pressing, try using a seam roller! This handy tool (get it?) helps flatten seams without having to take lots of trips to your pressing station. Make Your Block Slightly Larger With improvisational piecing, it can be tricky to tell how large your block will be after sewing everything together. That’s ok! One of the best things about improv is that you can always add more to get your block large enough to trim down to 12 ½″. That way you don’t have to worry about being so precise with your piecing! For example, once I sewed all of my columns together, I thought my block would be large enough. But, once I started sewing the columns together, I measured the block and realized that the fourth column was too short. I grabbed my trusty seam ripper and ripped out some of the stitches between the third and fourth column and added a piece of my favorite color — the dark purple.Once I added that one little piece of fabric, my entire block was the correct size and I could trim it down! If your block is too small, you can also add more columns or rows to make it bigger. There are no rules this month! Just play and have fun.
Quilt Documentation Tip Zak Foster’s quilts are rooted in community. Last month, the Quilt Alliance hosted a Textile Talk with two of the designers from our Birthday Block of the Month — Carole Lyles Shaw and Bonnie Hunter. Take a look at the video to hear the powerful things these two quilters had to say about quilting with community! Many Textile Talk viewers left feeling inspired and rejuvenated in their love for their own quilt communities. But that’s not all you’ll find in this Textile Talk. There is also an extensive conversation about how Carole and Bonnie document their quilts complete with tips from their own documentation practices. Share these tips with the quilters in your community!
Quilt Documentation Tip: Each month, we’ll bring you a quilt documentation tip in these blog posts. These tips will help you not only learn more about the Quilt Alliance but also learn how to preserve your own quilt stories. Your quilts matter and we want to help you preserve and share their stories! Ricky’s block is focused on beginner quilters, and since this month is the first in our Block of the Month, we want to encourage you to document your very first quilt. The journeys we all take towards becoming quilters are all unique. Share yours in a DIY Go Tell It Video, just like the video Ricky made about this block. To learn how to make your own Go Tell It video, head to the Go Tell It DIY page here. You’ll see that documenting your own quilts is much easier than you might…
by Emma Parker | Apr 13, 2023 | News
QA Birthday Block of the Month: Introduction
Happy birthday to us! Here at the Quilt Alliance, we love birthdays. And what better way to celebrate our own 30th anniversary than with a huge quilt party? The best part is — you’re invited! And so are nine of your very favorite quilt designers who each designed a block for our first-ever block of the month quilt as a birthday gift to the Quilt Alliance. What is the Quilt Alliance Block of the Month? For the rest of our anniversary year, all Quilt Alliance members at any level or donors who have contributed $30 or more will receive a new block pattern each month. You’ll get a reminder of when each block is released in our member newsletter so you’ll never have to worry about missing one. At the end of our Block of the Month celebration, you’ll have nine fun blocks. Put them together with sashing and you’ll have a cozy 52” square lap quilt! Each of the blocks, designed specifically for the Quilt Alliance’s Block of the Month, is inspired by some aspect of the designer’s quilt story, and we’ll provide guidance and tips as you work through the blocks for documenting and reflecting on YOUR quilt story! Who Are the Block of the Month Designers? Here is the schedule for our 30th anniversary Block of the Month! April: Ricky Tims May: Zak Foster June: Pat Sloan July: Sheri Cifaldi-Morrill August: Suzy Williams September: Andrea Tsang Jackson October: Bonnie Hunter November: Carol Lyles Shaw December: Georgia Bonesteel No doubt that if you’re a quilter, you recognize some of those names! We are so fortunate to have so many influential and talented designers participating in our Birthday Block of the Month. We can’t wait to share their stories with you through Go Tell It Videos as we quilt together! Getting Started with Your Own Birthday Block of the Month Like any fun block of the month, your first step for ours is picking your fabrics! You can either choose your own fabrics or use the same fabrics we are using for the cover version of the quilt. If you’re an adventurous quilter, you can even consider using scraps! The fabrics used for the cover version of our Birthday Block of the Month are Art Gallery Fabrics PURE Solids in the following colors: Evergreen Swimming Pool Creme de la Creme Sweet Fig Cabernet For our backing fabric, we added a beautiful Ruby Star Society print for a pop of excitement on the back! The print is from the Darlings 2 fabric line and is called Wildflowers in black. It complements the neutral Creme de la Creme so nicely! The Quilt Alliance Birthday Block of the Month uses 5 colors. Feel free to choose your own fabrics, but if you’d like tips, we have examples of 7 color palettes that can help inspire you! Here is the color palette we are using to make our quilt: Here is the easy three-step formula we used to come up with this color palette, which you can use to create your own! Choose two colors or color families. Ours are deep green/blue and red/purple. Pick one dark and one light color from each. Choose a neutral color that will be used in both the blocks and the sashing. It’s that easy! This simple light and dark formula will help ensure that your quilt has enough color contrast while keeping the look cohesive and fresh. Let’s break that formula down using our cover quilt colors before diving into other color palette examples. Evergreen — dark green/blue Swimming Pool — light green/blue Creme de la Creme — neutral Sweet Fig — light red/purple Cabernet — dark red/purple Here’s an example that uses the same formula. We have a dark yellow, light yellow, neutral, light blue, and dark blue. This rose garden-inspired palette uses the same light and dark formula, but instead of a traditional neutral like white or cream, we’ve used a soft pink to connect the greens and reds. This palette uses the same formula, but like the rose garden palette, these tropical sunset colors are connected with a soft color from the same family. We have a dark and light orange, dark and light pink, and a peach that connects all the colors. You can build on the light and dark formula to make a monochromatic palette! On the left, you can see that we have a dark and light blue. On the right, we also have a dark and light blue. The connecting neutral that will appear in both the blocks and sashing is the lightest color blue, creating a cool-themed monochromatic palette! Here’s a warm monochromatic color palette that was made the same way as the cool palette above. We have a dark and light yellow, a dark and light pink, and a peach neutral that connects them all! If you like vibrant colors, you can even consider using black as your neutral color! It helps bright colors jump off a quilt and glow almost like neon. Just like the palettes above, this one is made using the same formula — dark and light green, dark and light purple, and black as the neutral. There are so many ways to choose your own fabrics, but using our dark and light formula will help make sure that you have enough contrast in your colors as you make blocks each month!
Quilt Documentation Tip! Once you’ve selected your own color palette, write down the fabrics you used and the company that manufactured them. If you journal or record your thoughts about your quilting, you could also write down the inspiration behind your color palette. Share that inspiration with us on social media using #QuiltAllianceBOM! We can’t wait to see what colors you’re going to use in your Quilt Alliance Birthday Block of the Month quilt! If you use Instagram, be sure to post your fabric pull using the hashtag #QuiltAllianceBOM and tag @quiltalliance so we can see your beautiful creations!…
by Emma Parker | Apr 13, 2023 | BOM, Uncategorized
Birthday Block of the Month #1: Ricky Tims
Welcome to the first month of the Quilt Alliance Birthday Block of the Month! We are so happy that you are following along and joining our party! We’re kicking things off with one of the most beloved quilters we know — Ricky Tims. One of the many things Ricky is known for is his easy-to-follow, beginner-friendly quilt pattern instructions. For all the beginner quilters following along, we couldn’t have asked for a better block to kick things off! And for experienced quilters, you’ll love the ease of sewing this block. It’s so quick that you’ll want to make more.
Meet Ricky Tims A best-selling author, enthusiastic and encouraging teacher, an award-winning quilter, fabric designer, talented speaker, and novelist, Ricky’s entertaining presentations feature live music and humor combined with scholarly insights and motivational anecdotes. Ricky began designing and making quilts in 1991 and was named one of The Thirty Most Distinguished Quilters in the World. In 2009 he was selected (in a three-way tie) by the readers of Quilter’s Newsletter Magazine as The Most Influential Person in the Quilting Industry. He is the co-founder and co-host of The Quilt Show. You can follow Ricky on his website, on Facebook, and on Instagram. We recommend all three! One of the Quilt Alliance’s signature projects is the Go Tell It video documentation project which anyone can do. Watch the video below to see Ricky talk about his block, and keep reading this blog post to learn about how you can create your own Go Tell It video about one of your quilts!
Ricky’s Top BOM Tips Each month, our Birthday Block of the Month Designers will share their top tips for making the block they designed. Here are three great tips for making this block straight from Ricky himself. Ricky’s Tip 1: Avoid Distortion When sewing the strips, sew the seams in opposite directions to avoid distortion — sew the first seam from the top of the strip to the bottom, then the second seam bottom to top, the third seam top to bottom, etc. Ricky’s Tip 2: Double-Check Cuts Cutting accuracy is critical so make sure the ruler doesn’t slip and double-check every cut before cutting. Ricky’s Tip 3: Handle Bias Edges with Care There will be bias edges on two sides of each triangle (fabric cut on an angle, which is stretchy). Be extra cautious not to tug those bias edges when handling or sewing the four triangles together.
Quilt Alliance BOM Tips If you want even more tips for making this block, we’ve got you covered! Here are even more tips to help you kick off our Birthday Block of the Month with the best block you can make. Sew with a Scant Quarter Inch Seam We love this block for its trademark Ricky Tims ease. If this is your first time picking up a rotary cutter, you can make this block! The biggest thing you’ll have to focus on besides Ricky’s tips above is the accuracy of your seam allowance. If you are not yet confident in the accuracy of your quarter inch seam, consider sewing with a scant quarter inch, which is a seam that is very slightly smaller than a quarter inch. This will give you a little bit of wiggle room and may make the difference in your sewn strips ending up the correct width. Finger Press Before Using an Iron Some quilters find pressing tedious, and others love it. Regardless of how you feel about pressing, good pressing technique can increase your quilting accuracy. Before pressing your block with your iron, give it a good finger press to make sure you aren’t losing valuable fabric in your seams. Begin with the sewn strips facing right side up (seam side down). Gently press your fingers along the sewn seam to make sure the seam is completely open. For this pattern, we are pressing each strip seam to the side, so be sure that as you finger press, the seam and going in the correct direction. Finger press for about 12″ at a time and then give it a quick heat set with your iron. When you flip your strips over, your seams will be ready for an accurate iron pressing! Keep Seams Flat With a Tailor’s Clapper If you haven’t used a tailor’s clapper before, you’re in for a treat. This little piece of wood works big wonders and locks seams into place, keeping them flat as you piece. Using a spray bottle or continuous mist bottle (these bottles help distribute water more evenly than the spray setting on most irons), spray a small amount of water onto a seam. Press the damp seam with your iron. Immediately lay a tailor’s clapper on the seam. As the seam dries and cools, the tailor’s clapper keeps the fibers in your seam in place. Once cool, the seam is locked into place! Having flat seams will help with the next tip. Cutting at a 45-Degree Angle If you haven’t cut fabric at an angle before, here are some pictures that can help you make the strip triangles that form this block. Start with your sewn strips laying with Color 5 at the top as shown above. Lay your ruler on the sewn strips with the 45-degree mark across the top of Color 5. The right side of the ruler should be in the lower left corner of the sewn strips. Make your first cut and discard the half triangle. Keeping the sewn strips facing the same way (Color 5 up), flip your ruler for each subsequent cut, aligning the 45-degree angle mark with the bottom or top edge of the sewn strips. In the second picture above, you can see that the 45-degree mark is now aligned with the bottom, or Color 2. The top of the ruler is lined up with the point of the triangle. Make your cut along the right side of the ruler, and you’ll have your first triangle! Nest the Seams When sewing the strip triangles together, nest your seams to get perfect points. Once you feel the bumps of your seams nesting together as shown in the picture above, pin the seams in place so they do not stretch as you move your triangle strip blocks or sew them together. As Ricky notes, the bias edges of the triangle strip blocks are very delicate. If they are stretched, your finished block may be wavy or less accurate than you’d like.
Quilt Documentation Tip Each month, we’ll bring you a quilt documentation tip in these blog posts. These tips will help you not only learn more about the Quilt Alliance but also learn how to preserve your own quilt stories. Your quilts matter and we want to help you preserve and share their stories! Ricky’s block is focused on beginner quilters, and since this month is the first in our Block of the Month, we want to encourage you to document your very first quilt. The journeys we all take towards becoming quilters are all unique. Share yours in a DIY Go Tell It Video, just like the video Ricky made about this block. To learn how to make your own Go Tell It video, head to the Go Tell It! page here. You’ll see that documenting your own quilts is much easier than you might think!
Quilt Documentation Tip: Each month, we’ll bring you a quilt documentation tip in these blog posts. These tips will help you not only learn more about the Quilt Alliance but also learn how to preserve your own quilt stories. Your quilts matter and we want to help you preserve and share their stories! Ricky’s block is focused on beginner quilters, and since this month is the first in our Block of the Month, we want to encourage you to document your very first quilt. The journeys we all take towards becoming quilters are all unique. Share yours in a DIY Go Tell It Video, just like the video Ricky made about this block. To learn how to make your own Go Tell It video, head to the Go Tell It DIY page here. You’ll see that documenting your own quilts is much easier than you might…
by Amy Milne | Apr 7, 2023 | News, QSOS
We Are Our Stories By Karen S. Musgrave We are our stories and this one is mine. How do I reach you and make you care about the stories behind quilts? By you I mean the public, researchers/academia, people I wanted to interview, workshop attendees, lecture attendees, readers of the articles I wrote and the manual that I edited for Quilters’ S.O.S. – Save Our Stories and the Alliance—so everyone. Even now after being away from interviewing for years, I want you to care. Though we have come a long way, women and quilts still face inequality. We can learn a lot about a quilt by looking at it, but that does not tell us the whole story. Listening to the quiltmaker does. A little bit about me. I made my first quilt, for a baby, in 1974 after seeing an article in a magazine. Quilts were not a part of my life growing up. It wasn’t until I started doing genealogy that I learned that there were quiltmakers in my family. I, like many people interviewed, came to quiltmaking through sewing my own clothes. I didn’t know the “rules,” so the quilt was made with my drawings, rendered with fabric crayons using polyester/cotton blend fabric. From there, like many others, I created traditional quilts before moving on to create my own designs. I came to Quilters’ S.O.S.- Save Our Stories (Q.S.O.S.) via Boxes Under the Bed™, the Alliance’s first project that dealt with quilt ephemera in 1996. I volunteered to go to the Boxes training as my guild’s representative. The guild’s board decided to hold an essay contest to determine who would attend. I spent weeks on my essay to end up being the only one to write one. I attended both training sessions that were offered at the International Quilt Festival in Houston. And while I felt it was important work, it did not excite me. I never imagined that attending the first Q.S.O.S. training would change my life in the ways that it did. After attending the training, I volunteered to put together a manual and worked for a year with the project’s volunteer task force members—Bernie Herman, Patricia Keller, Marcie Cohen Ferris and Pat Crews – and the manual was born. Q.S.O.S. started by interviewing prize winners and people with quilts at the International Quilt Festival in Houston. Therese May’s interview from 2000 has stayed with me through all these years. It is not one that I conducted but was fortunate to sit in on. Therese’s honesty and openness left me in tears. It was the first time I cried during an interview, and it would not be my last. I think one of the most powerful questions ever asked is, “Have you used quilts to get through a difficult time?” Shortly after Therese’s interview, I was sent to the exhibition floor to interview Marion Mackey and to discover the story behind her quilt depicting baseball player Mark McGwire setting a home-run record. I was trying to remember everything I could about baseball. But it turned out the quilt had nothing to do with baseball. Her husband needed a liver transplant. He almost died twice while waiting. They were hoping and praying for a donor. Well, McGwire breaks the home-run record while they are watching it on TV, and then the phone rings and they get a liver. She started crying and I started crying. They travel with the quilt and talk to children’s groups about the importance of being an organ donor. This was another defining moment for me about why oral histories are so important. Quilt Festival made conducting interviews easy, but I felt the interviews did not reflect the diversity of quiltmakers and their stories that were out in the world beyond Quilt Festival. So, my personal mission began. In the end, I conducted nearly 300 interviews, transcribed nearly 75 (not all mine) and read every interview posted online. For 10 years, I never went anywhere without my trusty $35 tape recorder and paperwork. The interviews cover all sorts of territory, and often dispel common myths. There are traditional quiltmakers who think that art quiltmakers don’t do handwork. There is a notion that hand quilting is dying out—I don’t think that is the case. There’s the notion that you cannot be artful with a long arm machine. Reading the interviews and seeing the quilts helps set the record straight and eliminates these misunderstandings. Here are a few things that I learned. Regardless of the skill level, creating something means that a part of us will still be around after we are gone. Quilts heal. Quilts can cause change. Quilts can create awareness. Quilts can be a source of much needed income. Some people are more open to sharing than others. Some people regret how much they shared. Interviewing Latina quiltmakers and their children, especially those in northern California, gave these makers a way to share their stories about the impact in their lives from the income they made from selling their quilts. I will be eternally grateful to the Salser Foundation for supporting me and Molly Johnson Martinez who was the organizing force behind the group. Los hilos de la vida (The Threads of Life),a mostly Latina cooperative quilt group, was quietly making pictorial quilts for years before I arrived. Their quilts depict scenes of family life, border crossings, life in Mexico, dreams, and reverence for the natural and spiritual worlds. Vibrant with color, the quilts make an immediate impression on the viewer as they unselfconsciously capture the pure essence of the women’s stories. Even more impressive, the women had little or no previous experience creating art or quilts. Angeles Segura’s quilt shows her asleep on her GED diploma surrounded by the things she loves—her books and her guitar. The mother of four, she worked in the vineyards while studying for her diploma. Some of the most compelling quilts are those that depict scenes about crossing the border into the United States. Carmela Valdivia has created many border crossing quilts, which always have the figure of death somewhere in them. After returning from California, my mission became to help the group gain more recognition. I immediately made the first of many attempts to get the attention of the National Museum of Mexican Art (NMMA) in Chicago. Success was achieved when two of the group’s quilts hung in the museum’s exhibition Declaration of Immigration. I also curated an exhibition at the Pacific International Quilt Festival XVII, in Santa Clara, California. Unfortunately, funding ended for the program that supported the group which means the interviews I was able to conduct now provide a glimpse of something that no longer exists. My involvement with Hilos led me to start a quilting group at the NMMA. Again, the participants had never made quilts before, and many had never used a sewing machine. However, unlike the women of Hilos, many of the women had immigrated to the United States when they were young, and all had legally immigrated. The quilts are no less powerful. Maria Tortolero’s detailed quilt is split in two—one side depicts her life in Mexico and the other side her life in Chicago. Maria Herrera’s quilt honors her father and the stories of his immigration adventures and traveling around the United States to find work. “My quilt is …based on my dad/s journey from Mexico to the United States…I started recording my dad’s stories because I wanted my son to grow up hearing my dad’s stories…the stories I grew up hearing…I know that when my dad seed this quilt and a bit of his life in this quilt…he is going to start crying…My dad’s journey is being told through this quilt.” By the way, he did cry. The group at NMMA also created quilts that dealt with the torture, rape and murder of young women and children in Juarez, Mexico. The difficult subject matter produced incredibly thought-provoking quilts. Christina Carlos’ message, “al fub…en paz/ Finally at Peace,” is typical in that it expresses young girls no longer suffering and in a better place. I think Luz Maria Carillo expresses something universal when she said, “Each one of us leaves a piece of our hearts in each quilt that we make.” A handful of people that I interviewed (who did not know me) asked about me personally. One of them was the writer Spike Gillespie, who had begun writing about quilts at the time of her interview. After our conversation, she invited me to write essays for her book Quilts Around the World about my involvement with Q.S.O.S., Latina quiltmakers and my work with connecting American quilts with quilts or patchwork in the countries of Georgia, Armenia, Kazakhstan, and Kyrgyzstan. My connections to the Alliance through one of the founders and then president, Shelly Zegart, provided me with the connection to take an exhibition of quilts from Gee’s Bend, Alabama to Georgia, Armenia, and Kazakhstan. These quilt exhibitions provided a link in a global movement to revive interest in traditional culture and crafts. They illustrate the shared common threads in our arts and cultures—highlighting what makes us unique and embracing our commonalities. Interviews with some of the members of the Georgian Quilt Group can be found in the Q.S.O.S. project. My writing for Spike’s book led to an invitation to author my book – Quilts in the Attic – Uncovering the Hidden Stories of the Quilts We Love. I was also interested in gathering interviews of how quiltmaking can make a difference for incarcerated people. I found a quilting program in a Minnesota detention center for men. After months of answering questions and even signing papers stating I did not expect to be rescued if taken hostage, the warden decided without any explanation to pass on the project. I was devastated. Fortunately, in 2009, I was able to interview women who had participated in a quilt project featured in an exhibit called “Sacred Threads” in Columbus, Ohio. The Ohio Reformatory for Women (ORW) is just outside of Columbus in Marion, Ohio. Driving down the long road to the prison passing fields filled with wildflowers, it was such a shock to see buildings surrounded by a tall wire fence with razor wire on top. The warden required the women to state the reason that they were incarcerated at the beginning of each interview. It was explained to me that this requirement was to get the women to realize they were accountable and become more comfortable talking to strangers about why they were there. I made it clear before the tape recorder was turned on that I did not care why they were there. I cared about their experience making a quilt. None of them had made one before. The assistant to the warden was also present in the room during the interviews. She worked quietly a few tables away and I made sure to sit so that the women would have their back to her. I continued my relationship with these women after their interviews and with a few even until today. Rhonda Edwards was the most intense interview and one that I wished we had videotaped. Her quilt shows her split in two- her life before and her life after. Rhonda is a talented artist, so her quilt is full of her drawings. It also expresses her journey from a violent person to one who has found God, from a person who was deeply grieving her father’s death to someone who feels joy. Rhonda sent her quilt to her mom. The women were not allowed to have the quilts in their possession. Rosa Angulo’s quilt is called “Hope.” Her artist statement says so much about her quilt, “I want to give my first quilt the name of hope–Because I’m trying to express it somehow. My life in this place is the patches and the stitches are the different stages I’ve been going through. The ribbons are the razor wire that surrounds this prison. And the eagle is me, who with the help I’ve been getting from recovery and religious services, and some of the staff members, I feel I will have the tools to fly when my time gets here. Like it says in Isaiah 40:31 ‘They that hope in the Lord will renew their strength, they will soar as with eagles’ wings; they will run and not grow weary, walk and not grow faint.’“ And she added as a personal note: “I am 48 years old and the mother of three beautiful daughters and the grandmother of an eight-year-old girl. I work as a porter in my cottage, and love to do community service through the Stitching Post (a place to gain skills and employment sewing items for nonprofit organizations, many dealing with children). I’ve never made a quilt before, but I really enjoyed working on this one.” Rosa was deported to Mexico upon her release. She had sent her quilt to her eldest daughter. I never heard from Rosa after her release. I do hope that the skills she learned while at ORW continue to help her and that her desire to make more quilts continues. Once the interviews were posted and several articles about them were written, I received threats from some of the women’s victims’ families. Nothing came of them, and I certainly understand their anger and pain, yet I still feel the interviews should be included in the Q.S.O.S. collection.. I was not as successful in getting Native American quiltmakers into the project. It was only by chance that I interviewed Lois Beardslee. We met while I was working in northern Michigan. Her interview was conducted in her bedroom while sitting on her quilt. “I started piecing our old clothing and old blue jeans, everything…old handkerchiefs, old pillowcases, everything…this is {a piece from] my wedding dress…It was my son who one day took the sleeves off, and my husband said, “’Oh, no.’ I told him, ‘See, it is not about the dress. It is about the being married to you and growing old with you.’…It is a great quilt because it is our lives all wrapped up into one package.” Interviews with people included in exhibitions truly capture a moment in time and continue the historical use of quilts to communicate social or political messages. The exhibition-based projects include interviewing people who made quilts to celebrate the election of Barack Obama as president and the Ancestor Project that took place at the American Indian Center in Chicago where women from the senior lunch program stayed to appliqué designs of ancestral portraits, animal spirits and plants. Other exhibition-based projects include the Alzheimer’s Forgetting Piece by Piece and Priority Alzheimer’s Quilt projects led by Ami Simms, that helped raise awareness of Alzheimer’s and funds for research, and Healing Quilts in Medicine project to name a few. There are so many times that I wish I could have left the recorder going because far too often that is when amazing things were shared. They weren’t always about the quilt or quilts in general, but they provided intimate details or funny stories that I wish everyone knew. Interviewees were given the transcription of their interview to review before it was published online and archived. One interviewer called me quite upset stating that she did not talk the way the transcription portrayed her. She “most certainly did not have a potty mouth.” I tried explaining that transcribers do not add or subtract from the interviews. Still not satisfied, I played the tape for her. In another interview, the person shared details about other quiltmakers that they regretted and so the comments were removed. After one Houston interview, I encouraged editing because I thought it would hurt the interviewee’s reputation, but she stood by her words. I was pleasantly surprised by the deep friendships that happened because of interviewing people. I am so thankful that I was able to interview Yvonne Porcella, Merry Silber, Gwen Marston, Elizabeth Cherry Owen, Maxine Groves and Lisa Quintana, who are no longer with us. I think my proudest moment was after we lost our original archives at the University of Delaware. As the chair of the task force, I had to find a new archival home for the collection. Board members volunteered their universities as potential partners, but I set my goal higher. With the help of David Taylor, I wrote a successful proposal to the American Folklife Center at the Library of Congress. Repeatedly, historians often run into the same obstacle when working to identify information about a historic quilt: a dearth of clues as to the origin, maker, and story. That means a lot of mystery remains. And while Q.S.O.S. might not help today’s historians solve certain mysteries of the past, the interviews will leave behind a legacy for historians of the future. While interviewers probably did not set out to touch another’s feelings and longings, words and images emerge in interviews that are just as universal as they are personal. Q.S.O.S. has provided a place where quiltmakers’ stories are accessible, where others can draw on them for strength and make a connection. This is the gift that volunteer interviewers will continue to give for years to come. I will close with my favorite quote by Betty Reese and one I use at the end of my lecture, “If you think you are too small to be effective, you’ve never been in bed with a mosquito.” About Karen Karen S. Musgrave is an interdisciplinary, multihyphenate artist whose recent body of work deals with loss, memory, and identity. She feels passionately about connecting cultures with quilts. Her projects include curating a traveling exhibition of the African American quilts from Gee’s Bend, Alabama, alongside quilts in Georgia, Armenia, and Kazakhstan. In Kyrgyzstan, she organized, curated, and wrote the catalogue for an exhibition of American art quilts and Kyrgyz patchwork. She has served on numerous nonprofit boards. She was a consultant on the 9-part documentary Why Quits Matter. As a writer, she contributed to Spike Gillespie’s book quilts Around the World, wrote the book Quilts in the Attic: Uncovering the Hidden Stories of the Quilts We Love and has written numerous articles for magazines. She has exhibited internationally, and her work is in many different private collections. She lives in the far west suburbs of Chicago. Visit Karen on Instagram …